


一、项目搭建的整体效果:

1、建立好项目后,需要再建立两个单独的源文件夹,分别为test和config
在config下分别建立struts,spring和hibernate三个文件夹,以便分别放这三部分的配置2、加入Spring支持
Spring的默认配置文件先使用-hibernate.xml,方便配置,将这个生成的配置文件复制多份:
1) -hibernate.xml:放入固定的数据库连接等相关配置
2) -dao.xml:放入DAO相关配置
3) -service.xml:放入Service相关配置
4) -struts.xml:放入Action相关配置
5) -transaction.xml:放入固定的事务处理相关配置。
3、加入Hibernate支持
在-hibernate.xml中补充其他配置 (配置包括dataSource配置、Hibernate的属性配置和hibernateTemplate配置)
在-transaction.xml中补充三个<bean>的配置(配置包括transactionManager配置、transactionInterceptor配置和BeanNameAutoProxyCreator配置)。
4、加入和struts的支持
加入支持后,将Structs.xml放到config根目录下。Struts的配置文件拆分:
1)Struts.xml:放入一些公共的配置和包含信息
2)Struts-root.xml:里面配置所有不需要登陆就能访问的Action配置。
3)Struts-front.xml:前台普通用户登陆后才能处理的相关功能
4)Struts-back.xml:后台管理员登陆后才能处理的相关功能。
5、然后需要建立一些公共的文件夹或包,以及拷贝公共的类到项目中。
6、生成表的pojo映射
7、在web.xml 中加入监听配置。
8、最后启动服务器,检测环境是否正确
项目运行的效果:

建立数据库的两张表:
CREATE TABLE news_type (
       tid                      number(8)           primary key ,
       tname                    varchar2(50)        not null
);
INSERT INTO news_type VALUES (1,'经济');
INSERT INTO news_type VALUES (2,'军事');
INSERT INTO news_type VALUES (3,'娱乐');
INSERT INTO news_type VALUES (4,'游戏');
INSERT INTO news_type VALUES (5,'广告');

CREATE TABLE news (
       id                       number(8)           primary key ,
       title                    varchar2(50)        not null,
       content                  varchar2(500)       not null,
       pub_date                 date                not null,
       Photo                     varchar2(100),
       type_id                  number(8)           not null,
       foreign key (type_id) references news_type (tid) on delete cascade
);
commit;
二、按顺序加入Spring,Hibernate,Struts支持包
建立项目SSHDemo,加入ssh框架支持包的顺序:先Spring,再Hibernate,最后再Struts。
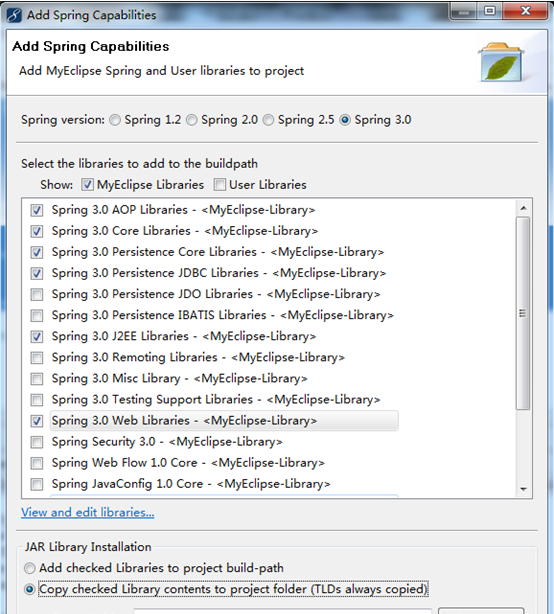
加入Spring支持包:
下一步:

加入Hibernate的支持包:

下一步:选择已经存在的

注意:这里不需要家里SessionFactory,因为这里要是建立,就是需要Hibernate自己管理连接。

<?xml version="1.0" encoding="UTF-8"?>
<beans xmlns="http://www.springframework.org/schema/beans"
	xmlns:xsi="http://www.w3.org/2001/XMLSchema-instance" xmlns:p="http://www.springframework.org/schema/p"
	xsi:schemaLocation="http://www.springframework.org/schema/beans http://www.springframework.org/schema/beans/spring-beans-3.0.xsd">

	<bean id="dataSource" class="org.apache.commons.dbcp.BasicDataSource">
		<property name="driverClassName" value="oracle.jdbc.OracleDriver">
		</property>
		<property name="url" value="jdbc:oracle:thin:@localhost:1521:ORCL">
		</property>
		<property name="username" value="sunxun"></property>
		<property name="password" value="123"></property>
	</bean>
	<bean id="sessionFactory"
	class="org.springframework.orm.hibernate3.LocalSessionFactoryBean">
		<property name="dataSource">
			<ref bean="dataSource" />
		</property>
		<property name="hibernateProperties">
			<props>
				<prop key="hibernate.dialect">
					org.hibernate.dialect.Oracle9Dialect
				</prop>
				<prop key="hibernate.show_sql">
					true
				</prop>
				<prop key="hibernate.format_sql">
					true
				</prop>
			</props>
		</property>
	</bean>
</beans>
最后加入Struts支持包:Struts选择2.1版

三、Dao层
这里DAO层,有两个:INewsDAO 和 INewsTypeDAO:
IDAO:
public interface IDAO<K, V> {

	public void doCreate(V vo) throws Exception;

	public void doUpdate(V vo) throws Exception;

	public void doRemove(K id) throws Exception;

	public List<V> findAll() throws Exception;

	public V findById(K id) throws Exception;

	public List<V> findAll(int pageNo, int pageSize, String keyword,
			String column) throws Exception;

	public int getAllCount(String keyword, String column) throws Exception;

}
INewsDAO : INewsDAO继承IDAO这个通用抽象类;
public interface INewsDAO extends IDAO<Integer, News> {
}public interface INewsTypeDAO extends IDAO<Integer, NewsType> {
}package org.liky.ssh.dao.impl;
import java.util.List;
import org.hibernate.criterion.DetachedCriteria;
import org.hibernate.criterion.Restrictions;
import org.liky.ssh.dao.INewsDAO;
import org.liky.ssh.pojo.News;
import org.springframework.orm.hibernate3.support.HibernateDaoSupport;
public class NewsDAOImpl extends HibernateDaoSupport implements INewsDAO {
public void doCreate(News vo) throws Exception {
super.getHibernateTemplate().save(vo);
}
public void doRemove(Integer id) throws Exception {
super.getHibernateTemplate().delete(findById(id));
}
public void doUpdate(News vo) throws Exception {
super.getHibernateTemplate().update(vo);
}
public List<News> findAll() throws Exception {
return getHibernateTemplate().loadAll(News.class);
}
public List<News> findAll(final int pageNo, final int pageSize,
final String keyword, final String column) throws Exception {
// Spring没有提供针对HQL方式的分页查询方法
// 1、使用Criteria来完成分页查询
DetachedCriteria c = DetachedCriteria.forClass(News.class);
// 加入条件
c.add(Restrictions.like(column, "%" + keyword + "%"));
List all = super.getHibernateTemplate().findByCriteria(c,
(pageNo - 1) * pageSize, pageSize);
// 2、自行扩展Spring功能,添加分页查询方法,使用的方式为匿名内部类
// List all = super.getHibernateTemplate().executeFind(
// new HibernateCallback() {
// public Object doInHibernate(Session session)
// throws HibernateException, SQLException {
// String hql = "FROM News AS n WHERE n." + column
// + " LIKE ?";
// Query query = session.createQuery(hql);
// query.setString(0, "%" + keyword + "%");
// query.setFirstResult((pageNo - 1) * pageSize);
// query.setMaxResults(pageSize);
//
// return query.list();
// }
// });
return all;
}
public News findById(Integer id) throws Exception {
return super.getHibernateTemplate().get(News.class, id);
}
public int getAllCount(String keyword, String column) throws Exception {
String hql = "SELECT COUNT(n) FROM News AS n WHERE n." + column
+ " LIKE ?";
List all = super.getHibernateTemplate().find(hql, "%" + keyword + "%");
return ((Long) all.get(0)).intValue();
}
}
注:
INewsTypeDAOImpl:这里只需要加入一个查询全部的方法就可以了。
在这里调用的HibernateTemplate的常用操作有以下几类:
1) 继承自Session操作:save(),update(),delete(),get/load(),saveOrUpdate()
2) 扩展Session的操作:loadAll()(查询全部数据),deleteAll(Collection)(删除一组数据),saveOrUpdateAll(Collection)
3) HQL操作:find(hql,参数),返回的是List集合
4) Criteria操作:findByCriteria,可以实现分页功能
5) 扩展操作:executeFind,execute,自行通过匿名内部类扩展Spring操作。
这里我们还要养成习惯:就是写完一部代码,就立刻写它的配置文件:
	<bean id="hibernateTemplate" class="org.springframework.orm.hibernate3.HibernateTemplate">
		<property name="sessionFactory">
			<ref bean="sessionFactory" />
		</property>
	</bean>

	<bean id="newsDAOImpl" class="org.liky.dao.impl.NewsDAOImpl">
		<property name="hibernateTemplate">
			<ref bean="hibernateTemplate" />
		</property>
</bean>public List<NewsType> findAll() throws Exception {
return super.getHibernateTemplate().loadAll(NewsType.class);
}<strong>
</strong>四、Service层:
注:这一层我们需要注意,我们在DAO层用的是Spring提供的getHibernateTemplate来处理数据,那么我们希望是Spring的自动在这一层关闭连接和添加事务处理,那么我们就必须定义规则,Sping的AOP操作;
INewsService:
package org.liky.ssh.back.service;
import java.util.List;
import java.util.Map;
import org.liky.ssh.pojo.News;
import org.liky.ssh.pojo.NewsType;

public interface INewsService {

	public List<NewsType> insertPre() throws Exception;

	public void insert(News news) throws Exception;

	public void update(News news) throws Exception;

	public void delete(int id) throws Exception;

	public Map<String, Object> updatePre(int id) throws Exception;

	public Map<String, Object> list(int pageNo, int pageSize, String column,
			String keyword) throws Exception;

}package org.liky.ssh.back.service.impl;
import java.util.HashMap;
import java.util.List;
import java.util.Map;
import org.liky.ssh.back.service.INewsService;
import org.liky.ssh.dao.INewsDAO;
import org.liky.ssh.dao.INewsTypeDAO;
import org.liky.ssh.pojo.News;
import org.liky.ssh.pojo.NewsType;
public class NewsServiceImpl implements INewsService {
private INewsDAO newsdao;
private INewsTypeDAO typedao;
public void delete(int id) throws Exception {
newsdao.doRemove(id);
}
public Map<String, Object> updatePre(int id) throws Exception {
Map<String, Object> map = new HashMap<String, Object>();
map.put("allType", typedao.findAll());
map.put("news", newsdao.findById(id));
return map;
}
public void insert(News news) throws Exception {
newsdao.doCreate(news);
}
public void update(News news) throws Exception {
newsdao.doUpdate(news);
}
public Map<String, Object> list(int pageNo, int pageSize, String column,
String keyword) throws Exception {
Map<String, Object> map = new HashMap<String, Object>();
map.put("allNews", newsdao.findAll(pageNo, pageSize, keyword, column));
map.put("allCount", newsdao.getAllCount(keyword, column));
return map;
}
public void setNewsdao(INewsDAO newsdao) {
this.newsdao = newsdao;
}
public List<NewsType> insertPre() throws Exception {
return typedao.findAll();
}
public void setTypedao(INewsTypeDAO typedao) {
this.typedao = typedao;
}
}
首先,在applicationContext-service中加入Service的配置:
<span style="white-space:pre">	</span><bean id="newsServiceImpl" class="org.liky.ssh.back.service.impl.NewsServiceImpl">
		<property name="newsdao">
			<ref bean="newsDAOImpl" />
		</property>
		<property name="typedao">
			<ref bean="newsTypeDAOImpl" />
		</property>
	</bean>
<span style="white-space:pre">	</span><bean id="transactionManager"
		class="org.springframework.orm.hibernate3.HibernateTransactionManager">
		<property name="sessionFactory">
			<ref bean="sessionFactory" />
		</property>
	</bean>

	<bean id="transactionInterceptor"
		class="org.springframework.transaction.interceptor.TransactionInterceptor">
		<property name="transactionManager">
			<ref bean="transactionManager" />
		</property>
		<!--
			配置事务处理的方法和方式
		-->
		<property name="transactionAttributes">
			<props>
				<!--
					表示所有方法都要关闭连接,并进行事务处理.
					PROPAGATION_REQUIRED:如果之前有事务,则将当前操作合并到之前的事务中,如果之前没有事务,则开始一个新的事务。
					PROPAGATION_REQUIRED_NEW:无论之前是否有事务,都开始一个新的事务。
					PROPAGATION_REQUIRED_NEVER:不使用事务处理,使用自动提交方式。
				-->
				<prop key="*">PROPAGATION_REQUIRED</prop>
			</props>
		</property>
	</bean>

	<bean
		class="org.springframework.aop.framework.autoproxy.BeanNameAutoProxyCreator">
		<property name="beanNames">
			<list>
				<value>*ServiceImpl</value>
			</list>
		</property>
		<property name="interceptorNames">
			<list>
				<value>transactionInterceptor</value>
			</list>
		</property>
	</bean>
五、完成Action
这里所有的set/get方法省略:所有的private属性,都需要get/set.
import java.io.File;
import java.util.List;
import java.util.Map;

import org.apache.struts2.ServletActionContext;
import org.liky.ssh.back.service.INewsService;
import org.liky.ssh.pojo.News;
import org.liky.ssh.pojo.NewsType;
import org.liky.ssh.util.FileUtils;
import org.liky.ssh.util.LogUtils;

import com.opensymphony.xwork2.ActionSupport;

public class NewsAction extends ActionSupport {

	private List<NewsType> allType;
	private INewsService service;

	private News news;

	private File photo;
	private String photoFileName;

	private String message;
	private String url;

	private int pageNo = 1;
	private int pageSize = 5;
	private String keyword = "";
	private String column = "title";

	private List<News> allNews;
	private int count;

	public String updatePre() throws Exception {
		Map<String, Object> map = service.updatePre(news.getId());
		allType = (List<NewsType>) map.get("allType");
		news = (News) map.get("news");

		return "update";
	}

	public String update() throws Exception {
		if (photo != null && photo.length() > 0) {
			// 传了新文件, 删除原有文件
			String filePath = ServletActionContext.getServletContext()
					.getRealPath("/upload")
					+ "/";
			FileUtils.dropFile(filePath, news.getPhoto());

			// 传新的
			String fileName = FileUtils
					.saveFile(photo, filePath, photoFileName);
			news.setPhoto(fileName);
		}

		service.update(news);
		LogUtils.addInfo("修改结束...." + news.getId());

		message = "修改成功";
		url = "pages/back/news_list.action";
		return "forward";
	}

	public String delete() throws Exception {

		service.delete(news.getId());

		String filePath = ServletActionContext.getServletContext().getRealPath(
				"/upload")
				+ "/";

		FileUtils.dropFile(filePath, news.getPhoto());

		LogUtils.addInfo("删除结束...." + news.getId());

		message = "删除成功";
		url = "pages/back/news_list.action";
		return "forward";
	}

	public String list() throws Exception {
		Map<String, Object> map = service.list(pageNo, pageSize, column,
				keyword);
		allNews = (List<News>) map.get("allNews");
		count = (Integer) map.get("allCount");

		return "list";
	}

	public String insert() throws Exception {
		// 取得要保存的真实路径
		String savePath = ServletActionContext.getServletContext().getRealPath(
				"/upload")
				+ "/";
		String fileName = FileUtils.saveFile(photo, savePath, photoFileName);

		news.setPhoto(fileName);

		service.insert(news);
		LogUtils.addInfo("新闻添加完成: " + news.getId() + " --> 添加人是: zhangsan");

		message = "添加成功";
		url = "index.jsp";
		return "forward";
	}

	public String insertPre() throws Exception {
		allType = service.insertPre();

		return "insert";
	}
六、公共类FIleUtils,处理图片的上传的:
package org.liky.ssh.util;
import java.io.File;
import java.io.FileInputStream;
import java.io.FileOutputStream;
import java.util.UUID;

public class FileUtils {

	/**
	 * 保存文件功能
	 *
	 * @param orgFile
	 *            要保存的文件
	 * @param savePath
	 *            保存的位置(真实路径)
	 * @param fileName
	 *            原文件名(为了取得扩展名)
	 * @return 生成的文件名
	 * @throws Exception
	 */
	public static String saveFile(File orgFile, String savePath,
			String orgFileName) throws Exception {
		String fileName = UUID.randomUUID().toString();
		String extName = orgFileName.substring(orgFileName.lastIndexOf("."));

		FileOutputStream os = new FileOutputStream(new File(savePath + fileName
				+ extName));
		FileInputStream is = new FileInputStream(orgFile);

		byte[] data = new byte[1024];
		int length = 0;

		try {
			while ((length = is.read(data)) != -1) {
				os.write(data, 0, length);
			}
		} catch (Exception e) {
			e.printStackTrace();
		} finally {
			is.close();
			os.close();
		}

		return fileName + extName;
	}

	public static void dropFile(String filePath, String fileName) {
		File file = new File(filePath + fileName);
		if (file.exists()) {
			file.delete();
		}
	}
}七、页面的编辑:
先完成struts的配置操作:
<struts>
	<package name="back" namespace="/pages/back" extends="my-default">
		<action name="news_*" class="newsAction" method="{1}">
			<result name="insert">/pages/back/news/news_insert.jsp</result>
			<result name="list">/pages/back/news/news_list.jsp</result>
			<result name="update">/pages/back/news/news_update.jsp</result>
			<interceptor-ref name="fileUpload">
				<param name="maximumSize">700000</param>
				<param name="allowedExtensions">png,jpg,bmp,gif</param>
			</interceptor-ref>
			<interceptor-ref name="defaultStack"></interceptor-ref>
		</action>
	</package>
</struts>
news_list.jsp:
<span style="color: rgb(51, 51, 51); white-space: pre; ">	</span><span style="color:#333333;"><body>
		<center>
			<table border="1" width="80%">
				<tr>
					<td>
						编号
					</td>
					<td>
						标题
					</td>
					<td>
						内容
					</td>
					<td>
						所属分类
					</td>
					<td>
						发布日期
					</td>
					<td>
						图片
					</td>
					<td>
						操作
					</td>
				</tr>
				<s:if test="allNews != null && allNews.size() > 0">
					<s:iterator value="allNews" >
						<tr>
							<td>
								${id }
							</td>
							<td>
								${title }
							</td>
							<td>
								${content }
							</td>
							<td>
								${newsType.tname}
							</td>
							<td>
								${pubDate }
							</td>
							<td>
								<img src="upload/${photo==null?'nophoto.png':photo}" width="100" height="75"/>
							</td>
							<td>
								<a href="pages/back/news_updatePre.action?news.id=${id}">修改</a>
								<a href="pages/back/news_delete.action?news.id=${id}&news.photo=${photo}"
									οnclick="return window.confirm('确定要删除该数据吗?');">删除</a>
							</td>
						</tr>
					</s:iterator>
				</s:if>
			</table>
</span><span style="color: rgb(51, 51, 51); white-space: pre; ">		</span><span style="color:#cc0000;">//下面的时分页的组件插入操作,这在我之前的博文中介绍过:</span><span style="color:#333333;">
			<jsp:include page="/split_page_plugin.jsp">
				<jsp:param value="${pageNo}" name="pageNo" />
				<jsp:param value="${pageSize}" name="pageSize" />
				<jsp:param value="${column}" name="column" />
				<jsp:param value="${keyword}" name="keyword" />
				<jsp:param value="${count}" name="count" />
				<jsp:param value="pages/back/news_list.action" name="URL" />
				<jsp:param value="title:标题|content:内容" name="columnData" />
				<jsp:param value="1" name="pageStyle" />
			</jsp:include>

		</center>
</body></span><span style="white-space:pre"> </span><body>
<center>
<s:form action="news_insert.action" method="post" namespace="/pages/back" enctype="multipart/form-data">
新闻标题: <s:textfield name="news.title"></s:textfield> <br/>
新闻内容: <s:textfield name="news.content"></s:textfield> <br/>
发布日期: <s:textfield name="news.pubDate"></s:textfield> <br/>
新闻类型: <s:select list="allType" name="news.newsType.tid" listKey="tid" listValue="tname"></s:select>
<br/>
新闻照片: <s:file name="photo"></s:file>
<br/>
<s:submit value="添加"></s:submit>
</s:form>
</center>
</body><span style="white-space:pre"> </span><body>
<center>
<s:form action="news_update.action" method="post" namespace="/pages/back" enctype="multipart/form-data">
新闻标题: <s:textfield name="news.title"></s:textfield> <br/>
新闻内容: <s:textfield name="news.content"></s:textfield> <br/>
发布日期: <s:textfield name="news.pubDate"></s:textfield> <br/>
新闻类型: <s:select list="allType" name="news.newsType.tid" listKey="tid" listValue="tname"></s:select>
<br/>
新闻照片: <s:file name="photo"></s:file>
<br/>
原照片: <img src="upload/${news.photo==null?'nophoto.png':news.photo }"/>
<br/>
<s:if test="news.photo != null">
<s:hidden name="news.photo"></s:hidden>
</s:if>
<s:hidden name="news.id"></s:hidden>
<s:submit value="添加"></s:submit>
</s:form>
</center>
</body>上面的页面的代码是部分的,仅供参照。


 1301
1301


 被折叠的 条评论
为什么被折叠?
被折叠的 条评论
为什么被折叠?
 到【灌水乐园】发言


