


Spring框架学的差不多了,现在开始做项目了。今天老师给我们讲了讲如何用Spring+Struts2+Hibernate进行整合开发。下面我就说说如何进行开发!
第一步:创建一个web项目,需要引入类库文件;
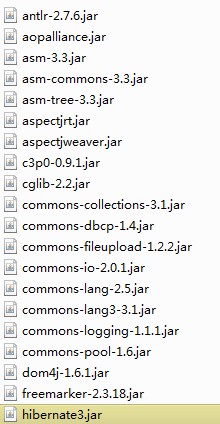
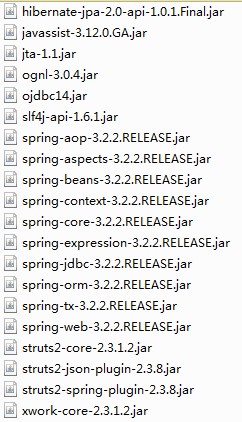
你项目中需要什么jar就引入什么jar,(别忘了引入数据库的jar包)如图大概就是这些jar包:
二、添加配置文件
1、struts2的配置文件(struts2的配置文件名不可改):
<?xml version="1.0" encoding="UTF-8"?>
<!DOCTYPE struts PUBLIC
	"-//Apache Software Foundation//DTD Struts Configuration 2.3//EN"
	"http://struts.apache.org/dtds/struts-2.3.dtd">
<struts>

	<!-- 常量的配置 -->
	<!-- struts2的后缀 -->
	<constant name="struts.action.extension" value="action" />
	<!-- 编码方式 -->
	<constant name="struts.i18n.encoding" value="UTF-8" />
	<!-- 浏览器静态缓存最好处于关闭状态 -->
	<constant name="struts.serve.static.browserCache" value="false" />
	<!-- struts.xml文件当被修改后 重新加载,开发阶段最好打开 -->
	<constant name="struts.configuration.xml.reload" value="true" />
	<!-- 处于开发阶段 最好把开发模式打开 会打印更多的详细错误信息 -->
	<constant name="struts.devMode" value="true" />
	<!-- 设置临时保存的路径 -->
	<constant name="struts.multipart.saveDir" value="c:\\day\\" />
	<!-- 设置文件上传的大小 ,这个值必须大于等于拦截器中的值 -->
	<constant name="struts.multipart.maxSize" value="10485760" />
	<!-- 国际化资源文件的基本名称 -->
	<constant name="struts.custom.i18n.resources" value="csdn" />
    <!--  struts2的action交给spring管理-->
	<constant name="struts.objectFactory" value="spring"/>


	<!-- 配置文件加入到这里 -->
	<include file="struts-newstype.xml"/>
</struts>
2、spring的配置文件
<?xml version="1.0" encoding="UTF-8"?>
<beans xmlns="http://www.springframework.org/schema/beans"
	xmlns:context="http://www.springframework.org/schema/context"
	xmlns:aop="http://www.springframework.org/schema/aop" xmlns:tx="http://www.springframework.org/schema/tx"
	xmlns:xsi="http://www.w3.org/2001/XMLSchema-instance"
	xsi:schemaLocation="http://www.springframework.org/schema/beans
           http://www.springframework.org/schema/beans/spring-beans.xsd
           http://www.springframework.org/schema/context
           http://www.springframework.org/schema/context/spring-context.xsd
            http://www.springframework.org/schema/aop
           http://www.springframework.org/schema/aop/spring-aop.xsd
           http://www.springframework.org/schema/tx
           http://www.springframework.org/schema/tx/spring-tx.xsd">


	<!-- 数据库连接的数据源 -->
	<bean id="dataSource" class="org.apache.commons.dbcp.BasicDataSource">
		<!-- 数据库连接驱动 -->
		<property name="driverClassName" value="${jdbc.driverClassName}" />
		<!-- 连接的用户名 -->
		<property name="username" value="${jdbc.username}" />
		<!-- 连接的用户密码 -->
		<property name="password" value="${jdbc.password}" />
		<!-- 连接的url地址 -->
		<property name="url" value="${jdbc.url}" />
		<!--数据库的连接的最小值 -->
		<!--数据库的连接的最大值 -->
	</bean>

	<!-- sessionFactory工厂 -->
	<bean id="localSessionFactoryBean"
		class="org.springframework.orm.hibernate3.LocalSessionFactoryBean">
		<!-- 数据库连接的数据源 -->
		<property name="dataSource" ref="dataSource" />
		<!-- hibernate的映射文件配置 -->
		<property name="mappingResources">
		 <value>www/csdn/news/domain/NewsType.hbm.xml</value>
		</property>
		<!-- hibernate的属性配置 -->
		<property name="hibernateProperties">
			<props>
				<prop key="hibernate.show_sql">true</prop>
				<prop key="hibernate.query.factory_class">org.hibernate.hql.ast.ASTQueryTranslatorFactory
				</prop>
				<prop key="hibernate.dialect">org.hibernate.dialect.Oracle9Dialect</prop>
			</props>
		</property>
	</bean>


	<!-- hibernate封装的模版类 -->
	<bean id="hibernateTemplate" class="org.springframework.orm.hibernate3.HibernateTemplate">
		<property name="sessionFactory" ref="localSessionFactoryBean" />
	</bean>


	<!-- 封装hibernateTemplate的类 -->
	<bean id="hibernateDaoSupport"
		class="org.springframework.orm.hibernate3.support.HibernateDaoSupport"
		abstract="true">
		<property name="hibernateTemplate" ref="hibernateTemplate" />
	</bean>


 <!-- 事务管理器 -->
   <bean  id="hibernateTransactionManager" class="org.springframework.orm.hibernate3.HibernateTransactionManager">
       <property name="sessionFactory" ref="localSessionFactoryBean"/>
   </bean>


  <!-- 事务的通知-->
   <tx:advice id="txAdvice" transaction-manager="hibernateTransactionManager">
       <!-- 事务的属性 -->
       <tx:attributes>
           <!-- 事务的具体执行方法 -->
           <tx:method name="save*" propagation="REQUIRED" isolation="DEFAULT"/>
           <tx:method name="delete*" propagation="REQUIRED" isolation="DEFAULT"/>
           <tx:method name="get*" propagation="REQUIRED" isolation="DEFAULT" read-only="true"/>
       </tx:attributes>
   </tx:advice>


     <!-- 切面 -->
	<aop:config>
		<aop:pointcut expression="execution(* *..Service*.*(..))" id="mycut" />
		<aop:advisor advice-ref="txAdvice" pointcut-ref="mycut" />
	</aop:config>


    <!-- 导入文件 -->
    <import resource="spring-dao.xml"/>
    <import resource="spring-service.xml"/>
    <import resource="spring-action.xml"/>
	<!-- 分散配置解析 -->
	<context:property-placeholder location="classpath:jdbc.properties" />
</beans>
3、分散配置解析的配置文件
jdbc.driverClassName=oracle.jdbc.driver.OracleDriver
jdbc.username=scott
jdbc.password=tiger
jdbc.url=jdbc\:oracle\:thin\:@127.0.0.1\:1521\:orcl
三、添加启动配置,在web.xml中配置
<?xml version="1.0" encoding="UTF-8"?>
<web-app version="2.5" xmlns="http://java.sun.com/xml/ns/javaee"
	xmlns:xsi="http://www.w3.org/2001/XMLSchema-instance"
	xsi:schemaLocation="http://java.sun.com/xml/ns/javaee
	http://java.sun.com/xml/ns/javaee/web-app_2_5.xsd">
	<display-name></display-name>
	<welcome-file-list>
		<welcome-file>index.jsp</welcome-file>
	</welcome-file-list>


	<!-- 指定spring的配置文件,默认从web根目录寻找配置文件,我们可以通过spring提供的classpath:前缀指定从类路径下寻找 -->
	<context-param>
		<param-name>contextConfigLocation</param-name>
		<param-value>classpath:applicationContext.xml</param-value>
	</context-param>
	<!-- 对Spring容器进行实例化 -->
	<listener>
		<listener-class>org.springframework.web.context.ContextLoaderListener</listener-class>
	</listener>


	<!-- 延迟Session关闭 -->

	<filter>
		<filter-name>opensession</filter-name>
		<filter-class>org.springframework.orm.hibernate3.support.OpenSessionInViewFilter</filter-class>
		<init-param>
			<!-- singleSession应该设置为true,表示一个request只能打开一个 session,如果设置为false的话,session可以被打开多个 -->
			<param-name>singleSession</param-name>
			<param-value>true</param-value>
		</init-param>

		<init-param>
			<param-name>sessionFactoryBeanName</param-name>
			<param-value>localSessionFactoryBean</param-value>
		</init-param>
	</filter>

	<filter-mapping>
		<filter-name>opensession</filter-name>
		<url-pattern>*.action</url-pattern>
	</filter-mapping>


	<!-- struts2的过滤器配置 -->
	<filter>
		<filter-name>struts2</filter-name>
		<filter-class>org.apache.struts2.dispatcher.ng.filter.StrutsPrepareAndExecuteFilter</filter-class>
	</filter>

	<filter-mapping>
		<filter-name>struts2</filter-name>
		<url-pattern>/*</url-pattern>
	</filter-mapping>


</web-app>
四、测试


 2095
2095


 被折叠的 条评论
为什么被折叠?
被折叠的 条评论
为什么被折叠?
 到【灌水乐园】发言


