


docker实战(一):centos7 yum安装docker
Cenos7 搭建Minio集群Nginx统一访问入口|反向动态代理(二)
Spring Boot 与Minio整合实现文件上传与下载(三)
MySQL8.0.30执行语句异常:1055 - Expression
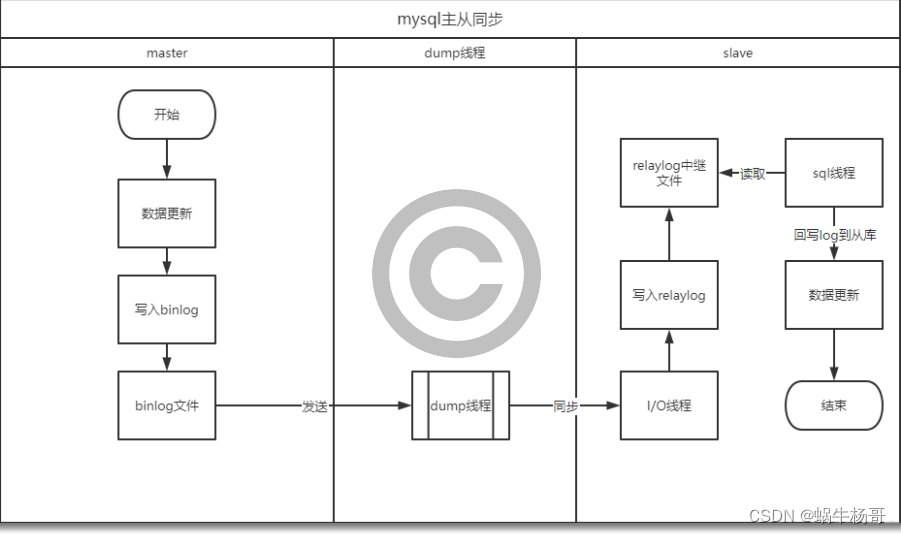
Mysql的主从复制中主要有三个线程:
master(binlog dump thread)、slave(I/O thread 、SQL thread),Master一条线程和Slave中的两条线程。
master(binlog dump thread)主要负责Master库中有数据更新的时候,会按照binlog格式,将更新的事件类型写入到主库的
binlog文件中。并且,Master会创建log dump线程通知Slave主库中存在数据更新,这就是为什么主库的binlog日志一定要开启的原因。
I/O thread线程在Slave中创建,该线程用于请求Master,Master会返回binlog的名称以及当前数据更新的位置、binlog文件位置的副本。
然后,将binlog保存在 「relay log(中继日志)」 中,中继日志也是记录数据更新的信息。
SQL线程也是在Slave中创建的,当Slave检测到中继日志有更新,就会将更新的内容同步到Slave数据库中,这样就保证了主从的数据的同步。
以上就是主从复制的过程,当然,主从复制的过程有不同的策略方式进行数据的同步,主要包含以下几种:
「同步策略」:Master会等待所有的Slave都回应后才会提交,这个主从的同步的性能会严重的影响。
「半同步策略」:Master至少会等待一个Slave回应后提交。
「异步策略」:Master不用等待Slave回应就可以提交。
「延迟策略」:Slave要落后于Master指定的时间。
搭建环境:
查看系统版本
cat /etc/redhat-release
[root@www tools]# cat /etc/redhat-release
CentOS Linux release 7.9.2009 (Core)
查看内核版本
cat /proc/version
 目标: 一主两从
| 主机IP | 主机名称 | 端口 | 搭建环境 | 安装目录|节点类型 |
| 192.168.1.100 | docker0 | 3306 | CentOS Linux release 7.9.2009 | /usr/local/mysql8 | master |
| 192.168.1.101 | docker1 | 3306 | CentOS Linux release 7.9.2009 | /usr/local/mysql8 | slave |
| 192.168.1.102 | docker2 | 3306 | CentOS Linux release 7.9.2009 | /usr/local/mysql8 | slave |
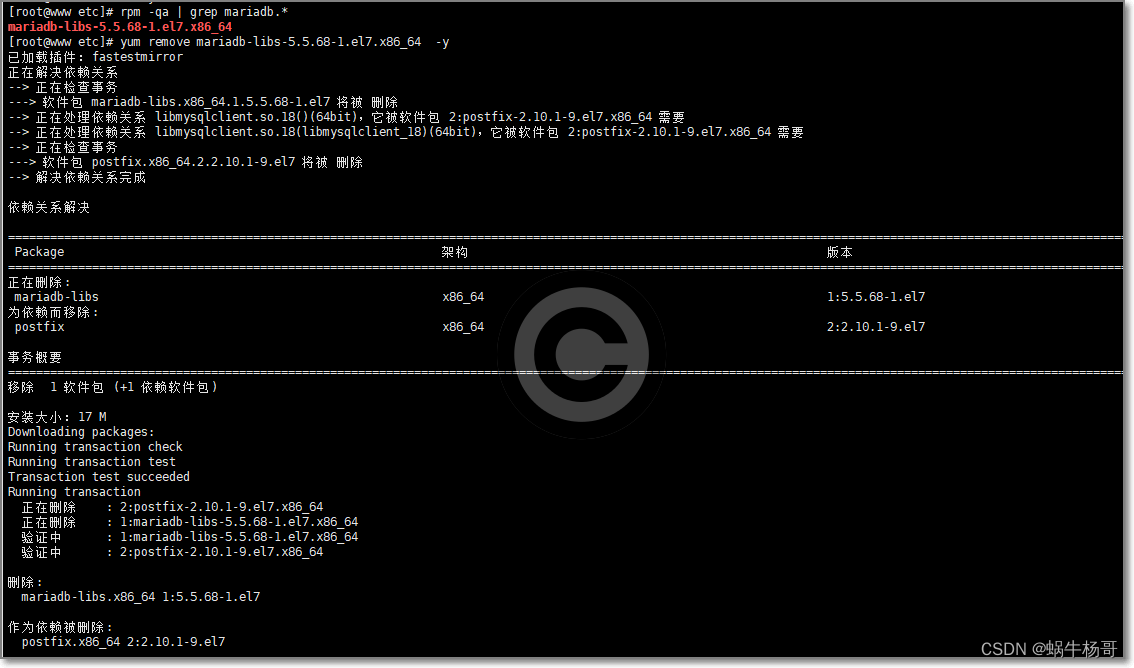
检查MariaDB并移除:
[root@www etc]# rpm -qa | grep mariadb.*
mariadb-libs-5.5.68-1.el7.x86_64
[root@www etc]# yum remove mariadb-libs-5.5.68-1.el7.x86_64 -y
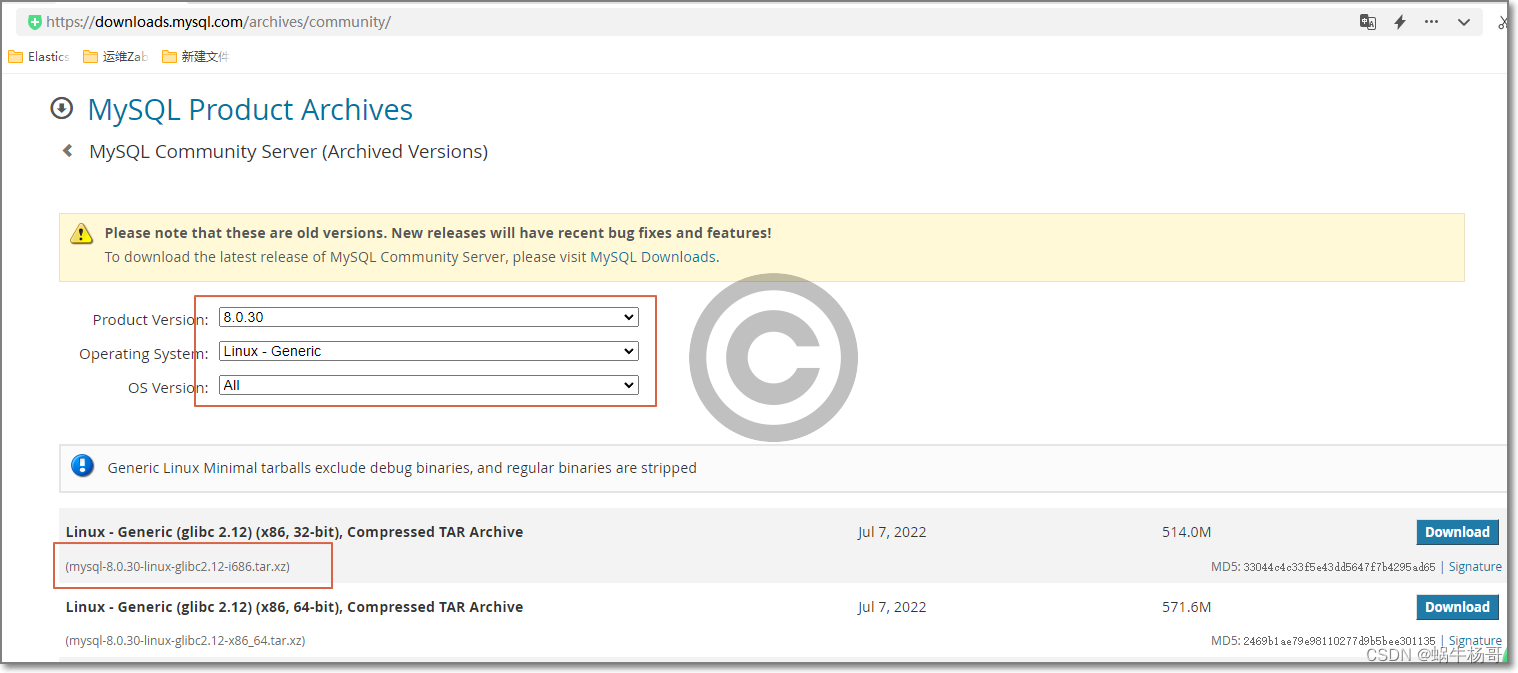
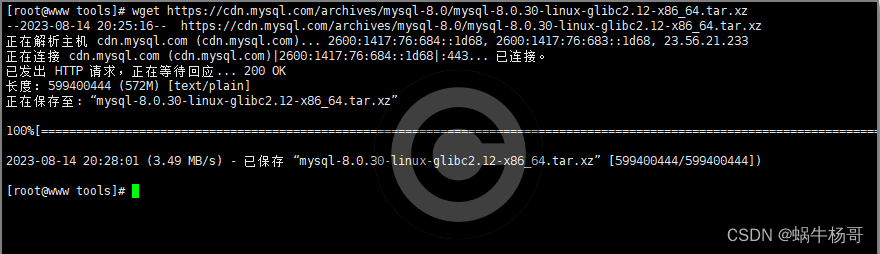
一: 下载对应的版本:
[root@www tools]#
wget https://cdn.mysql.com/archives/mysql-8.0/mysql-8.0.30-linux-glibc2.12-x86_64.tar.xz
[root@www tools]# mkdir -p /usr/local/mysql8
1.1解压过程也分为两层:
[root@www tools]# tar -xvf mysql-8.0.30-linux-glibc2.12-x86_64.tar.xz
或者
xz -d mysql-8.0.30-linux-glibc2.12-x86_64.tar.xz
或者
tar -xvf mysql-8.0.30-linux-glibc2.12-x86_64.tar.xz
之后就会出现mysql-8.0.30-linux-glibc2.12-x86_64.tar文件;然后tar xvf mysql-8.0.18-linux-glibc2.12-x86_64.tar即可完成解压
解压 mysql-8.0.30-linux-glibc2.12-x86_64.tar.xz 至 /usr/local/mysql8
[root@www tools]# tar xvf mysql-8.0.30-linux-glibc2.12-x86_64.tar -C /usr/local/mysql8/
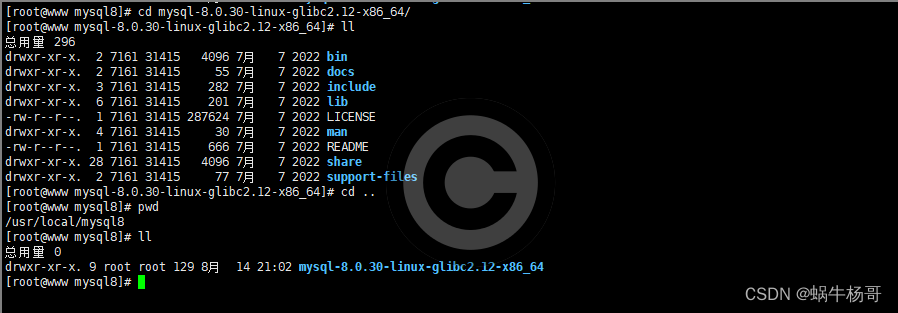
1.2重新命名:
[root@www mysql8]# mv mysql-8.0.30-linux-glibc2.12-x86_64 mysql-8.0.30
1.3创建mysql组和mysql用户
[root@www mysql8]# groupadd mysql
[root@www mysql8]# useradd -r -g mysql mysql
1.4创建软连接实现可直接命令行执行mysql
[root@www bin]# ln -s /usr/local/mysql8/mysql-8.0.30/bin/mysql /usr/bin
或:
将命令加入环境变量
#vim /etc/profile
MYSQL_HOME=/usr/local/mysql8/mysql-8.0.30
export PATH=$MYSQL_HOME/bin:$PATH
# source /etc/profile
1.5创建mysql工作目录
[root@www bin]# mkdir -p /usr/local/mysql8/mysql-8.0.30/data
[root@www bin]# mkdir -p /usr/local/mysql8/mysql-8.0.30/log
[root@www bin]# mkdir -p /usr/local/mysql8/mysql-8.0.30/binlog
[root@www bin]# mkdir -p /usr/local/mysql8/mysql-8.0.30/config
[root@www bin]# mkdir -p /usr/local/mysql8/mysql-8.0.30/tmp
1.6赋权限给相关目录|将mysql目录的权限授给mysql用户和mysql组
[root@www msql-8.0.30]# chmod -R 777 /usr/local/mysql8
[root@www msql-8.0.30]# chown -R mysql:mysql /usr/local/mysql8
1.7新建配置文件
配置最小初始化内容如下:
[root@www log]# cat /etc/my.cnf
[mysql]
# 设置mysql客户端默认字符集
default-character-set=utf8mb4
[client]
# 设置mysql客户端连接服务端时默认使用的端口
port=3306
default-character-set=utf8mb4
[mysqld]
#character config
character_set_server=utf8mb4
#设置端口
port=3306
explicit_defaults_for_timestamp=true
# 允许最大连接数
max_connections=1000
#设置mysql安装目录
datadir=/usr/local/mysql8/mysql-8.0.30
# 设置mysql数据库的数据的存放目录
datadir=/usr/local/mysql8/mysql-8.0.30/data
# 允许连接失败的次数。这是为了防止有人从该主机试图攻击数据库系统
max_connect_errors=100
# 每次commit 日志缓存中的数据刷到磁盘中。通常设置为 1,意味着在事务提交前日志已被写入磁盘, 事务可以运行更长以及服务崩溃后的修复能力
innodb_flush_log_at_trx_commit=1
# 创建新表时将使用的默认存储引擎
default-storage-engine=INNODB
# 是否对sql语句大小写敏,1表示不敏感 (注意:这个在mysql8中已经无法在配置文件中修改了,只有在初始化的时候进行配置,且如果初始化时配置了该属性,则在本配置文件中必须要有该属性的设置,否则启动报错。意思就是要么两个地方都配置,要么这里也不要配置。不然迎接你的只有报错)
#lower_case_table_names = 1
#MySQL连接闲置超过一定时间后(单位:秒)将会被强行关闭
#MySQL默认的wait_timeout 值为8个小时, interactive_timeout参数需要同时配置才能生效
interactive_timeout = 1800
wait_timeout = 1800
#Metadata Lock最大时长(秒), 一般用于控制 alter操作的最大时长sine mysql5.6
#执行 DML操作时除了增加innodb事务锁外还增加Metadata Lock,其他alter(DDL)session将阻塞
lock_wait_timeout = 3600
#内部内存临时表的最大值。
#比如大数据量的group by ,order by时可能用到临时表,
#超过了这个值将写入磁盘,避免系统IO压力增大,默认16M
tmp_table_size = 64M
max_heap_table_size = 64M
# 配置密码插件使用低版本
default_authentication_plugin=mysql_native_password
# pid-file文件配置
pid-file=/usr/local/mysql8/mysql-8.0.30/mysqld.pid
# 配置日志目录
log_error=/usr/local/mysql8/mysql-8.0.30/log/mysql-error.log
slow_query_log_file=/usr/local/mysql8/mysql-8.0.30/log/mysql-slow.log
# 设置SQL模式
sql_mode="STRICT_TRANS_TABLES,NO_ZERO_IN_DATE,NO_ZERO_DATE,ERROR_FOR_DIVISION_BY_ZERO,NO_ENGINE_SUBSTITUTION"
#不限制导入导出 任意目录/temp/data/
secure_file_priv='/temp/data'
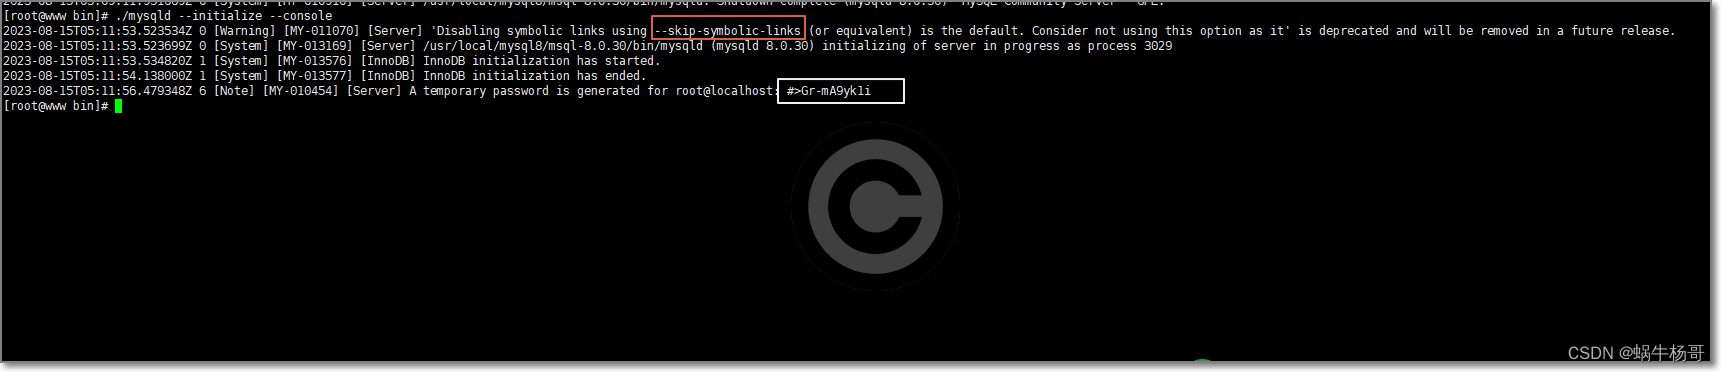
1.8初始化,并记住随机生成的密码
[root@www bin]# ./mysqld --initialize --console 这个等同于下面的第一个命令
# 数据库初始化-区分大小写
./mysqld --user=mysql --basedir=/usr/local/mysql8/mysql-8.0.30 --datadir=/usr/local/mysql8/mysql-8.0.30/data/ --initialize
# 数据库初始化-不区分大小写
./mysqld --user=mysql --lower-case-table-names=1 --basedir=/usr/local/mysql8/mysql-8.0.30 --datadir=/usr/local/mysql8/mysql-8.0.30/data/ --initialize
修改SELINUX=disabled
[root@www bin]# cat /etc/selinux/config
# This file controls the state of SELinux on the system.
# SELINUX= can take one of these three values:
# enforcing - SELinux security policy is enforced.
# permissive - SELinux prints warnings instead of enforcing.
# disabled - No SELinux policy is loaded.
#SELINUX=enforcing
SELINUX=disabled
# SELINUXTYPE= can take one of three values:
# targeted - Targeted processes are protected,
# minimum - Modification of targeted policy. Only selected processes are protected.
# mls - Multi Level Security protection.
SELINUXTYPE=targeted
1.9添加开机启动mysql服务和启动mysql服务 制作启动服务脚本
[root@www data]# cat /usr/lib/systemd/system/mysql.service
[Unit]
Description=MySQL Server
Documentation=http://dev.mysql.com/doc/refman/en/using-systemd.html
After=network.target
After=syslog.target
[Install]
WantedBy=multi-user.target
[Service]
User=mysql
Group=mysql
ExecStart=/usr/local/mysql8/mysql-8.0.30/bin/mysqld --defaults-file=/etc/my.cnf
LimitNOFILE = 5000
#Restart=on-failure
#RestartPreventExitStatus=1
#PrivateTmp=false
[root@www data]# systemctl daemon-reload
[root@www data]# systemctl start mysql
[root@www data]# systemctl status mysql

已启动,但是有几个警告:
[Warning] [MY-000054]
[Server]
World-writable config file '/usr/local/mysql8/msyql-8.0.30/data/auto.cnf' is ignored.
[Warning] [MY-010107]
[Server]
World-writable config file '/usr/local/mysql8/mysql-8.0.30/data/auto.cnf' has been removed.
大概意思是权限全局可写,任何一个用户都可以写。mysql担心这种文件被其他用户恶意修改,所以忽略掉这个配置文件。导致无法进入,这也是mysql的安全机制之一。所以我们必须得改一些权限。设置其他用户不可写
[root@www data]# chmod -R 644 /usr/local/mysql8/mysql-8.0.30/data/auto.cnf
重新启动:
[root@www data]# systemctl restart mysql
[root@www data]# systemctl status mysql

上面的警告已解决:
查看下启动日志
[root@www data]# journalctl -xe

2.0使用先前生成的随机密码登录msql:
[root@www ~]# mysql -u root -p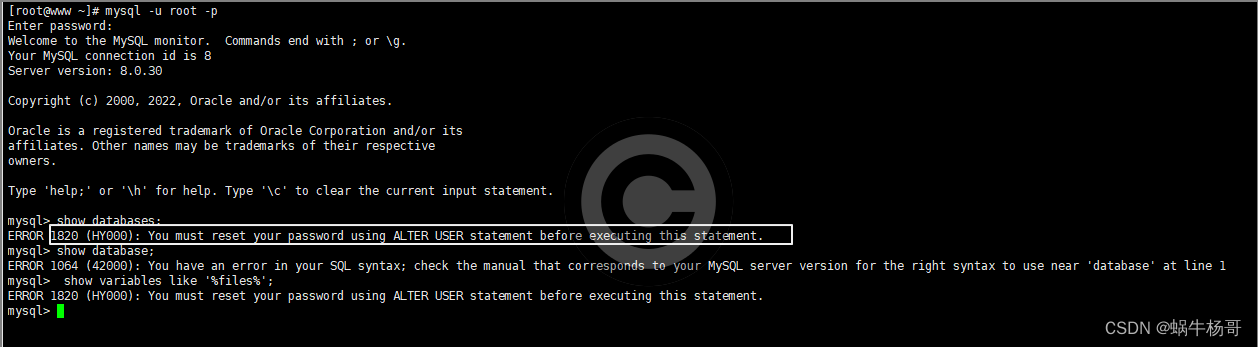
重置初始密码, 才能操作数据库相关命令
mysql> set PASSWORD = 'mysql123456' ;
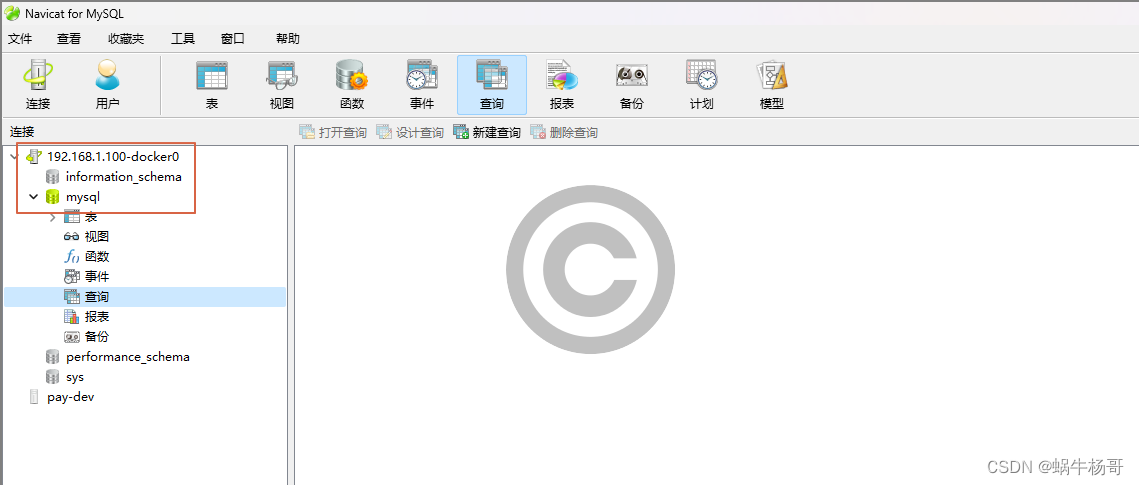
2.1开启mysql的远程访问权限
mysql> create user 'root'@'%' identified by 'mysql123456';
Query OK, 0 rows affected (0.02 sec)
mysql> grant all privileges on *.* to 'root'@'%' with grant option;
Query OK, 0 rows affected (0.01 sec)
mysql> grant all privileges on *.* to 'root'@'%' with grant option;
Query OK, 0 rows affected (0.01 sec)
mysql> use mysql;
Reading table information for completion of table and column names
You can turn off this feature to get a quicker startup with -A
Database changed
mysql> select host,user,plugin,authentication_string from user;
+-----------+------------------+-----------------------+------------------------------------------------------------------------+
| host | user | plugin | authentication_string |
+-----------+------------------+-----------------------+------------------------------------------------------------------------+
| % | root | mysql_native_password | *CAAA3AD851D5FFA9E5BDB96CA06F73633A3BA831 |
| localhost | mysql.infoschema | caching_sha2_password | $A$005$THISISACOMBINATIONOFINVALIDSALTANDPASSWORDTHATMUSTNEVERBRBEUSED |
| localhost | mysql.session | caching_sha2_password | $A$005$THISISACOMBINATIONOFINVALIDSALTANDPASSWORDTHATMUSTNEVERBRBEUSED |
| localhost | mysql.sys | caching_sha2_password | $A$005$THISISACOMBINATIONOFINVALIDSALTANDPASSWORDTHATMUSTNEVERBRBEUSED |
| localhost | root | caching_sha2_password | $A$005$^xy\V {<+_"Y=e >0qt2GXCJXB2wZqdGd4DmBSmUnaK/buocKhiZcurZ158 |
+-----------+------------------+-----------------------+------------------------------------------------------------------------+
5 rows in set (0.00 sec)
客户端远程连接:
拓展:分别执行下面的命令:
mysql> show variables like '%files%';
mysql> show variables like '%connections%';
mysql> show variables like '%table_open_cache%';
Query OK, 0 rows affected (0.01 sec)
2.2MySQL8.0.30启动警告:
[Warning] [MY-010139] [Server] Changed limits: max_open_files: 5000 (requested 8210)
[Warning] [MY-010139] [Server] Changed limits: max_open_files: 5000 (requested 8210)
后续可以真对这些参数进行调优:
继续完善my.cnf文件
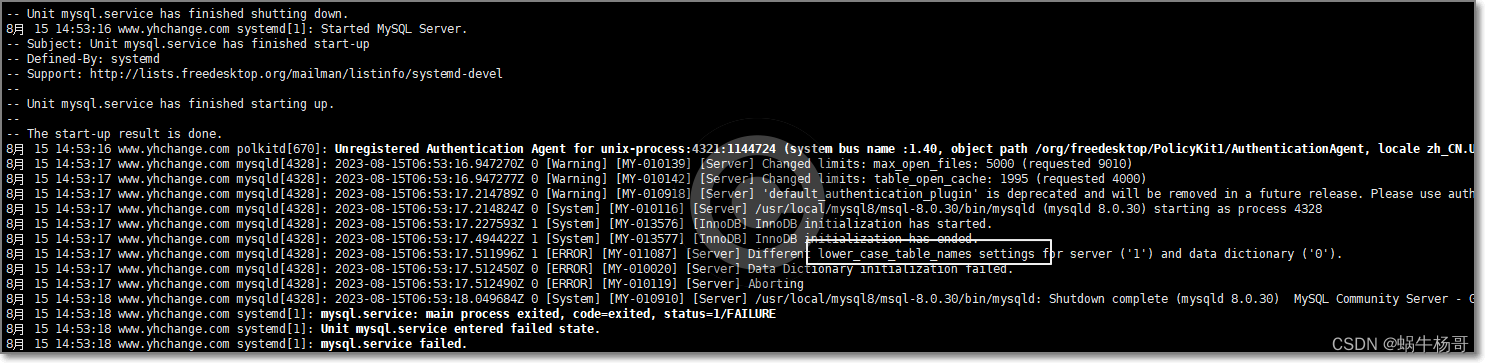
# 是否对sql语句大小写敏感,1表示不敏感 (注意:这个在mysql8中已经无法在配置文件中修改了,只有在初始化的时候进行配置,且如果初始化时配置了该属性,则在本配置文件中必须要有该属性的设置,否则启动报错。意思就是要么两个地方都配置,要么这里也不要配置。不然迎接你的只有报错)
lower_case_table_names = 1 配置该参数后,重启报错,查看日志如下:
看看操作系统的可打开文件句柄:
[root@www ~]# ulimit -n
1024
二 :CentOS7修改单个进程可打开的最大文件句柄数
2.1./etc/security/limits.conf中指定的nofile的值,nofile有上限,不是无穷大。nofile由内核参数nr_open定义的.
“在2.6.25内核之前有个宏定义,定义了这个值的最大值,为1024*1024,正好是100万,而在2.6.25内核及其之后,这个值是可以通过/proc/sys/fs/nr_open来设置。”
2.2.使用cat /proc/sys/fs/nr_open 查看nr_open值,可通过修改/etc/sysctl.conf 修改fs.nr_open值,sysctl -p生效
2.3.fix_max linux内核定义的最大file handles(文件句柄数).nr_open定义是单进程最大file-handles,file-handles(即文件句柄)
file-max:
The value in file-max denotes the maximum number of file-
handles that the Linux kernel will allocate. When you get lots
of error messages about running out of file handles, you might
want to increase this limit
nr_open:
This denotes the maximum number of file-handles a process can
allocate. Default value is 1024*1024 (1048576) which should be
enough for most machines. Actual limit depends on RLIMIT_NOFILE
resource limit.
注:
在centos 5/6 等版本中,资源限制的配置可以在 /etc/security/limits.conf 设置,针对root/user等各个用户或者*代表所有用户来设置。 当然,/etc/security/limits.d/ 中可以配置,系统是先加载limits.conf然后按照英文字母顺序加载limits.d目录下的配置文件,后加载配置覆盖之前的配置。
不过,在CentOS 7 / RHEL 7的系统中,使用Systemd替代了之前的SysV,因此 /etc/security/limits.conf 文件的配置作用域缩小了一些。limits.conf这里的配置,只适用于通过PAM认证登录用户的资源限制,它对systemd的service的资源限制不生效。登录用户的限制,与上面讲的一样,通过 /etc/security/limits.conf 和 limits.d 来配置即可。
对于systemd service的资源限制,如何配置呢?
全局的配置,放在文件 /etc/systemd/system.conf 和 /etc/systemd/user.conf。 同时,也会加载两个对应的目录中的所有.conf文件 /etc/systemd/system.conf.d/*.conf 和 /etc/systemd/user.conf.d/*.conf
其中,system.conf 是系统实例使用的,user.conf用户实例使用的。一般的sevice,使用system.conf中的配置即可。systemd.conf.d/*.conf中配置会覆盖system.conf。
注意:修改了system.conf后,需要重启系统才会生效。
2.4、如果需要修改 单个进程打开的文件句柄数 即nofile大于1024*1024,需要修改nr_open,方法如下:
1、使用cat /proc/sys/fs/nr_open查看nr_open值;
[root@localhost ~]# cat /proc/sys/fs/nr_open
1048576
2、修改nr_open的值为10240000
打开/etc/sysctl.conf,在文件末尾添加fs.nr_open=10240000
# sysctl settings are defined through files in
# /usr/lib/sysctl.d/, /run/sysctl.d/, and /etc/sysctl.d/.
#
# Vendors settings live in /usr/lib/sysctl.d/.
# To override a whole file, create a new file with the same in
# /etc/sysctl.d/ and put new settings there. To override
# only specific settings, add a file with a lexically later
# name in /etc/sysctl.d/ and put new settings there.
#
# For more information, see sysctl.conf(5) and sysctl.d(5).
fs.nr_open=10240000
保存
(注:nr_open的值要小于file—max)
2.3.1、执行如下命令,使修改生效
sysctl -p
2.3.2、验证修改是否生效
cat /proc/sys/fs/nr_open
如果结果为10240000,说明修改生效
2.3.4、修改/etc/systemd/system.conf,主要用于systemd service的资源限制
[root@localhost ~]# vi /etc/systemd/system.conf
# This file is part of systemd.
#
# systemd is free software; you can redistribute it and/or modify it
# under the terms of the GNU Lesser General Public License as published by
# the Free Software Foundation; either version 2.1 of the License, or
# (at your option) any later version.
#
# Entries in this file show the compile time defaults.
# You can change settings by editing this file.
# Defaults can be restored by simply deleting this file.
#
# See systemd-system.conf(5) for details.
[Manager]
#LogLevel=info
#LogTarget=journal-or-kmsg
#LogColor=yes
#LogLocation=no
#DumpCore=yes
#CrashShell=no
#ShowStatus=yes
#CrashChVT=1
#CtrlAltDelBurstAction=reboot-force
#CPUAffinity=1 2
#JoinControllers=cpu,cpuacct net_cls,net_prio
#RuntimeWatchdogSec=0
#ShutdownWatchdogSec=10min
#CapabilityBoundingSet=
#SystemCallArchitectures=
#TimerSlackNSec=
#DefaultTimerAccuracySec=1min
#DefaultStandardOutput=journal
#DefaultStandardError=inherit
#DefaultTimeoutStartSec=90s
#DefaultTimeoutStopSec=90s
#DefaultRestartSec=100ms
#DefaultStartLimitInterval=10s
#DefaultStartLimitBurst=5
#DefaultEnvironment=
#DefaultCPUAccounting=no
#DefaultBlockIOAccounting=no
#DefaultMemoryAccounting=no
#DefaultTasksAccounting=no
#DefaultTasksMax=
#DefaultLimitCPU=
#DefaultLimitFSIZE=
#DefaultLimitDATA=
#DefaultLimitSTACK=
#DefaultLimitCORE=
DefaultLimitCORE=infinity
#DefaultLimitRSS=
#DefaultLimitNOFILE=
DefaultLimitNOFILE=10240000
#DefaultLimitAS=
#DefaultLimitNPROC=
DefaultLimitNPROC=10240000
#DefaultLimitMEMLOCK=
#DefaultLimitLOCKS=
#DefaultLimitSIGPENDING=
#DefaultLimitMSGQUEUE=
#DefaultLimitNICE=
#DefaultLimitRTPRIO=
#DefaultLimitRTTIME=
保存
2.3.5、修改/etc/security/limits.conf文件
[root@localhost ~]# vi /etc/security/limits.conf
在文件末尾添加
root soft fsize unlimited
root hard fsize unlimited
root soft cpu unlimited
root hard cpu unlimited
root soft as unlimited
root hard as unlimited
root soft nofile 10240000
root hard nofile 10240000
root soft nproc 10240000
root hard nproc 10240000
保存退出
2.3.6、修改/etc/security/limits.d/20-nproc.conf文件
[root@localhost ~]# vi /etc/security/limits.d/20-nproc.conf
修改
* soft nproc 4096
为
* soft nproc 10240000
保存。
CentOS7修改单个进程可打开的最大文件句柄数为10240000完成。
后续完善一主二从的搭建:.........................................................................................................


 313
313


 被折叠的 条评论
为什么被折叠?
被折叠的 条评论
为什么被折叠?
 到【灌水乐园】发言


