


 本文档记录了在Linux环境下安装Weblogic 10.3.6的过程,包括卸载旧版JDK、安装JDK 1.7.9、创建用户和组、安装Weblogic,以及配置和启动Weblogic服务器的详细步骤。
最近做一个项目的时候,客户要求发布的生产环境的web应用服务器为weblogic,之前一直用的是tomcat,为此着实费了一番脑子,记录下。
weblogic版本10.3.6,jdk版本1.7.9。
一.weblogic10.3.6安装
1. 卸载openjdk
先查系统已有jdk版本,
rpm -qa|grep java
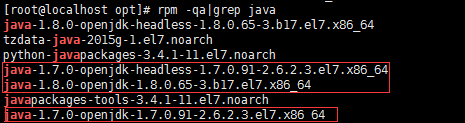
卸载openjdk
rpm -e --nodeps java-1.7.0-openjdk-headless-1.7.0.91-2.6.2.3.el7.x86_64 -e --nodeps java-1.7.0-openjdk-1.7.0.91-2.6.2.3.el7.x86_64 -e --nodeps java-1.8.0-openjdk-1.8.0.65-3.b17.el7.x86_64卸载完成。

2.安装新jdk
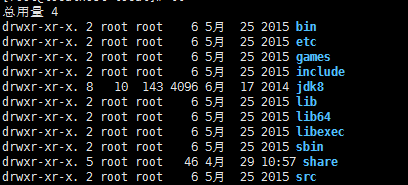
下载Linux版本jdk,并解压。

ll 可以查看当前目录下存在目录jdk1.7.0_07,然后将其移动到/usr/local/目录下,并重命名为 jdk7,输入命令:mv jdk1.7.0_07 /usr/local/jdk7
修改 /etc/profile,它是所有用户的共用的环境变量输入命令:vi /etc/profile然后在打开的文件末尾添加如下内容:
JAVA_HOME=/usr/local/jdk8
JRE_HOME=/usr/local/jdk8/jre
PATH=$JAVA_HOME/bin:$JRE_HOME/bin:$PATH
CLASSPATH=.:$JAVA_HOME/lib/dt.jar:$JAVA_HOME/lib/tools.jar:$JRE_HOME/lib
export JAVA_HOME JRE_HOME PATH CLASSPATH
使环境变量立即生效,输入命令:source /etc/profile
输入命令:java #检测jdk bin环境
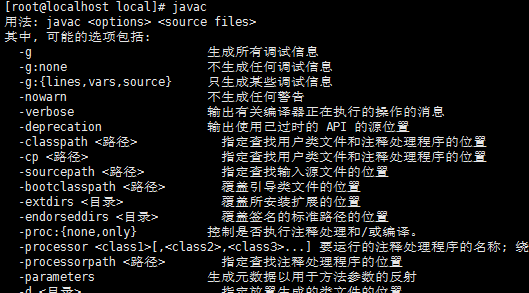
接着输入:javac #检测jdk classpath环境
3.安装weblogic
创建用户组:groupadd xycrm_weblogic
创建用户添加用户组weblogci指目录:
useradd -g xycrm_weblogic -m -d /home/lip weblogic
设置密码  passwd Xycrmwb123
指定用户目录 chown -R weblogic:xycrm_weblogic /home
执行ll 可查看目录属组
安装:
进入weblogic安装包存放目录执行安装命令如:
java -jar wls1036_generic.jar
一、安装weblogic10.3.6 64位:
-bash-4.1$ java -jar wls1036_generic.jar
Unable to instantiate GUI, defaulting to console mode.无法实例化 GUI,默认进入控制台模式。
Extracting 0%……………………………………………………………………………………….100%
<——————– Oracle Installer - WebLogic 10.3.6.0 ——————->
Welcome:
This installer will guide you through the installation of WebLogic 10.3.6.0.
Type “Next” or enter to proceed to the next prompt. If you want to change data entered previously, type “Previous”. You may quit the installer at any time by typing “Exit”.
Enter [Exit][Next]> 回车
<——————– Oracle Installer - WebLogic 10.3.6.0 ——————->
Choose Middleware Home Directory:
"Middleware Home" = [Enter new value or use default
“/bea/weblogic/Oracle/Middleware”]
Enter new Middleware Home OR [Exit][Previous][Next]> /bea/weblogic/
<——————– Oracle Installer - WebLogic 10.3.6.0 ——————->
Choose Middleware Home Directory:
"Middleware Home" = [/bea/weblogic]
Use above value or select another option:
1 - Enter new Middleware Home
2 - Change to default [/bea/weblogic/Oracle/Middleware]
Enter option number to select OR [Exit][Previous][Next]> 1
<——————– Oracle Installer - WebLogic 10.3.6.0 ——————->
Choose Middleware Home Directory:
"Middleware Home" = [/bea/weblogic]
Enter new Middleware Home OR [Exit][Previous][Next]>
<——————– Oracle Installer - WebLogic 10.3.6.0 ——————->
Choose Middleware Home Directory:
Warning
/bea/weblogic directory is not empty. Proceed with installation?
Enter [Exit][Previous][Next]>
<——————– Oracle Installer - WebLogic 10.3.6.0 ——————->
Register for Security Updates:
Provide your email address for security updates and to initiate configuration manager.
1|Email:[]
2|Support Password:[]
3|Receive Security Update:[Yes]
Enter index number to select OR [Exit][Previous][Next]> 3
<——————– Oracle Installer - WebLogic 10.3.6.0 ——————->
Register for Security Updates:
Provide your email address for security updates and to initiate configuration manager.
“Receive Security Update:” = [Enter new value or use default “Yes”]
Enter [Yes][No]? no
<——————– Oracle Installer - WebLogic 10.3.6.0 ——————->
Register for Security Updates:
Provide your email address for security updates and to initiate configuration manager.
“Receive Security Update:” = [Enter new value or use default “Yes”]
Enter [Yes][No]? yes
<——————– Oracle Installer - WebLogic 10.3.6.0 ——————->
Register for Security Updates:
Provide your email address for security updates and to initiate configuration manager.
1|Email:[]
2|Support Password:[]
3|Receive Security Update:[No]
Enter index number to select OR [Exit][Previous][Next]>
<——————– Oracle Installer - WebLogic 10.3.6.0 ——————->
Register for Security Updates:
Provide your email address for security updates and to initiate configuration manager.
1|Email:[]
2|Support Password:[]
3|Receive Security Update:[No]
Enter index number to select OR [Exit][Previous][Next]>
<——————– Oracle Installer - WebLogic 10.3.6.0 ——————->
Choose Install Type:
Select the type of installation you wish to perform.
->1|Typical
| Install the following product(s) and component(s):
| - WebLogic Server
| - Oracle Coherence
2|Custom
| Choose software products and components to install and perform optional
|configuration.
Enter index number to select OR [Exit][Previous][Next]> 2
<——————– Oracle Installer - WebLogic 10.3.6.0 ——————->
Choose Products and Components:
Release 10.3.6.0
|_____WebLogic Server [1] x
|    |_____Core Application Server [1.1] x
|
最低0.47元/天 解锁文章


 1477
1477

 被折叠的 条评论
为什么被折叠?
被折叠的 条评论
为什么被折叠?
 到【灌水乐园】发言


