


有兴趣的开发者可以参阅连接http://doc.qt.io/qt-5/qtgraphicaleffects-qmlmodule.html来深度学习Qt对Graphics方面的处理。在今天的这篇文章中,我们来使用OpacityMask做一个小小的例子来抛砖引玉看看Qt对我们的图像的处理。具体的例子在Qt的官方网站上可以看到。由于一些原因,在官方网站上下载的例程中的文件并不能被使用,需要做一些的处理才可以。
下面,我们直接来把我们的例子展示给大家:
import QtQuick 2.0
import Ubuntu.Components 1.1
import QtGraphicalEffects 1.0

/*!
    \brief MainView with a Label and Button elements.
*/

MainView {
    // objectName for functional testing purposes (autopilot-qt5)
    objectName: "mainView"

    // Note! applicationName needs to match the "name" field of the click manifest
    applicationName: "mask.liu-xiao-guo"

    /*
     This property enables the application to change orientation
     when the device is rotated. The default is false.
    */
    //automaticOrientation: true

    // Removes the old toolbar and enables new features of the new header.
    useDeprecatedToolbar: false

    width: units.gu(60)
    height: units.gu(85)

    Page {
        title: i18n.tr("mask")

        Flickable {
            anchors.fill: parent
            contentHeight: mypics.childrenRect.height

            Item {
                id: mypics
                width: parent.width
                height: units.gu(80)

                Image {
                    id: bug
                    height: parent.height/2
                    width: height
                    source: "images/bug.png"
                    sourceSize: Qt.size(parent.width, parent.height)
                    smooth: true
                    visible: false
                }

                Image {
                    id: bug1
                    height: parent.height/2
                    width: height
                    source: "images/bug.png"
                    anchors.top: bug.bottom
                    anchors.topMargin: units.gu(1)
                    sourceSize: Qt.size(parent.width, parent.height)
                    smooth: true
                    visible: false
                }

                Rectangle {
                    id: mask
                    anchors.margins: 10
                    width: 65
                    height: 65
                    color: "black"
                    radius: width/2
                    clip: true
                    visible: false
                }

                Image {
                    id: mask1
                    height: units.gu(40)
                    width: height
                    source: "images/bufferfly.png"
                    sourceSize: Qt.size(parent.width, parent.height)
                    smooth: true
                    visible: false
                }

                OpacityMask {
                    anchors.fill: bug
                    source: bug
                    maskSource: mask
                }

                OpacityMask {
                    anchors.fill: bug1
                    source: bug
                    maskSource: mask1
                }
            }
        }
    }
}
在这里,我们使用了Image来展示图片,但是,他们并不是可见的(visible = false)。我们可以通过一个掩膜mask,在mask上值为非透明的地方可以显示出图像。可以通过OpacityMask来使得它们可以显示。
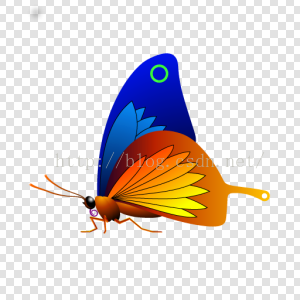
我们的mask图片bufferfly.png如下:
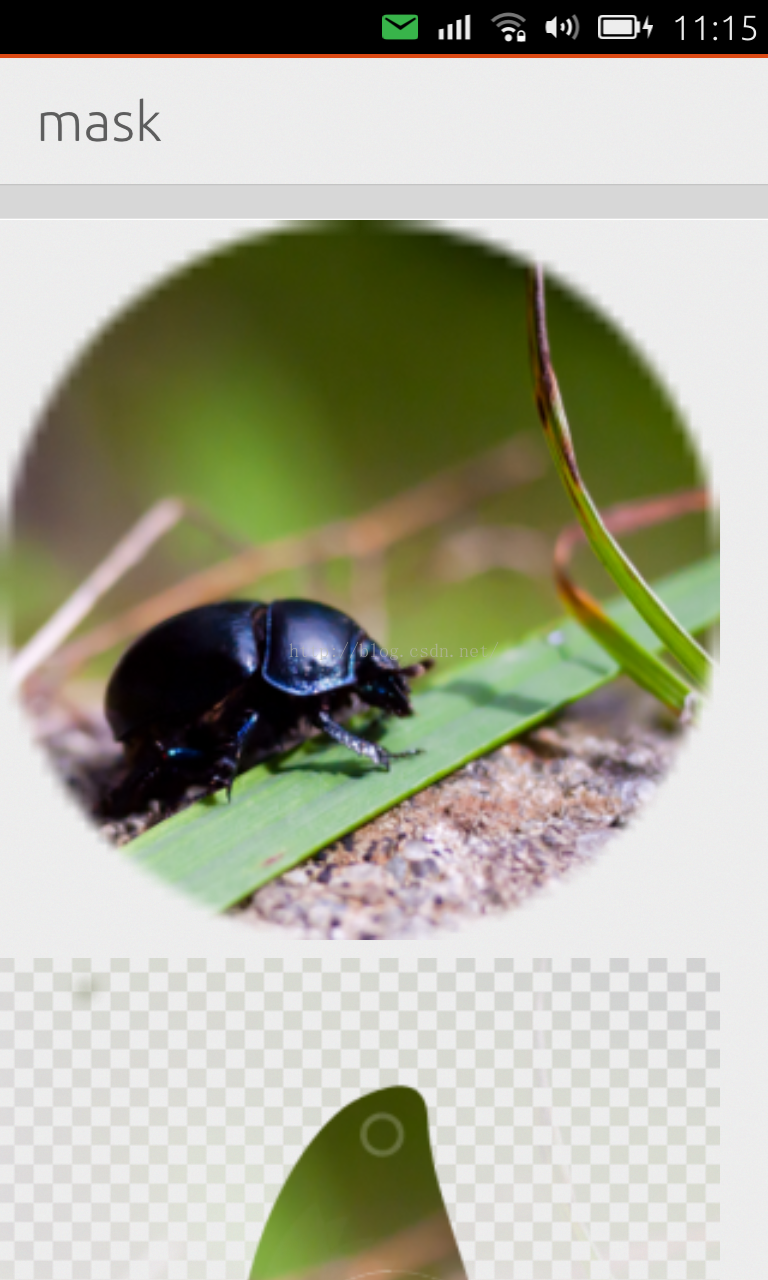
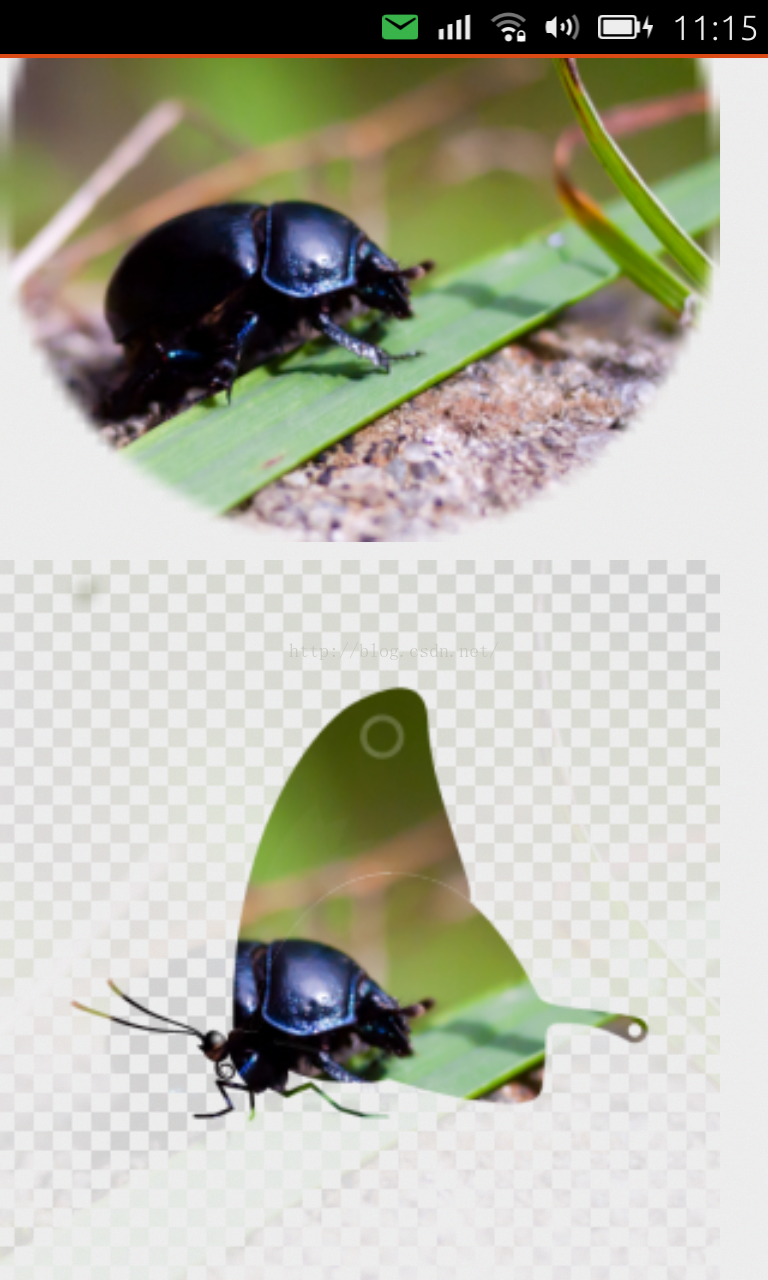
bug.png的原图为:

运行我们的例程,效果图如下:


 1410
1410

 被折叠的 条评论
为什么被折叠?
被折叠的 条评论
为什么被折叠?
 到【灌水乐园】发言


