


websocket
基于 TCP 协议的全双工通信协议,它允许客户端和服务器之间建立持久的、双向的通信连接。
相比传统的 HTTP 请求 - 响应模式,WebSocket 提供了实时、低延迟的数据传输能力。通过 WebSocket,客户端和服务器可以在任意时间点互相发送消息,实现实时更新和即时通信的功能。WebSocket 协议经过了多个浏览器和服务器的支持,成为了现代 Web 应用中常用的通信协议之一。
广泛应用于聊天应用、实时数据更新、多人游戏等场景,为 Web 应用提供了更好的用户体验和更高效的数据传输方式。
Spring Boot 中整合websocket
一、依赖
spring-boot-starter-websocket
<?xml version="1.0" encoding="UTF-8"?>
<project xmlns="http://maven.apache.org/POM/4.0.0"
         xmlns:xsi="http://www.w3.org/2001/XMLSchema-instance"
         xsi:schemaLocation="http://maven.apache.org/POM/4.0.0 http://maven.apache.org/xsd/maven-4.0.0.xsd">
    <parent>
        <artifactId>springboot-demo</artifactId>
        <groupId>com.et</groupId>
        <version>1.0-SNAPSHOT</version>
    </parent>
    <modelVersion>4.0.0</modelVersion>

    <artifactId>websocket</artifactId>

    <properties>
        <maven.compiler.source>8</maven.compiler.source>
        <maven.compiler.target>8</maven.compiler.target>
    </properties>
    <dependencies>

        <dependency>
            <groupId>org.springframework.boot</groupId>
            <artifactId>spring-boot-starter-web</artifactId>
        </dependency>

        <dependency>
            <groupId>org.springframework.boot</groupId>
            <artifactId>spring-boot-autoconfigure</artifactId>
        </dependency>

        <dependency>
            <groupId>org.springframework.boot</groupId>
            <artifactId>spring-boot-starter-websocket</artifactId>
        </dependency>
        <dependency>
            <groupId>com.alibaba</groupId>
            <artifactId>fastjson</artifactId>
            <version>2.0.40</version>
            <scope>compile</scope>
        </dependency>
    </dependencies>
</project>
二、配置文件和启动类
server:
  port: 8088
@SpringBootApplication
public class DemoApplication {

   public static void main(String[] args) {
      SpringApplication.run(DemoApplication.class, args);
   }
}
三、websocket配置类
@Configuration
@EnableWebSocket
public class WebSocketConfiguration{

	@Bean
	public ServerEndpointExporter serverEndpointExporter(){
		return new ServerEndpointExporter();
	}
}
四、websocket服务类
四个事件:
- @OnOpen:标注客户端打开 WebSocket 服务端点调用方法
- @OnClose:标注客户端关闭 WebSocket 服务端点调用方法
- @OnMessage:标注客户端发送消息,WebSocket 服务端点调用方法
- @OnError:标注客户端请求 WebSocket 服务端点发生异常调用方法
@ServerEndpoint("/websocket/{userId}")
@Component
public class WebSocketServer{

	private static final Logger log = LoggerFactory.getLogger(WebSocketServer.class);

	//当前在线连接数
	private static AtomicInteger onlineCount = new AtomicInteger(0);

	//用来存放每个客户端对应的WebSocketServer对象
	private static ConcurrentHashMap<String,WebSocketServer> webSocketMap = new ConcurrentHashMap<>();

	//与某个客户端的连接会话,需要通过它给客户端发送数据
	private Session session;

	//接收用户userId
	private String userId = "";

	//连接建立成功调用的方法 (标注客户端打开 WebSocket 服务端点调用方法)
	@OnOpen
	public void onOpen(Session session,@PathParam("userId") String userId){

		this.session = session;
		this.userId = userId;

		if(webSocketMap.containsKey(userId)){
			webSocketMap.remove(userId);
			webSocketMap.put(userId, this);
		}else{
			webSocketMap.put(userId, this);
            addOnlineCount();
		}
		log.info("用户连接:" + userId + ",当前在线人数为:" + getOnlineCount());

		try {
            sendMessage("连接成功!");
        } catch (IOException e) {
            log.error("用户:" + userId + ",网络异常!!!!!!");
        }
	}

	//连接关闭调用的方法
	@OnClose
	public void onClose(){
		if (webSocketMap.containsKey(userId)) {
            webSocketMap.remove(userId);
            subOnlineCount();
        }
        log.info("用户退出:" + userId + ",当前在线人数为:" + getOnlineCount());
	}

	//收到客户端消息后调用的方法
	@OnMessage
    public void onMessage(String message, Session session) {
        log.info("用户消息:" + userId + ",报文:" + message);
        if (!StringUtils.isEmpty(message)) {
            try {
                JSONObject jsonObject = JSON.parseObject(message);
                jsonObject.put("fromUserId", this.userId);
                String toUserId = jsonObject.getString("toUserId");
                if (!StringUtils.isEmpty(toUserId) && webSocketMap.containsKey(toUserId)) {
                    webSocketMap.get(toUserId).sendMessage(jsonObject.toJSONString());
                } else {
                    log.error("请求的 userId:" + toUserId + "不在该服务器上");
                }
            } catch (Exception e) {
                e.printStackTrace();
            }
        }
    }

	//发生错误时调用
	@OnError
    public void onError(Session session, Throwable error) {
        log.error("用户错误:" + this.userId + ",原因:" + error.getMessage());
        error.printStackTrace();
    }

	/**
     * 实现服务器主动推送
     */
    public void sendMessage(String message) throws IOException {
        this.session.getBasicRemote().sendText(message);
    }

    public static synchronized AtomicInteger getOnlineCount() {
        return onlineCount;
    }

    public static synchronized void addOnlineCount() {
        WebSocketServer.onlineCount.getAndIncrement();
    }

    public static synchronized void subOnlineCount() {
        WebSocketServer.onlineCount.getAndDecrement();
    }
}
测试
打开postman,新建2个websocket测试连接,ws://127.0.0.1:8088/websocket/wupx
点击开启连接按钮,消息记录中会多一条由服务器端发送的连接成功!记录

输入ws://127.0.0.1:8088/websocket/huxy,点击开启连接按钮,然后回到第一次打开的网页在消息框中输入{“toUserId”:“huxy”,“message”:“i love you”},点击发送到服务端,第二个网页中会收到服务端推送的消息{“fromUserId”:“wupx”,“message”:“i love you”,“toUserId”:“huxy”}
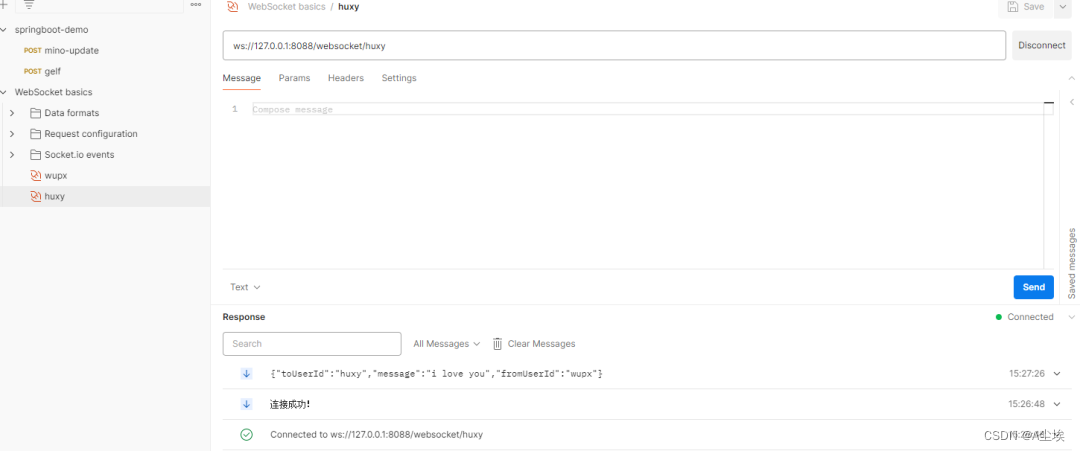
控制台输出
2024-02-26 15:26:48.699 INFO 27848 --- [nio-8088-exec-2] c.et.websocket.channel.WebSocketServer : 用户连接:huxy,当前在线人数为:1
2024-02-26 15:26:56.581 INFO 27848 --- [nio-8088-exec-4] c.et.websocket.channel.WebSocketServer : 用户连接:wupx,当前在线人数为:2
2024-02-26 15:27:26.401 INFO 27848 --- [nio-8088-exec-5] c.et.websocket.channel.WebSocketServer : 用户消息:wupx,报文:{"toUserId":"huxy","message":"i love you"}
springboot整合websocket实现一对一消息推送和广播消息推送
一、依赖
<dependency>
    <groupId>org.springframework.boot</groupId>
    <artifactId>spring-boot-starter-websocket</artifactId>
</dependency>
二、常量和消息实体
Constant常量类
   //webSocket相关配置
    //链接地址
    public static String WEBSOCKETPATHPERFIX = "/ws-push";
    public static String WEBSOCKETPATH = "/endpointWisely";
    //消息代理路径
    public static String WEBSOCKETBROADCASTPATH = "/topic";
    //前端发送给服务端请求地址
    public static final String FORETOSERVERPATH = "/welcome";
    //服务端生产地址,客户端订阅此地址以接收服务端生产的消息
    public static final String PRODUCERPATH = "/topic/getResponse";
    //点对点消息推送地址前缀
    public static final String P2PPUSHBASEPATH = "/user";
    //点对点消息推送地址后缀,最后的地址为/user/用户识别码/msg
    public static final String P2PPUSHPATH = "/msg";
//前端接收消息实体
public class WiselyMessage {
    private String name;

    public String getName() {
        return name;
    }

    public void setName(String name) {
        this.name = name;
    }
}
//后端发送消息实体
private String responseMessage;

public WiselyResponse(String responseMessage){
    this.responseMessage = responseMessage;
}

public String getResponseMessage() {
    return responseMessage;
}

public void setResponseMessage(String responseMessage) {
    this.responseMessage = responseMessage;
}
三、配置类
开启使用STOMP协议来传输基于代理(MessageBroker)的消息。这时候控制器(controller)开始支持@MessageMapping,就像是使用@requestMapping一样
@Configuration //
@EnableWebSocketMessageBroker//开启使用STOMP协议来传输基于代理(MessageBroker)的消息。
public class WebSocketConfig extends AbstractWebSocketMessageBrokerConfigurer{

	@Override
	public void registerStompEndpoints(StompEndpointRegistry stompEndpointRegistry){
		//注册一个Stomp的节点(endpoint),并指定使用SockJS协议。
        stompEndpointRegistry.addEndpoint(Constant.WEBSOCKETPATH).withSockJS();
	}

	@Override
	public void configureMessageBroker(MessageBrokerRegistry registry){
		//服务端发送消息给客户端的域,多个用逗号隔开
        registry.enableSimpleBroker(Constant.WEBSOCKETBROADCASTPATH, Constant.P2PPUSHBASEPATH);
        //定义一对一推送的时候前缀
        registry.setUserDestinationPrefix(Constant.P2PPUSHBASEPATH);
        //定义websoket前缀
        registry.setApplicationDestinationPrefixes(Constant.WEBSOCKETPATHPERFIX);
	}
}
四、Service
@Service
public class WebSocketService{

	@Autowired
	private SimpMessagingTemplate template;

	//广播发送给所有在线用户
	public void sendMsg(WiselyResponse msg){
		template.convertAndSend(Constant.PRODUCERPATH,msg);
	}

	//发送给指定用户
	public void send2Users(List<String> users, WiselyResponse msg){
		users.forEach(userName -> {
			template.convertAndSendToUser(userName,Constant.P2PPUSHPATH, msg);
		});
	}
}
五、Controller
@Controller
public class WsController{

	@Resource
	WebSocketService webSocketService;

	/**
		@MessageMapping和@RequestMapping功能类似,用于设置URL映射地址,浏览器向服务器发起请求,需要通过该地址。
		@SendTo(Constant.PRODUCERPATH)如果服务器接受到了消息,就会对订阅了@SendTo括号中的地址传送消息。
	*/
	@MessageMapping
	@SendTo(Constant.PRODUCERPATH)
	public WiselyResponse say(WiselyMessage message) throws Exception {

		List<String> users = Lists.newArrayList();
        users.add("d892bf12bf7d11e793b69c5c8e6f60fb");//此处写死只是为了方便测试,此值需要对应页面中订阅个人消息的userId
        webSocketService.send2Users(users, new WiselyResponse("admin hello"));

        return new WiselyResponse("Welcome, " + message.getName() + "!");
	}
}
页面
<!DOCTYPE html>
<html xmlns:th="http://www.thymeleaf.org">
<head>
<meta charset="UTF-8" />
<title>Spring Boot+WebSocket+广播式</title>
</head>
<body onload="disconnect()">
<noscript><h2 style="color: #ff0000">貌似你的浏览器不支持websocket</h2></noscript>
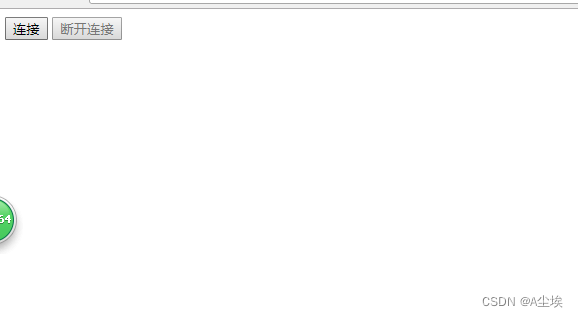
<div>
<div>
<button id="connect" onclick="connect();">连接</button>
<button id="disconnect" disabled="disabled" onclick="disconnect();">断开连接</button>
</div>
<div id="conversationDiv">
<label>输入你的名字</label><input type="text" id="name" />
<button id="sendName" onclick="sendName();">发送</button>
<p id="response"></p>
<p id="response1"></p>
</div>
</div>
<!--<script th:src="@{sockjs.min.js}"></script>
<script th:src="@{stomp.min.js}"></script>
<script th:src="@{jquery.js}"></script>-->
<script src="https://cdn.bootcss.com/sockjs-client/1.1.4/sockjs.min.js"></script>
<script src="https://cdn.bootcss.com/stomp.js/2.3.3/stomp.min.js"></script>
<script src="https://cdn.bootcss.com/jquery/3.2.1/jquery.min.js"></script>
<script th:inline="javascript">
var stompClient = null;
//此值有服务端传递给前端,实现方式没有要求
var userId = [[${userId}]];
function setConnected(connected) {
document.getElementById('connect').disabled = connected;
document.getElementById('disconnect').disabled = !connected;
document.getElementById('conversationDiv').style.visibility = connected ? 'visible' : 'hidden';
$('#response').html();
}
function connect() {
var socket = new SockJS('/endpointWisely'); //1连接SockJS的endpoint是“endpointWisely”,与后台代码中注册的endpoint要一样。
stompClient = Stomp.over(socket);//2创建STOMP协议的webSocket客户端。
stompClient.connect({}, function(frame) {//3连接webSocket的服务端。
setConnected(true);
console.log('开始进行连接Connected: ' + frame);
//4通过stompClient.subscribe()订阅服务器的目标是'/topic/getResponse'发送过来的地址,与@SendTo中的地址对应。
stompClient.subscribe('/topic/getResponse', function(respnose){
showResponse(JSON.parse(respnose.body).responseMessage);
});
//4通过stompClient.subscribe()订阅服务器的目标是'/user/' + userId + '/msg'接收一对一的推送消息,其中userId由服务端传递过来,用于表示唯一的用户,通过此值将消息精确推送给一个用户
stompClient.subscribe('/user/' + userId + '/msg', function(respnose){
console.log(respnose);
showResponse1(JSON.parse(respnose.body).responseMessage);
});
});
}
function disconnect() {
if (stompClient != null) {
stompClient.disconnect();
}
setConnected(false);
console.log("Disconnected");
}
function sendName() {
var name = $('#name').val();
//通过stompClient.send()向地址为"/welcome"的服务器地址发起请求,与@MessageMapping里的地址对应。因为我们配置了registry.setApplicationDestinationPrefixes(Constant.WEBSOCKETPATHPERFIX);所以需要增加前缀/ws-push/
stompClient.send("/ws-push/welcome", {}, JSON.stringify({ 'name': name }));
}
function showResponse(message) {
var response = $("#response");
response.html(message);
}
function showResponse1(message) {
var response = $("#response1");
response.html(message);
}
</script>
</body>
</html>
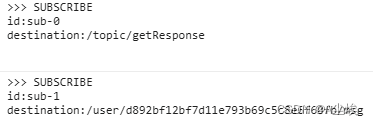
点击连接控制台输出
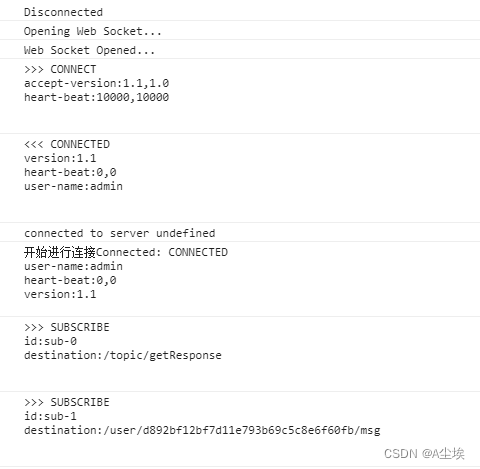
表示连接成功并且订阅了两个地址
此时在文本框内输入任意值,结果如图所示则代表成功

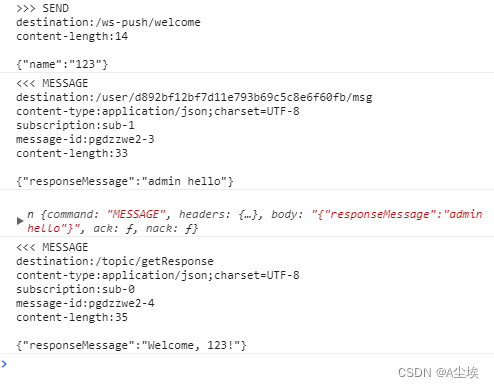
控制台中显示依次为,发送信息,目标长度内容

此时服务端控制器接收到请求

同时给指定用户发送了消息,所以控制台接收到消息

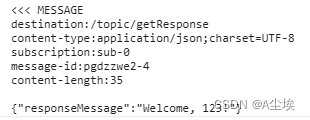
同时因为控制器有注解@SendTo所以会向@SendTo的地址广播消息,客户端订阅了广播地址所有控制台显示接收了消息


 4800
4800


 被折叠的 条评论
为什么被折叠?
被折叠的 条评论
为什么被折叠?
 到【灌水乐园】发言


