


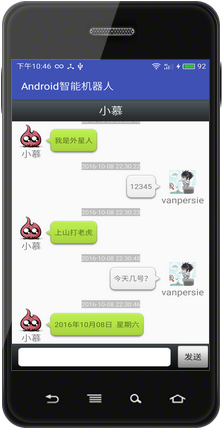
本文将实现一个仿微信的聊天界面demo,对话的双方分别来自“自己”和第三方接口“图灵机器人”,该接口会根据您发送的信息智能回答,从而形成简单的对话聊天。效果如下:
界面分析:
聊天界面整体上是一个ListView,该ListView的item包含了两种布局,每种布局都包含时间、聊天内容、和布局样式(区分是哪种布局)。
当自己发送一个内容时,将该内容添加到Adapter所绑定的List中,并刷新Adapter;再将List中的内容拼接到接口中远程访问Url,返回结果是一个JSON格式的数据,使用GSON将其解析,并将内容部分添加到List中,再次通知Adapter刷新List,这样就实现了对话。由于远程访问Url是一个网络操作,故不可将其放在主线程中,又由于返回的数据需要在添加到List中再通知Adapter刷新,这是一个主线程操作。由于涉及到线程见的交互,所以需要使用Handler控制。
(本demo所需的资源图片地址:http://img.mukewang.com/down/54586b4c0001ec8100000000.zip)
下面是代码解析:
- 首先您需要在图灵网(www.tuling123.com)注册一个账号,并使用该账号绑定您要编写的应用程序,图灵网会返回一个改程序对应的API Key。
使用GET请求访问http://www.tuling123.com/openapi/api地址以获取返回的JSON格式的数据,还需要在GET请求中添加”key”(也就是申请的API Key),”info”(就是您的发送的信息),”userid”(表示用户的位移标识,确保唯一性)。
下面使用一个工具类来封装该GET请求:
public class Utils {
    private static final String URL = "http://www.tuling123.com/openapi/api";
    private static final String API_KEY = "6bb5146414bb4fd9a8cf192be580d367";

    /**
     * @param msg 发送的内容
     * @return 远程返回的JSON格式的字符串
     * @throws IOException
     */
    public static String doGet(String msg) throws IOException {
        String result = "";
        String url = getUrl(msg);
        InputStream is = null;
        ByteArrayOutputStream baos = null;
        try {
            java.net.URL urlConn = new URL(url);
            HttpURLConnection conn = (HttpURLConnection) urlConn.openConnection();
            conn.setRequestMethod("GET");
            conn.setReadTimeout(5000);
            conn.setConnectTimeout(5000);
            is = conn.getInputStream();
            int len = -1;
            byte[] byteRead = new byte[128];
            baos = new ByteArrayOutputStream();

            while ((len = is.read(byteRead)) != -1) {
                baos.write(byteRead, 0, len);

            }
            baos.flush();
            result = new String(baos.toByteArray());
        } catch (MalformedURLException e) {
            e.printStackTrace();
        } finally {
            try {
                if (is != null) {
                    is.close();

                }
            } catch (IOException e) {
                e.printStackTrace();
            }
            if (baos != null) {
                baos.close();

            }
        }
        return result;


    }

    /**
     * @param msg 发送的内容
     * @return 拼接的URL
     */
    private static String getUrl(String msg) {
        String result = null;
        try {
            result = URL + "?key=" + API_KEY + "&info=" + URLEncoder.encode(msg, "UTF-8") + "&userid=" + "12345678";

        } catch (UnsupportedEncodingException e) {
            e.printStackTrace();
        }
        return result;
    }

    /**
     * 发送一个消息 返回消息
     *
     * @param msg 发送的内容
     * @return 从JSON数据中去除的返回内容
     */
    public static MsgBean getMessage(String msg)

    {
        MsgBean msgBean = new MsgBean();
        try {
            String jsonString = doGet(msg);
            Gson gson = new Gson();
            Result result = gson.fromJson(jsonString, Result.class);
            msgBean.setMsg(result.getText());
        } catch (IOException e) {
            e.printStackTrace();
        }
        msgBean.setDate(new Date());
        msgBean.setType(MsgBean.Type.INCOMING);


        return msgBean;
    }

}
其中Result类是远程返回的JSON格式的数据,该类如下:
public class Result {
    private int code;
    private String text;

    public int getCode() {
        return code;
    }

    public void setCode(int code) {
        this.code = code;
    }

    public String getText() {
        return text;
    }

    public void setText(String text) {
        this.text = text;
    }
}
code为10000时表示请求成功,text即为结果。
MsgBean类是ListView中的每一个数据项,该类如下:
public class MsgBean {

    private String msg;
    private Type type;
    private Date date;


    public String getMsg() {
        return msg;
    }

    public void setMsg(String msg) {
        this.msg = msg;
    }

    public Type getType() {
        return type;
    }

    public void setType(Type type) {
        this.type = type;
    }

    public Date getDate() {
        return date;
    }

    public void setDate(Date date) {
        this.date = date;
    }

    public enum Type {
        INCOMING, OUTCOMING

    }

}
该类中包含一个枚举类型Type,该枚举类用于区分发送和接收的消息。
下面是每一个接受的Item的布局:
<!-- item_incoming_msg.xml -->
<LinearLayout xmlns:android="http://schemas.android.com/apk/res/android"
android:layout_width="match_parent"
android:layout_height="match_parent"
android:orientation="vertical">
<TextView
android:id="@+id/tv_incoming_date"
android:layout_width="wrap_content"
android:layout_height="wrap_content"
android:layout_gravity="center"
android:background="#BEBEBE"
android:text="2016-12-12 12:12:12"
android:textColor="#F5F5F5"
android:textSize="12sp" />
<LinearLayout
android:layout_width="match_parent"
android:layout_height="wrap_content"
android:orientation="horizontal">
<LinearLayout
android:layout_width="wrap_content"
android:layout_height="wrap_content"
android:layout_marginLeft="10dp"
android:orientation="vertical">
<ImageView
android:id="@+id/iv_xiaomu_icon"
android:layout_width="49dp"
android:layout_height="49dp"
android:layout_gravity="center_horizontal"
android:src="@drawable/icon" />
<TextView
android:layout_width="wrap_content"
android:layout_height="wrap_content"
android:layout_gravity="center_horizontal"
android:text="小慕"
android:textSize="18sp" />
</LinearLayout>
<TextView
android:id="@+id/tv_incoming_content"
android:layout_width="wrap_content"
android:layout_height="wrap_content"
android:layout_gravity="center_vertical"
android:background="@drawable/chatfrom_bg_normal"
android:gravity="center"
android:text="你好" />
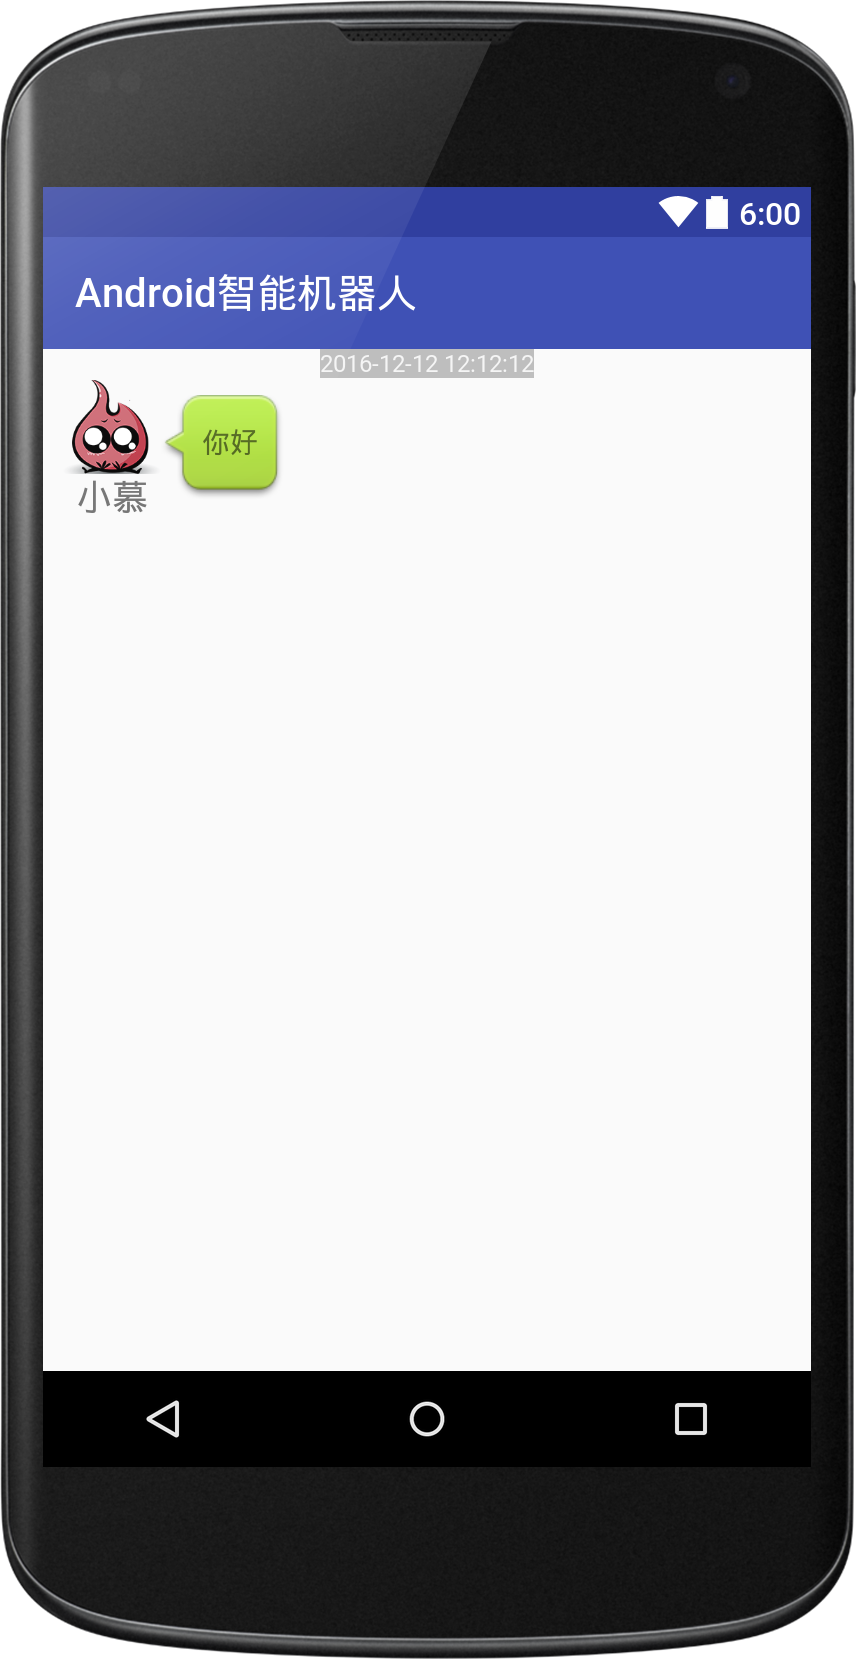
</LinearLayout>
</LinearLayout>该布局的效果如下:
同理,发送的item的布局如下:
<!-- item_outcoming_msg.xml -->
<LinearLayout xmlns:android="http://schemas.android.com/apk/res/android"
android:layout_width="match_parent"
android:layout_height="match_parent"
android:orientation="vertical">
<TextView
android:id="@+id/tv_outcoming_date"
android:layout_width="wrap_content"
android:layout_height="wrap_content"
android:layout_gravity="center"
android:background="#BEBEBE"
android:text="2016-12-12 12:12:12"
android:textColor="#F5F5F5"
android:textSize="12sp" />
<LinearLayout
android:layout_width="match_parent"
android:layout_height="wrap_content"
android:layoutDirection="rtl"
android:orientation="horizontal">
<LinearLayout
android:layout_width="wrap_content"
android:layout_height="wrap_content"
android:layout_marginRight="10dp"
android:orientation="vertical">
<ImageView
android:id="@+id/iv_me_icon"
android:layout_width="49dp"
android:layout_height="49dp"
android:layout_gravity="center_horizontal"
android:src="@drawable/me" />
<TextView
android:id="@+id/textView"
android:layout_width="wrap_content"
android:layout_height="wrap_content"
android:layout_gravity="center_horizontal"
android:text="vanpersie"
android:textSize="18sp" />
</LinearLayout>
<TextView
android:id="@+id/tv_outcoming_content"
android:layout_width="wrap_content"
android:layout_height="wrap_content"
android:layout_gravity="center_vertical"
android:background="@drawable/chatto_bg_normal"
android:gravity="center"
android:text="你也好" />
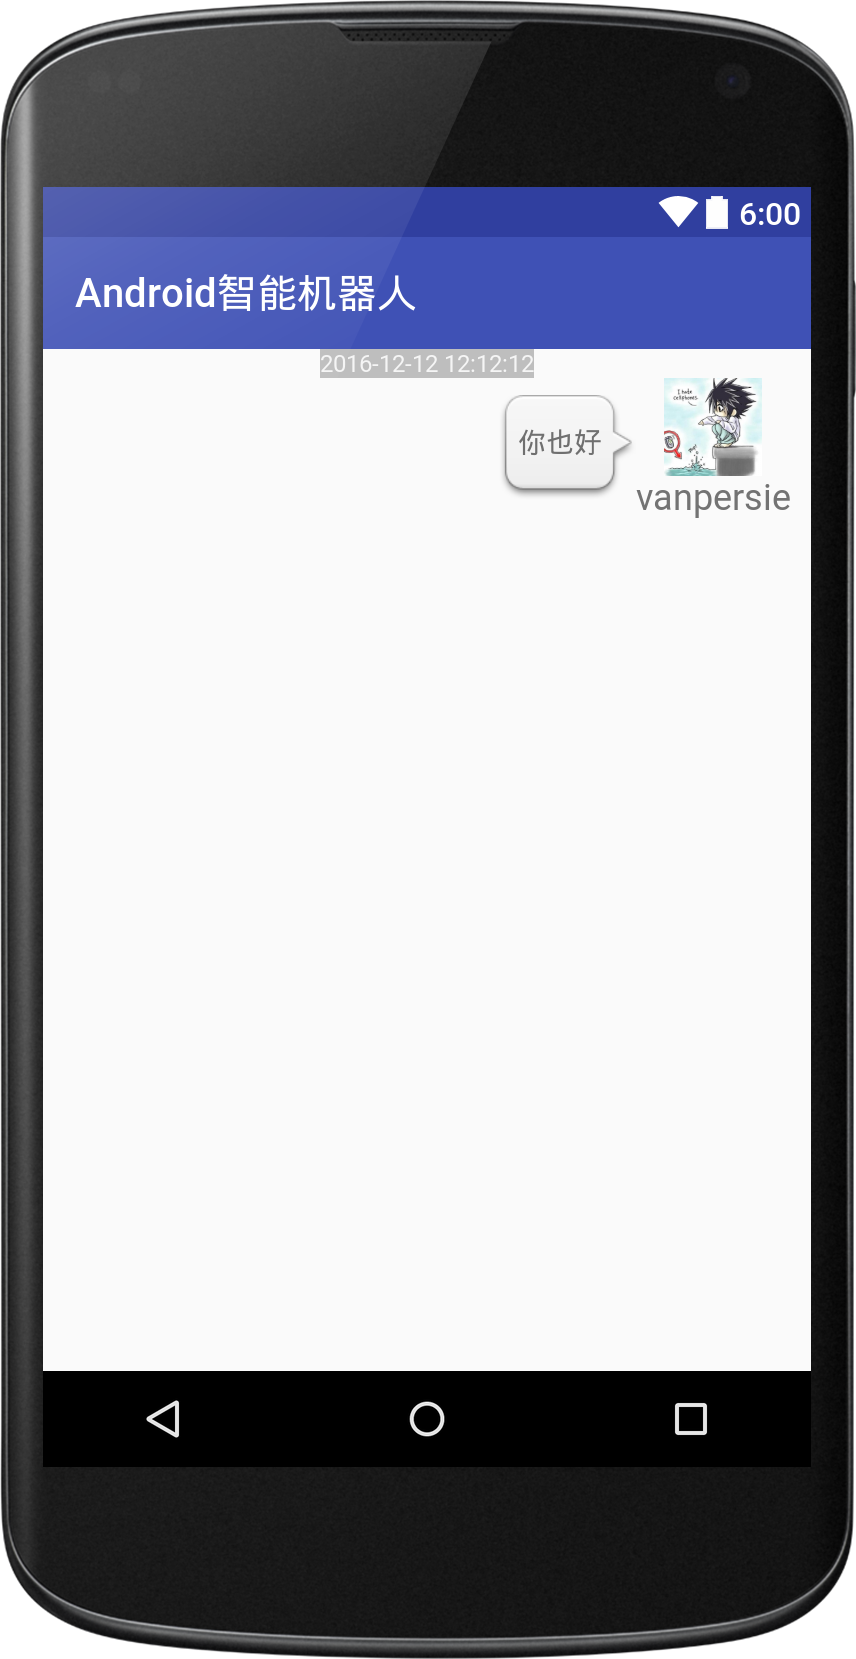
</LinearLayout>
</LinearLayout>布局的效果如下:
下面是Adapter的内容:
public class ChatAdapter extends BaseAdapter {
    private LayoutInflater mLayoutInflater;
    private List<MsgBean> mList;

    public ChatAdapter(Context context, List<MsgBean> list) {
        this.mLayoutInflater = LayoutInflater.from(context);
        this.mList = list;
    }

    @Override
    public int getCount() {
        return mList.size();
    }

    @Override
    public MsgBean getItem(int position) {
        return mList.get(position);
    }

    @Override
    public long getItemId(int position) {
        return position;
    }

    @Override
    public int getViewTypeCount() {
        return 2;
    }

    @Override
    public int getItemViewType(int position) {
        MsgBean bean = mList.get(position);
        if (bean.getType() == MsgBean.Type.INCOMING) {
            return 0;
        } else {
            return 1;
        }


    }

    @Override
    public View getView(int position, View convertView, ViewGroup parent) {
        ViewHolder viewHolder = null;
        // MsgBean bean = getItem(position);
        if (convertView == null) {
            viewHolder = new ViewHolder();
            if (getItemViewType(position) == 0) {

                convertView = mLayoutInflater.inflate(R.layout.item_imcoming_msg, parent, false);
                viewHolder.tv_date = (TextView) convertView.findViewById(R.id.tv_incoming_date);
                viewHolder.tv_content = (TextView) convertView.findViewById(R.id.tv_incoming_content);


            } else {
                convertView = mLayoutInflater.inflate(R.layout.item_outcoming_msg, parent, false);
                viewHolder.tv_date = (TextView) convertView.findViewById(R.id.tv_outcoming_date);
                viewHolder.tv_content = (TextView) convertView.findViewById(R.id.tv_outcoming_content);


            }
            convertView.setTag(viewHolder);

        } else {
            viewHolder = (ViewHolder) convertView.getTag();
        }
        //设置数据
        SimpleDateFormat format = new SimpleDateFormat("yyyy-MM-dd HH:mm:ss");
        viewHolder.tv_date.setText(format.format(getItem(position).getDate()));
        viewHolder.tv_content.setText(getItem(position).getMsg());


        return convertView;
    }

    private static class ViewHolder {
        private TextView tv_date;
        private TextView tv_content;

    }
}
由于存在两种布局方式,所以需要重写BaseAdapter中的getViewTypeCount()和getItemViewType(int position)方法,前者用于返回不同种类布局的个数,后者根据position参数的所在项属于哪一种布局而返回0~(到布局种类-1)。在本例中有两种布局,所以getViewTypeCount()方法返回2,后者返回0或1。
在getView方法中,根据item的不同类型,将内容设置到ViewHolder中。
最后是MainActivity,先看看它的布局:
<!-- activity_main.xml -->
<?xml version="1.0" encoding="utf-8"?>
<RelativeLayout xmlns:android="http://schemas.android.com/apk/res/android"
    xmlns:tools="http://schemas.android.com/tools"
    android:id="@+id/activity_main"
    android:layout_width="match_parent"
    android:layout_height="match_parent"

    tools:context="com.demo.lenovo.android.MainActivity">

    <RelativeLayout
        android:id="@+id/rl_top"
        android:layout_width="match_parent"

        android:layout_height="45dp"
        android:layout_alignParentTop="true"
        android:background="@drawable/title_bar">

        <TextView
            android:layout_width="wrap_content"
            android:layout_height="wrap_content"
            android:layout_centerInParent="true"
            android:text="小慕"
            android:textColor="@android:color/white"
            android:textSize="22sp" />
    </RelativeLayout>

    <RelativeLayout
        android:id="@+id/rl_bottom"
        android:layout_width="match_parent"
        android:layout_height="55dp"
        android:layout_alignParentBottom="true"
        android:background="@drawable/bottom_bar">

        <Button
            android:id="@+id/btn_input"
            android:layout_width="60dp"
            android:layout_height="50dp"
            android:layout_alignParentRight="true"
            android:layout_centerVertical="true"
            android:background="@drawable/btn_select"
            android:text="发送"
            android:textSize="16sp" />

        <EditText

            android:id="@+id/et_input"
            android:layout_width="match_parent"
            android:layout_height="40dp"
            android:layout_centerVertical="true"
            android:layout_marginLeft="10dp"
            android:layout_marginRight="10dp"
            android:layout_toLeftOf="@id/btn_input"
            android:maxLines="1"
            android:background="@drawable/login_edit_normal"
            android:textSize="18sp" />

    </RelativeLayout>

    <ListView
        android:id="@+id/lv_list"
        android:layout_width="match_parent"
        android:layout_height="match_parent"
        android:layout_above="@id/rl_bottom"
        android:layout_below="@id/rl_top"
        android:divider="@null"
        android:dividerHeight="5dp" />
</RelativeLayout>
效果如下:
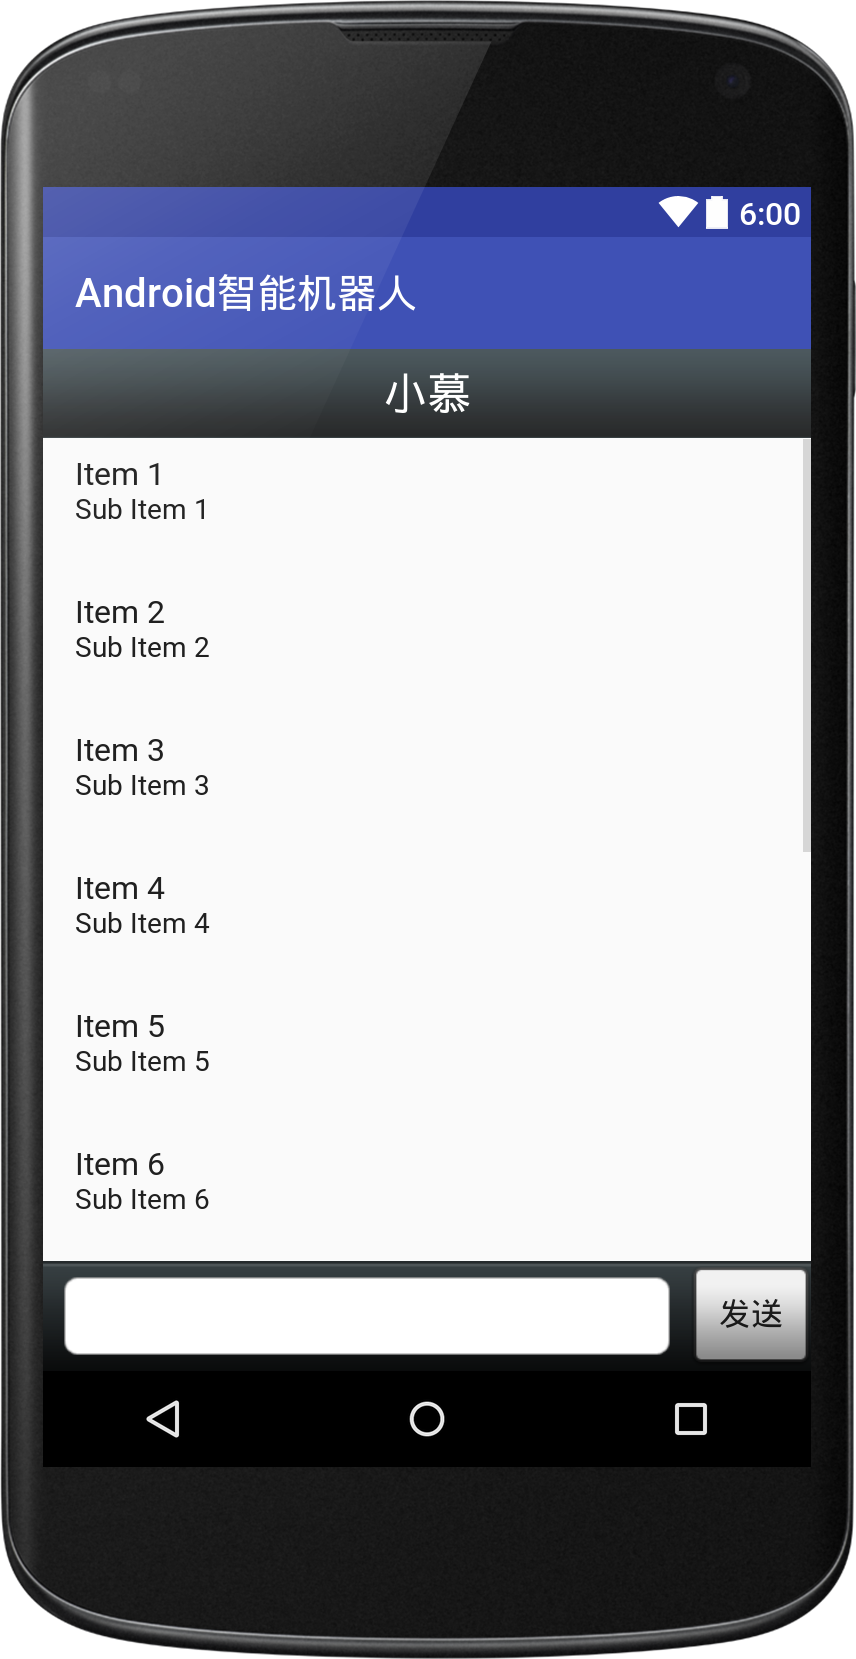
注意到发送按钮使用了一个StateDrawable,它的代码如下:
<!-- btn_select.xml -->
<selector xmlns:android="http://schemas.android.com/apk/res/android">
    <item android:drawable="@drawable/send_btn_pressed" android:state_pressed="true" />
    <item android:drawable="@drawable/send_btn_normal" />

</selector>
最后是MainActivity代码:
public class MainActivity extends AppCompatActivity implements View.OnClickListener {
    private ListView lv_list;
    private ChatAdapter mChatAdapter;
    private List<MsgBean> mList;
    private EditText et_input;
    private Button btn_input;
    private Handler mHandler = new Handler() {
        @Override
        public void handleMessage(Message msg) {
            MsgBean bean = (MsgBean) msg.obj;

            mList.add(bean);
            mChatAdapter.notifyDataSetChanged();
            lv_list.setSelection(mList.size() - 1);

        }
    };

    @Override
    protected void onCreate(Bundle savedInstanceState) {
        super.onCreate(savedInstanceState);
        requestWindowFeature(Window.FEATURE_NO_TITLE);
        setContentView(R.layout.activity_main);
        initViews();
        initDatas();
        setEvent();
    }

    private void setEvent() {
        btn_input.setOnClickListener(this);
    }

    private void initDatas() {
        mList = new ArrayList<>();
        mChatAdapter = new ChatAdapter(this, mList);
        lv_list.setAdapter(mChatAdapter);
    }

    private void initViews() {
        lv_list = (ListView) findViewById(R.id.lv_list);
        et_input = (EditText) findViewById(R.id.et_input);
        btn_input = (Button) findViewById(R.id.btn_input);

    }

    @Override
    public void onClick(View v) {
        switch (v.getId()) {
            case R.id.btn_input:
                final String send = et_input.getText().toString();
                if (TextUtils.isEmpty(send)) {
                    Toast.makeText(this, "can't be null", Toast.LENGTH_SHORT).show();
                    return;
                } else {
                    MsgBean bean = new MsgBean();
                    bean.setMsg(send);
                    bean.setType(MsgBean.Type.OUTCOMING);
                    bean.setDate(new Date());
                    mList.add(bean);
                    mChatAdapter.notifyDataSetChanged();
                    lv_list.setSelection(mList.size() - 1);
                    et_input.setText("");

                    new Thread(new Runnable() {
                        @Override
                        public void run() {
                            MsgBean bean = Utils.getMessage(send);
                            Message message = Message.obtain();
                            message.obj = bean;
                            mHandler.sendMessage(message);


                        }
                    }).start();


                }
                break;
        }

    }
}
代码中开启一个线程从网络请求返回的结果,在线程中使用Handler的sendMessage向UI线程发信息,并在handleMessage()中将该信息(也就是MsgBean)加入到List中并通知Adapter刷新数据。完成对话的功能。


 5869
5869

 被折叠的 条评论
为什么被折叠?
被折叠的 条评论
为什么被折叠?
 到【灌水乐园】发言


