


前言
Security 自定义 登陆页面,这个只是一个简单的Demo 只是为了学习
新建项目
新建一个springboot 项目,相关的依赖这里就不贴出来了. 就 web.和 security 那些
POM
pom,这里的依赖只是添加了 jsp 相关的 需要再加上 springboot 和 security 相关的jar 包
<!-- jwt -->
<dependency>
    <groupId>io.jsonwebtoken</groupId>
    <artifactId>jjwt</artifactId>
    <version>0.9.1</version>
</dependency>
<!--     以下是jsp依赖-->
<dependency>
    <groupId>javax.servlet</groupId>
    <artifactId>javax.servlet-api</artifactId>
    <scope>provided</scope>
</dependency>
<!--  jsp页面使用jstl标签 -->
<dependency>
    <groupId>javax.servlet</groupId>
    <artifactId>jstl</artifactId>
</dependency>
<!--  用于编辑JSP-->
<dependency>
    <groupId>org.apache.tomcat.embed</groupId>
    <artifactId>tomcat-embed-jasper</artifactId>
    <scope>provided</scope>
</dependency>
将webapp 的资源 copy 到 META/resources 目录下否则访问不到…
  <build>
        <resources>
            <resource>
                <!-- 指定处理哪个目录下的资源文件 -->
                <directory>src/main/webapp</directory>
                <!-- 目标路径-->
                <targetPath>META-INF/resources</targetPath>
                <includes>
                    <include>**/**</include>
                </includes>
            </resource>
            <resource>
                <directory>src/main/resources</directory>
                <filtering>true</filtering>
                <includes>
                    <include>**/**</include>
                </includes>
            </resource>
        </resources>
        <plugins>
            <plugin>
                <groupId>org.springframework.boot</groupId>
                <artifactId>spring-boot-maven-plugin</artifactId>
                <version>2.3.7.RELEASE</version>
            </plugin>
        </plugins>
    </build>
建立目录
建立目录 webapp.WEB-INF.views
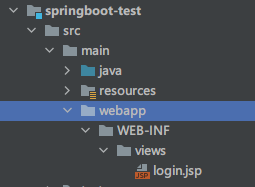
将页面建在 views 目录下
<%@ page contentType="text/html;charset=utf-8" pageEncoding="utf-8" %>
<html>
<head>
<title>用户登录</title>
</head>
<body>
<form action="login" method="get">
用户名:<input type="text" name="username"><br>
密 码:
<input type="password" name="password"><br>
<input type="submit" value="登录">
</form>
</body>
</html>
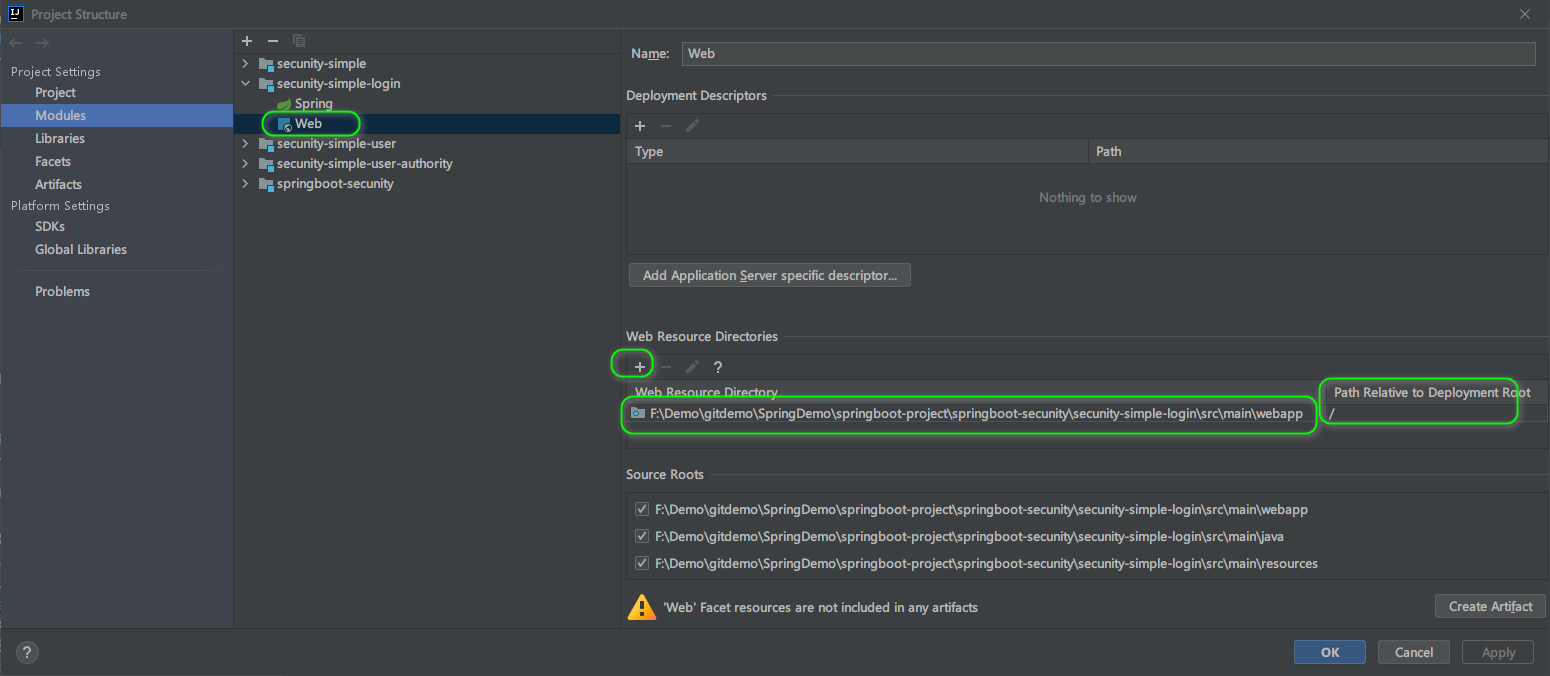
IDEA配置
按下 快捷Shift+Ctrl+Alt+S 弹出以下窗口
配置文件
@Configuration
public class SpringMvcConfigure implements WebMvcConfigurer {

    @Bean
    public InternalResourceViewResolver viewResolver() {
        InternalResourceViewResolver viewResolver = new InternalResourceViewResolver();
        viewResolver.setPrefix("/WEB-INF/views/");
        viewResolver.setSuffix(".jsp");
        // 这个属性通常并不需要手 动配置,高版本的Spring会自动检测
        // viewResolver.setViewClass(JstlView.class);
        return viewResolver;
    }

    //默认Url根路径跳转到/login,此url为spring security提供
    @Override
    public void addViewControllers(ViewControllerRegistry registry) {
    	//  这里为了演示才这么做跳转的
        registry.addViewController("/").setViewName("redirect:/login-view");
        // 当IDEA 配置完后是能进行跳转到 login的
        registry.addViewController("/login-view").setViewName("login");

    }
}
也可以直接跳转到 login…
registry.addViewController("/").setViewName(“login”);
也可以将 loigin 换成 mylogin 当然对应的 JSP 文件名 也需要改成 mylogin
对应的 Security 也需要进行修改 loginPage(“mylogin”)…
定义配置类
@Component
public class SecurityLogin extends WebSecurityConfigurerAdapter {

    //重写参数为HttpSecurity的configure方法,配置拦截策略
    @Override
    protected void configure(HttpSecurity http) throws Exception {
        //屏蔽CSRF控制,即spring security不再限制CSRF
        http.csrf().disable()
                .authorizeRequests()
                .antMatchers("/test/**").authenticated() // 对其进行拦截
                .anyRequest().permitAll() // 所有的请求都放行
                .and()
                //表单登陆
                .formLogin()
                // 自定义登陆页面,默认是 /login
                .loginPage("/login-view")//登录页面
                // 指定登录处理的URL,也就是用户名、密码表单提交的目的路径
                .loginProcessingUrl("/login")
                // 登录名的请求参数,就是表单提交的参数
                .usernameParameter("username")
                // 密码的请求参数,就是表单提交的参数
                .passwordParameter("password")
                // 登陆成功访问的页面
                .successForwardUrl("/test/test")
        ;
    }
}
定义controller
@RestController
@RequestMapping("test")
public class TestController {

    @RequestMapping("test")
    public String test() {
        return "需要权限才能访问";
    }
}
访问页面
127.0.0.1:8080 访问即可…
后言
我按照这个步骤从新跑了一个新的Demo 是没问题… 如有问题留言…


 424
424


 被折叠的 条评论
为什么被折叠?
被折叠的 条评论
为什么被折叠?
 到【灌水乐园】发言


