


简介
用过 vue-cli 脚手架搭建 vue 项目都知道,vue-cli 中内置了 vue-style-loader 去加载样式模块,最后通过 <style> 标签把样式加载到页面,但是 style-loader 同样可以达到同样的效果,那么 vue 官方为啥还封装一个 vue-style-loader 库呢?那么它们到底有啥区别?平时项目中又该如何选择呢?
开始
为了更好的去分析这两个库,我们简单的搭建一个 vue 项目。
其实如果对 webpack 很熟悉的话,从 0 开始搭建一个 vue 项目就很简单了,所以强烈推荐大家去看一下我上一篇 webpack 的文章,来和 webpack 谈场恋爱吧。
首先创建一个目录叫 style-loader-demo,然后初始化 npm:
mkdir style-loader-demo && cd style-loader-demo && npm init
接下来我们需要安装 webpack 相关的依赖:
安装 webpack
webpack 核心库。
在工程目录 style-loader-demo 执行以下命令安装 webpack:
npm install -D webpack --registry https://registry.npm.taobao.org
安装 webpack-cli
webpack 指令库。
在工程目录 style-loader-demo 执行以下命令:
npm install -D webpack-cli --registry https://registry.npm.taobao.org
安装 webpack-dev-server
webpack 开发者服务框架。
在工程目录 style-loader-demo 执行以下命令:
npm install -D webpack-dev-server --registry https://registry.npm.taobao.org
安装 webpack-chain
webpack 配置工具。
在工程目录 style-loader-demo 执行以下命令:
npm install -D webpack-chain --registry https://registry.npm.taobao.org
创建 webpack 配置
在工程目录 style-loader-demo 下创建一个 webpack.config.js 文件:
touch webpack.config.js
然后对 webpack.config.js 进行配置,用 webpack-chain 导入一个 webpack 配置:
const config = new (require('webpack-chain'))();

module.exports = config.toConfig();
为了开发方便,我们在 package.json 中声明两个脚本 build 跟 dev:
{
  "name": "style-loader-demo",
  "version": "1.0.0",
  "description": "",
  "main": "index.js",
  "scripts": {
    "test": "echo \"Error: no test specified\" && exit 1",
    "build": "rimraf dist && webpack --mode=production",
    "dev": "webpack-dev-server --mode=development --progress"
  },
  "author": "",
  "license": "ISC",
  "devDependencies": {
    "css-loader": "^5.0.0",
    "html-webpack-plugin": "^4.5.0",
    "style-loader": "^2.0.0",
    "vue-style-loader": "^4.1.2",
    "webpack": "^4.44.2",
    "webpack-chain": "^6.5.1",
    "webpack-cli": "^3.3.12",
    "webpack-dev-server": "^3.11.0"
  },
  "dependencies": {
    "vue": "^2.6.12",
    "vue-loader": "^15.9.3",
    "vue-template-compiler": "^2.6.12"
  }
}
入口与出口
我们首先在工程目录 style-loader-demo 下创建一个 src 目录,然后在 src 目录下创建一个 main.s 文件:
mkdir src && cd src && touch main.js && cd ..
然后我们找到 webpack.config.js 文件,对 webpack 的入口和出口进行配置:
const path = require('path');
const config = new (require('webpack-chain'))();
config
    .context(path.resolve(__dirname, '.')) // webpack 上下文目录为项目根目录
        .entry('app') // 入口文件名称为 app
        .add('./src/main.js') // 入口文件为 ./src/main.ts
        .end()
    .output
        .path(path.join(__dirname, './dist')) // webpack 输出的目录为根目录的 dist 目录
        .filename('[name].[hash:8].js') // 打包出来的 bundle 名称为 "[name].[hash:8].js"
        .publicPath('/') // publicpath 配置为 "/"
        .end()
安装 vue
vue 核心 API。
npm install vue --registry https://registry.npm.taobao.org
安装 vue-loader
.vue 文件加载器。
npm install vue-loader --registry https://registry.npm.taobao.org
安装 vue-template-compiler
.vue 文件模版解析器。
npm install vue-template-compiler --registry https://registry.npm.taobao.org
安装 html-webpack-plugin
npm install -D html-webpack-plugin --registry https://registry.npm.taobao.org
接下来我们在工程目录 sy_webpack-wedding 底下创建一个 public 目录,然后在 public 目录下创建一个 index.html 文件作为我们 app 的入口页面:
mkdir public && touch public/index.html
然后将以下内容写入 public/index.html:
<!DOCTYPE html>
<html lang="en">
  <head>
    <meta charset="UTF-8" />
    <title>Title</title>
  </head>
  <body>
    <noscript>your browser should support javascript!</noscript>
    <div id="app"></div>
    <!-- html-webpack-plugin 将自动引入入口文件 -->
  </body>
</html>
安装 css-loader
css 模块加载器。
npm install -D css-loader --registry https://registry.npm.taobao.org
安装 vue-style-loader
npm install -D vue-style-loader --registry https://registry.npm.taobao.org
安装 style-loader
npm install -D style-loader --registry https://registry.npm.taobao.org
配置 webpack.config.js
webpack 配置全部内容:
const path = require('path');
const config = new (require('webpack-chain'))();
config
    .context(path.resolve(__dirname, '.')) // webpack 上下文目录为项目根目录
    .entry('app') // 入口文件名称为 app
        .add('./src/main.js') // 入口文件为 ./src/main.ts
        .end()
    .output
        .path(path.join(__dirname, './dist')) // webpack 输出的目录为根目录的 dist 目录
        .filename('[name].[hash:8].js') // 打包出来的 bundle 名称为 "[name].[hash:8].js"
        .publicPath('/') // publicpath 配置为 "/"
        .end()
    .resolve
        .extensions
            .add('.js')
            .add('.vue') // 配置以 .js 等结尾的文件当模块使用的时候都可以省略后缀
            .end()
        .end()
    .module
        .rule('vue') // vue-loader 相关配置
            .test(/\.vue$/) // 匹配 .vue 文件
            .use('vue-loader')
                .loader('vue-loader')
                .end()
            .end()
        .rule('css') // css-loader 相关配置
            .test(/\.css$/)
            .use('vue-style-loader')
                .loader('vue-style-loader')
                .end()
            .use('css-loader')
                .loader('css-loader')
                .options({
                    esModule: false
                })
                .end()
            .end()
        .end()
    .plugin('vue-loader-plugin') // vue-loader 必须要添加 vue-loader-plugin
        .use(require('vue-loader').VueLoaderPlugin, [])
        .end()
    .plugin('html') // 添加 html-webpack-plugin 插件
        .use(require('html-webpack-plugin'), [
            {
                template: path.resolve(__dirname, './public/index.html'), // 指定模版文件
                chunks: ['app'], // 指定需要加载的 chunk
                inject: 'body', // 指定 script 脚本注入的位置为 body
            },
        ])
        .end()
    .devServer
        .host('0.0.0.0') // 服务器外部可访问
        .disableHostCheck(true) // 关闭白名单校验
        .contentBase(path.resolve(__dirname, './public')) // 设置一个 express 静态目录
        .historyApiFallback({
            disableDotRule: true, // 禁止在链接中使用 "." 符号
            rewrites: [
                { from: /^\/$/, to: '/index.html' }, // 将所有的 404 响应重定向到 index.html 页面
            ],
        })
        .port(8080) // 当前端口号
        .hot(true) // 打开页面热载功能
        .sockPort('location') // 设置成平台自己的端口
        .open(true);
module.exports = config.toConfig();
测试
我们在 src 目录下创建一个 app.vue 文件:
touch src/app.vue
然后将以下内容写入其中:
<template>
    <div class="app">{{ msg }}</div>
</template>

<script>
export default {
    name: "app",
    data(){
        return {
            msg: "hello"
        }
    }
}
</script>
<style scoped>
    .app {
        color: red;
    }
</style>
很简单,就是一个简单的 vue 文件。
然后在 main.js 中引入 app.vue 文件:
import Vue from 'vue';
import App from './app.vue';
new Vue({
    el: '#app',
    render: (h) => h(App),
});
ok!一切准备完毕后,我们直接在工程目录运行 npm run dev 命令:
npm run dev
运行完毕后浏览器打开:
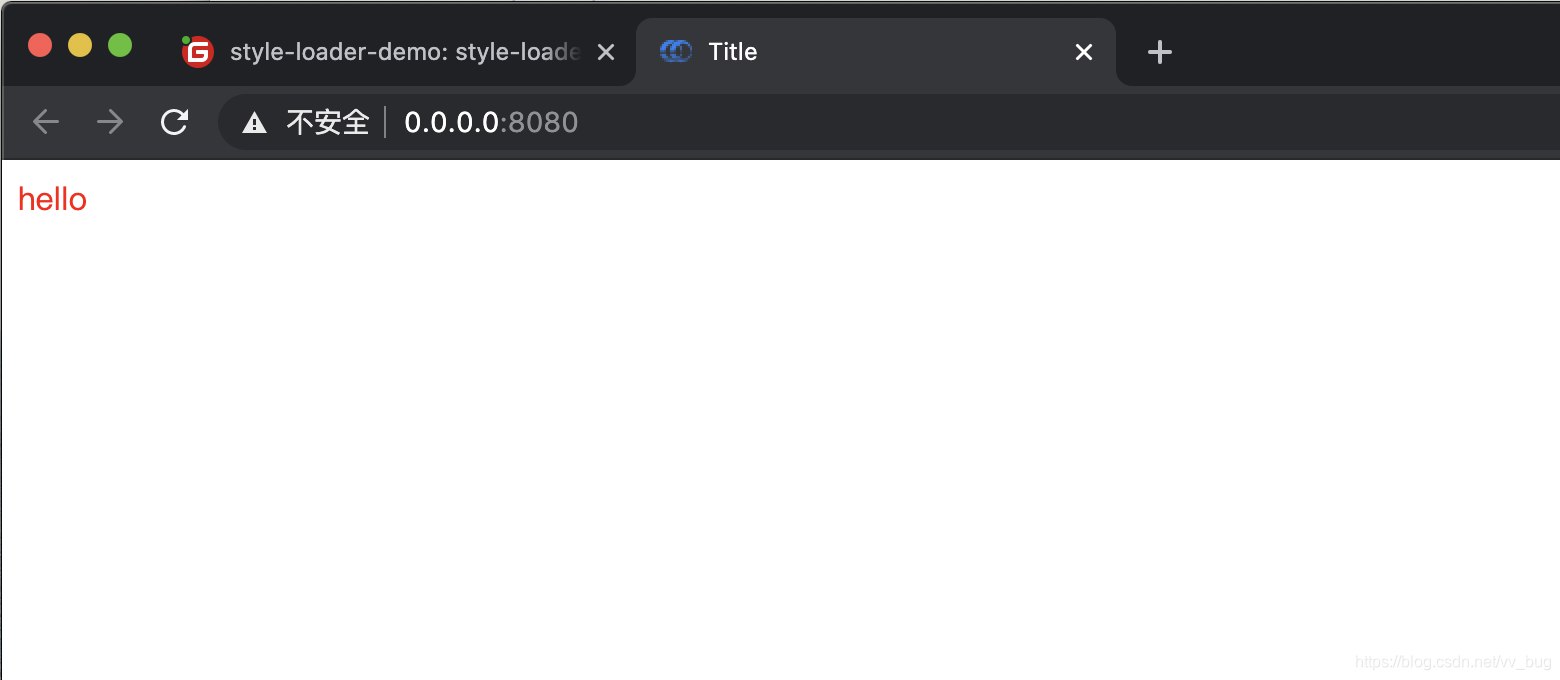
跟不上的童鞋可以直接下载源码:https://gitee.com/vv_bug/style-loader-demo
vue-style-loader
官网地址:https://github.com/vuejs/vue-style-loader
This is a fork based on style-loader. Similar to
style-loader, you can chain it aftercss-loaderto dynamically inject CSS into the document as style tags. However, since this is included as a dependency and used by default invue-loader, in most cases you don’t need to configure this loader yourself.
意思大概是:“基于 style-loader fork 过来的,跟 style-loader 类似。”
官网解释的还是比较敷衍的,我们结合 Demo 继续往下看。
看一下现在的设置,我们找到 webpack.config.js:
const path = require('path');
const config = new (require('webpack-chain'))();
config
    .context(path.resolve(__dirname, '.')) // webpack 上下文目录为项目根目录
    .entry('app') // 入口文件名称为 app
        .add('./src/main.js') // 入口文件为 ./src/main.ts
        .end()
    .output
        .path(path.join(__dirname, './dist')) // webpack 输出的目录为根目录的 dist 目录
        .filename('[name].[hash:8].js') // 打包出来的 bundle 名称为 "[name].[hash:8].js"
        .publicPath('/') // publicpath 配置为 "/"
        .end()
    .resolve
        .extensions
            .add('.js')
            .add('.vue') // 配置以 .js 等结尾的文件当模块使用的时候都可以省略后缀
            .end()
        .end()
    .module
        .rule('vue') // vue-loader 相关配置
            .test(/\.vue$/) // 匹配 .vue 文件
            .use('vue-loader')
                .loader('vue-loader')
                .end()
            .end()
        .rule('css') // css-loader 相关配置
            .test(/\.css$/)
            .use('vue-style-loader')
                .loader('vue-style-loader')
                .end()
            .use('css-loader')
                .loader('css-loader')
                .options({
                    esModule: false
                })
                .end()
            .end()
        .end()
    .plugin('vue-loader-plugin') // vue-loader 必须要添加 vue-loader-plugin
        .use(require('vue-loader').VueLoaderPlugin, [])
        .end()
    .plugin('html') // 添加 html-webpack-plugin 插件
        .use(require('html-webpack-plugin'), [
            {
                template: path.resolve(__dirname, './public/index.html'), // 指定模版文件
                chunks: ['app'], // 指定需要加载的 chunk
                inject: 'body', // 指定 script 脚本注入的位置为 body
            },
        ])
        .end()
    .devServer
        .host('0.0.0.0') // 服务器外部可访问
        .disableHostCheck(true) // 关闭白名单校验
        .contentBase(path.resolve(__dirname, './public')) // 设置一个 express 静态目录
        .historyApiFallback({
            disableDotRule: true, // 禁止在链接中使用 "." 符号
            rewrites: [
                { from: /^\/$/, to: '/index.html' }, // 将所有的 404 响应重定向到 index.html 页面
            ],
        })
        .port(8080) // 当前端口号
        .hot(true) // 打开页面热载功能
        .sockPort('location') // 设置成平台自己的端口
        .open(true);
module.exports = config.toConfig();
再看一下现在的样式,我们找到 src/app.vue 文件:
<style scoped>
    .app {
        color: red;
    }
</style>
上面的样式到底是怎样起作用的呢?
首先经过 vue-loader 处理一遍变成了这样:
.app[data-v-5ef48958] {
    color: red;
}
可以看到,我们样式经过 vue-loader 处理后加上了一个 “data-v-5ef48958”,这是为什么呢?因为我们在 style 标签上加了 scoped 标记:
<style scoped>
所以 vue-loader 会给所有的样式都加上一个 scoped 的属性。
vue-loader 处理过后就到了 css-loader,经过 css-loader 处理后:
// Imports
var ___CSS_LOADER_API_IMPORT___ = require("../node_modules/css-loader/dist/runtime/api.js");
var ___CSS_LOADER_EXPORT___ = ___CSS_LOADER_API_IMPORT___(function(i){return i[1]});
// Module
___CSS_LOADER_EXPORT___.push([module.id, "\n.app[data-v-5ef48958] {\n    color: red;\n}\n", ""]);
// Exports
module.exports = ___CSS_LOADER_EXPORT___;
可以看到,css-loader 处理过后会把样式都变成 module 形式,然后直接导出这个模块,模块中包含了 css 的源码跟模块的 id。
css-loader 处理过后会被 vue-style-loader 引用:
// style-loader: Adds some css to the DOM by adding a <style> tag

// load the styles
var content = require("!!../node_modules/css-loader/dist/cjs.js??ref--1-1!../node_modules/vue-loader/lib/loaders/stylePostLoader.js!../node_modules/vue-loader/lib/index.js??vue-loader-options!./app.vue?vue&type=style&index=0&id=5ef48958&scoped=true&lang=css&");
if(typeof content === 'string') content = [[module.id, content, '']];
if(content.locals) module.exports = content.locals;
// add the styles to the DOM
var add = require("!../node_modules/vue-style-loader/lib/addStylesClient.js").default
var update = add("d929f8d0", content, false, {});
// Hot Module Replacement
if(module.hot) {
 // When the styles change, update the <style> tags
 if(!content.locals) {
   module.hot.accept("!!../node_modules/css-loader/dist/cjs.js??ref--1-1!../node_modules/vue-loader/lib/loaders/stylePostLoader.js!../node_modules/vue-loader/lib/index.js??vue-loader-options!./app.vue?vue&type=style&index=0&id=5ef48958&scoped=true&lang=css&", function() {
     var newContent = require("!!../node_modules/css-loader/dist/cjs.js??ref--1-1!../node_modules/vue-loader/lib/loaders/stylePostLoader.js!../node_modules/vue-loader/lib/index.js??vue-loader-options!./app.vue?vue&type=style&index=0&id=5ef48958&scoped=true&lang=css&");
     if(typeof newContent === 'string') newContent = [[module.id, newContent, '']];
     update(newContent);
   });
 }
 // When the module is disposed, remove the <style> tags
 module.hot.dispose(function() { update(); });
}
上面代码中的 content 就是 css-loader 处理过后的模块。
我们看一下 update 方法的声明:
...
var add = require("!../node_modules/vue-style-loader/lib/addStylesClient.js").default
var update = add("d929f8d0", content, false, {});
...
可以看到,update 方法是通过 add 方法构建的,add 方法又是通过 !../node_modules/vue-style-loader/lib/addStylesClient.js 文件导入的,所以我们找到 !../node_modules/vue-style-loader/lib/addStylesClient.js 文件,我们直接定位到 xx/style-loader-demo/node_modules/vue-style-loader/lib/addStylesClient.js 文件:
...
var ssrIdKey = 'data-vue-ssr-id'
function createStyleElement () {
  var styleElement = document.createElement('style')
  styleElement.type = 'text/css'
  head.appendChild(styleElement)
  return styleElement
}

function addStyle (obj /* StyleObjectPart */) {
  var update, remove
  var styleElement = document.querySelector('style[' + ssrIdKey + '~="' + obj.id + '"]')

  if (styleElement) {
    if (isProduction) {
      // has SSR styles and in production mode.
      // simply do nothing.
...
可以看到,其实就是创建了一个 style 标签,然后直接插入到了 head 标签中,但是 vue-style-loader 除了插入 style 外,还做了一些服务端渲染的支持,所以如果你的 vue 项目是需要支持服务端渲染的时候,就需要用到 vue-style-loader了,原理是不是很简单呢?
style-loader
官网地址:https://github.com/webpack-contrib/style-loader
Inject CSS into the DOM.
哈哈,无语了,style-loader 甚至都懒得解释了。
ok!既然两位大佬官网都懒得解释了,那我们就只能自己去结合 Demo 看源码了。
我们先用一下 style-loader,我们修改一下 webpack.config.js 文件:
const path = require('path');
const config = new (require('webpack-chain'))();
config
    .context(path.resolve(__dirname, '.')) // webpack 上下文目录为项目根目录
    .entry('app') // 入口文件名称为 app
        .add('./src/main.js') // 入口文件为 ./src/main.ts
        .end()
    .output
        .path(path.join(__dirname, './dist')) // webpack 输出的目录为根目录的 dist 目录
        .filename('[name].[hash:8].js') // 打包出来的 bundle 名称为 "[name].[hash:8].js"
        .publicPath('/') // publicpath 配置为 "/"
        .end()
    .resolve
        .extensions
            .add('.js')
            .add('.vue') // 配置以 .js 等结尾的文件当模块使用的时候都可以省略后缀
            .end()
        .end()
    .module
        .rule('vue') // vue-loader 相关配置
            .test(/\.vue$/) // 匹配 .vue 文件
            .use('vue-loader')
                .loader('vue-loader')
                .end()
            .end()
        .rule('css') // css-loader 相关配置
            .test(/\.css$/)
            .use('style-loader')
                .loader('style-loader')
                .end()
            .use('css-loader')
                .loader('css-loader')
                .options({
                    esModule: false
                })
                .end()
            .end()
        .end()
    .plugin('vue-loader-plugin') // vue-loader 必须要添加 vue-loader-plugin
        .use(require('vue-loader').VueLoaderPlugin, [])
        .end()
    .plugin('html') // 添加 html-webpack-plugin 插件
        .use(require('html-webpack-plugin'), [
            {
                template: path.resolve(__dirname, './public/index.html'), // 指定模版文件
                chunks: ['app'], // 指定需要加载的 chunk
                inject: 'body', // 指定 script 脚本注入的位置为 body
            },
        ])
        .end()
    .devServer
        .host('0.0.0.0') // 服务器外部可访问
        .disableHostCheck(true) // 关闭白名单校验
        .contentBase(path.resolve(__dirname, './public')) // 设置一个 express 静态目录
        .historyApiFallback({
            disableDotRule: true, // 禁止在链接中使用 "." 符号
            rewrites: [
                { from: /^\/$/, to: '/index.html' }, // 将所有的 404 响应重定向到 index.html 页面
            ],
        })
        .port(8080) // 当前端口号
        .hot(true) // 打开页面热载功能
        .sockPort('location') // 设置成平台自己的端口
        .open(true);
module.exports = config.toConfig();
可以看到,我们把 vue-style-loader 换成了 style-loader:
...
.rule('css') // css-loader 相关配置
            .test(/\.css$/)
            .use('style-loader')
                .loader('style-loader')
                .end()
            .use('css-loader')
                .loader('css-loader')
                .options({
                    esModule: false
                })
                .end()
...
然后再次运行一下 npm run dev 命令看效果:
npm run dev
可以看到,跟 vue-style-loader 的效果是一样的,这是为什么呢?
跟前面 vue-style-loader 分析方式一样,我们先看一下现在的样式,我们找到 src/app.vue 文件:
<style scoped>
    .app {
        color: red;
    }
</style>
上面的样式到底是怎样起作用的呢?
首先经过 vue-loader 处理一遍变成了这样:
.app[data-v-5ef48958] {
    color: red;
}
可以看到,我们样式经过 vue-loader 处理后加上了一个 “data-v-5ef48958”,这是为什么呢?因为我们在 style 标签上加了 scoped 标记:
<style scoped>
所以 vue-loader 会给所有的样式都加上一个 scoped 的属性。
vue-loader 处理过后就到了 css-loader,经过 css-loader 处理后:
// Imports
var ___CSS_LOADER_API_IMPORT___ = require("../node_modules/css-loader/dist/runtime/api.js");
var ___CSS_LOADER_EXPORT___ = ___CSS_LOADER_API_IMPORT___(function(i){return i[1]});
// Module
___CSS_LOADER_EXPORT___.push([module.id, "\n.app[data-v-5ef48958] {\n    color: red;\n}\n", ""]);
// Exports
module.exports = ___CSS_LOADER_EXPORT___;
可以看到,css-loader 处理过后会把样式都变成 module 形式,然后直接导出这个模块,模块中包含了 css 的源码跟模块的 id。
到这里其实都跟前面 vue-style-loader 方式一样。
css-loader 处理过后会被 style-loader 引用,代码变成了这样:
import api from "!../node_modules/style-loader/dist/runtime/injectStylesIntoStyleTag.js";
            import content from "!!../node_modules/css-loader/dist/cjs.js??ref--1-1!../node_modules/vue-loader/lib/loaders/stylePostLoader.js!../node_modules/vue-loader/lib/index.js??vue-loader-options!./app.vue?vue&type=style&index=0&id=5ef48958&scoped=true&lang=css&";

var options = {};

options.insert = "head";
options.singleton = false;

var update = api(content, options);


if (module.hot) {
  if (!content.locals || module.hot.invalidate) {
    var isEqualLocals = function isEqualLocals(a, b, isNamedExport) {
  if (!a && b || a && !b) {
    return false;
  }

  var p;

  for (p in a) {
    if (isNamedExport && p === 'default') {
      // eslint-disable-next-line no-continue
      continue;
    }

    if (a[p] !== b[p]) {
      return false;
    }
  }

  for (p in b) {
    if (isNamedExport && p === 'default') {
      // eslint-disable-next-line no-continue
      continue;
    }

    if (!a[p]) {
      return false;
    }
  }

  return true;
};
    var oldLocals = content.locals;

    module.hot.accept(
      "!!../node_modules/css-loader/dist/cjs.js??ref--1-1!../node_modules/vue-loader/lib/loaders/stylePostLoader.js!../node_modules/vue-loader/lib/index.js??vue-loader-options!./app.vue?vue&type=style&index=0&id=5ef48958&scoped=true&lang=css&",
      function () {
        if (!isEqualLocals(oldLocals, content.locals, undefined)) {
                module.hot.invalidate();

                return;
              }

              oldLocals = content.locals;

              update(content);
      }
    )
  }

  module.hot.dispose(function() {
    update();
  });
}

export default content.locals || {};
可以看到,上面的代码:
import api from "!../node_modules/style-loader/dist/runtime/injectStylesIntoStyleTag.js";
            import content from "!!../node_modules/css-loader/dist/cjs.js??ref--1-1!../node_modules/vue-loader/lib/loaders/stylePostLoader.js!../node_modules/vue-loader/lib/index.js??vue-loader-options!./app.vue?vue&type=style&index=0&id=5ef48958&scoped=true&lang=css&";
...
content 就是 css-loader 处理过后的 css样式模块,包含了 css 源码跟 moduleid,那么 这里的 api 是啥呢?我们找到 xxx/style-loader-demo/node_modules/style-loader/dist/runtime/injectStylesIntoStyleTag.js 文件:
...
function insertStyleElement(options) {
  var style = document.createElement('style');
  var attributes = options.attributes || {};

  if (typeof attributes.nonce === 'undefined') {
    var nonce = typeof __webpack_nonce__ !== 'undefined' ? __webpack_nonce__ : null;

    if (nonce) {
      attributes.nonce = nonce;
    }
  }

  Object.keys(attributes).forEach(function (key) {
    style.setAttribute(key, attributes[key]);
  });

  if (typeof options.insert === 'function') {
    options.insert(style);
  } else {
    var target = getTarget(options.insert || 'head');

    if (!target) {
      throw new Error("Couldn't find a style target. This probably means that the value for the 'insert' parameter is invalid.");
    }

    target.appendChild(style);
  }

  return style;
}

function removeStyleElement(style) {
  // istanbul ignore if
  if (style.parentNode === null) {
    return false;
  }

  style.parentNode.removeChild(style);
}
/* istanbul ignore next  */


var replaceText = function replaceText() {
  var textStore = [];
  return function replace(index, replacement) {
    textStore[index] = replacement;
    return textStore.filter(Boolean).join('\n');
  };
}();

function applyToSingletonTag(style, index, remove, obj) {
  var css = remove ? '' : obj.media ? "@media ".concat(obj.media, " {").concat(obj.css, "}") : obj.css; // For old IE

  /* istanbul ignore if  */

  if (style.styleSheet) {
    style.styleSheet.cssText = replaceText(index, css);
  } else {
    var cssNode = document.createTextNode(css);
    var childNodes = style.childNodes;

    if (childNodes[index]) {
      style.removeChild(childNodes[index]);
    }

    if (childNodes.length) {
      style.insertBefore(cssNode, childNodes[index]);
    } else {
      style.appendChild(cssNode);
    }
  }
}

function applyToTag(style, options, obj) {
  var css = obj.css;
  var media = obj.media;
  var sourceMap = obj.sourceMap;

  if (media) {
    style.setAttribute('media', media);
  } else {
    style.removeAttribute('media');
  }

  if (sourceMap && typeof btoa !== 'undefined') {
    css += "\n/*# sourceMappingURL=data:application/json;base64,".concat(btoa(unescape(encodeURIComponent(JSON.stringify(sourceMap)))), " */");
  } // For old IE

  /* istanbul ignore if  */


  if (style.styleSheet) {
    style.styleSheet.cssText = css;
  } else {
    while (style.firstChild) {
      style.removeChild(style.firstChild);
    }

    style.appendChild(document.createTextNode(css));
  }
}

var singleton = null;
var singletonCounter = 0;

function addStyle(obj, options) {
  var style;
  var update;
  var remove;

  if (options.singleton) {
    var styleIndex = singletonCounter++;
    style = singleton || (singleton = insertStyleElement(options));
    update = applyToSingletonTag.bind(null, style, styleIndex, false);
    remove = applyToSingletonTag.bind(null, style, styleIndex, true);
  } else {
    style = insertStyleElement(options);
    update = applyToTag.bind(null, style, options);

    remove = function remove() {
      removeStyleElement(style);
    };
  }

  update(obj);
  return function updateStyle(newObj) {
    if (newObj) {
      if (newObj.css === obj.css && newObj.media === obj.media && newObj.sourceMap === obj.sourceMap) {
        return;
      }

      update(obj = newObj);
    } else {
      remove();
    }
  };
}

module.exports = function (list, options) {
  options = options || {}; // Force single-tag solution on IE6-9, which has a hard limit on the # of <style>
  // tags it will allow on a page

  if (!options.singleton && typeof options.singleton !== 'boolean') {
    options.singleton = isOldIE();
  }

  list = list || [];
  var lastIdentifiers = modulesToDom(list, options);
  return function update(newList) {
    newList = newList || [];

    if (Object.prototype.toString.call(newList) !== '[object Array]') {
      return;
    }

    for (var i = 0; i < lastIdentifiers.length; i++) {
      var identifier = lastIdentifiers[i];
      var index = getIndexByIdentifier(identifier);
      stylesInDom[index].references--;
    }

    var newLastIdentifiers = modulesToDom(newList, options);

    for (var _i = 0; _i < lastIdentifiers.length; _i++) {
      var _identifier = lastIdentifiers[_i];

      var _index = getIndexByIdentifier(_identifier);

      if (stylesInDom[_index].references === 0) {
        stylesInDom[_index].updater();

        stylesInDom.splice(_index, 1);
      }
    }

    lastIdentifiers = newLastIdentifiers;
  };
};
可以看到,其实跟 vue-style-loader 一样,也是往 head 标签中注入一个 style 标签:

但是 style-loader 除了支持普通的注入 style 外,还支持以下模式:
- linkTag:生成一个 link 标签,把 css-loader 处理过后的值赋给 link 标签的 href 属性。
- lazyStyleTag & lazySingletonStyleTag:懒注入 style 标签。
- styleTag & singletonStyleTag:默认方式,直接注入 style 标签。
ok!我们拿一种方式操作一下,我们用一下 lazySingletonStyleTag。
首先我们创建一个 loaders 目录,然后在 loaders 目录下创建一个 customer-style-loader.js 文件:
mkdir loaders && touch loaders/customer-style-loader.js
然后将以下代码写入 loaders/customer-style-loader.js 文件:
module.exports=function (source) {
    return `
        ${source}
        setTimeout(()=>{
            alert("来来来,show style!")
            exported && exported.use && exported.use();
        },5000);
    `;
}
可以看到,我们延迟了 5s 去显示我们的样式,然后我们找到 webpack.config.js 引入我们的 customer-style-loader.js,并且把 style-loader 的 injectType 设置成 lazySingletonStyleTag:
const path = require('path');
const config = new (require('webpack-chain'))();
config
    .context(path.resolve(__dirname, '.')) // webpack 上下文目录为项目根目录
        .entry('app') // 入口文件名称为 app
        .add('./src/main.js') // 入口文件为 ./src/main.ts
        .end()
    .output
        .path(path.join(__dirname, './dist')) // webpack 输出的目录为根目录的 dist 目录
        .filename('[name].[hash:8].js') // 打包出来的 bundle 名称为 "[name].[hash:8].js"
        .publicPath('/') // publicpath 配置为 "/"
        .end()
    .resolve
        .extensions
            .add('.js')
            .add('.vue') // 配置以 .js 等结尾的文件当模块使用的时候都可以省略后缀
            .end()
        .end()
    .module
        .rule('vue') // vue-loader 相关配置
            .test(/\.vue$/) // 匹配 .vue 文件
            .use('vue-loader')
                .loader('vue-loader')
                .end()
            .end()
        .rule('css') // css-loader 相关配置
            .test(/\.css$/)
            .use('customer-style-loader')
                .loader(path.resolve("./loaders/customer-style-loader.js"))
                .end()
            .use('vue-style-loader')
                .loader('style-loader')
                .options({
                    injectType: "lazySingletonStyleTag"
                })
                .end()
            .use('css-loader')
                .loader('css-loader')
                .options({
                    esModule: false
                })
                .end()
            .end()
        .end()
    .plugin('vue-loader-plugin') // vue-loader 必须要添加 vue-loader-plugin
        .use(require('vue-loader').VueLoaderPlugin, [])
        .end()
    .plugin('html') // 添加 html-webpack-plugin 插件
        .use(require('html-webpack-plugin'), [
            {
                template: path.resolve(__dirname, './public/index.html'), // 指定模版文件
                chunks: ['app'], // 指定需要加载的 chunk
                inject: 'body', // 指定 script 脚本注入的位置为 body
            },
        ])
        .end()
    .devServer
        .host('0.0.0.0') // 服务器外部可访问
        .disableHostCheck(true) // 关闭白名单校验
        .contentBase(path.resolve(__dirname, './public')) // 设置一个 express 静态目录
        .historyApiFallback({
            disableDotRule: true, // 禁止在链接中使用 "." 符号
            rewrites: [
                { from: /^\/$/, to: '/index.html' }, // 将所有的 404 响应重定向到 index.html 页面
            ],
        })
        .port(8080) // 当前端口号
        .hot(true) // 打开页面热载功能
        .sockPort('location') // 设置成平台自己的端口
        .open(true);
module.exports = config.toConfig();
然后运行 npm run dev 命令打开浏览器看效果:
npm run dev

可以看到,当我们刷新页面后,“hello” 一开始是没有样式的,然后过后 5s 后弹出 alert 点击 “确定” 后才有样式的。
ok!style-loader 还有一些其它的功能,我就不演示了,小伙伴自己去研究哦!
总结
vue-style-loader 跟 style-loader 基本用法跟功能是一样的,都是往 dom 里面插入一个 style 标签去让样式生效的,但是 vue-style-loader 支持 vue 中的 ssr(服务端渲染),所以如果需要支持服务端渲染的 vue 项目,就需要用到 vue-style-loader了,如果一般的 vue 项目的话,推荐使用 style-loader,毕竟 style-loader 支持的功能还是丰富些,比如可以懒注入、可以指定位置插入标签等等。


 9540
9540


 被折叠的 条评论
为什么被折叠?
被折叠的 条评论
为什么被折叠?
 到【灌水乐园】发言


