


文章目录
线程操作的定义
1、如果一个程序没有数据竞争,那么程序的所有执行看起来都是顺序一致的,各自按照线程内语义执行即可,JMM对此不需要有额外的描述了。
2、线程间操作指:一个程序执行的操作可被其他线程感知或被其他线程直接影响。
线程间操作:
1、write 要写的变量以及要写的值。
2、read 要读的变量以及可见的写入值(由此,我们可以确定可见的值)。
3、lock 要锁定的管程(监视器monitor)。
4、unlock 要解锁的管程。
5、外部操作(socket等等…)
6、启动和终止
注意: 所有线程间操作,都存在可见性问题,JMM需要对其进行规范。
对于同步的规则定义
- 对于监视器 m 的解锁与所有后续操作对于 m 的加锁同步
- 对 volatile 变量 v 的写入,与所有其他线程后续对 v 的读同步
- 对于每个属性写入默认值(0, false,null)与每个线程对其进行的操作同步
- 启动线程的操作与线程中的第一个操作同步
- 线程 T12的最后操作与线程 T1 发现线程 T2 已经结束同步。( isAlive ,join可以判断线程是否终结)
- 如果线程 T1 中断了 T2,那么线程 T1 的中断操作与其他所有线程发现 T2 被中断了同步,通过抛出 InterruptedException 异常,或者调用 Thread.interrupted 或 Thread.isInterrupted
Happens-before先行发生原则
happens-before 关系用于描述两个有冲突的动作之间的顺序,如果一个action happends before 另一个action,则第一个操作被第二个操作可见 。
具体的虚拟机实现,有必要确保以下原则的成立:
- 某个线程中的每个动作都 happens-before 该线程中该动作后面的动作。
- 某个管程上的 unlock 动作 happens-before 同一个管程上后续的 lock 动作。
- 对某个 volatile 字段的写操作 happens-before 每个后续对该 volatile 字段的读操作。
- 在某个线程对象上调用 start()方法 happens-before 被启动线程中的任意动作。
- 如果在线程t1中成功执行了t2.join(),则t2中的所有操作对t1可见。
- 如果某个动作 a happens-before 动作 b,且 b happens-before 动作 c,则有 a happens-before c.
补充: 当程序包含两个没有被 happens-before 关系排序的冲突访问时,就称存在数据竞争。遵守了这个原则,也就意味着有些代码不能进行重排序,有些数据不能缓存!
final在JMM中的处理
1、final在该对象的构造函数中设置对象的字段,当线程看到该对象时,将始终看到该对象的final字段的正确构造版本。伪代码示例:f = new finalDemo(); 读取到的 f.x 一定最新,x为final字段。
public class Demo2Final {

    final int x;
    int y;

    static Demo2Final f;

    public Demo2Final(){
        x = 3;
        y = 4;
    }

    static void writer(){
        f = new Demo2Final();
    }

    static void reader(){
        if (f!=null){
            int i = f.x;        //一定读到正确构造版本
            int j = f.y;        //可能会读到 默认值0
            System.out.println("i=" + i + ", j=" +j);
        }
    }

}
在多线程中,调用reader方法,f.x一定能读到在构造函数中的正确赋值,但是f.y却不一定。
2、如果在构造函数中设置字段后发生读取,则会看到该final字段分配的值,否则它将看到默认值;伪代码示例:public finalDemo(){ x = 1; y = x; }; y会等于1;
public class Demo3Final {
    final int x;
    int y;

    static Demo2Final f;

    public Demo3Final(){
        x = 3;
        //#### 重点 语句 #####
        y = x;      //因为x被final修饰了,所以可读到y的正确构造版本
    }

    static void writer(){
        f = new Demo2Final();
    }

    static void reader(){
        if (f!=null){
            int i = f.x;        //一定读到正确构造版本
            int j = f.y;        //也能读到正确构造版本
            System.out.println("i=" + i + ", j=" +j);
        }
    }
}
在多线程中,reader方法都能读到x和y的正确值,因为x被final修饰了,所以可读到y的正确构造版本。
3、读取该共享对象的final成员变量之前,先要读取共享对象。伪代码示例: r = new ReferenceObj(); k = r.f ; 这两个操作不能重排序。
4、通常static final是不可以修改的字段 。然而System.in,System.out和System.err是static final字段,遗留原因,必须允许通过set方法改变,我们将这些字段称为写保护,以区别于普通final字段;
Word Tearing字节处理
Java虚拟机实现的一个考虑因素是,每个字段和数组元素被认为是不同的;对一个字段或元素的更新,不得与任何其他字段或元素的读取或更新交互。特别是,分别更新字段数组的相邻元素的两个线程不得干扰或交互。
有些处理器(尤其是早期的 Alphas 处理器)没有提供写单个字节的功能。在这样的处理器上更新 byte 数组,若只是简单地读取整个内容,更新对应的字节,然后将整个内容再写回内存,将是不合法的。
这个问题有时候被称为“字分裂(word tearing)”,更新单个字节有难度的处理器,就需要寻求其它方式来解决问题。
因此,编程人员需要注意,尽量不要对byte[]中的元素进行重新赋值,更不要在多线程程序中这样做。
volatile关键字
多个线程同时访问一个共享的变量的时候,每个线程的工作内存有这个变量的一个拷贝,变量本身还是保存在共享内存中。
Violate修饰的字段,对这个变量的访问必须要从共享内存刷新一次。最新的修改写回共享内存。可以保证字段的可见性,并且禁止对象指令重排。
注意:
Violate修饰的字段绝对不是线程安全的,没有操作的原子性。
适用场景:
- 一个线程写,多个线程读;
- volatile变量的变化很固定
示例代码:
public class VolatileThread implements Runnable {

    private volatile  int a= 0;

    @Override
    public void run() {
            a=a+1;
            System.out.println(Thread.currentThread().getName()+"----"+a);
            try {
                Thread.sleep(100);
            } catch (InterruptedException e) {
                e.printStackTrace();
            }
            a=a+1;
            System.out.println(Thread.currentThread().getName()+"----"+a);
    }
}
public class VolatileTest {
    public static void main(String[] args) {
        VolatileThread volatileThread = new VolatileThread();

        Thread t1 = new Thread(volatileThread);
        Thread t2 = new Thread(volatileThread);
        Thread t3 = new Thread(volatileThread);
        Thread t4 = new Thread(volatileThread);
        t1.start();
        t2.start();
        t3.start();
        t4.start();
    }
}
输出结果:
Thread-2----3
Thread-3----4
Thread-1----3
Thread-0----3
Thread-2----5
Thread-3----8
Thread-0----8
Thread-1----8
可以看到变量a虽然用volatile修饰,是线程共享的变量,但是并不是线程安全的,输出结果是不可预测的。
理解volatile特性的一个好方法是把对volatile变量的单个读/写,看成是使用同一个锁对这些单个读/写操作做了同步。
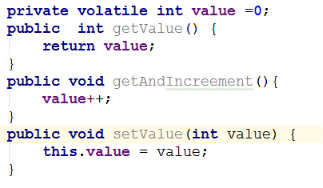
假设有多个线程分别调用上面程序的3个方法,这个程序在语义上和下面程序等价。

volatile写的内存语义如下:
当写一个volatile变量时,JMM会把该线程对应的本地内存中的共享变量值刷新到主内存。
volatile读的内存语义如下:
当读一个volatile变量时,JMM会把该线程对应的本地内存置为无效。线程接下来将从主内存中读取共享变量。
本质也是通过内存屏障来实现可见性 写内存屏障(Store Memory Barrier)可以促使处理器将当前store buffer(存储缓存)的值写回 主存。读内存屏障(Load Memory Barrier)可以促使处理器处理invalidate queue(失效队 列)。进而避免由于Store Buffer和Invalidate Queue的非实时性带来的问题。
禁止指令重排序: volatile是通过内存屏障来禁止指令重排序 JMM内存屏障的策略 在每个 volatile 写操作的前面插入一个 StoreStore 屏障。 在每个 volatile 写操作的后面插入一个 StoreLoad 屏障。 在每个 volatile 读操作的后面插入一个 LoadLoad 屏障。 在每个 volatile 读操作的后面插入一个 LoadStore 屏障。
内存屏障协议很多,比较有名的是MESI ,他的本质上是使用了cpu的一个叫做 高速缓存一致性协议
现代CPU的数据一致性实现 = 缓存锁(MESI …) + 总线锁
X86 CPU内存屏障
sfence:在sfence指令前的写操作当必须在sfence指令后的写操作前完成。
lfence:在lfence指令前的读操作当必须在lfence指令后的读操作前完成。
mfence:在mfence指令前的读写操作当必须在mfence指令后的读写操作前完成。
JSR内存屏障
LoadLoad屏障:
对于这样的语句Load1; LoadLoad; Load2, 在Load2及后续读取操作要读取的数据被访问前,保证Load1要读取的数据被读取完毕。
StoreStore屏障:
对于这样的语句Store1; StoreStore; Store2, 在Store2及后续写入操作执行前,保证Store1的写入操作对其它处理器可见。
LoadStore屏障:
对于这样的语句Load1; LoadStore; Store2, 在Store2及后续写入操作被刷出前,保证Load1要读取的数据被读取完毕。
StoreLoad屏障:
对于这样的语句Store1; StoreLoad; Load2, 在Load2及后续所有读取操作执行前,保证Store1的写入对所有处理器可见。
synchronized关键字
可以修饰方法或者以同步块的形式来进行使用,它主要确保多个线程在同一个时刻,只能有一个线程处于方法或者同步块中,它保证了线程对变量访问的可见性和排他性,又称为内置锁机制。
例如在上面的VolatileThread示例代码中,在run方法里面加上synchronized锁,那么就可以保证运行结果,修改后的代码为:
public class VolatileThread implements Runnable {

    private volatile  int a= 0;

    @Override
    public void run() {
        synchronized (this){
            a=a+1;
            System.out.println(Thread.currentThread().getName()+"----"+a);
            try {
                Thread.sleep(100);
            } catch (InterruptedException e) {
                e.printStackTrace();
            }
            a=a+1;
            System.out.println(Thread.currentThread().getName()+"----"+a);

        }
    }
}
VolatileTest运行结果:
Thread-0----1
Thread-0----2
Thread-3----3
Thread-3----4
Thread-2----5
Thread-2----6
Thread-1----7
Thread-1----8
所以可以知道synchronized锁住的代码,同一时间只能有一个线程运行。
Synchronized的类锁和对象锁,本质上是两把锁,Synchronized加在静态方法上就是类锁,加在非静态的上面就是对象锁,类锁实际锁的是每一个类的class对象。对象锁锁的是当前对象实例。
示例代码:
package com.dongnaoedu.syn;

import com.dongnaoedu.threadstate.SleepUtils;

/**
 * 动脑学院-Mark老师
 * 创建日期:2017/11/28
 * 创建时间: 20:45
 * 类锁和实例锁
 */
public class InstanceAndClass {

    //测试类锁
    private static class TestClassSyn extends Thread{
        @Override
        public void run() {
            System.out.println("TestClass is going...");
            synClass();
        }
    }

    //测试类锁
    private static class TestClassSyn2 extends Thread{
        @Override
        public void run() {
            System.out.println("TestClass2 is going...");
            synClass2();
        }
    }

    //测试对象锁
    private static class TestInstanceSyn extends Thread{
        private InstanceAndClass instanceAndClass;

        public TestInstanceSyn(InstanceAndClass instanceAndClass) {
            this.instanceAndClass = instanceAndClass;
        }

        @Override
        public void run() {
            System.out.println("TestInstance is going..."+instanceAndClass);
            instanceAndClass.synInstance();
        }

    }

    //测试对象锁
    private static class TestInstance2Syn implements Runnable{
        private InstanceAndClass instanceAndClass;

        public TestInstance2Syn(InstanceAndClass instanceAndClass) {
            this.instanceAndClass = instanceAndClass;
        }
        @Override
        public void run() {
            System.out.println("TestInstance2 is going..."+instanceAndClass);
            instanceAndClass.synInstance2();
        }
    }

    //锁对象的方法
    private synchronized void synInstance(){
        SleepUtils.second(3);
        System.out.println("synInstance is going...");
        SleepUtils.second(3);
        System.out.println("synInstance ended");
    }

    //锁对象的方法
    private synchronized void synInstance2(){
        SleepUtils.second(3);
        System.out.println("synInstance2 going...");
        SleepUtils.second(3);
        System.out.println("synInstance2 ended");
    }

    //锁类的方法
    private static synchronized void synClass(){
        SleepUtils.second(5);
        System.out.println("synClass going...");
        SleepUtils.second(5);
    }

    //锁类的方法
    private static synchronized void synClass2(){
        SleepUtils.second(1);
        System.out.println("synClass2 going...");
        SleepUtils.second(1);
    }

    public static void main(String[] args) {
        InstanceAndClass instanceAndClass = new InstanceAndClass();
        Thread t1 = new TestClassSyn();
        Thread t4 = new TestClassSyn2();
        Thread t2 = new Thread(new TestInstanceSyn(instanceAndClass));
        Thread t3 = new Thread(new TestInstance2Syn(instanceAndClass));
        t2.start();
        t3.start();
        SleepUtils.second(1);
        t1.start();
        t4.start();
    }

}
输出结果:
TestInstance is going...com.dongnaoedu.syn.InstanceAndClass@698b3761
TestInstance2 is going...com.dongnaoedu.syn.InstanceAndClass@698b3761
TestClass is going...
TestClass2 is going...
synInstance is going...
synInstance ended
synClass going...
synInstance2 going...
synInstance2 ended
synClass2 going...
从输出结果可以看出,类锁和对象锁是两个不同的锁,并且当一个对象在运行一个加了该对象锁的方法时,其他线程不能用该对象运行加了该对象锁的其他方法。如上例代码中,一个线程运行着synInstance方法,在synInstance运行结束之前,那么其他线程就不能通过instanceAndClass对象调用synInstance2或者synInstance方法。
补充: 即使是同一个方法,加了对象锁,如果不是同一个对象去调用,那么是不会互斥的,因为synchronized锁的不是同一个对象,如下面,把main方法改成如下,那么t2和t3是互不干扰的,不会互斥。
把TestInstance2Syn 在run方法中调用的方法改成synInstance,让两个线程都去调用synInstance方法。
private static class TestInstance2Syn implements Runnable{
        private InstanceAndClass instanceAndClass;

        public TestInstance2Syn(InstanceAndClass instanceAndClass) {
            this.instanceAndClass = instanceAndClass;
        }
        @Override
        public void run() {
            System.out.println("TestInstance2 is going..."+instanceAndClass);
            instanceAndClass.synInstance();
        }
    }
    public static void main(String[] args) {
        InstanceAndClass instanceAndClass1 = new InstanceAndClass();
        InstanceAndClass instanceAndClass2 = new InstanceAndClass();
        Thread t1 = new TestClassSyn();
        Thread t4 = new TestClassSyn2();
        Thread t2 = new Thread(new TestInstanceSyn(instanceAndClass1));
        Thread t3 = new Thread(new TestInstance2Syn(instanceAndClass2));
        t2.start();
        t3.start();
        SleepUtils.second(1);
        t1.start();
        t4.start();
    }
运行结果:
TestInstance is going...com.dongnaoedu.syn.InstanceAndClass@64669643
TestInstance2 is going...com.dongnaoedu.syn.InstanceAndClass@7e437185
TestClass is going...
TestClass2 is going...
synInstance is going...
synInstance is going...
synClass going...
synInstance ended
synInstance ended
synClass2 going...
从结果上看,t2和t3是可以并发执行的。所以即使加了synchronized的对象方法,不同对象去调用是不会互斥的,是可以并发执行的。
等待和通知机制
等待方原则:
1、获取对象锁
2、如果条件不满足,调用对象的wait方法,被通知后依然要检查条件是否满足
3、条件满足以后,才能执行相关的业务逻辑
wait方法导致当前线程等待,加入该对象的等待集合中,并且放弃当前持有的对象锁。
格式:
Synchronized(对象){
	While(条件不满足){
		对象.wait()
	}
	业务逻辑处理
}
通知方原则:
1、获得对象的锁;
2、改变条件;
3、通知所有等待在对象的线程
notify/notifyAll方法唤醒一个或所有正在等待这个对象锁的线程。
格式:
Synchronized(对象){
	业务逻辑处理,改变条件
	对象.notify/notifyAll
}
示例代码:
public class BlockingQueueWN<T> {

    private List queue = new LinkedList<>();
    private final int limit;

    public BlockingQueueWN(int limit) {
        this.limit = limit;
    }

    //入队
    public synchronized void enqueue(T item) throws InterruptedException {
        while(this.queue.size()==this.limit){
            wait();
        }
        //将数据入队,可以肯定有出队的线程正在等待
        if (this.queue.size()==0){
            notifyAll();
        }
        this.queue.add(item);
    }

    //出队
    public synchronized T dequeue() throws InterruptedException {
        while(this.queue.size()==0){
            wait();
        }
        if (this.queue.size()==this.limit){
            notifyAll();
        }
        return (T)this.queue.remove(0);
    }
}
public class BqTest {
    public static void main(String[] args) {
        BlockingQueueWN bq = new BlockingQueueWN(10);
        Thread threadA = new ThreadPush(bq);
        threadA.setName("Push");
        Thread threadB = new ThreadPop(bq);
        threadB.setName("Pop");
        threadB.start();
        threadA.start();
    }

    //推数据入队列
    private static class ThreadPush extends Thread{
        BlockingQueueWN<Integer> bq;

        public ThreadPush(BlockingQueueWN<Integer> bq) {
            this.bq = bq;
        }

        @Override
        public void run() {
            String threadName = Thread.currentThread().getName();
            int i = 20;
            while(i>0){
                try {
                    Thread.sleep(1000);
                    System.out.println(" i="+i+" will push");
                    bq.enqueue(i--);
                } catch (InterruptedException e) {
                    //e.printStackTrace();
                }

            }
        }
    }

    //取数据出队列
    private static class ThreadPop extends Thread{
        BlockingQueueWN<Integer> bq;

        public ThreadPop(BlockingQueueWN<Integer> bq) {
            this.bq = bq;
        }
        @Override
        public void run() {
            while(true){
                try {
                    System.out.println(Thread.currentThread().getName()
                            +" will pop.....");
                    Integer i = bq.dequeue();
                    System.out.println(" i="+i.intValue()+" alread pop");
                } catch (InterruptedException e) {
                    //e.printStackTrace();
                }
            }

        }
    }
}
注意:
1、虽然会wait自动解锁,但是对顺序有要求, 如果在notify被调用之后,才开始wait方法的调用,线程会永远处于WAITING状态。
2、这些方法只能由同一对象锁的持有者线程调用,也就是写在同步块里面,否则会抛出IllegalMonitorStateException异常。
join方法
线程A,执行了thread.join(),线程A等待thread线程终止了以后,A在join后面的语句才会继续执行.
示例代码:
public class JoinTest {

    static class CutInLine implements Runnable{

        private Thread thread;

        public CutInLine(Thread thread) {
            this.thread = thread;
        }

        @Override
        public void run() {
            try {
                //在被插队的线程里,调用一下插队线程的join方法
                thread.join();
            } catch (InterruptedException e) {
                e.printStackTrace();
            }
            System.out.println(Thread.currentThread().getName()+" will work");
        }
    }

    public static void main(String[] args) {
        Thread previous = Thread.currentThread();
        for(int i=0;i<10;i++){
            Thread thread =
                    new Thread(new CutInLine(previous),String.valueOf(i));
            System.out.println(previous.getId()+" cut in the thread:"+thread.getName());
            thread.start();
            previous = thread;
        }

    }

}
运行结果:
1 cut in the thread:0
12 cut in the thread:1
13 cut in the thread:2
14 cut in the thread:3
15 cut in the thread:4
16 cut in the thread:5
17 cut in the thread:6
18 cut in the thread:7
19 cut in the thread:8
20 cut in the thread:9
0 will work
1 will work
2 will work
3 will work
4 will work
5 will work
6 will work
7 will work
8 will work
9 will work
这里在main方法启动的10个线程中,每个线程都是得在上一个线程执行完成(终止)之后,才会执行自己的输出。
park/unpark机制
线程调用park则等待“许可”,处于等待状态,unpark方法为指定线程提供“许可(permit)”,线程继续运行。
补充:调用unpark之后,再调用park,线程会直接运行。
提前调用的unpark不叠加,连续多次调用unpark后,第一次调用park后会拿到“许可”直接运行,后续调用会进入等待。
代码示例:
package com.dongnao.concurrent.period2;

import java.util.concurrent.locks.LockSupport;

public class Demo9_ParkUnpark {

    public static void main(String args[]) throws Exception {
        Demo9_ParkUnpark demo = new Demo9_ParkUnpark();
        demo.test1_normal();
        //demo.test2_DeadLock();
    }

    public static Object iceCream = null;

    /** 正常的park/unpark */
    public void test1_normal() throws Exception {
        //开启一个线程,代表小朋友
        Thread consumerThread = new Thread(new Runnable() {
            @Override
            public void run() {
                while (iceCream == null) {     // 若没有冰激凌
                    System.out.println("没有冰激凌,小朋友不开心,等待...");
                    LockSupport.park();
                }
                System.out.println("小朋友买到冰激凌,开心回家");
            }
        });
        consumerThread.start();

        Thread.sleep(3000L);    // 3秒之后
        iceCream = new Object();    //店员做了一个冰激凌

        LockSupport.unpark(consumerThread);     //通知小朋友

        System.out.println("通知小朋友");
    }

    /** 死锁的park/unpark */
    public void test2_DeadLock() throws Exception {
        //开启一个线程,代表小朋友
        Thread consumerThread = new Thread(new Runnable() {
            @Override
            public void run() {
                if (iceCream == null) {     // 若没有冰激凌
                    System.out.println("没有冰激凌,小朋友不开心,等待...");

                    synchronized (this) {   // 若拿到锁
                        LockSupport.park();     //执行park
                    }
                }
                System.out.println("小朋友买到冰激凌,开心回家");
            }
        });
        consumerThread.start();

        Thread.sleep(3000L);    // 3秒之后
        iceCream = new Object();    //店员做了一个冰激凌

        synchronized (this) {   // 争取到锁以后,才能恢复consumerThread
            LockSupport.unpark(consumerThread);
        }
        System.out.println("通知小朋友");
    }
}
伪唤醒
注意:
之前代码中用 if 语句来判断,是否进入等待状态,这样的做法是错误的!
官方建议应该在循环中检查等待条件,原因是处于等待状态的线程可能会收到错误警报和伪唤醒,如果不在循环中检查等待条件,程序就会在没有满足结束条件的情况下退出。
伪唤醒是指线程并非因为notify、notifyall、unpark等api调用而意外唤醒,是更底层原因导致的。
Disruptor
介绍
主页:http://lmax-exchange.github.io/disruptor/
源码:https://github.com/LMAX-Exchange/disruptor
GettingStarted: https://github.com/LMAX-Exchange/disruptor/wiki/Getting-Started
api: http://lmax-exchange.github.io/disruptor/docs/index.html
maven: https://mvnrepository.com/artifact/com.lmax/disruptor
Disruptor的特点
对比ConcurrentLinkedQueue : 链表实现
JDK中没有ConcurrentArrayQueue
Disruptor是数组实现的
无锁,高并发,使用环形Buffer,直接覆盖(不用清除)旧的数据,降低GC频率
实现了基于事件的生产者消费者模式(观察者模式)
RingBuffer
环形队列
RingBuffer的序号,指向下一个可用的元素
采用数组实现,没有首尾指针
对比ConcurrentLinkedQueue,用数组实现的速度更快
假如长度为8,当添加到第12个元素的时候在哪个序号上呢?用
 最低0.47元/天 解锁文章


 266
266


 被折叠的 条评论
为什么被折叠?
被折叠的 条评论
为什么被折叠?
 到【灌水乐园】发言


