这篇文章应该是晚到了好几个月,之前想写,但是中途遇到了一些棘手的问题,无奈没有去写。写这篇文章的最初来源是一个朋友问我在Android中如何实现瀑布流布局?,当时我的回答是使用RecyclerView,后来他又问我那怎么实现上拉加载并添加Footer呢?我想都没想就回答他根据type的不同去添加一个Footer,监听滚动事件,当滑动到最后显示footer并回调对应的接口,那么,这个过程就会遇到一个Footer布局显示的问题,就像下面这张图一样。
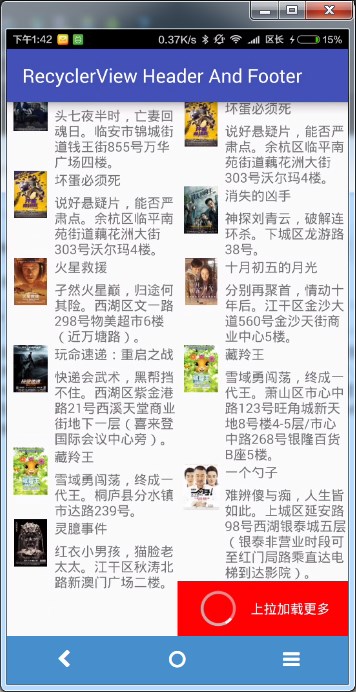
可以看到,我们 的 Footer布局并没有占据全屏,而是作为瀑布流布局的一部分了。这显然不是我们想要的。
当然,除了为瀑布流布局添加Footer实现上拉加载外,我们还想要对GridLayout添加Footer实现上拉加载,同样的,在GridLayout中,布局也不是我们想要的结果。效果也是这样。
也把我们的Footer作为了GridLayout的一部分,并没有全屏进行显示。
那么接下来,我们需要解决几个问题,即可以实现正确的添加Footer并实现上拉加载功能了。
- 如何实现上拉加载更多?这个解决方法很简单,就是为RecyclerView添加滚动监听事件,根据布局的不同编写对应的逻辑代码,实现滑到到底部加载更多的功能。
- 如何正确的添加Footer,使其能够占据宽度为全屏显示?这个有点棘手,但是并不是不能解决,我们需要对适配器进行一些处理就能实现该功能。
- 此外我们还想要添加一个Header,用于展示ViewPager或者图片等信息。这个原理和添加Footer是一样的。
首先定义一个处理上拉加载的接口
public interface OnLoadMoreListener<T> {
    /**
     * 加载更多前回调,比如显示Footer的操作
     */
    void onStart();

    /**
     * 加载更多业务处理,如网络请求数据
     */
    void onLoadMore();

    /**
     * 由于onLoadMore可能是异步调用的,所以onFinish需要手动调用,完成数据的刷新,隐藏Footer等
     * @param list onLoadMore中返回的数据
     */
    void onFinish(List<T> list);
}
- 1
- 2
- 3
- 4
- 5
- 6
- 7
- 8
- 9
- 10
- 11
- 12
- 13
- 14
- 15
- 16
- 17
- 18
- 1
- 2
- 3
- 4
- 5
- 6
- 7
- 8
- 9
- 10
- 11
- 12
- 13
- 14
- 15
- 16
- 17
- 18
然后我们自己定义一个抽象类,用于继承RecyclerView.OnScrollListener并实现我们定义的接口OnLoadMoreListener,如果需要上拉加载更多,直接为RecyclerView添加滚动监听为我们的实现类即可,就像这样子
mRecyclerView.addOnScrollListener(new OnRecyclerViewScrollListener<Content>(){
            @Override
            public void onStart() {

            }

            @Override
            public void onLoadMore() {

            }

            @Override
            public void onFinish(List<Content> contents) {

            }
        });
由于RecyclerView默认有三种布局,所以我们要对这三种布局分别进行判断上拉加载,处理的逻辑有点不同,首先添加如下定义
public abstract class OnRecyclerViewScrollListener<T extends RecyclerViewAdapter.Item> extends RecyclerView.OnScrollListener implements OnLoadMoreListener<T> {

    public static enum layoutManagerType {
        LINEAR_LAYOUT,
        GRID_LAYOUT,
        STAGGERED_GRID_LAYOUT
    }
    protected layoutManagerType mLayoutManagerType;

    private boolean mIsLoadingMore = false;

    public boolean isLoadingMore() {
        return mIsLoadingMore;
    }

    public void setLoadingMore(boolean loadingMore) {
        mIsLoadingMore = loadingMore;
    }

}
- 1
- 2
- 3
- 4
- 5
- 6
- 7
- 8
- 9
- 10
- 11
- 12
- 13
- 14
- 15
- 16
- 17
- 18
- 19
- 20
- 21
- 1
- 2
- 3
- 4
- 5
- 6
- 7
- 8
- 9
- 10
- 11
- 12
- 13
- 14
- 15
- 16
- 17
- 18
- 19
- 20
- 21
这个类是泛型的,接收一个实现了Item接口的类。主要是定义了一个枚举类,里面是布局的类型,然后是一个布尔变量,用于判断当前是否正在加载更多。
RecyclerViewAdapter.Item主要是一个接口,其定义如下
    public interface Item {
        int TYPE_HEADER = 0;
        int TYPE_FOOTER = 1;
        /**
         * 返回item类型,其值不能为0或者1;
         *
         * @return
         */
        int getType();
    }
我们的RecyclerView的Item实体类需要实现Item接口,并返还item的类型,默认情况下header的类型为0,footer的类型为1。
接下来最重要的事就是实现onScrolled和onScrollStateChanged方法,根据布局的不同判断是否需要加载更多操作。
    private int[] lastPositions;
    private int lastVisibleItemPosition;
    private int currentScrollState = 0;

    @Override
    public void onScrolled(RecyclerView recyclerView, int dx, int dy) {
        super.onScrolled(recyclerView, dx, dy);

        RecyclerView.LayoutManager layoutManager = recyclerView.getLayoutManager();
        if (mLayoutManagerType == null) {
            if (layoutManager instanceof LinearLayoutManager) {
                mLayoutManagerType = layoutManagerType.LINEAR_LAYOUT;
            } else if (layoutManager instanceof GridLayoutManager) {
                mLayoutManagerType = layoutManagerType.GRID_LAYOUT;
            } else if (layoutManager instanceof StaggeredGridLayoutManager) {
                mLayoutManagerType = layoutManagerType.STAGGERED_GRID_LAYOUT;
            } else {
                throw new RuntimeException("Unsupported LayoutManager used. Valid ones are LinearLayoutManager, GridLayoutManager and StaggeredGridLayoutManager");
            }
        }

        switch (mLayoutManagerType) {
            case LINEAR_LAYOUT:
                lastVisibleItemPosition = ((LinearLayoutManager) layoutManager).findLastVisibleItemPosition();
                break;
            case GRID_LAYOUT:
                lastVisibleItemPosition = ((GridLayoutManager) layoutManager).findLastVisibleItemPosition();
                break;
            case STAGGERED_GRID_LAYOUT:
                StaggeredGridLayoutManager staggeredGridLayoutManager = (StaggeredGridLayoutManager) layoutManager;
                if (lastPositions == null) {
                    lastPositions = new int[staggeredGridLayoutManager.getSpanCount()];
                }
                staggeredGridLayoutManager.findLastVisibleItemPositions(lastPositions);
                lastVisibleItemPosition = findMax(lastPositions);
                break;
            default:
                break;
        }
    }

    @Override
    public void onScrollStateChanged(RecyclerView recyclerView, int newState) {
        super.onScrollStateChanged(recyclerView, newState);
        currentScrollState = newState;
        RecyclerView.LayoutManager layoutManager = recyclerView.getLayoutManager();
        int visibleItemCount = layoutManager.getChildCount();
        int totalItemCount = layoutManager.getItemCount();
        if (visibleItemCount > 0 && currentScrollState == RecyclerView.SCROLL_STATE_IDLE
                && lastVisibleItemPosition >= totalItemCount - 1) {
            if (!isLoadingMore()){
                mIsLoadingMore =true;
                onStart();
                onLoadMore();
            }
        }
    }

    private int findMax(int[] lastPositions) {
        int max = lastPositions[0];
        for (int value : lastPositions) {
            if (value > max) {
                max = value;
            }
        }
        return max;
    }
- 1
- 2
- 3
- 4
- 5
- 6
- 7
- 8
- 9
- 10
- 11
- 12
- 13
- 14
- 15
- 16
- 17
- 18
- 19
- 20
- 21
- 22
- 23
- 24
- 25
- 26
- 27
- 28
- 29
- 30
- 31
- 32
- 33
- 34
- 35
- 36
- 37
- 38
- 39
- 40
- 41
- 42
- 43
- 44
- 45
- 46
- 47
- 48
- 49
- 50
- 51
- 52
- 53
- 54
- 55
- 56
- 57
- 58
- 59
- 60
- 61
- 62
- 63
- 64
- 65
- 66
- 67
具体逻辑见代码,LinearLayoutManager 和 GridLayoutManager的处理逻辑类似,只不过StaggeredGridLayoutManager 的处理稍微复杂一点,因为布局是错乱的,所以需要自己找到最底下的布局是哪一个,关键代码就是这两句
staggeredGridLayoutManager.findLastVisibleItemPositions(lastPositions);
lastVisibleItemPosition = findMax(lastPositions);
就这样子,其实已经出现了上拉加载更多的功能了,这时候你使用一下这个滚动监听,是完全没有什么问题的,只不过没有显示Footer布局而已。接下来我们最重要的事就是改造适配器。
public abstract class RecyclerViewAdapter<T extends RecyclerViewAdapter.Item> extends RecyclerView.Adapter<RecyclerView.ViewHolder> {
    public interface Item {
        int TYPE_HEADER = 0;
        int TYPE_FOOTER = 1;
        /**
         * 返回item类型,其值不能为0或者1;
         *
         * @return
         */
        int getType();
    }
}
这是最基本的结构,内部定义了上面提到的Item接口,我们的Item实体类需要实现该接口,用于判断Item的类型。
定义Getter和Setter方法
    protected List<T> list = null;
    protected int headerViewRes;
    protected int footerViewRes;
    protected boolean hasHeader = false;
    protected boolean hasFooter = false;


    public List<T> getList() {
        return list;
    }

    public void setList(List<T> list) {
        this.list = list;
    }

    public boolean isHeader(int position) {
        return hasHeader() && position == 0;
    }

    public boolean isFooter(int position) {
        if(hasHeader()){
            return hasFooter() && position == list.size() + 1;
        }else {
            return hasFooter() && position == list.size();
        }
    }

    public int getHeaderView() {
        return headerViewRes;
    }

    public int getFooterView() {
        return footerViewRes;
    }

    public void setHeaderView(int headerViewRes) {

        if (headerViewRes != 0) {
            if (!hasHeader()){
                this.headerViewRes = headerViewRes;
                this.hasHeader = true;
                notifyItemInserted(0);
            }else{
                this.headerViewRes = headerViewRes;
                notifyDataSetChanged();
            }

        } else {
            if (hasHeader()){
                this.hasHeader = false;
                notifyItemRemoved(0);
            }

        }

    }

    public void setFooterView(int footerViewRes) {
        if (footerViewRes != 0) {
            if (!hasFooter()){
                this.footerViewRes = footerViewRes;
                this.hasFooter = true;
                if (hasHeader()){
                    notifyItemInserted(list.size()+1);
                }else{
                    notifyItemInserted(list.size());
                }
            }else{
                this.footerViewRes = footerViewRes;
                notifyDataSetChanged();
            }

        } else {
            if(hasFooter()){
                this.hasFooter = false;
                if (hasHeader()){
                    notifyItemRemoved(list.size()+1);
                }else{
                    notifyItemRemoved(list.size());
                }

            }

        }

    }

    public boolean hasHeader() {
        return hasHeader;
    }

    public boolean hasFooter() {
        return hasFooter;
    }
- 1
- 2
- 3
- 4
- 5
- 6
- 7
- 8
- 9
- 10
- 11
- 12
- 13
- 14
- 15
- 16
- 17
- 18
- 19
- 20
- 21
- 22
- 23
- 24
- 25
- 26
- 27
- 28
- 29
- 30
- 31
- 32
- 33
- 34
- 35
- 36
- 37
- 38
- 39
- 40
- 41
- 42
- 43
- 44
- 45
- 46
- 47
- 48
- 49
- 50
- 51
- 52
- 53
- 54
- 55
- 56
- 57
- 58
- 59
- 60
- 61
- 62
- 63
- 64
- 65
- 66
- 67
- 68
- 69
- 70
- 71
- 72
- 73
- 74
- 75
- 76
- 77
- 78
- 79
- 80
- 81
- 82
- 83
- 84
- 85
- 86
- 87
- 88
- 89
- 90
- 91
- 92
- 93
- 94
- 95
内部逻辑看上去一大堆,其实并不复杂,关键是需要判断Header存不存在,Header存在与不存在的情况下Footer的位置是不同的,注意这一点,编写对应的逻辑即可,当然你的逻辑可以与我不同。
接下来是构造函数,传入我们的数据集,Header和Footer的布局资源
    public RecyclerViewAdapter(List<T> list) {
        this.list = list;
    }

    public RecyclerViewAdapter(List<T> list, int headerViewRes) {
        this.list = list;
        setHeaderView(headerViewRes);
    }

    public RecyclerViewAdapter(List<T> list, int headerViewRes, int footerViewRes) {
        this.list = list;
        setHeaderView(headerViewRes);
        setFooterView(footerViewRes);
    }
实现我们的Header布局和Footer布局的ViewHolder,其实就是定义两个类
    static class HeaderViewHolder extends RecyclerView.ViewHolder {
        public HeaderViewHolder(View itemView) {
            super(itemView);
        }
    }

    static class FooterViewHolder extends RecyclerView.ViewHolder {
        public FooterViewHolder(View itemView) {
            super(itemView);
        }
    }
重写getItemCount和getItemViewType方法
getItemCount中我们需要根据是否有Header和Footer来返回对应的Item数
  @Override
    public int getItemCount() {
        int count = 0;
        count += (hasHeader() ? 1 : 0);
        count += (hasFooter() ? 1 : 0);
        count += list.size();
        return count;
    }
getItemViewType就需要根据判断位置判断是否具有Header来判断对应的Item的类型
 @Override
    public int getItemViewType(int position) {
        int size = list.size();
        if (hasHeader()) {
            if (position == 0) {
                return Item.TYPE_HEADER;
            } else {
                if (position == size + 1) {
                    return Item.TYPE_FOOTER;
                } else {
                    return list.get(position - 1).getType();
                }
            }

        } else {
            if (position == size) {
                return Item.TYPE_FOOTER;
            } else {
                return list.get(position).getType();
            }
        }
    }
- 1
- 2
- 3
- 4
- 5
- 6
- 7
- 8
- 9
- 10
- 11
- 12
- 13
- 14
- 15
- 16
- 17
- 18
- 19
- 20
- 21
- 22
- 1
- 2
- 3
- 4
- 5
- 6
- 7
- 8
- 9
- 10
- 11
- 12
- 13
- 14
- 15
- 16
- 17
- 18
- 19
- 20
- 21
- 22
创建ViewHolder,根据类型的不同创建对应的ViewHolder,如果不是Header和Footer之外的类型,交由抽象方法onCreateHolder处理
    @Override
    public RecyclerView.ViewHolder onCreateViewHolder(ViewGroup parent, int viewType) {
        if (hasHeader() && viewType == Item.TYPE_HEADER) {
            View v = LayoutInflater.from(parent.getContext()).inflate(getHeaderView(), parent, false);
            return new HeaderViewHolder(v);
        } else if (hasFooter() && viewType == Item.TYPE_FOOTER) {
            View v = LayoutInflater.from(parent.getContext()).inflate(getFooterView(), parent, false);
            return new FooterViewHolder(v);
        } else {
            return onCreateHolder(parent, viewType);
        }
    }
    public abstract RecyclerView.ViewHolder onCreateHolder(ViewGroup parent, int viewType);
绑定数据,同创建ViewHolder,根据位置的不同来获得item的类型,如果是Header就回调抽象方法onBindHeaderView,如果是Footer就回调抽象方法onBindFooterView,否则就回调抽象方法onBindItemView,将对应的holder和实体类传入。
 @Override
    public void onBindViewHolder(RecyclerView.ViewHolder holder, int position) {
        if (getItemViewType(position) == Item.TYPE_HEADER) {
            HeaderViewHolder headerHolder = (HeaderViewHolder) holder;
            View headerView = headerHolder.itemView;

            onBindHeaderView(headerView);
        } else if (getItemViewType(position) == Item.TYPE_FOOTER) {
            FooterViewHolder footerHolder = (FooterViewHolder) holder;
            View footerView = footerHolder.itemView;

            onBindFooterView(footerView);
        } else {
            T i = getItemByPosition(position);
            onBindItemView(holder, i);

        }

    }
    protected abstract void onBindHeaderView(View headerView);

    protected abstract void onBindFooterView(View footerView);

    protected abstract void onBindItemView(RecyclerView.ViewHolder holder, T item);
- 1
- 2
- 3
- 4
- 5
- 6
- 7
- 8
- 9
- 10
- 11
- 12
- 13
- 14
- 15
- 16
- 17
- 18
- 19
- 20
- 21
- 22
- 23
- 24
- 25
- 1
- 2
- 3
- 4
- 5
- 6
- 7
- 8
- 9
- 10
- 11
- 12
- 13
- 14
- 15
- 16
- 17
- 18
- 19
- 20
- 21
- 22
- 23
- 24
- 25
这样子,已经能够处理Header和Footer了,但是显示位置还是不正确的,接下来我们需要对GridLayout和StaggeredGridLayout做特殊处理。
定义抽象类GridLayoutAdapter继承RecyclerViewAdapter
public abstract class GridLayoutAdapter<T extends RecyclerViewAdapter.Item> extends RecyclerViewAdapter<T> {
    public GridLayoutAdapter(List list) {
        super(list);
    }
    public GridLayoutAdapter(List list, int headerViewRes) {
        super(list, headerViewRes);
    }

    public GridLayoutAdapter(List list, int headerViewRes, int footerViewRes) {
        super(list, headerViewRes, footerViewRes);
    }
}
定义一个内部类GridSpanSizeLookup 继承GridLayoutManager.SpanSizeLookup,调用父类isHeader和isFooter方法判断是否是头或者尾,如果是则返回gridManager.getSpanCount();即一个item占据一行的span数,否则就返回1
    class GridSpanSizeLookup extends GridLayoutManager.SpanSizeLookup {
        @Override
        public int getSpanSize(int position) {
            if (isHeader(position) || isFooter(position)) {
                return gridManager.getSpanCount();
            }
            return 1;
        }
    }
最重要的一步就是重写onAttachedToRecyclerView,判断是否是GridLayout布局,然后通过setSpanSizeLookup设置为我们的内部类
    private GridSpanSizeLookup mGridSpanSizeLookup;
    private GridLayoutManager gridManager;
    @Override
    public void onAttachedToRecyclerView(RecyclerView recyclerView) {
        super.onAttachedToRecyclerView(recyclerView);
        RecyclerView.LayoutManager manager = recyclerView.getLayoutManager();
        if (manager instanceof GridLayoutManager) {
            gridManager = ((GridLayoutManager) manager);
            if (mGridSpanSizeLookup == null) {
                mGridSpanSizeLookup = new GridSpanSizeLookup();
            }
            gridManager.setSpanSizeLookup(mGridSpanSizeLookup);
        }
    }
同理,瀑布流布局也需要进行同样的操作。
public abstract class StaggeredGridLayoutAdapter<T extends RecyclerViewAdapter.Item> extends RecyclerViewAdapter<T> {
    public StaggeredGridLayoutAdapter(List<T> list) {
        super(list);
    }

    public StaggeredGridLayoutAdapter(List<T> list, int headerViewRes) {
        super(list, headerViewRes);
    }

    public StaggeredGridLayoutAdapter(List<T> list, int headerViewRes, int footerViewRes) {
        super(list, headerViewRes, footerViewRes);
    }
}
但是 StaggeredGridLayoutManager中没有setSpanSizeLookup方法,庆幸的是StaggeredGridLayoutManager.LayoutParams中有setFullSpan方法可以达到同样的效果。
这时候重写的不再是onAttachedToRecyclerView方法而是onViewAttachedToWindow方法
  @Override
    public void onViewAttachedToWindow(RecyclerView.ViewHolder holder) {
        super.onViewAttachedToWindow(holder);
        if (isStaggeredGridLayout(holder)) {
            handleLayoutIfStaggeredGridLayout(holder, holder.getLayoutPosition());
        }
    }

    private boolean isStaggeredGridLayout(RecyclerView.ViewHolder holder) {
        ViewGroup.LayoutParams layoutParams = holder.itemView.getLayoutParams();
        if (layoutParams != null && layoutParams instanceof StaggeredGridLayoutManager.LayoutParams) {
            return true;
        }
        return false;
    }

    protected void handleLayoutIfStaggeredGridLayout(RecyclerView.ViewHolder holder, int position) {
        if (isHeader(position) || isFooter(position)) {
            StaggeredGridLayoutManager.LayoutParams p = (StaggeredGridLayoutManager.LayoutParams) holder.itemView.getLayoutParams();
            p.setFullSpan(true);
        }
    }
- 1
- 2
- 3
- 4
- 5
- 6
- 7
- 8
- 9
- 10
- 11
- 12
- 13
- 14
- 15
- 16
- 17
- 18
- 19
- 20
- 21
- 22
- 1
- 2
- 3
- 4
- 5
- 6
- 7
- 8
- 9
- 10
- 11
- 12
- 13
- 14
- 15
- 16
- 17
- 18
- 19
- 20
- 21
- 22
基本上,到这里为止,就完成了所有的工作,在使用的时候要实现上拉加载显示Footer,如果是瀑布流布局,就需要继承StaggeredGridLayoutAdapter,如果是网格布局,就需要继承GridLayoutAdapter,其他情况下,继承RecyclerViewAdapter即可。
为了演示,这里简单进行使用,首先定义一个Item的实现类
public class Content implements RecyclerViewAdapter.Item {
    private int TYPE = 2;
    private String title;
    private String desc;
    private String url;

    public String getTitle() {
        return title;
    }

    public void setTitle(String title) {
        this.title = title;
    }

    public String getDesc() {
        return desc;
    }

    public void setDesc(String desc) {
        this.desc = desc;
    }

    public String getIconUrl() {
        return url;
    }

    public void setIconUrl(String iconUrl) {
        this.url = iconUrl;
    }

    @Override
    public String toString() {
        return "Content{" +
                "title='" + title + '\'' +
                ", desc='" + desc + '\'' +
                ", icon=" + url +
                '}';
    }

    @Override
    public int getType() {
        return TYPE;
    }
}
- 1
- 2
- 3
- 4
- 5
- 6
- 7
- 8
- 9
- 10
- 11
- 12
- 13
- 14
- 15
- 16
- 17
- 18
- 19
- 20
- 21
- 22
- 23
- 24
- 25
- 26
- 27
- 28
- 29
- 30
- 31
- 32
- 33
- 34
- 35
- 36
- 37
- 38
- 39
- 40
- 41
- 42
- 43
- 44
- 45
- 1
- 2
- 3
- 4
- 5
- 6
- 7
- 8
- 9
- 10
- 11
- 12
- 13
- 14
- 15
- 16
- 17
- 18
- 19
- 20
- 21
- 22
- 23
- 24
- 25
- 26
- 27
- 28
- 29
- 30
- 31
- 32
- 33
- 34
- 35
- 36
- 37
- 38
- 39
- 40
- 41
- 42
- 43
- 44
- 45
我们这里以瀑布流布局为例,因此继承StaggeredGridLayoutAdapter实现我们的适配器。
public class MyAdapter extends StaggeredGridLayoutAdapter<Content> {


    public MyAdapter(List<Content> list, int headerViewRes) {
        super(list, headerViewRes);
    }

    public MyAdapter(List<Content> list) {
        super(list);
    }

    public MyAdapter(List<Content> list, int headerViewRes, int footerViewRes) {
        super(list, headerViewRes, footerViewRes);
    }

    @Override
    public RecyclerView.ViewHolder onCreateHolder(ViewGroup parent, int viewType) {
        View view=LayoutInflater.from(parent.getContext()).inflate(R.layout.item_content,parent,false);
        return new ItemViewHolder(view);
    }

    @Override
    protected void onBindHeaderView(View headerView) {
        Log.e("TAG","这是HeadView数据绑定的过程");
        ImageView imageView= (ImageView) headerView.findViewById(R.id.icon);
        Picasso.with(headerView.getContext()).load("https://img-my.csdn.net/uploads/201508/05/1438760758_3497.jpg").into(imageView);
    }

    @Override
    protected void onBindFooterView(View footerView) {
        Log.e("TAG","这是FootView数据绑定的过程");
    }


    @Override
    protected void onBindItemView(RecyclerView.ViewHolder holder, Content item) {
        ItemViewHolder itemViewHolder = (ItemViewHolder) holder;
        Picasso.with(holder.itemView.getContext()).load(item.getIconUrl()).into( itemViewHolder.icon);
        itemViewHolder.title.setText(item.getTitle());
        itemViewHolder.desc.setText(item.getDesc());
    }


    static class ItemViewHolder extends RecyclerView.ViewHolder {
        ImageView icon;
        TextView title;
        TextView desc;
        public ItemViewHolder(View itemView) {
            super(itemView);
            icon = (ImageView) itemView.findViewById(R.id.icon);
            title = (TextView) itemView.findViewById(R.id.title);
            desc = (TextView) itemView.findViewById(R.id.desc);
        }
    }
}
- 1
- 2
- 3
- 4
- 5
- 6
- 7
- 8
- 9
- 10
- 11
- 12
- 13
- 14
- 15
- 16
- 17
- 18
- 19
- 20
- 21
- 22
- 23
- 24
- 25
- 26
- 27
- 28
- 29
- 30
- 31
- 32
- 33
- 34
- 35
- 36
- 37
- 38
- 39
- 40
- 41
- 42
- 43
- 44
- 45
- 46
- 47
- 48
- 49
- 50
- 51
- 52
- 53
- 54
- 55
- 56
- 1
- 2
- 3
- 4
- 5
- 6
- 7
- 8
- 9
- 10
- 11
- 12
- 13
- 14
- 15
- 16
- 17
- 18
- 19
- 20
- 21
- 22
- 23
- 24
- 25
- 26
- 27
- 28
- 29
- 30
- 31
- 32
- 33
- 34
- 35
- 36
- 37
- 38
- 39
- 40
- 41
- 42
- 43
- 44
- 45
- 46
- 47
- 48
- 49
- 50
- 51
- 52
- 53
- 54
- 55
- 56
使用也很简单,在onStart中显示footer,在onLoadMore中加载数据,这里是模拟操作,异步返回数据后将数据传入onFinish进行回调,回调完成后记得调用 setLoadingMore(false);来通知当前处于没在加载的状态,通过Handler发送数据到主线程进行UI更新,并因此Footer
public class MainActivity extends AppCompatActivity {
private RecyclerView mRecyclerView;
private List<Content> list = new ArrayList<Content>();
private RecyclerViewAdapter<Content> myAdapter;
private ArrayList<Content> arrayList;
Handler mHandler=new Handler(){
@Override
public void handleMessage(Message msg) {
super.handleMessage(msg);
List<Content> list= (List<Content>) msg.obj;
myAdapter.getList().addAll(list);
myAdapter.notifyDataSetChanged();
myAdapter.setFooterView(0);
}
};
@Override
protected void onCreate(Bundle savedInstanceState) {
super.onCreate(savedInstanceState);
setContentView(R.layout.activity_main);
mRecyclerView = (RecyclerView) findViewById(R.id.recyclerview);
initData();
mRecyclerView.setLayoutManager(new GridLayoutManager(this,2));
myAdapter = new MyAdapter(list);
mRecyclerView.setAdapter(myAdapter);
arrayList=new ArrayList<Content>(myAdapter.getList());
mRecyclerView.addOnScrollListener(new OnRecyclerViewScrollListener<Content>(){
@Override
public void onStart() {
myAdapter.setFooterView(R.layout.item_footer);
if (myAdapter.hasHeader()){
mRecyclerView.smoothScrollToPosition(myAdapter.getItemCount()+1);
}else{
mRecyclerView.smoothScrollToPosition(myAdapter.getItemCount());
}
}
@Override
public void onLoadMore() {
new Thread(new Runnable() {
@Override
public void run() {
try {
Log.e("TAG","模拟网络请求数据");
Thread.sleep(5000);
onFinish(arrayList);
} catch (InterruptedException e) {
e.printStackTrace();
}
}
}).start();
}
@Override
public void onFinish(List<Content> contents) {
Message message=Message.obtain();
message.obj=contents;
mHandler.sendMessage(message);
setLoadingMore(false);
}
});
}
private void initData() {
Content c = new Content();
c.setIconUrl("http://p1.meituan.net/63.90/movie/7a29814fe6549b929df6e0ef9575ce699434172.jpg");
c.setTitle("摇滚水果");
c.setDesc("比基尼女郎,掀摇滚热浪。滨江区滨文路577号华润超市4楼。");
list.add(c);
}
}
- 1
- 2
- 3
- 4
- 5
- 6
- 7
- 8
- 9
- 10
- 11
- 12
- 13
- 14
- 15
- 16
- 17
- 18
- 19
- 20
- 21
- 22
- 23
- 24
- 25
- 26
- 27
- 28
- 29
- 30
- 31
- 32
- 33
- 34
- 35
- 36
- 37
- 38
- 39
- 40
- 41
- 42
- 43
- 44
- 45
- 46
- 47
- 48
- 49
- 50
- 51
- 52
- 53
- 54
- 55
- 56
- 57
- 58
- 59
- 60
- 61
- 62
- 63
- 64
- 65
- 66
- 67
- 68
- 69
- 70
- 71
- 72
- 73
- 74
- 75
- 76
- 77
- 78
- 79
- 80
- 81
- 82
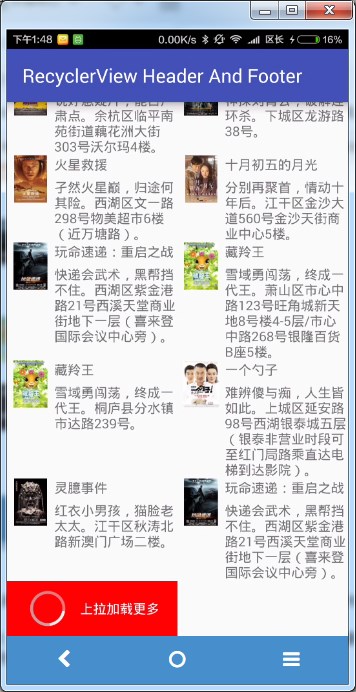
最终的效果看动图,如下

最后上源代码
http://download.csdn.net/detail/sbsujjbcy/9312425


 3784
3784

 被折叠的 条评论
为什么被折叠?
被折叠的 条评论
为什么被折叠?
 到【灌水乐园】发言


