


文章目录
在上一篇章中,已经创建好了module:nacos-sample-provider,我们就以它为例来演示Nacos的配置中心功能。
1.引入Nacos“配置中心”功能的依赖包
# 在主pom.xml文件中添加spring-cloud-alibaba-nacos-config依赖

<!--  基于Nacos的配置中心  -->
<dependency>
    <groupId>org.springframework.cloud</groupId>
    <artifactId>spring-cloud-alibaba-nacos-config</artifactId>
    <version>0.9.0.RELEASE</version>
    <exclusions>
        <exclusion>
            <groupId>org.springframework.cloud</groupId>
             <artifactId>spring-cloud-context</artifactId>
        </exclusion>
    </exclusions>
</dependency>
2.改造nacos-sample-provider项目
2.1 删除nacos-sample-provider项目中的application.yml
使用Nacos的配置中心功能,就不需要再在项目中写配置文件application.yml,而是使用
bootstrap.yml来“告诉”服务从Nacos的配置中心里获取自己所需配置文件。
2.2 添加bootstrap.yml,内容如下:
bootstrap.xml# nacos配置中心信息参数
nacos:
instance:
hostname: localhost
port: 8848
spring:
cloud:
nacos:
config:
# 配置中心地址
server-addr: ${nacos.instance.hostname}:${nacos.instance.port}
# 配置文件扩展名(目前只支持 properties 和 yml 类型)
file-extension: yml
# 配置文件名前缀(默认为 spring.application.name 的值,也可以自己手动设置)
prefix: nacos-sample-provider
profiles:
# 当 spring.profile.active 为空时,对应的连接符 - 也将不存在,dataId 的拼接格式变成 ${prefix}.${file-extension}
active: dev
# 当前设置对应的DataID是:nacos-sample-provider-dev.yml
application:
# 服务名,对应service-id
name: nacos-sample-provider
2.3 修改Controller类,为其添加@RefreshScope,实现配置的热加载
HelloServiceImpl.javapackage org.wy.provider;
import org.springframework.beans.factory.annotation.Value;
import org.springframework.cloud.context.config.annotation.RefreshScope;
import org.springframework.web.bind.annotation.GetMapping;
import org.springframework.web.bind.annotation.RequestParam;
import org.springframework.web.bind.annotation.RestController;
@RestController
@RefreshScope
public class HelloServiceImpl {
// @Value可以从Nacos配置中心的配置文件中读取对应的配置变量值
// ${}中的key要与配置文件中的key一致,否则无法读取
@Value("${testValue}")
private String testValue;
@GetMapping(value = "/hi")
public String sayHello(@RequestParam(name = "name") String name) {
return "Hello World: " + name;
}
// 新增一个接口,用于验证"@Value的功能"
@GetMapping(value = "/testValue")
public String getValueFromNacosConfigServer() {
return "testValue is: " + testValue;
}
}
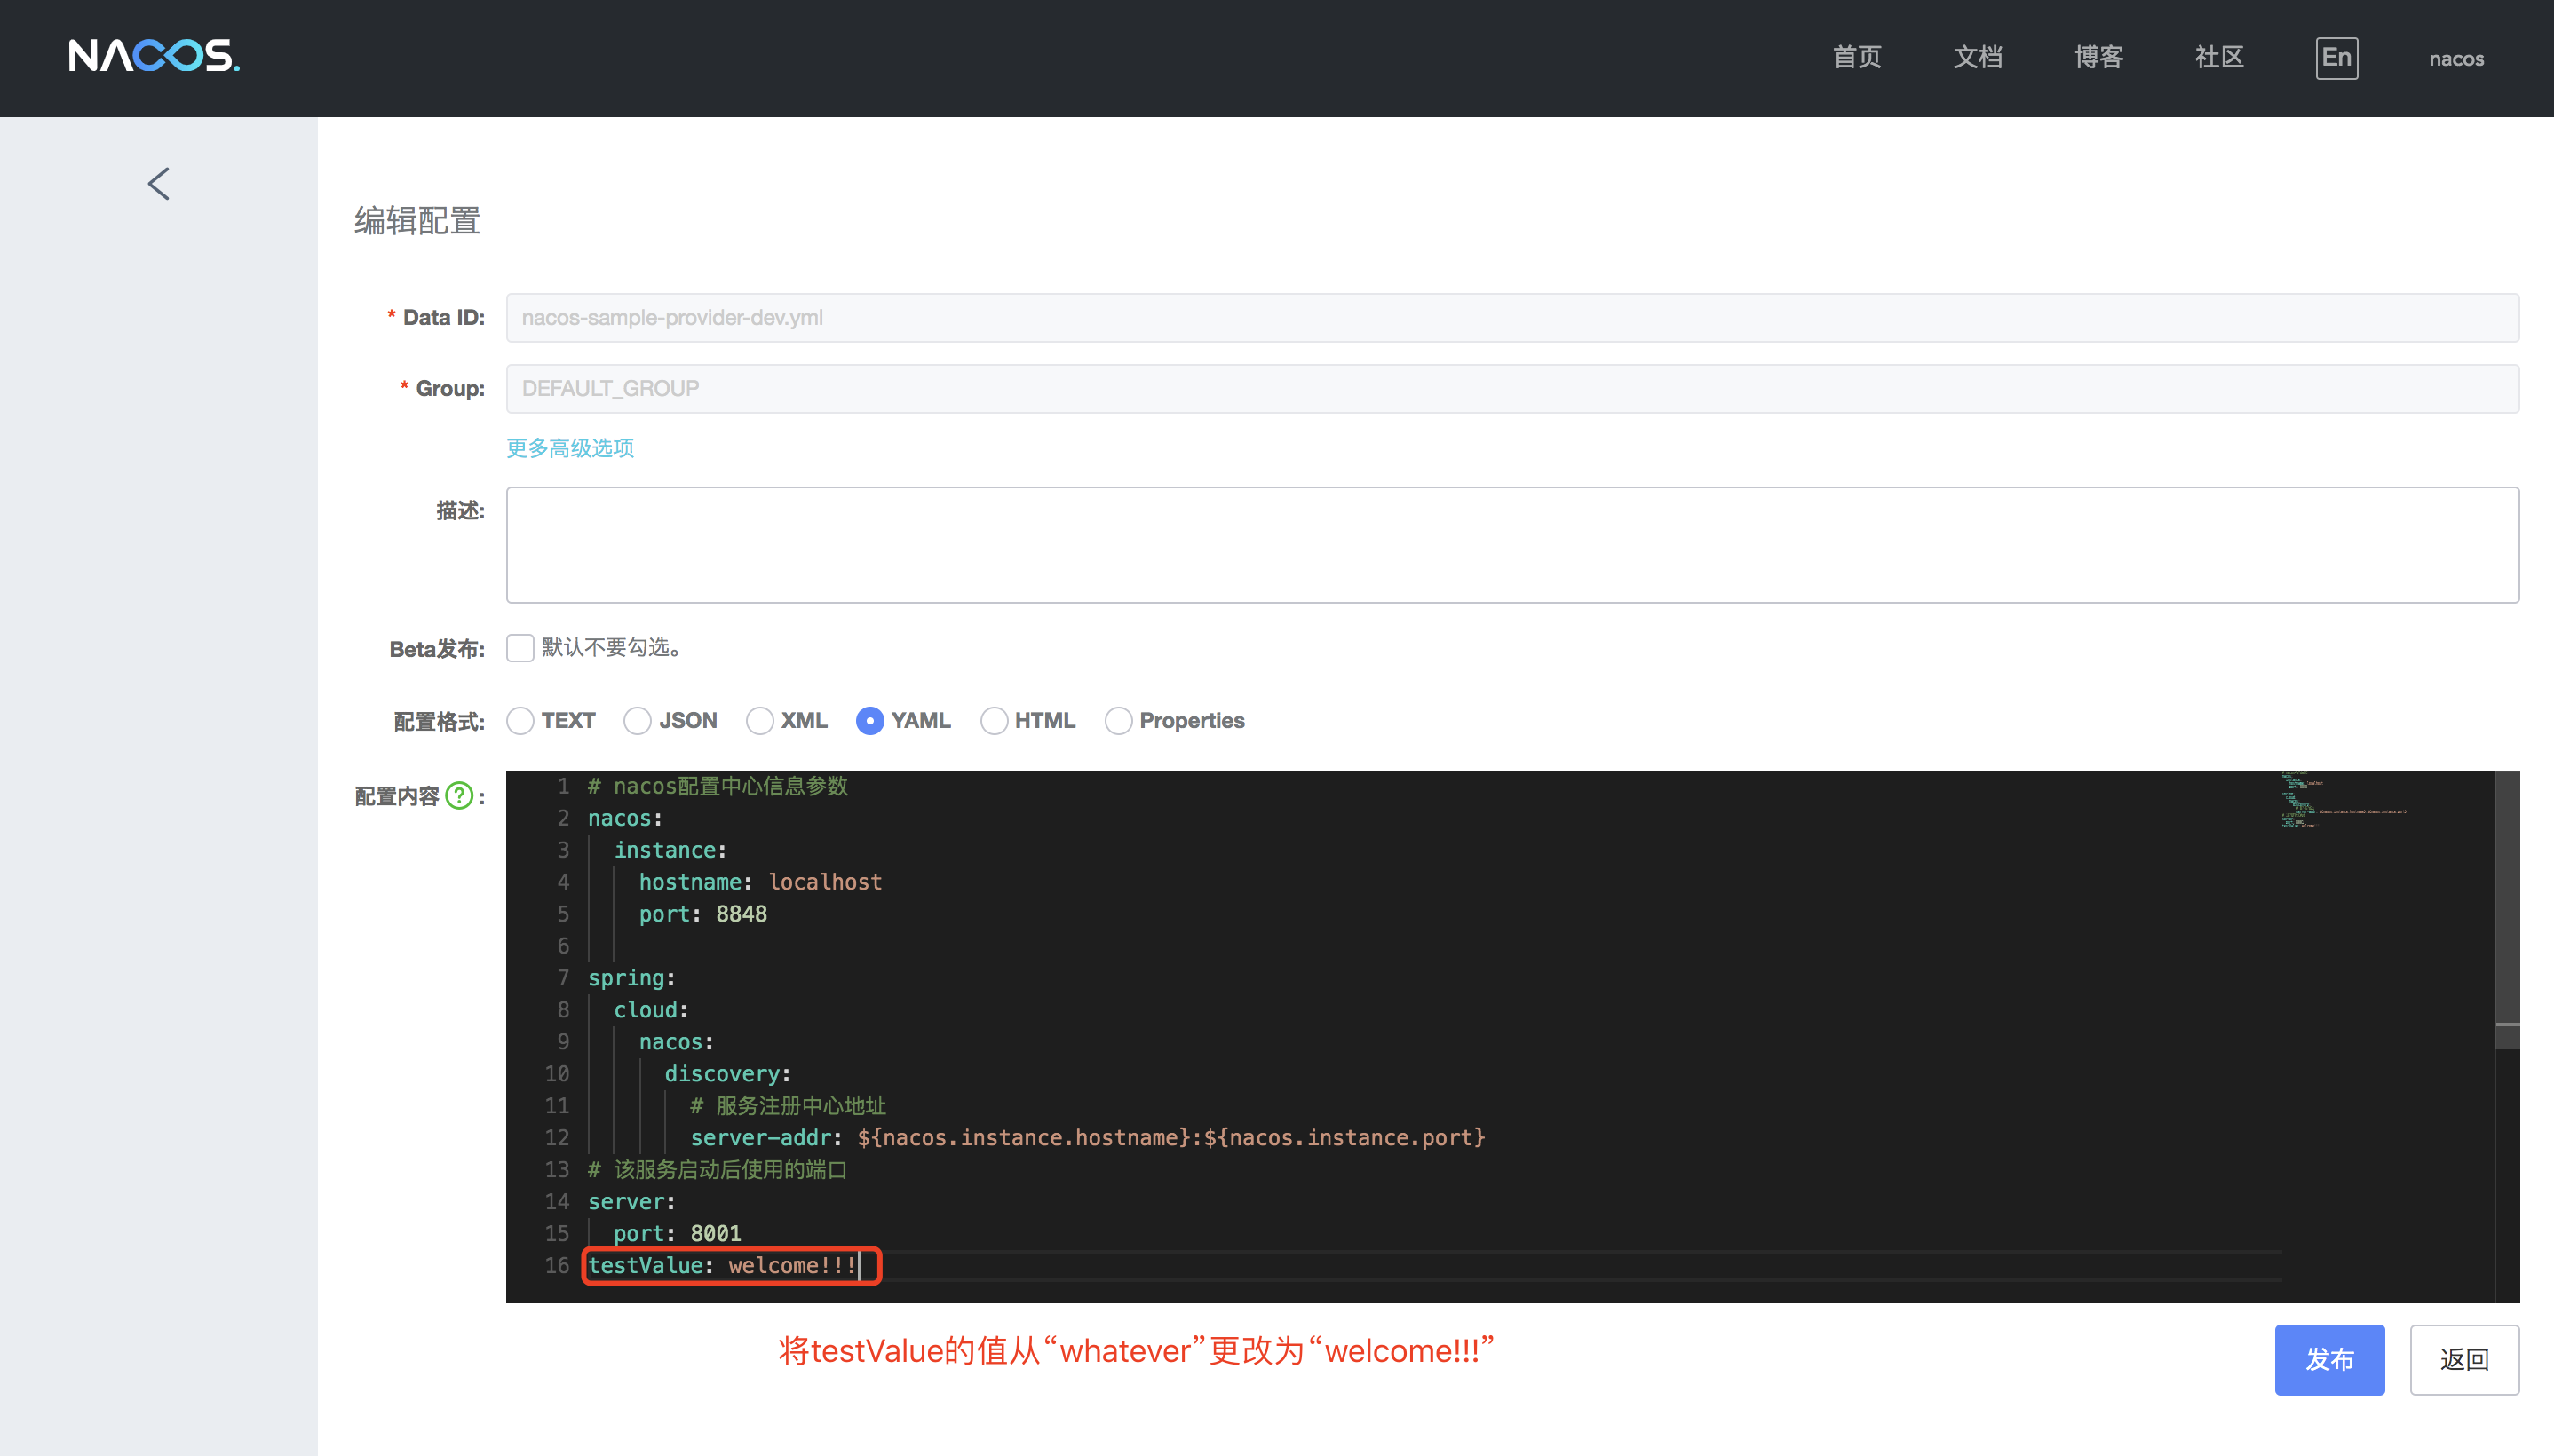
2.4 在Nacos控制台添加对应的配置文件

# nacos配置中心信息参数
nacos:
  instance:
    hostname: localhost
    port: 8848

spring:
  cloud:
    nacos:
      discovery:
        # 服务注册中心地址
        server-addr: ${nacos.instance.hostname}:${nacos.instance.port}

# 该服务启动后使用的端口
server:
  port: 8001

testValue: whatever
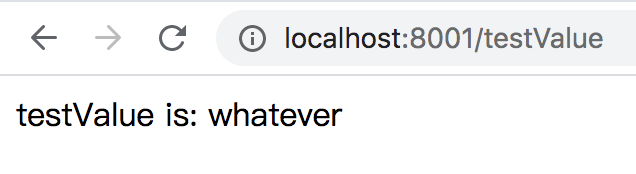
2.5 启动服务,调用一下url,验证服务是否正常
http://localhost:8001/hi?name=test

http://localhost:8001/testValue
2.6 在Nacos控制台修改一下配置文件中的配置值,再次验证
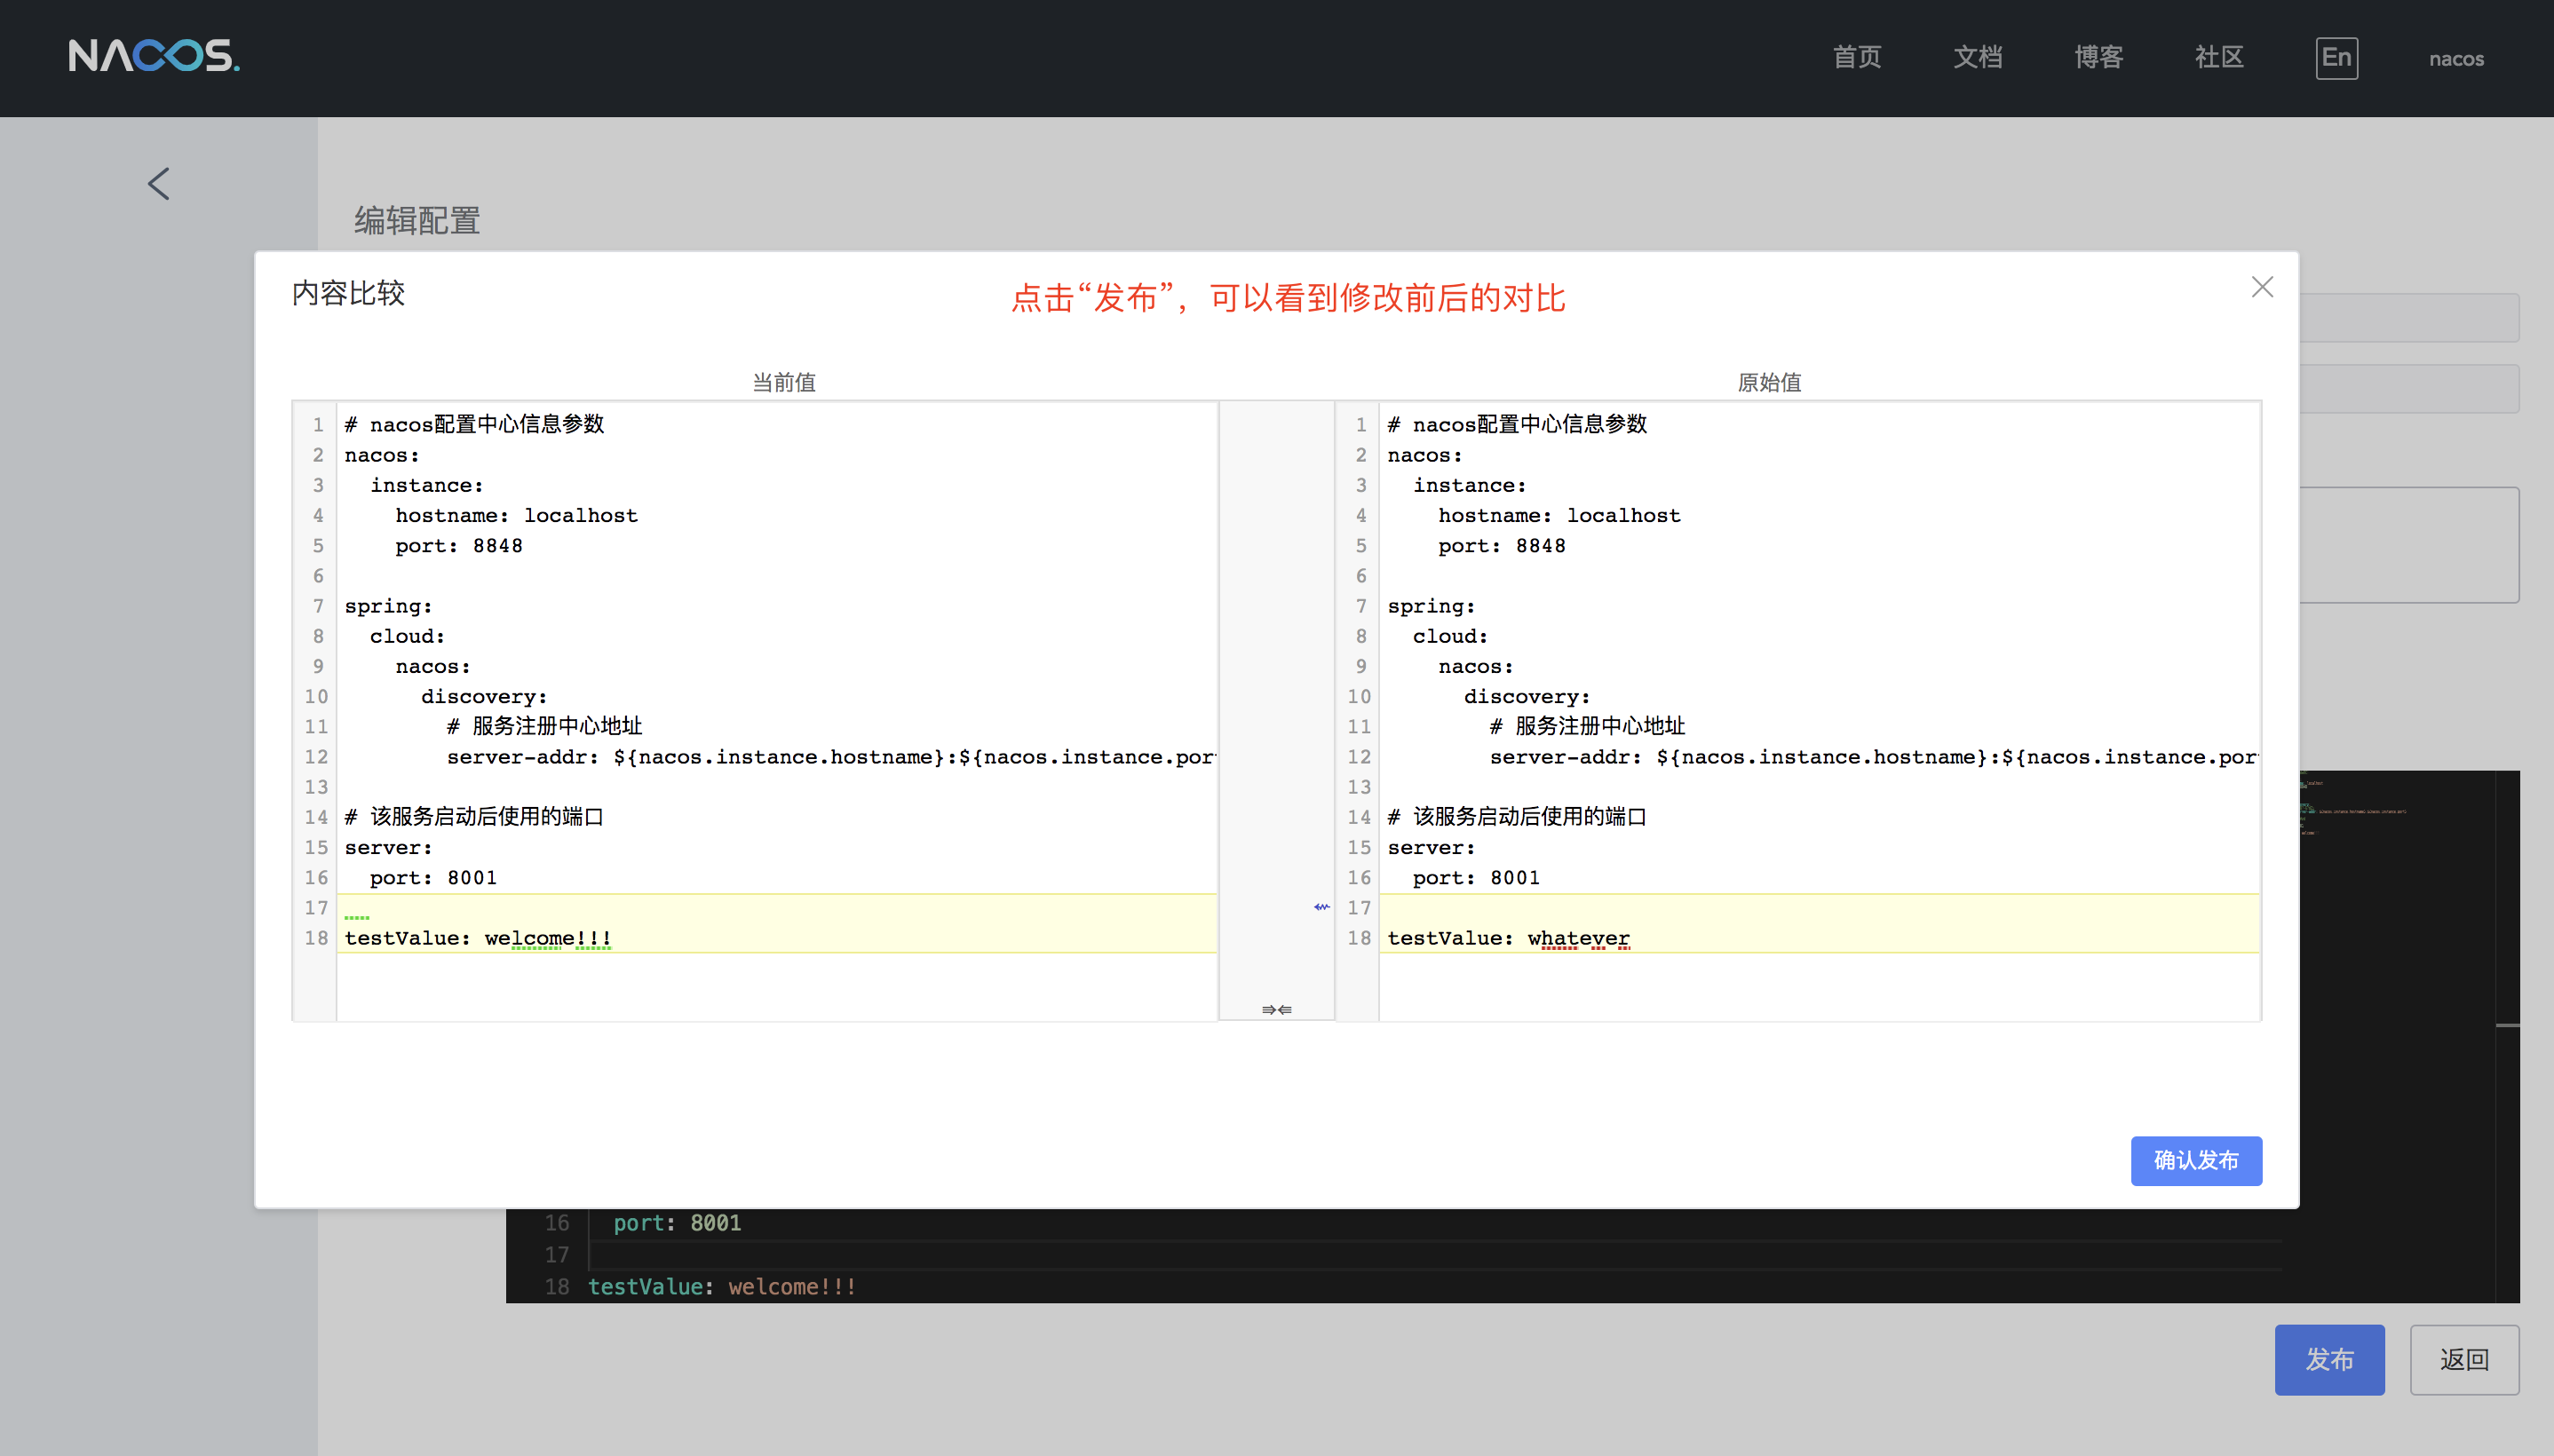
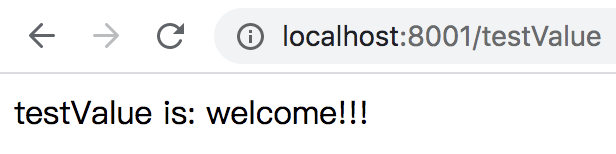
至此,可以验证Nacos配置中心功能的热部署特点。
3.小练习
读者可以尝试将另一个项目:nacos-sample-consumer,也改造成适配Nacos配置中心的,示例代码在下面,仅供参考。
本文示例源码:
[commit id:ec98ce92b8a29bc0ce5d1369beaeae463a1ac77a]


 1019
1019


 被折叠的 条评论
为什么被折叠?
被折叠的 条评论
为什么被折叠?
 到【灌水乐园】发言


