


👉文末查看项目功能视频演示+获取源码+sql脚本+视频导入教程视频
1 、功能描述
基于SSM的大学生勤工助学管理系统1拥有三种角色:管理员、学生和用工部门,具体功能如下
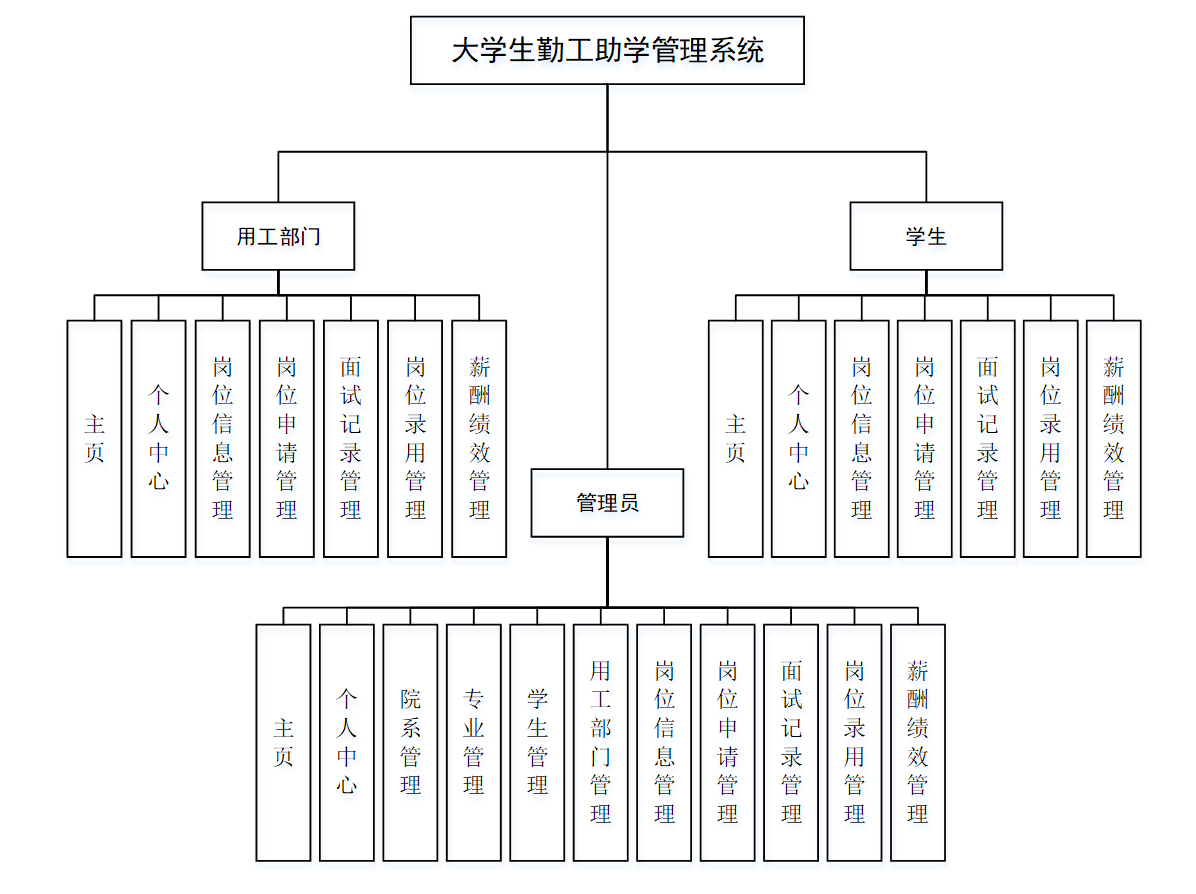
1.1 背景描述
勤工助学管理系统是为了帮助学校更好地管理和监督学生勤工助学工作而设计的一种信息系统。随着社会的发展,许多学生为了减轻家庭经济负担和获得工作经验,选择通过校内勤工助学的方式来赚取一定的零花钱。然而,传统的手工管理模式已经无法满足日益增长的勤工助学工作需求和管理的复杂性。因此,勤工助学管理系统的背景在于提供一个集中管理学生工作时间、工资结算、工作任务安排、考勤管理等功能的平台,以帮助学校更加高效地组织和管理勤工助学工作,确保学生合法权益,提高学校的管理水平和服务质量。
2、项目技术
后端框架:SSM(Spring、SpringMVC、Mybatis)
前端技术:jsp
2.1 SSM
SSM(Spring+SpringMVC+MyBatis)是目前比较主流的Java EE企业级框架,适用于搭建各种大型的企业级应用系统。其中,Spring就像是整个项目中的粘合剂,负责装配bean并管理其生命周期,实现控制反转(IoC)的功能。SpringMVC负责拦截用户请求,通过DispatcherServlet将请求匹配到相应的Controller并执行。而MyBatis则是对JDBC的封装,让数据库底层操作变得透明,通过配置文件关联到各实体类的Mapper文件,实现了SQL语句映射。
2.2 mysql
MySQL是一款Relational Database Management System,直译过来的意思就是关系型数据库管理系统,MySQL有着它独特的特点,这些特点使他成为目前最流行的RDBMS之一,MySQL想比与其他数据库如ORACLE、DB2等,它属于一款体积小、速度快的数据库,重点是它符合本次毕业设计的真实租赁环境,拥有成本低,开发源码这些特点,这也是选择它的主要原因。
3、开发环境
- JAVA版本:JDK1.8(最佳)
- IDE类型:IDEA、Eclipse都可运行
- 数据库类型:MySql(5.7、8.x版本都可)
- tomcat版本:Tomcat 7-10版本均可
- maven版本:无限制
- 硬件环境:Windows
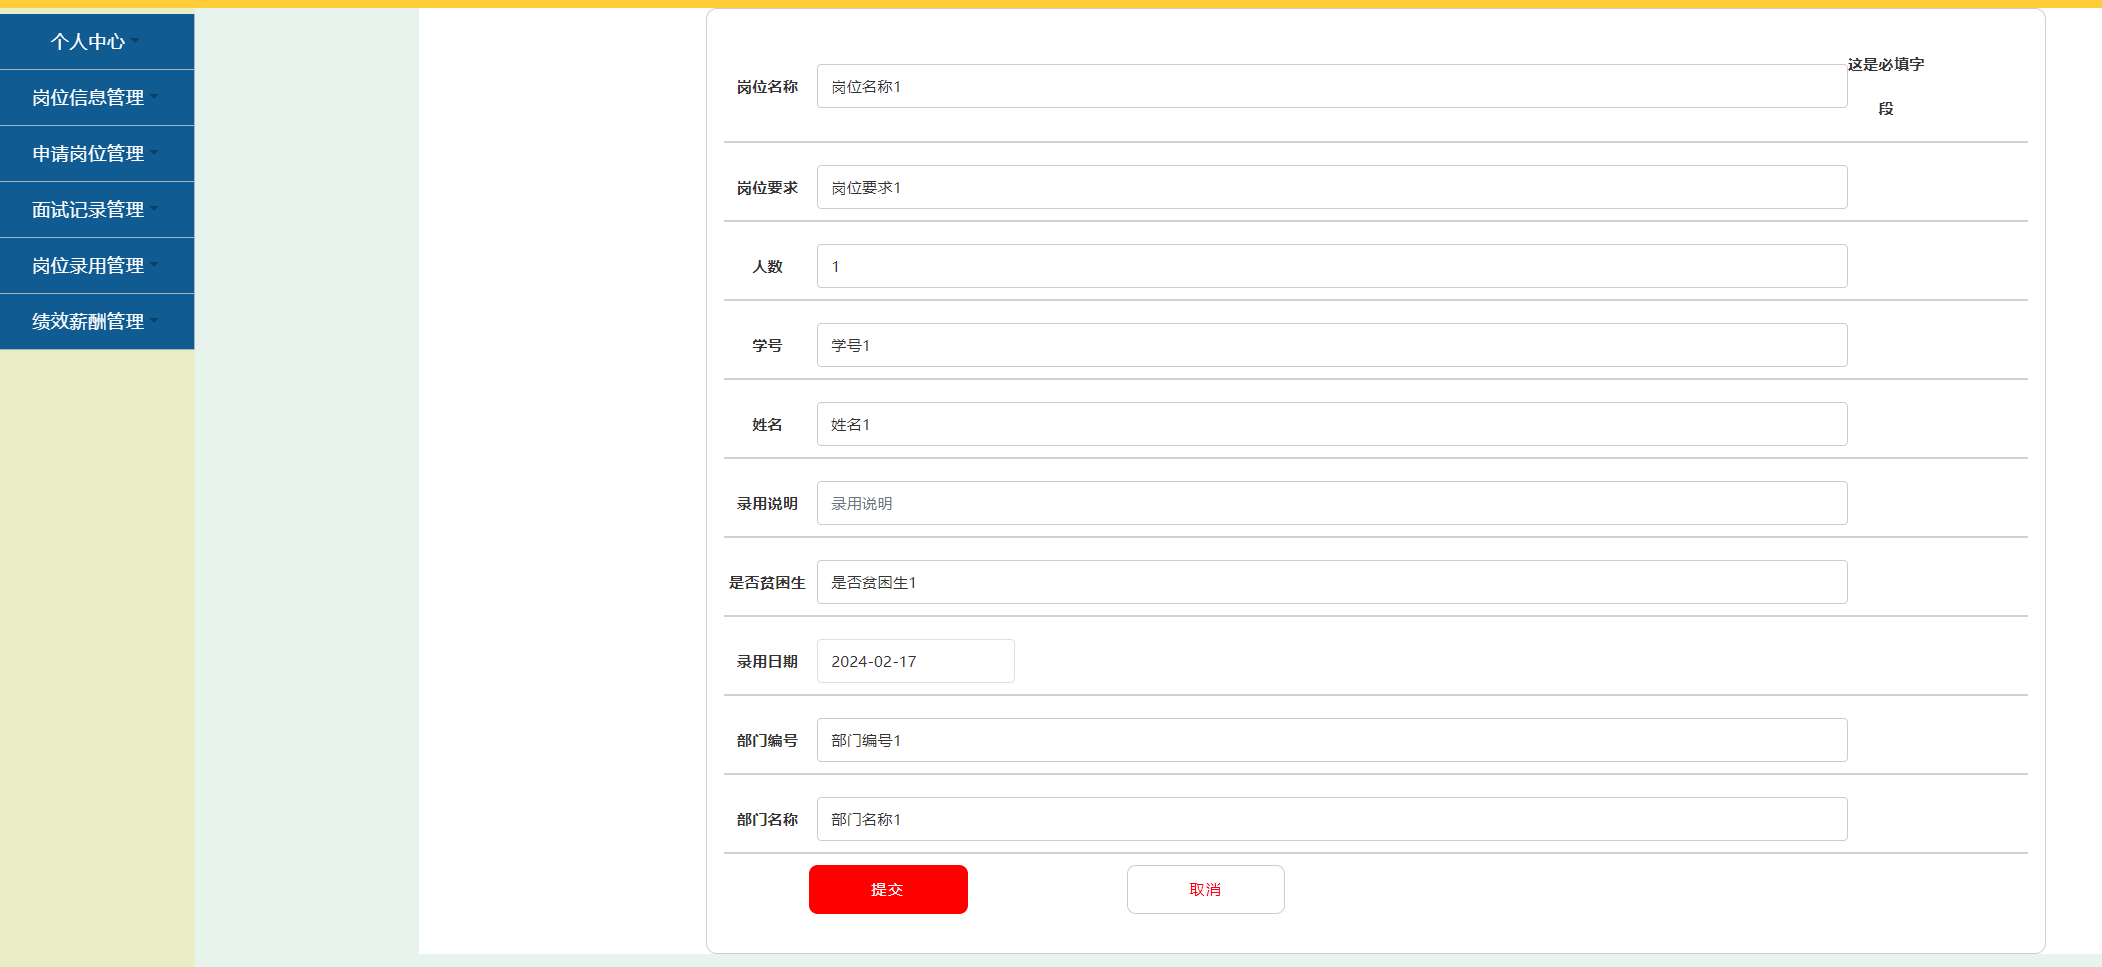
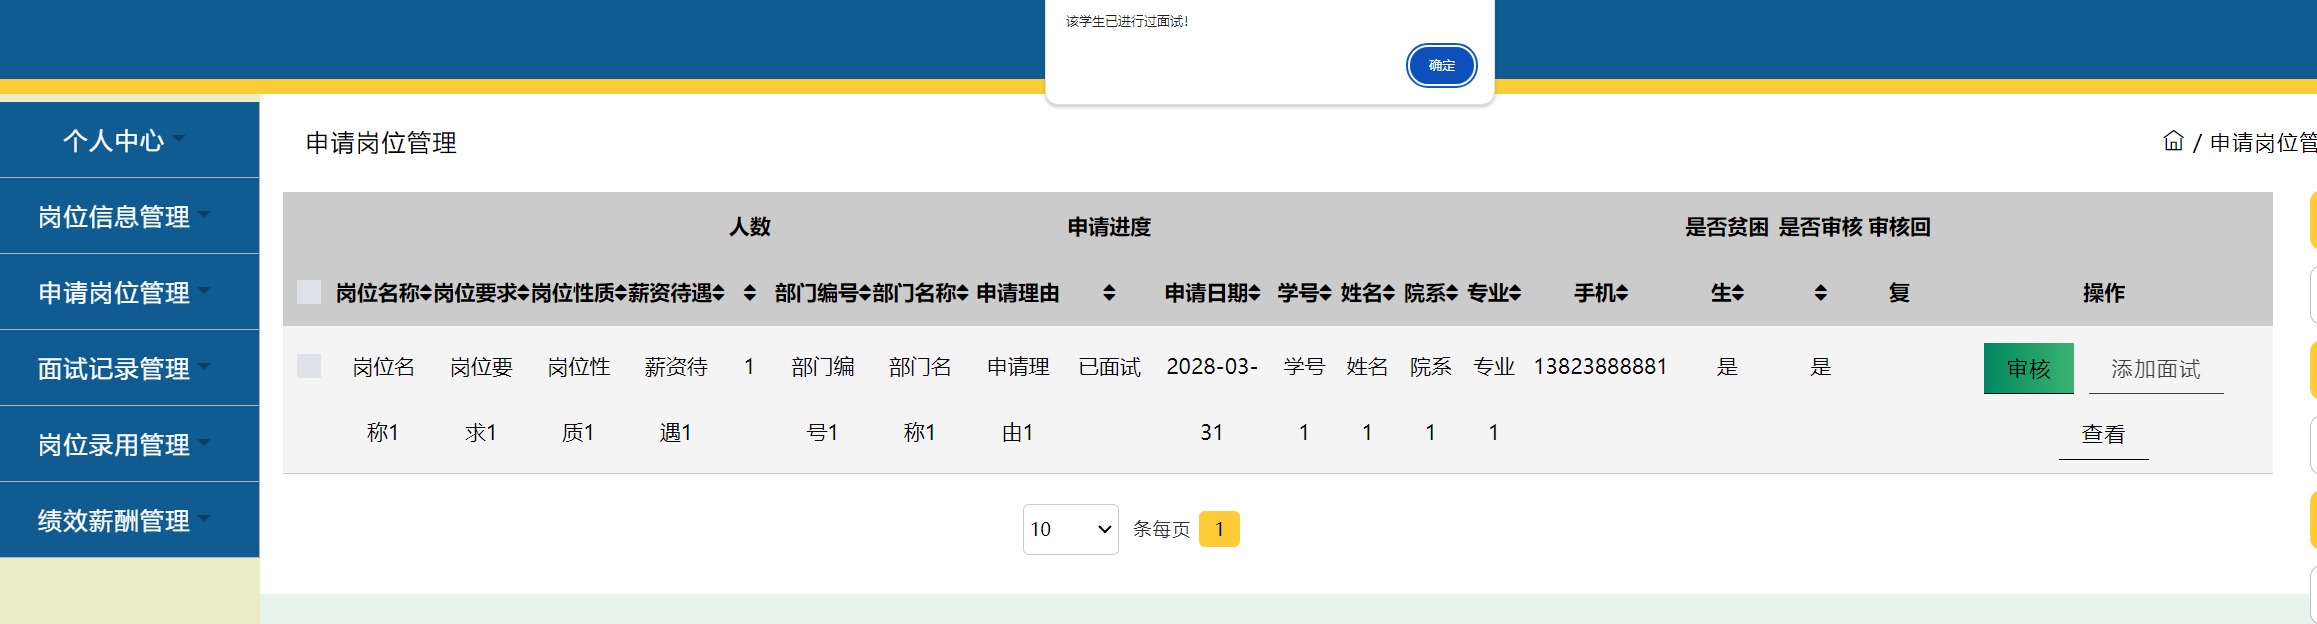
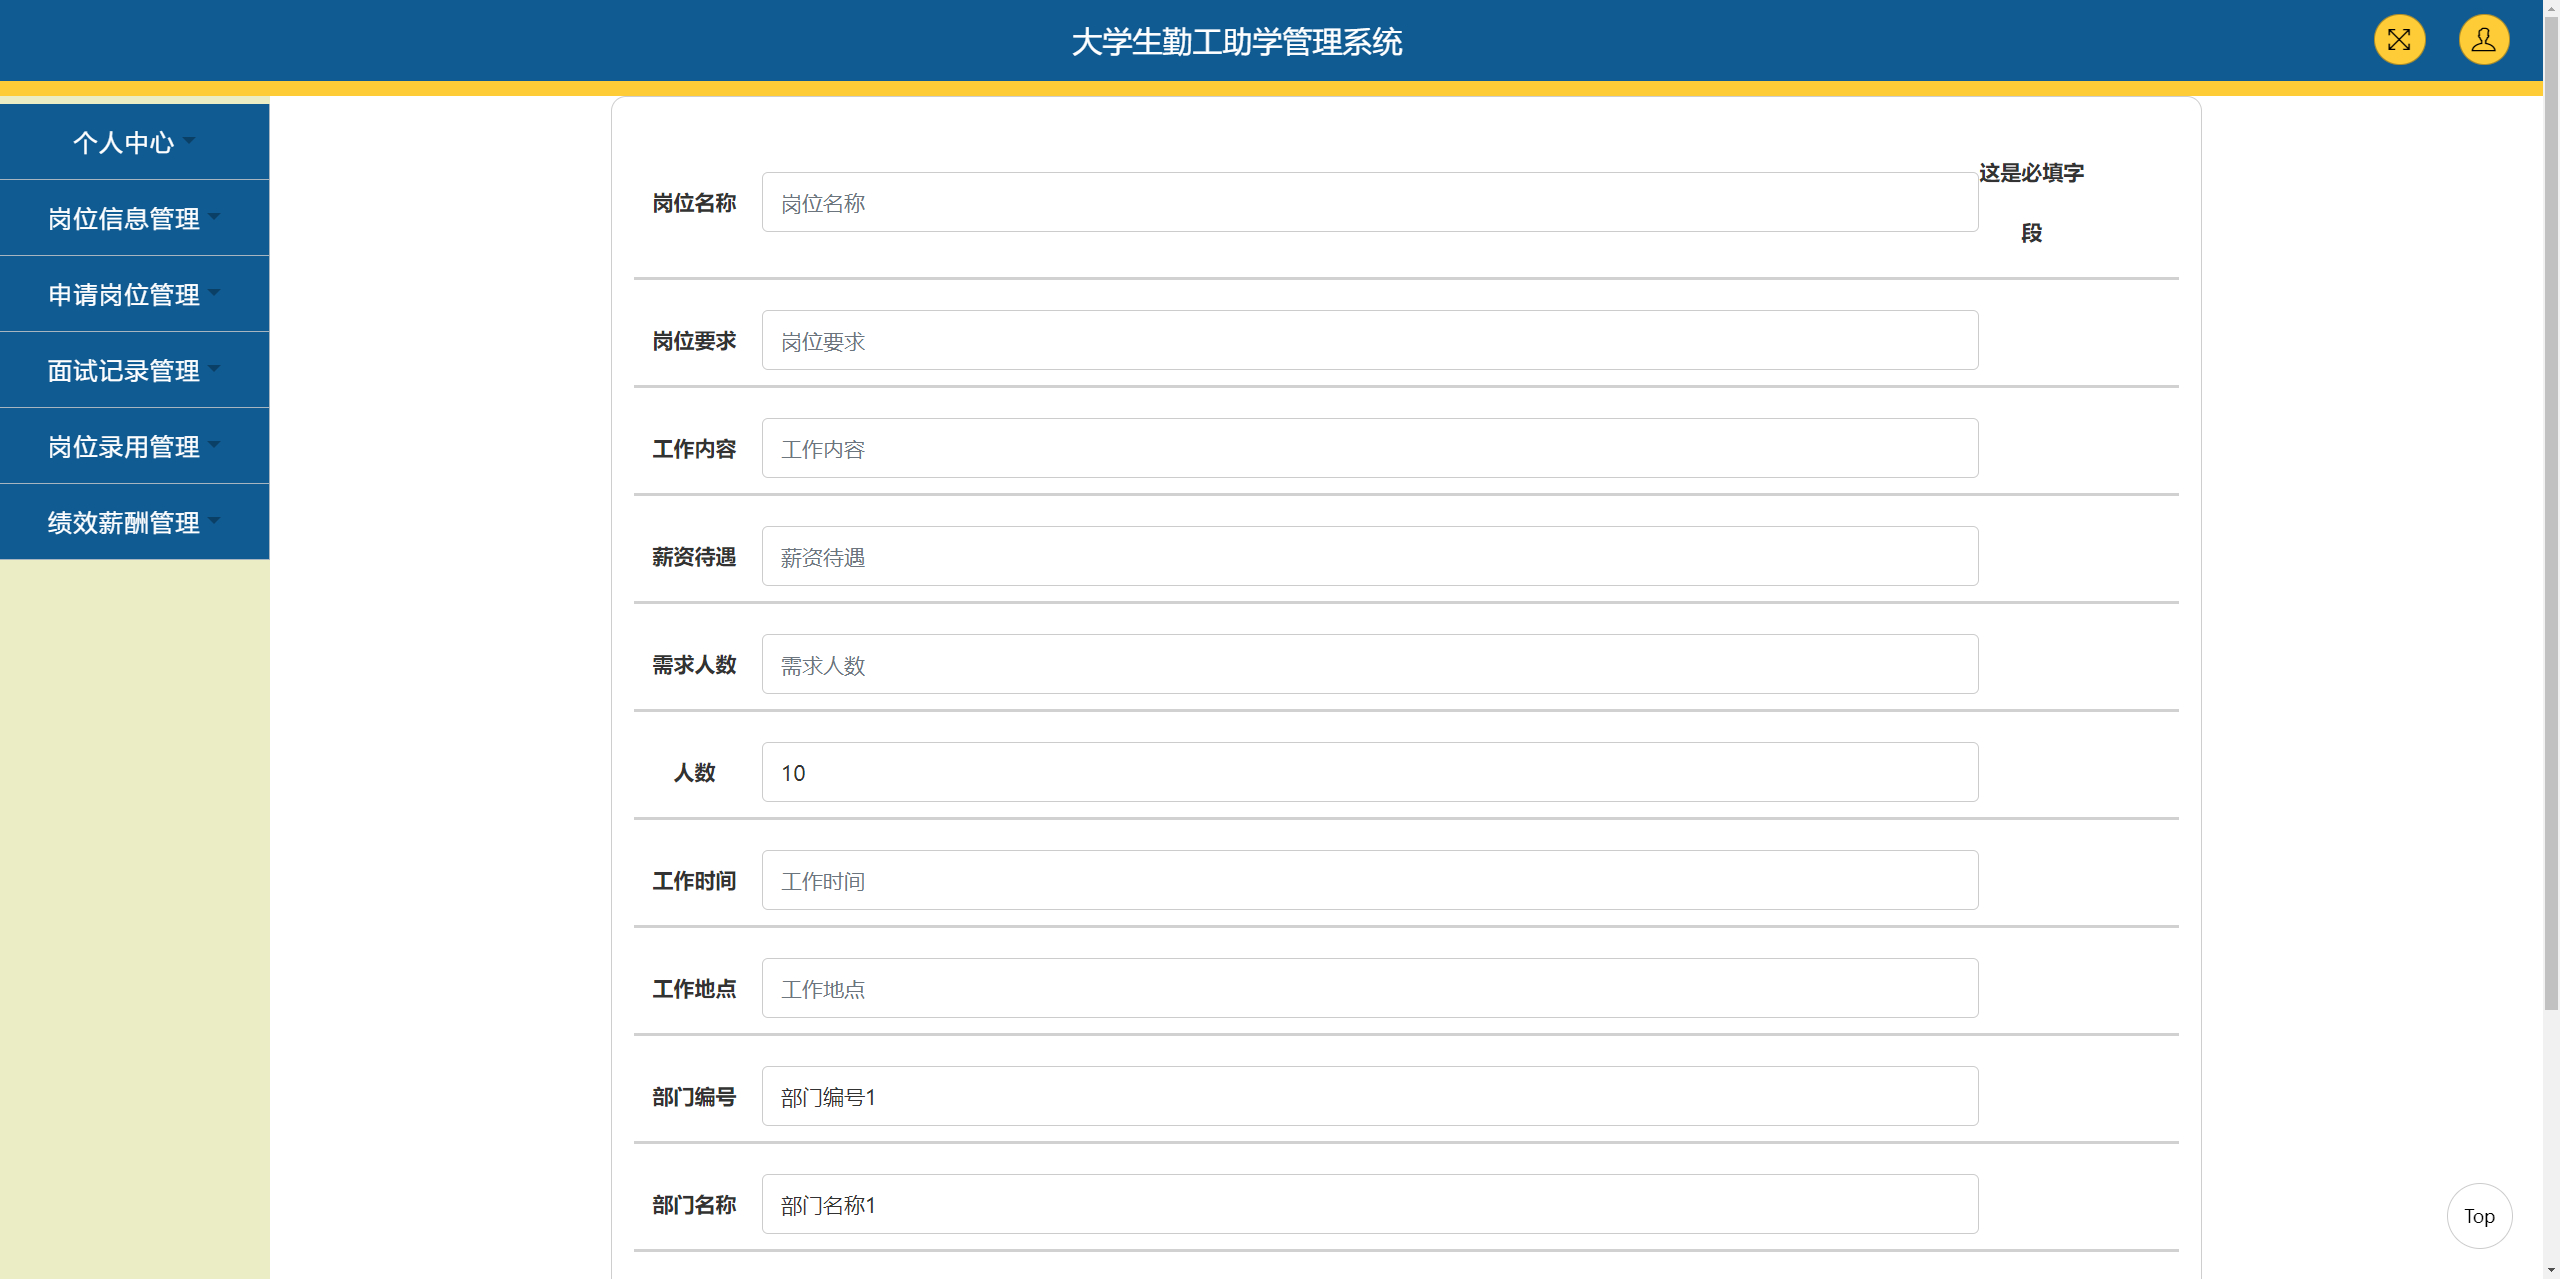
4、功能截图+视频演示+文档目录
4.1 登录

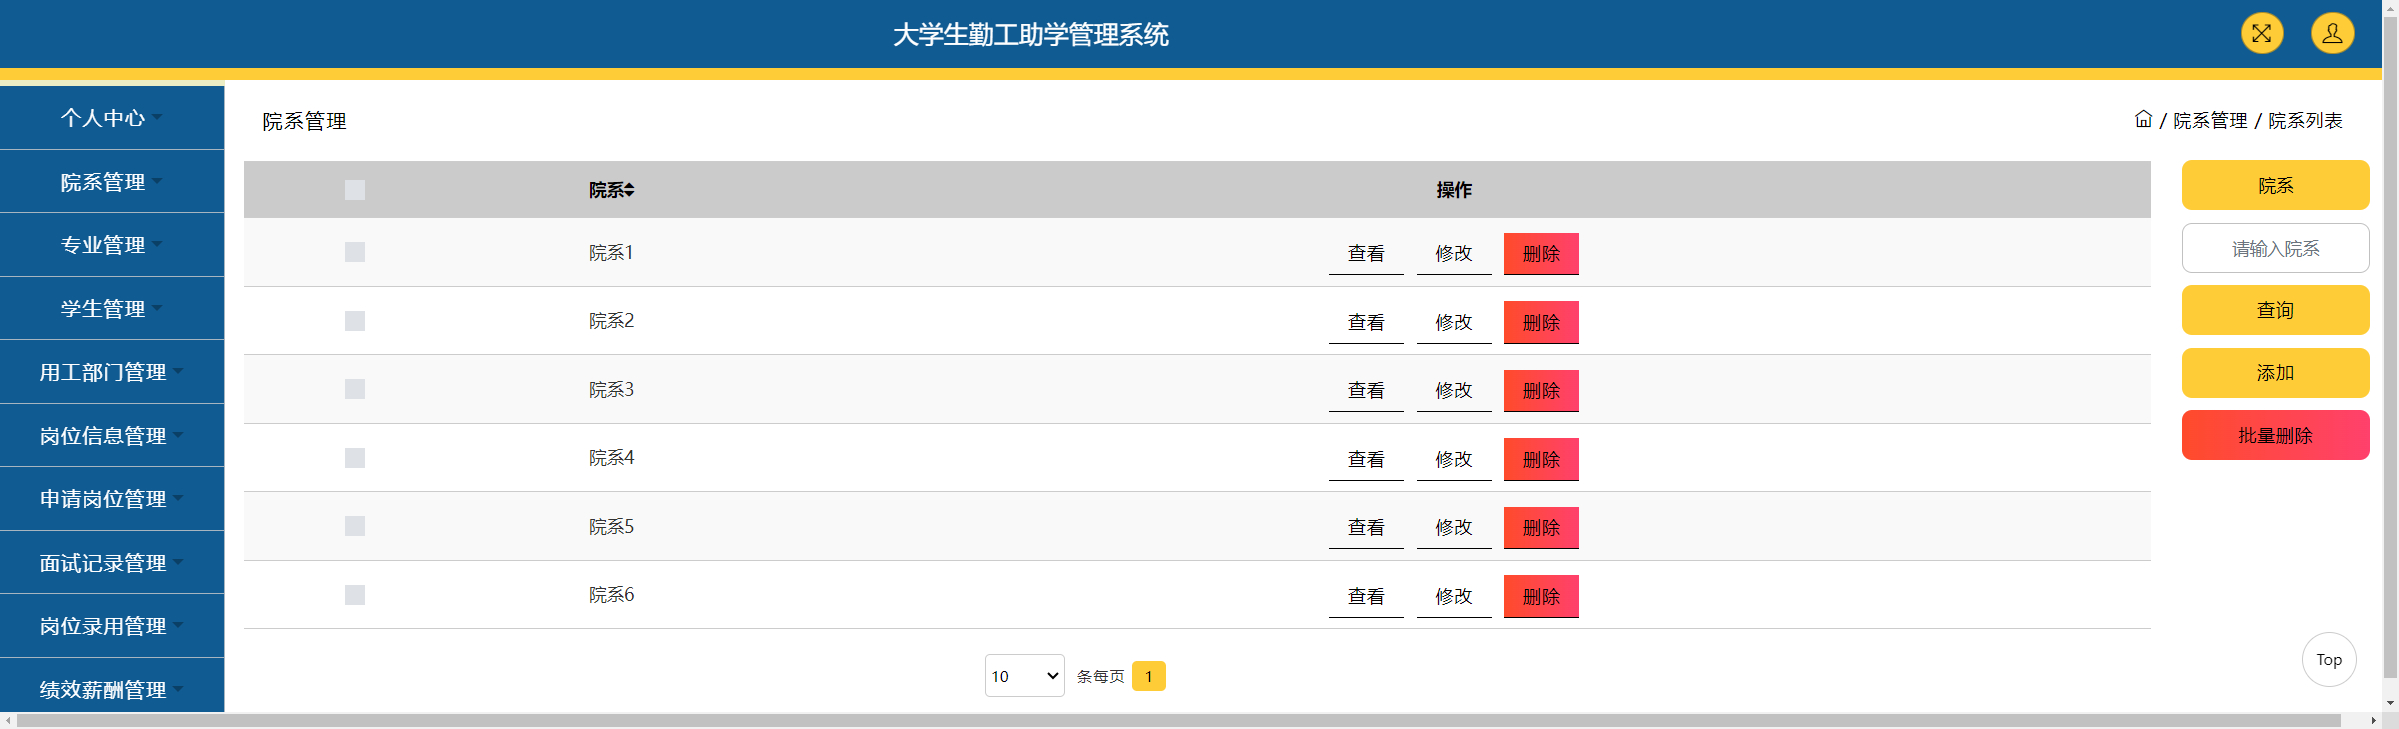
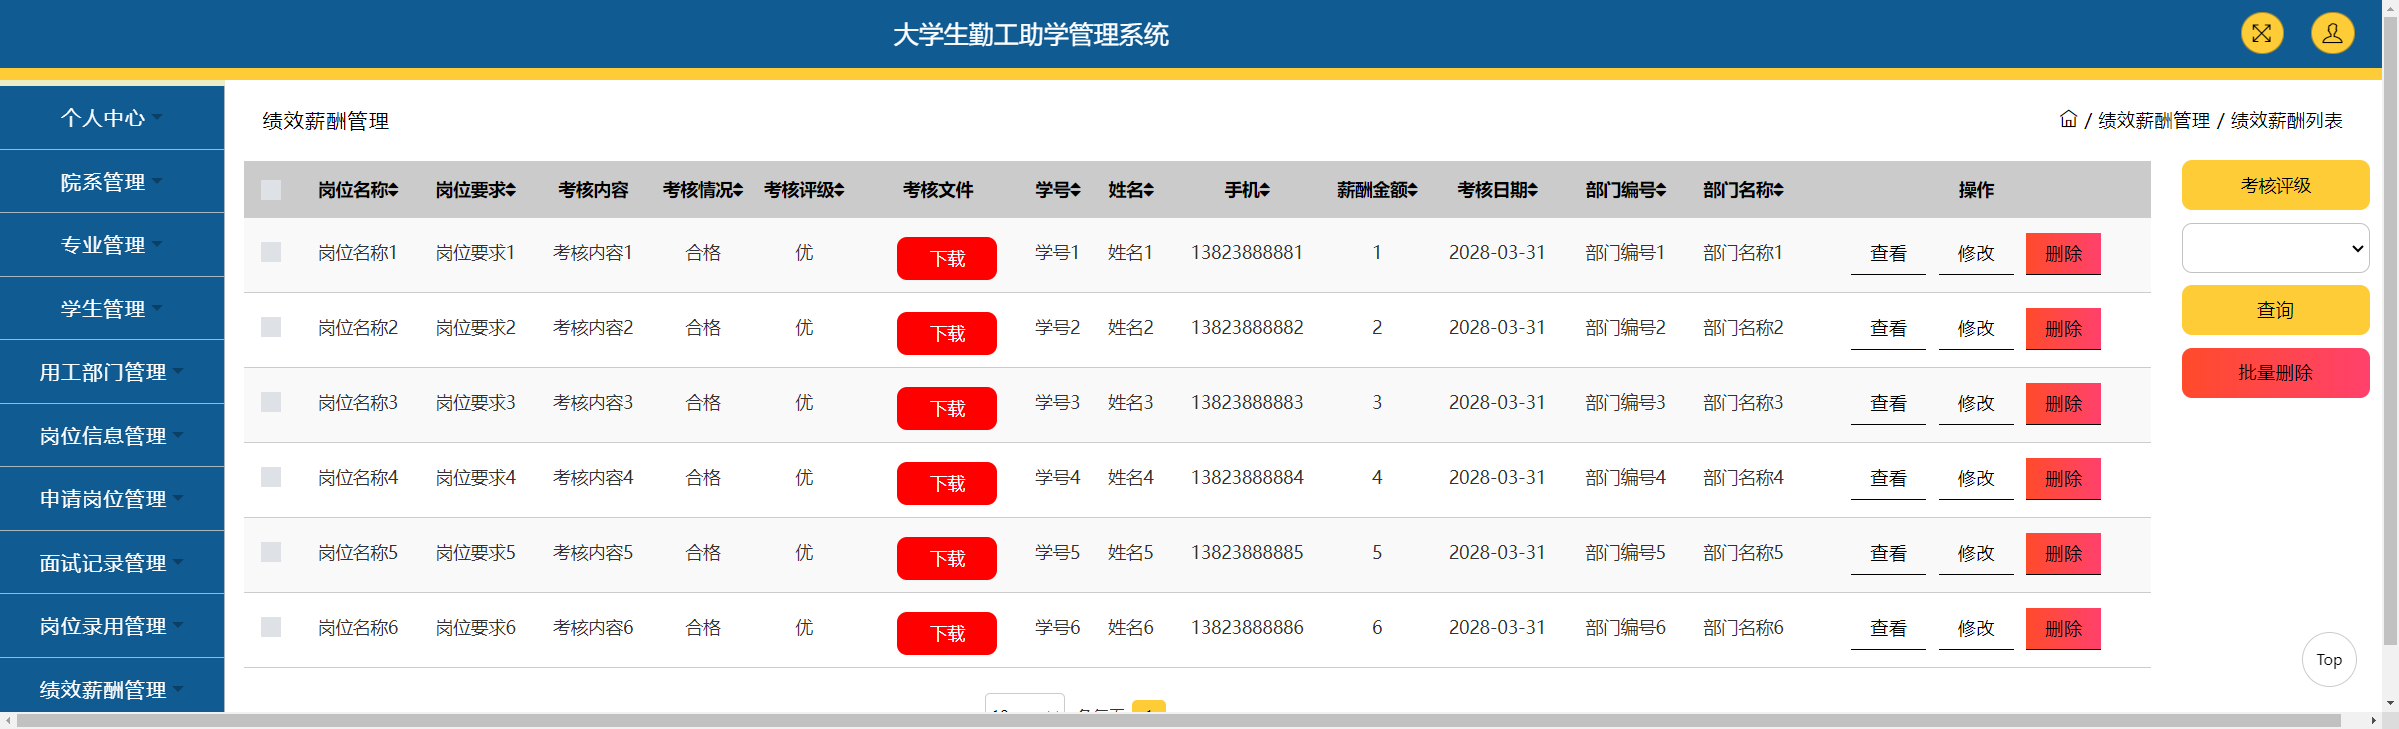
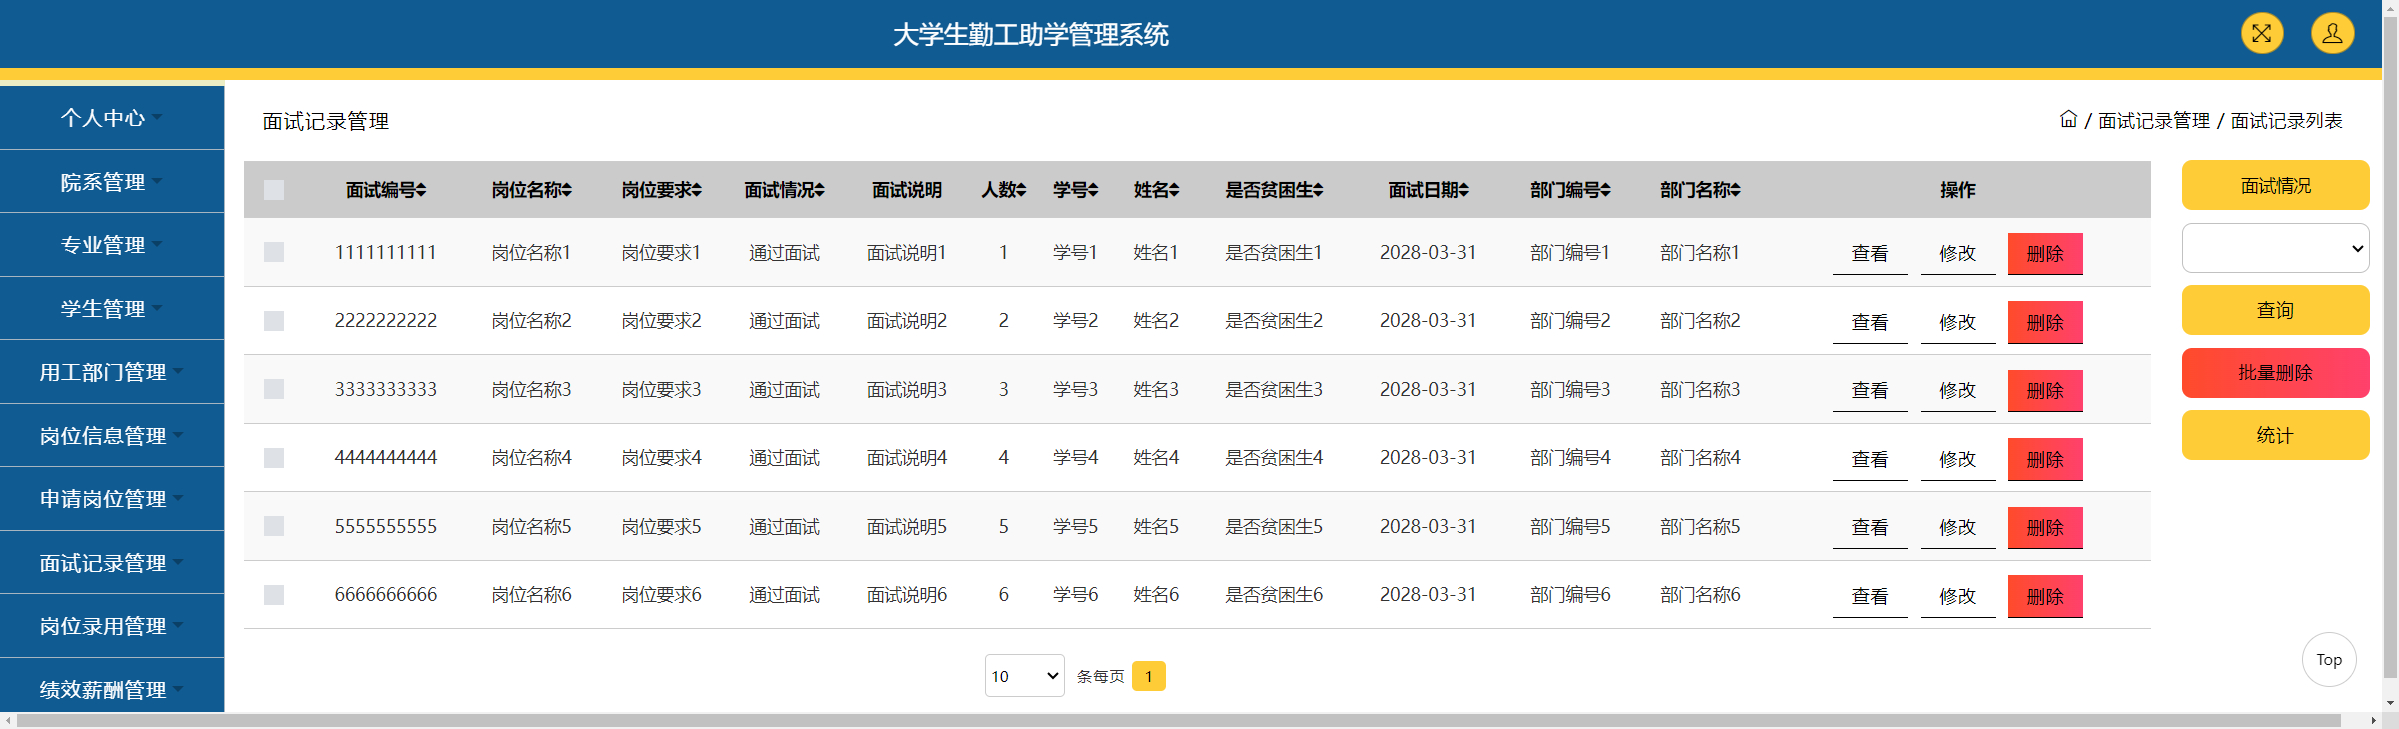
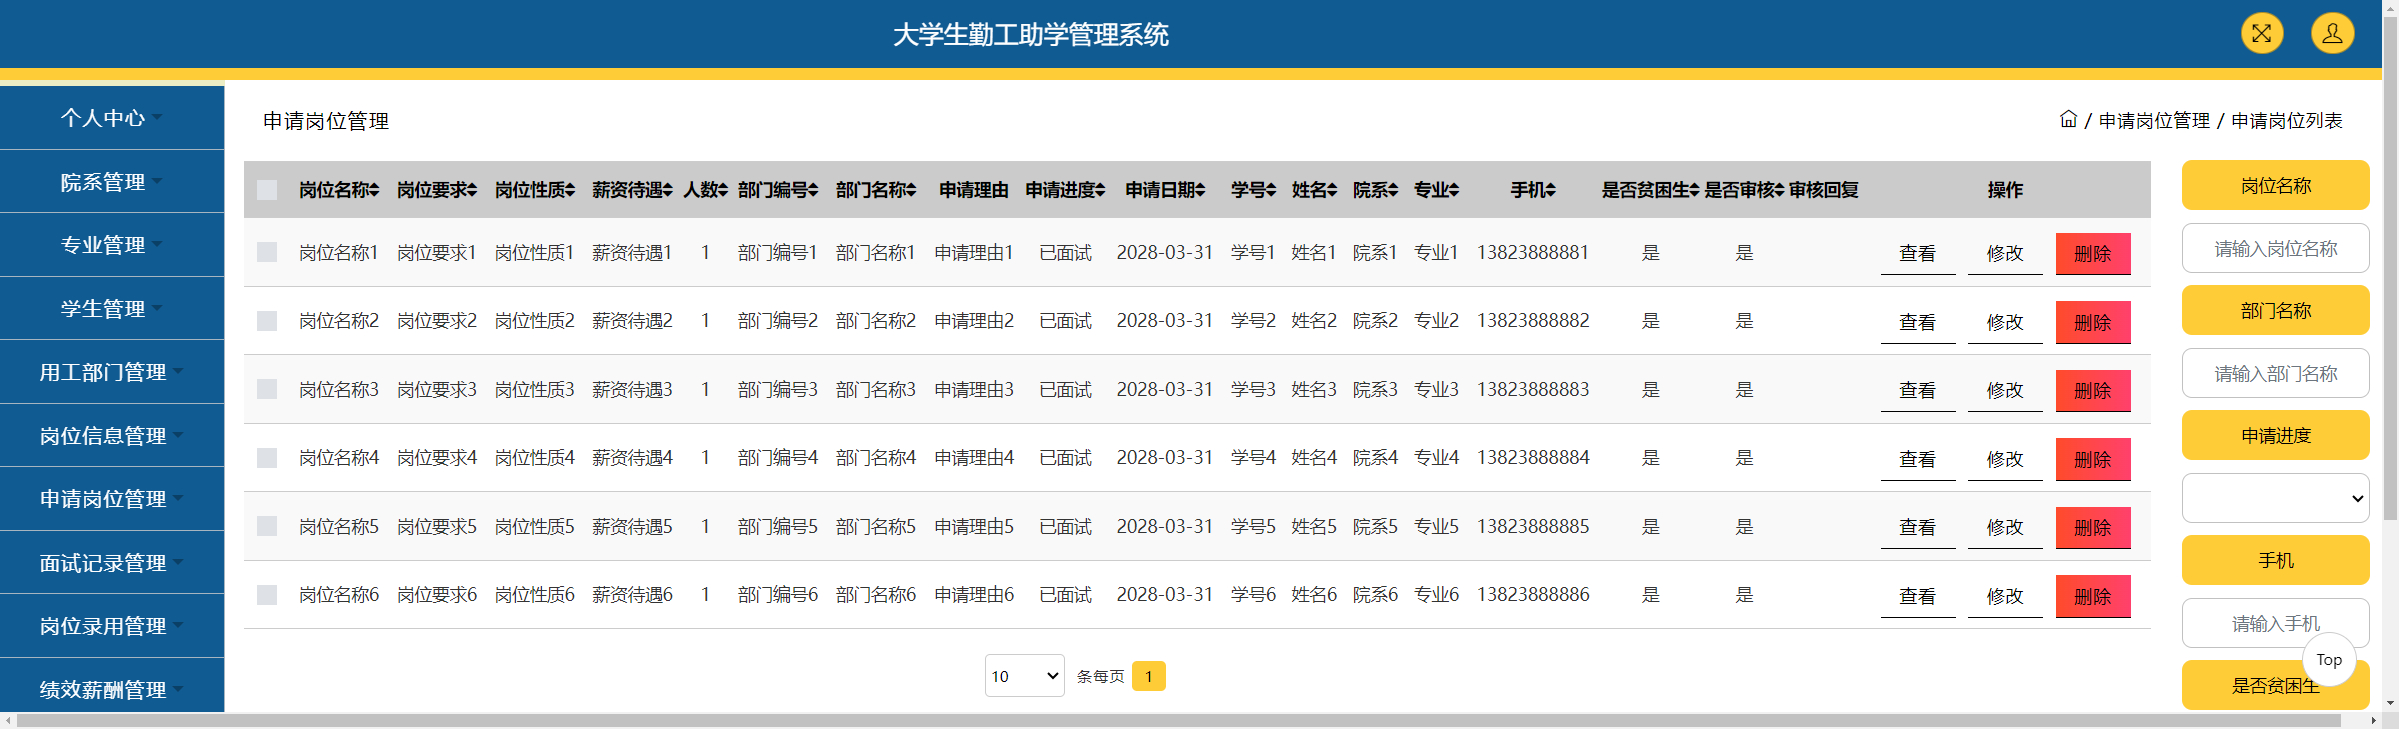
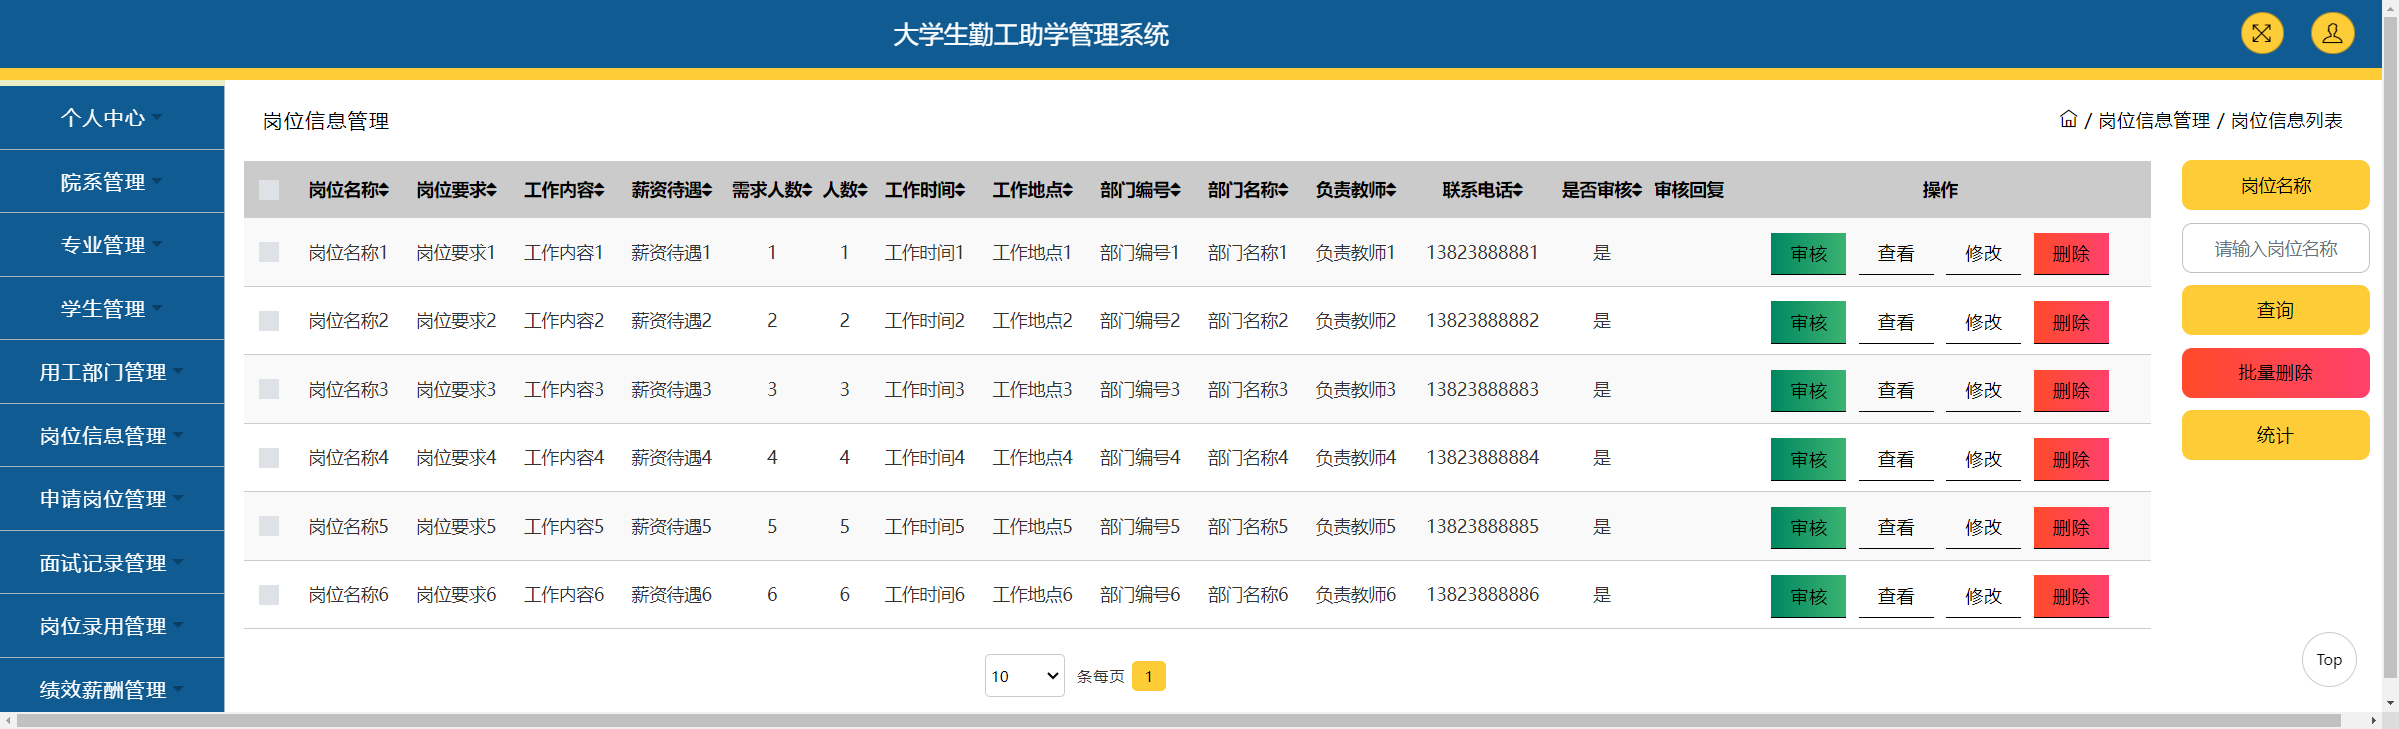
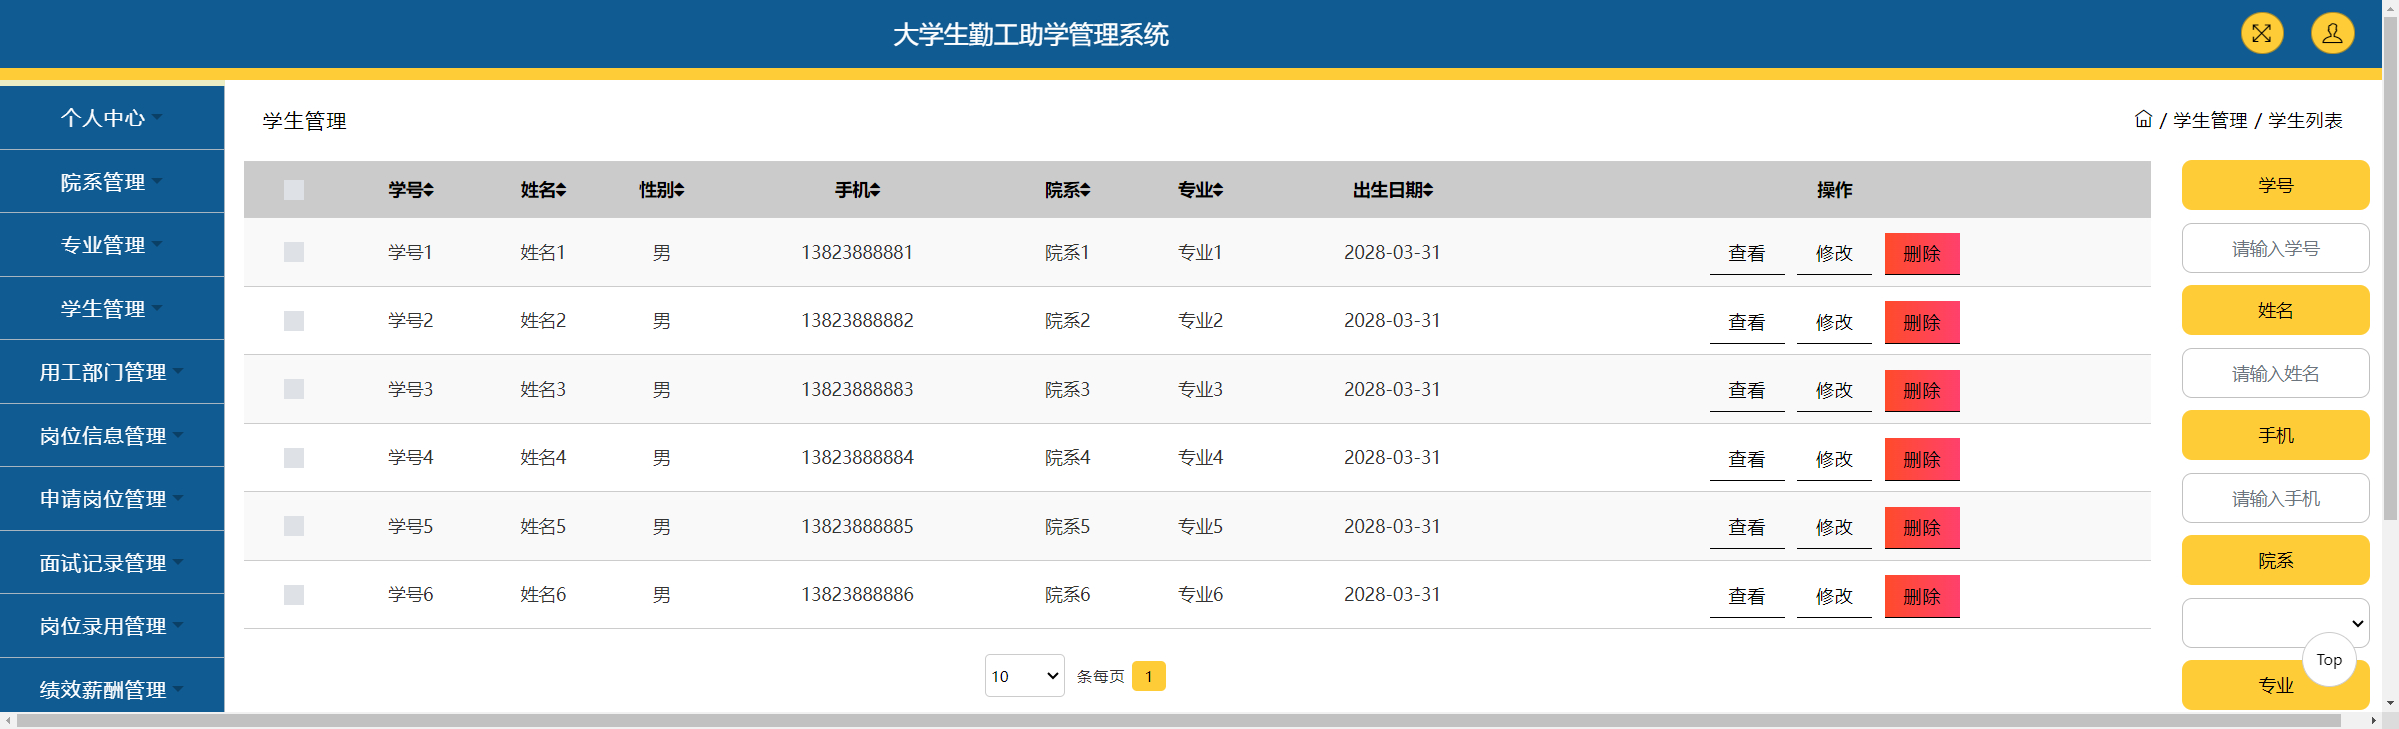
4.2 管理员模块

4.3 用户模块
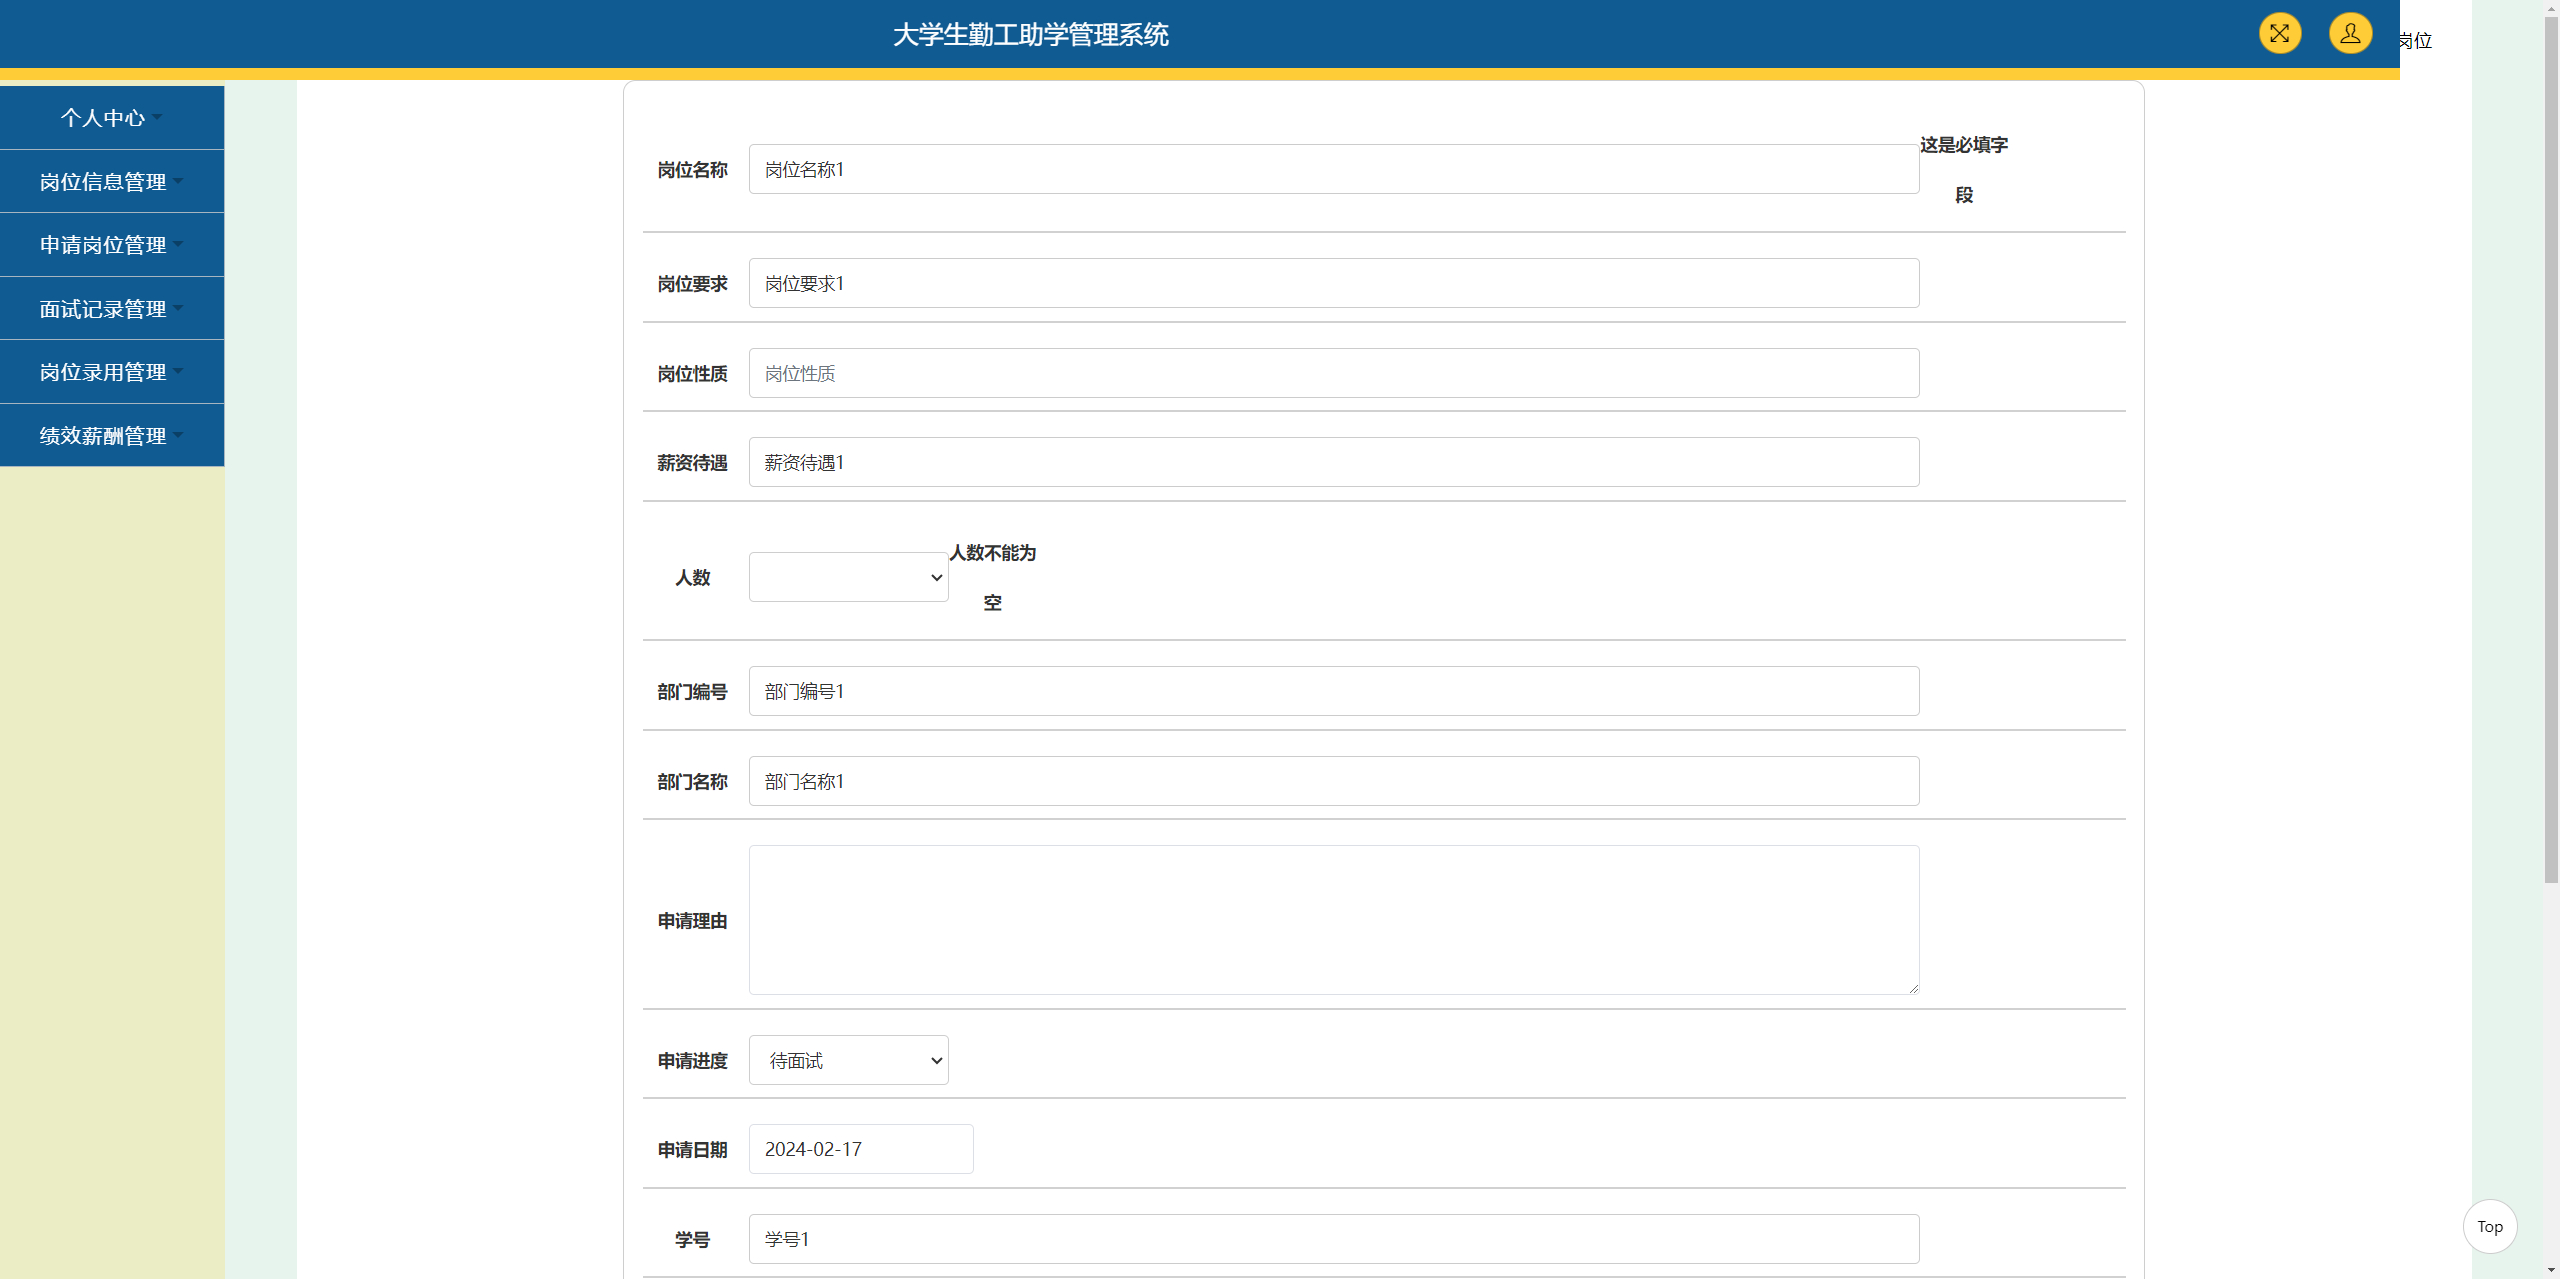
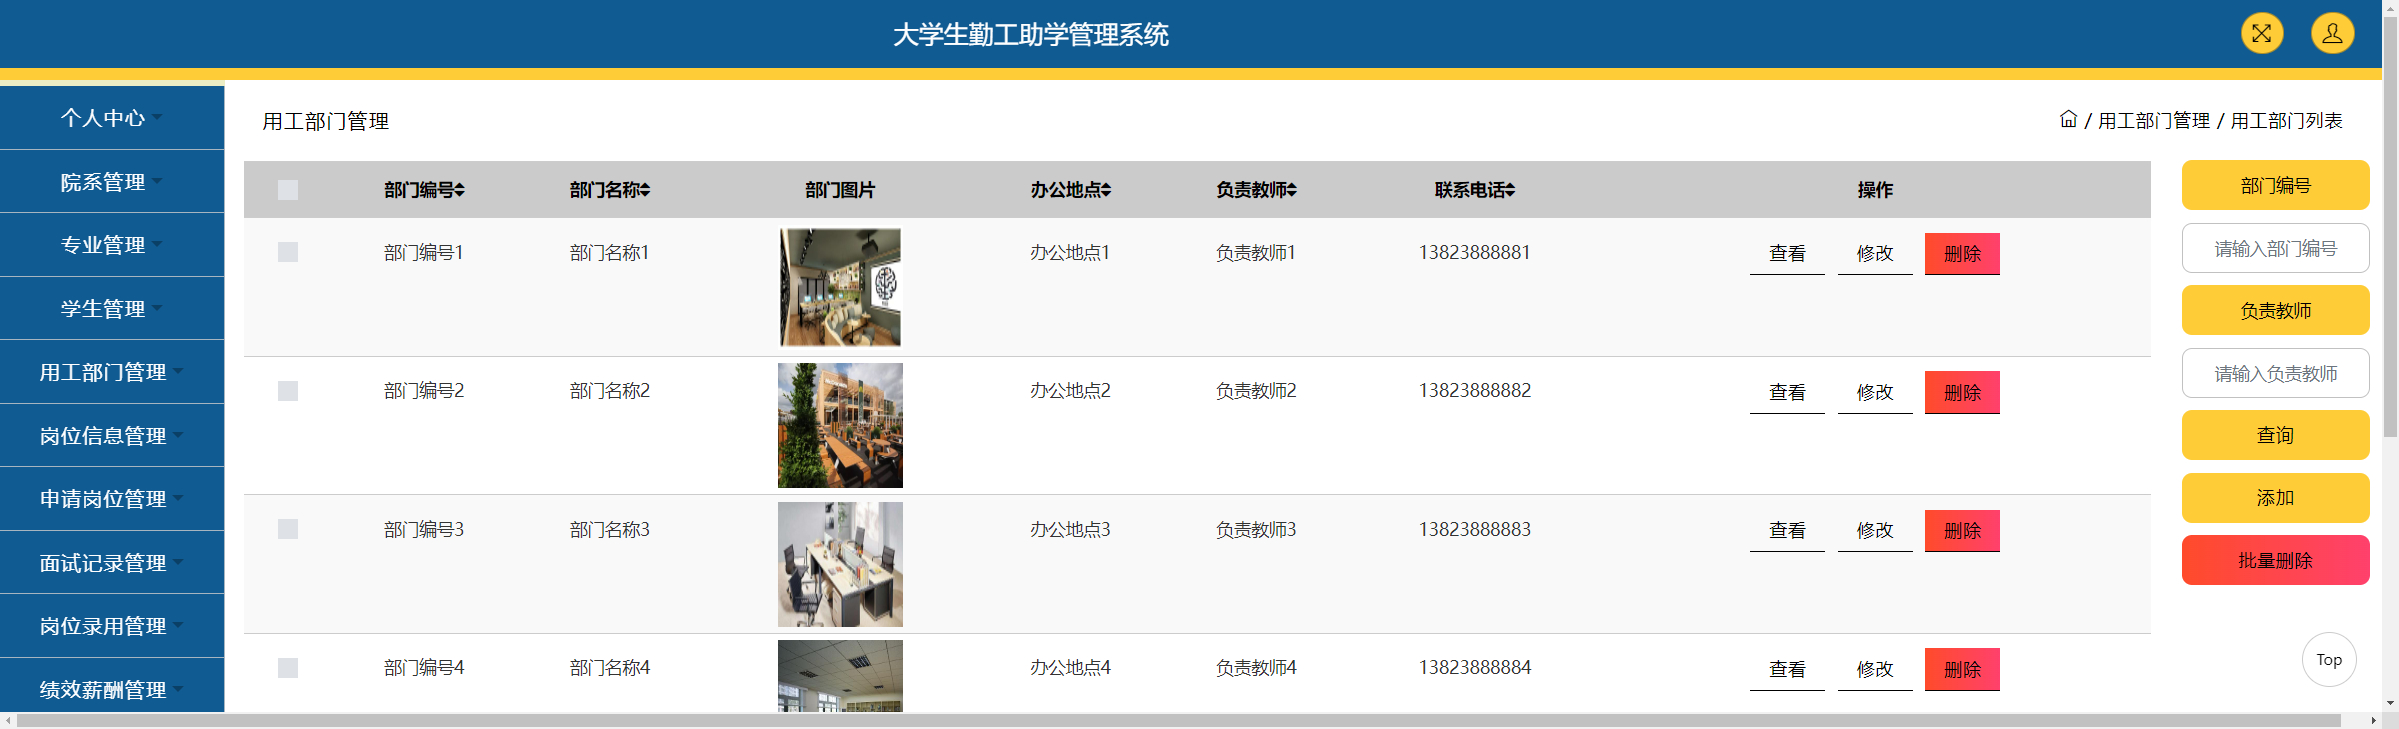
4.4 部门模块
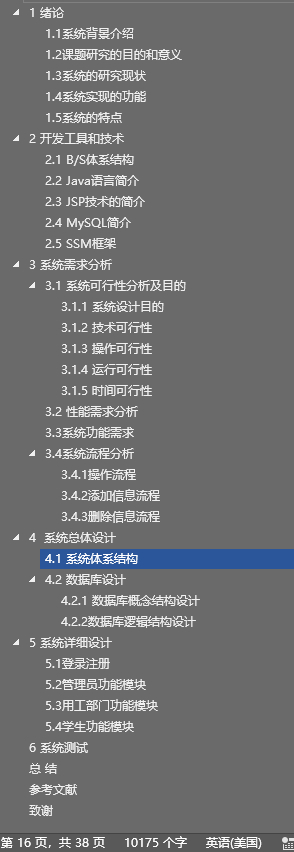
4.5 文档目录
5 、核心代码实现
5.1 配置代码
# Tomcat
server:
    tomcat:
        uri-encoding: UTF-8
    port: 8080
    servlet:
        context-path: /springboot3fy99

spring:
    datasource:
        driverClassName: com.mysql.cj.jdbc.Driver
        url: jdbc:mysql://127.0.0.1:3306/springboot3fy99?useUnicode=true&characterEncoding=utf-8&useJDBCCompliantTimezoneShift=true&useLegacyDatetimeCode=false&serverTimezone=GMT%2B8
        username: root
        password: root

#        driverClassName: com.microsoft.sqlserver.jdbc.SQLServerDriver
#        url: jdbc:sqlserver://127.0.0.1:1433;DatabaseName=springboot3fy99
#        username: sa
#        password: 123456

    servlet:
      multipart:
        max-file-size: 10MB
        max-request-size: 10MB
    resources:
      static-locations: classpath:static/,file:static/

#mybatis
mybatis-plus:
  mapper-locations: classpath*:mapper/*.xml
  #实体扫描,多个package用逗号或者分号分隔
  typeAliasesPackage: com.entity
  global-config:
    #主键类型  0:"数据库ID自增", 1:"用户输入ID",2:"全局唯一ID (数字类型唯一ID)", 3:"全局唯一ID UUID";
    id-type: 1
    #字段策略 0:"忽略判断",1:"非 NULL 判断"),2:"非空判断"
    field-strategy: 2
    #驼峰下划线转换
    db-column-underline: true
    #刷新mapper 调试神器
    refresh-mapper: true
    #逻辑删除配置
    logic-delete-value: -1
    logic-not-delete-value: 0
    #自定义SQL注入器
    sql-injector: com.baomidou.mybatisplus.mapper.LogicSqlInjector
  configuration:
    map-underscore-to-camel-case: true
    cache-enabled: false
    call-setters-on-nulls: true
    #springboot 项目mybatis plus 设置 jdbcTypeForNull (oracle数据库需配置JdbcType.NULL, 默认是Other)
    jdbc-type-for-null: 'null'
5.2 其它核心代码
package com.controller;


import java.util.Arrays;
import java.util.Calendar;
import java.util.Date;
import java.util.Map;

import javax.servlet.http.HttpServletRequest;

import org.springframework.beans.factory.annotation.Autowired;
import org.springframework.stereotype.Controller;
import org.springframework.web.bind.annotation.GetMapping;
import org.springframework.web.bind.annotation.PathVariable;
import org.springframework.web.bind.annotation.PostMapping;
import org.springframework.web.bind.annotation.RequestBody;
import org.springframework.web.bind.annotation.RequestMapping;
import org.springframework.web.bind.annotation.RequestParam;
import org.springframework.web.bind.annotation.ResponseBody;
import org.springframework.web.bind.annotation.RestController;

import com.annotation.IgnoreAuth;
import com.baomidou.mybatisplus.mapper.EntityWrapper;
import com.entity.TokenEntity;
import com.entity.UserEntity;
import com.service.TokenService;
import com.service.UserService;
import com.utils.CommonUtil;
import com.utils.MPUtil;
import com.utils.PageUtils;
import com.utils.R;
import com.utils.ValidatorUtils;

/**
 * 登录相关
 */
@RequestMapping("users")
@RestController
public class UserController{

	@Autowired
	private UserService userService;

	@Autowired
	private TokenService tokenService;

	/**
	 * 登录
	 */
	@IgnoreAuth
	@PostMapping(value = "/login")
	public R login(String username, String password, String captcha, HttpServletRequest request) {
		UserEntity user = userService.selectOne(new EntityWrapper<UserEntity>().eq("username", username));
		if(user==null || !user.getPassword().equals(password)) {
			return R.error("账号或密码不正确");
		}
		String token = tokenService.generateToken(user.getId(),username, "users", user.getRole());
		return R.ok().put("token", token);
	}

	/**
	 * 注册
	 */
	@IgnoreAuth
	@PostMapping(value = "/register")
	public R register(@RequestBody UserEntity user){
//    	ValidatorUtils.validateEntity(user);
    	if(userService.selectOne(new EntityWrapper<UserEntity>().eq("username", user.getUsername())) !=null) {
    		return R.error("用户已存在");
    	}
        userService.insert(user);
        return R.ok();
    }

	/**
	 * 退出
	 */
	@GetMapping(value = "logout")
	public R logout(HttpServletRequest request) {
		request.getSession().invalidate();
		return R.ok("退出成功");
	}

	/**
     * 密码重置
     */
    @IgnoreAuth
	@RequestMapping(value = "/resetPass")
    public R resetPass(String username, HttpServletRequest request){
    	UserEntity user = userService.selectOne(new EntityWrapper<UserEntity>().eq("username", username));
    	if(user==null) {
    		return R.error("账号不存在");
    	}
    	user.setPassword("123456");
        userService.update(user,null);
        return R.ok("密码已重置为:123456");
    }

	/**
     * 列表
     */
    @RequestMapping("/page")
    public R page(@RequestParam Map<String, Object> params,UserEntity user){
        EntityWrapper<UserEntity> ew = new EntityWrapper<UserEntity>();
    	PageUtils page = userService.queryPage(params, MPUtil.sort(MPUtil.between(MPUtil.allLike(ew, user), params), params));
        return R.ok().put("data", page);
    }

	/**
     * 列表
     */
    @RequestMapping("/list")
    public R list( UserEntity user){
       	EntityWrapper<UserEntity> ew = new EntityWrapper<UserEntity>();
      	ew.allEq(MPUtil.allEQMapPre( user, "user"));
        return R.ok().put("data", userService.selectListView(ew));
    }

    /**
     * 信息
     */
    @RequestMapping("/info/{id}")
    public R info(@PathVariable("id") String id){
        UserEntity user = userService.selectById(id);
        return R.ok().put("data", user);
    }

    /**
     * 获取用户的session用户信息
     */
    @RequestMapping("/session")
    public R getCurrUser(HttpServletRequest request){
    	Long id = (Long)request.getSession().getAttribute("userId");
        UserEntity user = userService.selectById(id);
        return R.ok().put("data", user);
    }

    /**
     * 保存
     */
    @PostMapping("/save")
    public R save(@RequestBody UserEntity user){
//    	ValidatorUtils.validateEntity(user);
    	if(userService.selectOne(new EntityWrapper<UserEntity>().eq("username", user.getUsername())) !=null) {
    		return R.error("用户已存在");
    	}
        userService.insert(user);
        return R.ok();
    }

    /**
     * 修改
     */
    @RequestMapping("/update")
    public R update(@RequestBody UserEntity user){
//        ValidatorUtils.validateEntity(user);
    	UserEntity u = userService.selectOne(new EntityWrapper<UserEntity>().eq("username", user.getUsername()));
    	if(u!=null && u.getId()!=user.getId() && u.getUsername().equals(user.getUsername())) {
    		return R.error("用户名已存在。");
    	}
        userService.updateById(user);//全部更新
        return R.ok();
    }

    /**
     * 删除
     */
    @RequestMapping("/delete")
    public R delete(@RequestBody Long[] ids){
        userService.deleteBatchIds(Arrays.asList(ids));
        return R.ok();
    }
}


 238
238


 被折叠的 条评论
为什么被折叠?
被折叠的 条评论
为什么被折叠?
 到【灌水乐园】发言


