


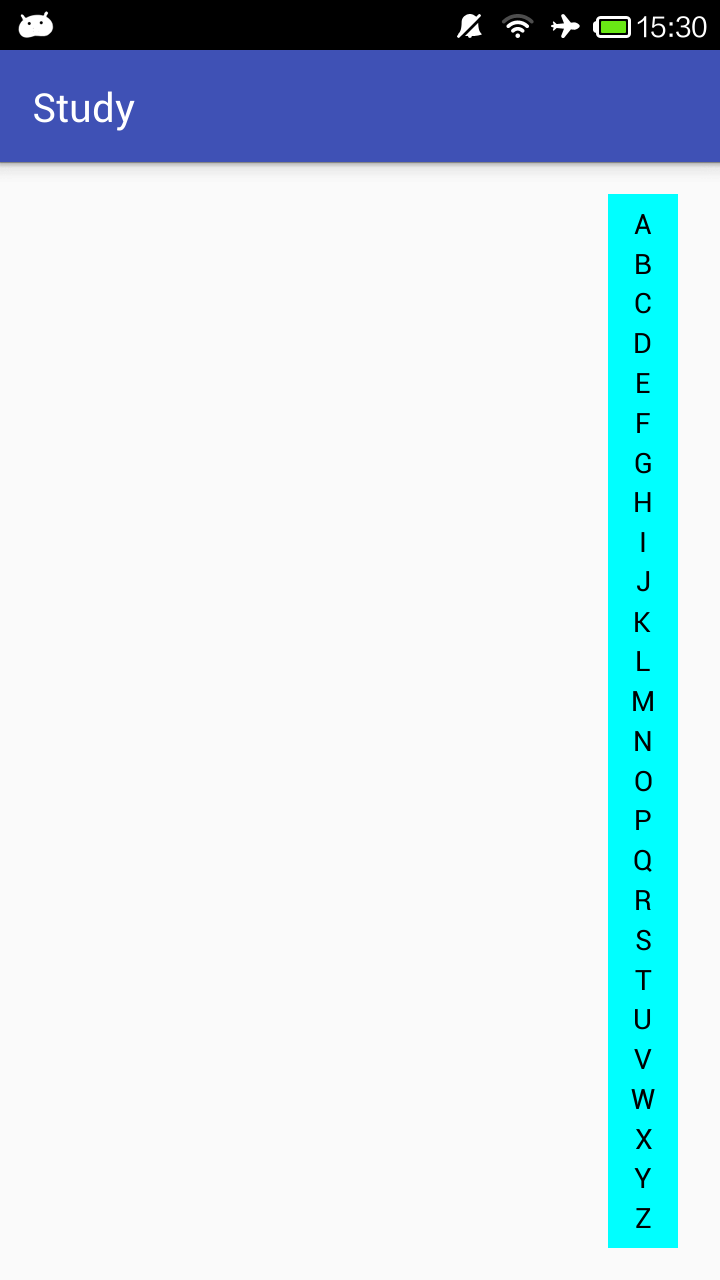
在联系人,好友等列表中,为了能够快速的根据名称查找到相应的联系人或者好友,通常会建立一个可以根据字母快速定位名称的View。如下图中右边字母表所示:

1.自定义View
关于自定义View需要注意的事项:
- 让View支持padding
- 让View支持wrap_content
- 如果是View,只需重写onDraw()方法;如果是ViewGroup,有必要重写onMeasure()和onLayout()方法。
在自定义字母索引View中,为了与普通的View有相同的属性,当然需要支持padding;对于支持wrap_content,为了防止在这种自定义View情况下,使用wrap_content就相当于match_parent的情形,可以在onMeasure()中定义一个最小的默认的宽高度,以避免View显示不正常;对于字母索引View需要重写的方法,它是一个View,所以只需重写onDraw()方法。
2.绘制字母
绘制字母时应该知道相关的信息:
- 字母的起始xy坐标
- 字母的大小
绘制字母的要求:
- 居中显示
- 可以改变字母的字体颜色
- 可以改变字母的字体大小
下面为onDraw()方法中,绘制字母表的代码:
        int paddingLeft = getPaddingLeft();
        //view实际宽度
        int width = getWidth() - paddingLeft - getPaddingRight();
        //绘制字符时的起始x坐标
        float startX = paddingLeft + (float) width / 2;

        int paddingTop = getPaddingTop();
        //view实际高
        int height = getHeight() - paddingTop - getPaddingBottom();
        int length = mCharacters.length();
        //每个字符所拥有的高度
        float characterHeight = (float) height / length;
        //绘制字符时的起始y坐标
        float startY = paddingTop + characterHeight / 2;
        //绘制的字符的界限
        Rect bounds = new Rect();
        mCharacterYValues = new int[length + 1];
        for (int i = 0; i < length; i++) {
            mPaint.getTextBounds(mCharacters, i, i + 1, bounds);
            float x = startX - (float) (bounds.left + bounds.right) / 2;
            float y = startY + i * characterHeight - (float) (bounds.top + bounds.bottom) / 2;
            canvas.drawText(mCharacters, i, i + 1, x, y, mPaint);
            //记录每个字符起始的y坐标值
            mCharacterYValues[i] = (int) (paddingTop + i * characterHeight);
        }
        //最后一个字符结束的y坐标值
        mCharacterYValues[length] = (int) (paddingTop + length * characterHeight);
绘制字母的步骤:
1.求view可绘制的实际宽高度(去除padding)
- view实际宽度width = getWidth() - getPaddingLeft()- getPaddingRight();
- view实际高度height = getHeight() - getPaddingTop()- getPaddingBottom();
2.求字母的宽高度
- 绘制的字符的界限 Rect bounds = new Rect();
mPaint.getTextBounds(mCharacters, i, i + 1, bounds); - 字体宽度bounds.left + bounds.right;
- 字体高度bounds.top + bounds.bottom
3.绘制字母
- 绘制字符时的起始x坐标startX = paddingLeft + (float) width / 2;
- 绘制字符时的起始y坐标startY = paddingTop + characterHeight / 2;(每个字符所拥有的高度characterHeight = (float) height/mCharacters.length())
- 绘制字符
float x = startX - (float) (bounds.left + bounds.right) / 2;
float y = startY + i * characterHeight - (float) (bounds.top + bounds.bottom) / 2;
canvas.drawText(mCharacters, i, i + 1, x, y, mPaint);
效果图:
4.处理View触摸事件
1.定义触摸事件监听接口
    /**
     * 触摸CharacterView事件的监听接口
     */
    public interface OnCharacterTouchListener {

        /**
         * 点击字符回调的方法
         *
         * @param view CharacterView
         * @param c    点击的字符
         */
        void onDown(View view, char c);

        /**
         * 在字符表上移动回调的方法
         *
         * @param view CharacterView
         * @param c    当前手指触摸的字符
         */
        void onMove(View view, char c);

    }
2.对View的触摸事件的处理
    /**
     * 设置CharacterView的触摸监听器
     *
     * @param listener CharacterView触摸监听器
     */
    public void setOnCharacterTouchListener(final OnCharacterTouchListener listener) {


        if (listener == null) {
            setOnTouchListener(null);
            return;
        }

        setOnTouchListener(new View.OnTouchListener() {
            char lastCharacter = ' ';

            @Override
            public boolean onTouch(View view, MotionEvent motionEvent) {
                int yDown = (int) motionEvent.getY();
                if (yDown > mCharacterYValues[0] && yDown < mCharacterYValues[mCharacterYValues.length - 1]) {
                    char c = findCharacter(yDown);
                    switch (motionEvent.getAction()) {
                        case MotionEvent.ACTION_DOWN:
                            listener.onDown(view, c);
                            break;
                        case MotionEvent.ACTION_MOVE:
                            if (lastCharacter == ' ' || lastCharacter != c) {
                                listener.onMove(view, c);
                                lastCharacter = c;
                            }
                            break;
                        case MotionEvent.ACTION_UP:
                            break;
                    }
                }
                return true;
            }
        });
    }

    /**
     * 根据坐标值找到对应的字符
     *
     * @param yValue y坐标值
     * @return 相应的字符
     */
    private char findCharacter(int yValue) {
        int low = 0, high = mCharacterYValues.length - 1;
        int lastMid = 0;
        while (low <= high) {
            int mid = (low + high) / 2;
            lastMid = mid;
            if (mCharacterYValues[mid] == yValue) {
                return mCharacters.charAt(mid);
            } else if (mCharacterYValues[mid] < yValue) {
                low = mid + 1;
            } else {
                high = mid - 1;
            }
        }
        //如果最后一次比较是大于目标值,则需要选择前一个下标
        if (mCharacterYValues[lastMid] > yValue) {
            lastMid -= 1;
        }
        return mCharacters.charAt(lastMid);
    }
主体思想:在绘制字符表的时候,记录每一个字符的起始y坐标值,然后在触摸事件中,把得到的y坐标值,与记录的所有记录的y坐标值进行比较,得到与触摸事件中的y坐标值最相近的一个y坐标值,就可找到当前触摸的字符。
例如: . A . B . C . D . E . . . Z .
在绘制的时候记录从A前面的一个y坐标值到Z最后的一个y坐标值,在查找的时候采用二分查找算法,找到触摸的y坐标值落在的区间,这个区间所代表的就是相应的字符。
//记录每个字符起始的y坐标值
mCharacterYValues[i] = (int) (paddingTop + i * characterHeight);
//最后一个字符结束的y坐标值
mCharacterYValues[length] = (int) (paddingTop + length * characterHeight);5.设置默认的宽度
重写onMeasure()方法
@Override
protected void onMeasure(int widthMeasureSpec, int heightMeasureSpec) {
super.onMeasure(widthMeasureSpec, heightMeasureSpec);
//设置默认的宽度
int widthSpecMode = MeasureSpec.getMode(widthMeasureSpec);
int heightSpecSize = MeasureSpec.getSize(heightMeasureSpec);
if (widthSpecMode == MeasureSpec.AT_MOST) {
final int defaultWidth = 80;
setMeasuredDimension(defaultWidth, heightSpecSize);
}
}不设置默认的高度的原因是:当View的layout_height=”wrap_content”时,可以让它匹配父View的高度。
6.具体实例
布局文件activity_main.xml:
<?xml version="1.0" encoding="utf-8"?>
<FrameLayout xmlns:android="http://schemas.android.com/apk/res/android"
xmlns:tools="http://schemas.android.com/tools"
android:id="@+id/root_layout"
android:layout_width="match_parent"
android:layout_height="match_parent"
android:paddingBottom="@dimen/activity_vertical_margin"
android:paddingLeft="@dimen/activity_horizontal_margin"
android:paddingRight="@dimen/activity_horizontal_margin"
android:paddingTop="@dimen/activity_vertical_margin"
tools:context="com.wj.study.MainActivity">
<com.wj.study.view.CharacterView
android:id="@+id/character_view"
android:layout_width="@dimen/size_35dp"
android:layout_height="wrap_content"
android:layout_gravity="right"
android:layout_marginRight="5dp"
android:padding="5dp" />
</FrameLayout>MainActivity代码:
package com.wj.study;
import android.graphics.Color;
import android.os.Bundle;
import android.support.v7.app.AppCompatActivity;
import android.util.Log;
import android.view.View;
import android.widget.Toast;
import com.wj.study.view.CharacterView;
public class MainActivity extends AppCompatActivity {
@Override
protected void onCreate(Bundle savedInstanceState) {
super.onCreate(savedInstanceState);
setContentView(R.layout.activity_main);
CharacterView characterView = (CharacterView) findViewById(R.id.character_view);
characterView.insertFirst('#');
characterView.setBackgroundColor(Color.CYAN);
characterView.setColor(Color.BLUE);
characterView.setTextSize(getResources().getDimensionPixelSize(R.dimen.textSize_14sp));
characterView.setOnCharacterTouchListener(new CharacterView.OnCharacterTouchListener() {
@Override
public void onDown(View view, char c) {
Log.d("TAG", "onDown=" + c);
}
@Override
public void onMove(View view, char c) {
Log.d("TAG", "onMove=" + c);
Toast.makeText(view.getContext(), String.valueOf(c), Toast.LENGTH_SHORT).show();
}
});
}
}
CharacterView代码:
package com.wj.study.view;
import android.annotation.TargetApi;
import android.content.Context;
import android.graphics.Canvas;
import android.graphics.Paint;
import android.graphics.Rect;
import android.util.AttributeSet;
import android.view.MotionEvent;
import android.view.View;
/**
* Author:王江 on 2016/6/30 17:45
* Description: CharacterView主要是根据名称首字母的做快速查找,通常应用于联系人列表,好友列表等。
*/
public class CharacterView extends View {
private String mCharacters = "ABCDEFGHIJKLMNOPQRSTUVWXYZ";
private Paint mPaint = new Paint(Paint.ANTI_ALIAS_FLAG | Paint.DITHER_FLAG);
private int[] mCharacterYValues = null;
public CharacterView(Context context) {
super(context);
}
public CharacterView(Context context, AttributeSet attrs) {
super(context, attrs);
}
@TargetApi(21)
public CharacterView(Context context, AttributeSet attrs, int defStyleAttr, int defStyleRes) {
super(context, attrs, defStyleAttr, defStyleRes);
}
public CharacterView(Context context, AttributeSet attrs, int defStyleAttr) {
super(context, attrs, defStyleAttr);
}
@Override
protected void onMeasure(int widthMeasureSpec, int heightMeasureSpec) {
super.onMeasure(widthMeasureSpec, heightMeasureSpec);
//设置默认的宽度
int widthSpecMode = MeasureSpec.getMode(widthMeasureSpec);
int heightSpecSize = MeasureSpec.getSize(heightMeasureSpec);
if (widthSpecMode == MeasureSpec.AT_MOST) {
final int defaultWidth = 80;
setMeasuredDimension(defaultWidth, heightSpecSize);
}
}
@Override
protected void onDraw(final Canvas canvas) {
super.onDraw(canvas);
mPaint.setStyle(Paint.Style.FILL);
mPaint.setStrokeCap(Paint.Cap.ROUND);
mPaint.setStrokeWidth(2.0f);
int paddingLeft = getPaddingLeft();
//view实际宽度
int width = getWidth() - paddingLeft - getPaddingRight();
//绘制字符时的起始x坐标
float startX = paddingLeft + (float) width / 2;
int paddingTop = getPaddingTop();
//view实际高
int height = getHeight() - paddingTop - getPaddingBottom();
int length = mCharacters.length();
//每个字符所拥有的高度
float characterHeight = (float) height / length;
//绘制字符时的起始y坐标
float startY = paddingTop + characterHeight / 2;
//绘制的字符的界限
Rect bounds = new Rect();
mCharacterYValues = new int[length + 1];
for (int i = 0; i < length; i++) {
mPaint.getTextBounds(mCharacters, i, i + 1, bounds);
float x = startX - (float) (bounds.left + bounds.right) / 2;
float y = startY + i * characterHeight - (float) (bounds.top + bounds.bottom) / 2;
canvas.drawText(mCharacters, i, i + 1, x, y, mPaint);
//记录每个字符起始的y坐标值
mCharacterYValues[i] = (int) (paddingTop + i * characterHeight);
}
//最后一个字符结束的y坐标值
mCharacterYValues[length] = (int) (paddingTop + length * characterHeight);
}
/**
* 设置字符的字体大小
*
* @param textSize 字体大小
*/
public void setTextSize(float textSize) {
mPaint.setTextSize(textSize);
}
/**
* 设置画笔的颜色
*
* @param color 画笔颜色
*/
public void setColor(int color) {
mPaint.setColor(color);
}
/**
* 插入新一个字符,与原来的字符表组成一个新的字符表
*
* @param c 字符
*/
public void insertFirst(char c) {
StringBuilder sb = new StringBuilder();
sb.append(c);
sb.append(mCharacters);
mCharacters = null;
mCharacters = sb.toString();
}
/**
* 插入新一个字符,与原来的字符表组成一个新的字符表
*
* @param c 字符
*/
public void insertLast(char c) {
StringBuilder sb = new StringBuilder();
sb.append(mCharacters);
sb.append(c);
mCharacters = null;
mCharacters = sb.toString();
}
/**
* 自定义字符表
*
* @param characters 字符串
*/
public void setCharacter(String characters) {
if (characters == null) return;
mCharacters = null;
mCharacters = characters;
}
/**
* 设置CharacterView的触摸监听器
*
* @param listener CharacterView触摸监听器
*/
public void setOnCharacterTouchListener(final OnCharacterTouchListener listener) {
if (listener == null) {
setOnTouchListener(null);
return;
}
setOnTouchListener(new View.OnTouchListener() {
char lastCharacter = ' ';
@Override
public boolean onTouch(View view, MotionEvent motionEvent) {
int yDown = (int) motionEvent.getY();
if (yDown > mCharacterYValues[0] && yDown < mCharacterYValues[mCharacterYValues.length - 1]) {
char c = findCharacter(yDown);
switch (motionEvent.getAction()) {
case MotionEvent.ACTION_DOWN:
listener.onDown(view, c);
break;
case MotionEvent.ACTION_MOVE:
if (lastCharacter == ' ' || lastCharacter != c) {
listener.onMove(view, c);
lastCharacter = c;
}
break;
case MotionEvent.ACTION_UP:
break;
}
}
return true;
}
});
}
/**
* 根据坐标值找到对应的字符
*
* @param yValue y坐标值
* @return 相应的字符
*/
private char findCharacter(int yValue) {
int low = 0, high = mCharacterYValues.length - 1;
int lastMid = 0;
while (low <= high) {
int mid = (low + high) / 2;
lastMid = mid;
if (mCharacterYValues[mid] == yValue) {
return mCharacters.charAt(mid);
} else if (mCharacterYValues[mid] < yValue) {
low = mid + 1;
} else {
high = mid - 1;
}
}
//如果最后一次比较是大于目标值,则需要选择前一个下标
if (mCharacterYValues[lastMid] > yValue) {
lastMid -= 1;
}
return mCharacters.charAt(lastMid);
}
/**
* 触摸CharacterView事件的监听器
*/
public interface OnCharacterTouchListener {
/**
* 点击字符回调的方法
*
* @param view CharacterView
* @param c 点击的字符
*/
void onDown(View view, char c);
/**
* 在字符表上移动回调的方法
*
* @param view CharacterView
* @param c 当前手指触摸的字符
*/
void onMove(View view, char c);
}
}
效果图:
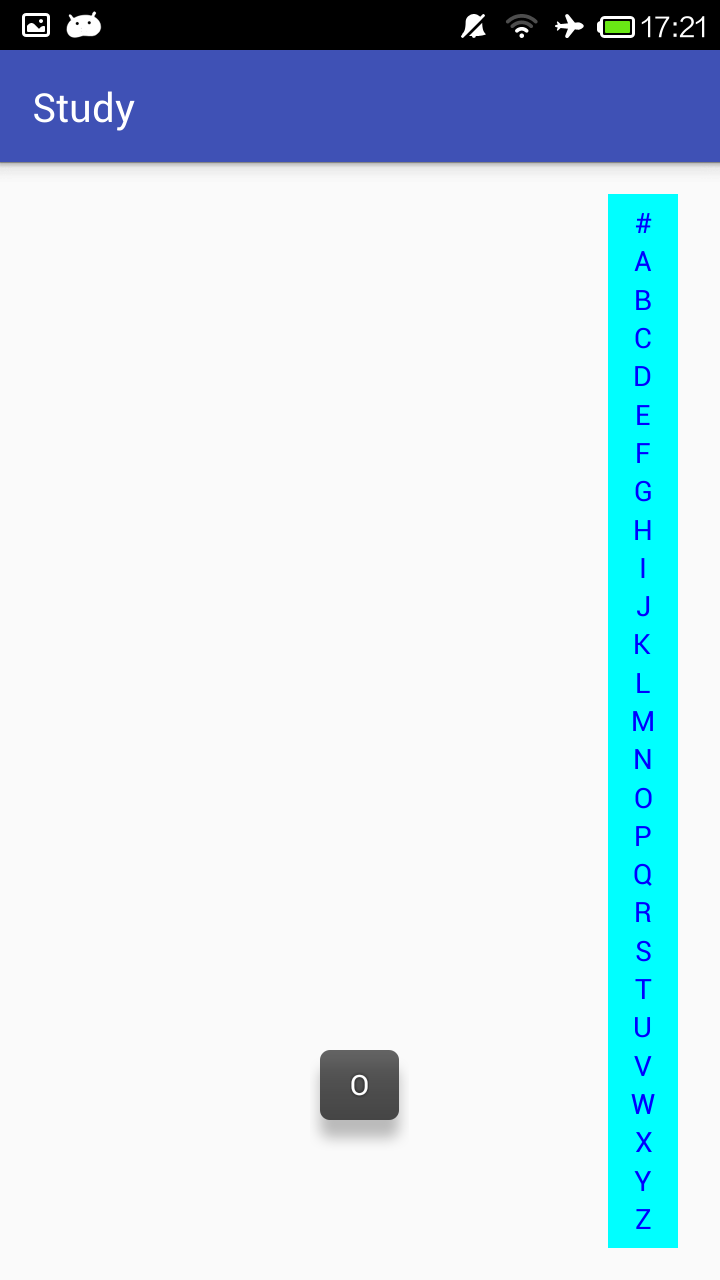
附加:对于该View如何与ListView(or RecyclerView)进行匹配,将在下一章中分析。


 511
511

 被折叠的 条评论
为什么被折叠?
被折叠的 条评论
为什么被折叠?
 到【灌水乐园】发言


