


很久没写博客,最近在搞一个新浪微博的第三方应用,涉及到了Oauth2.0授权获取Access_Token,特此记录分享!
步骤一:添加应用
进入新浪微博开放平台(没有的话自行注册),进入“管理中心“,点击”创建应用”,选择“微链接应用”,再点击“创建应用”,,选“移动应用”,填写相应的信息,其中应用地址没有的话可随便,勾选平台后提交。注意保存你的App Key和App Secret以备后用。
步骤二:Oauth2.0授权设置
应用创建完后可以在“管理中心”-“我的应用”中查看信息,在“应用信息”--“高级信息”中可以设置网站的授权回调页和取消授权回调页。授权回调页会在用户授权成功后会被回调,同时传回一个“code”参数,开发者可以用code换取Access_Token值。当然如果是移动应用,比如本文是没有自己授权回调页的,建议这里填:https://api.weibo.com/oauth2/default.html 或者 http://www.baidu.com 之类的。如果授权后传回的形式如下:
https://api.weibo.com/oauth2/default.html?code=a6146547f981199c07348837b0629d5d
我们只要获取其中code的值a6146547f981199c07348837b0629d5d即可,注意code的值每次都是不一样的。
步骤三:引导用户授权
引导需要授权的用户到如下页面:
https://api.weibo.com/oauth2/authorize?client_id=YOUR_CLIENT_ID&response_type=code&redirect_uri=YOUR_REGISTERED_REDIRECT_URI
YOUR_CLIENT_ID:即应用的AppKey,可以在应用基本信息里查看到。
YOUR_REGISTERED_REDIRECT_URI:即之前填写的授权回调页,注意一定要和你在开发平台填写的完全相同,这里以https://api.weibo.com/oauth2/default.html 为例。
如果用户授权成功后,会跳转到回调页,开发者此时需要得到url参数中的code值,注意code只能使用一次。
步骤四:换取Access Token
开发者可以访问如下页面得到Access Token:
https://api.weibo.com/oauth2/access_token?client_id=YOUR_CLIENT_ID&client_secret=YOUR_CLIENT_SECRET&grant_type=authorization_code&redirect_uri=YOUR_REGISTERED_REDIRECT_URI&code=CODE
YOUR_CLIENT_ID:即应用的AppKey,可以在应用基本信息里查看到。
YOUR_CLIENT_SECRET:即应用的App Secret,可以在应用基本信息里查看到。
YOUR_REGISTERED_REDIRECT_URI:即之前填写的授权回调页
code:就是步骤三引导用户授权后回传的code。
如果都没有问题,就可以得到Access Token了,返回示例:
{
"access_token": "ACCESS_TOKEN",
"expires_in": 1234,
"remind_in":"798114",
"uid":"12341234"
}
最后做了一个Xcode 5.0 storyboard的demo,用到一个UIViewController和一个UIWebView。
看代码如下:
#import <UIKit/UIKit.h>

@interface OAuthWebViewController : UIViewController<UIWebViewDelegate>

@property (weak, nonatomic) IBOutlet UIWebView *webView;

@end
#import "OAuthWebViewController.h"
@implementation OAuthWebViewController
@synthesize webView;
-(void)viewWillAppear:(BOOL)animated
{
[super viewWillAppear:animated];
NSString *url = @"https://api.weibo.com/oauth2/authorize?client_id=3693781153&redirect_uri=https://api.weibo.com/oauth2/default.html&response_type=code&display=mobile";
NSURLRequest *request = [[NSURLRequest alloc] initWithURL:[NSURL URLWithString:url]];
[self.webView setDelegate:self];
[self.webView loadRequest:request];
}
-(void)viewDidLoad
{
[super viewDidLoad];
}
#pragma mark - UIWebView Delegate Methods
-(void)webViewDidFinishLoad:(UIWebView *)_webView
{
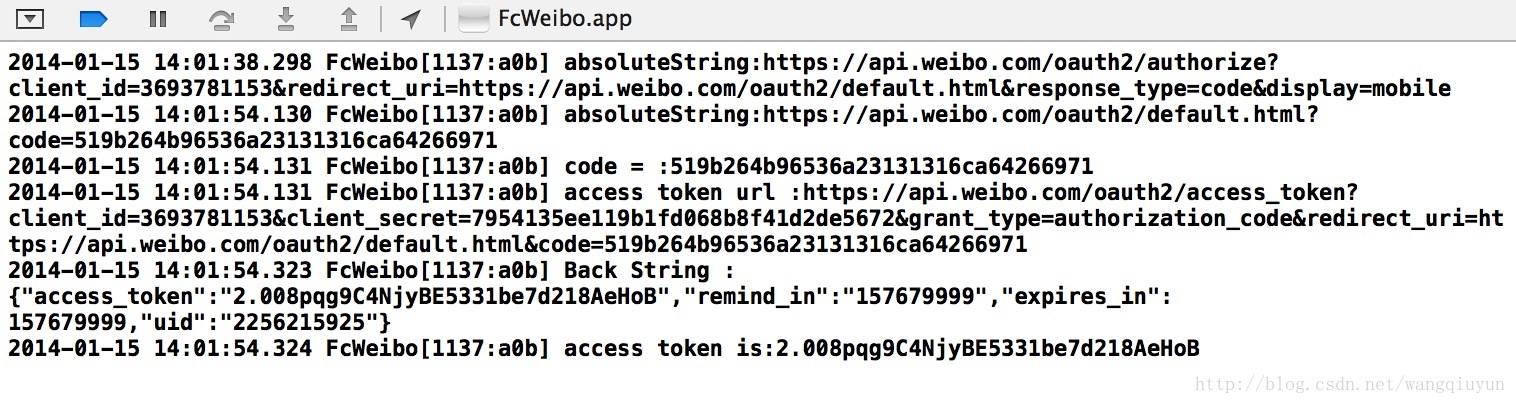
NSString *url = _webView.request.URL.absoluteString;
NSLog(@"absoluteString:%@",url);
if ([url hasPrefix:@"https://api.weibo.com/oauth2/default.html?"]) {
//找到”code=“的range
NSRange rangeOne;
rangeOne=[url rangeOfString:@"code="];
//根据他“code=”的range确定code参数的值的range
NSRange range = NSMakeRange(rangeOne.length+rangeOne.location, url.length-(rangeOne.length+rangeOne.location));
//获取code值
NSString *codeString = [url substringWithRange:range];
NSLog(@"code = :%@",codeString);
//access token调用URL的string
NSMutableString *muString = [[NSMutableString alloc] initWithString:@"https://api.weibo.com/oauth2/access_token?client_id=3693781153&client_secret=7954135ee119b1fd068b8f41d2de5672&grant_type=authorization_code&redirect_uri=https://api.weibo.com/oauth2/default.html&code="];
[muString appendString:codeString];
NSLog(@"access token url :%@",muString);
//第一步,创建URL
NSURL *urlstring = [NSURL URLWithString:muString];
//第二步,创建请求
NSMutableURLRequest *request = [[NSMutableURLRequest alloc]initWithURL:urlstring cachePolicy:NSURLRequestUseProtocolCachePolicy timeoutInterval:10];
[request setHTTPMethod:@"POST"];//设置请求方式为POST,默认为GET
NSString *str = @"type=focus-c";//设置参数
NSData *data = [str dataUsingEncoding:NSUTF8StringEncoding];
[request setHTTPBody:data];
//第三步,连接服务器
NSData *received = [NSURLConnection sendSynchronousRequest:request returningResponse:nil error:nil];
NSString *str1 = [[NSString alloc]initWithData:received encoding:NSUTF8StringEncoding];
NSLog(@"Back String :%@",str1);
NSError *error;
//如何从str1中获取到access_token
NSDictionary *dictionary = [NSJSONSerialization JSONObjectWithData:received options:NSJSONReadingMutableContainers error:&error];
NSString *_access_token = [dictionary objectForKey:@"access_token"];
NSLog(@"access token is:%@",_access_token);
}
}
@end
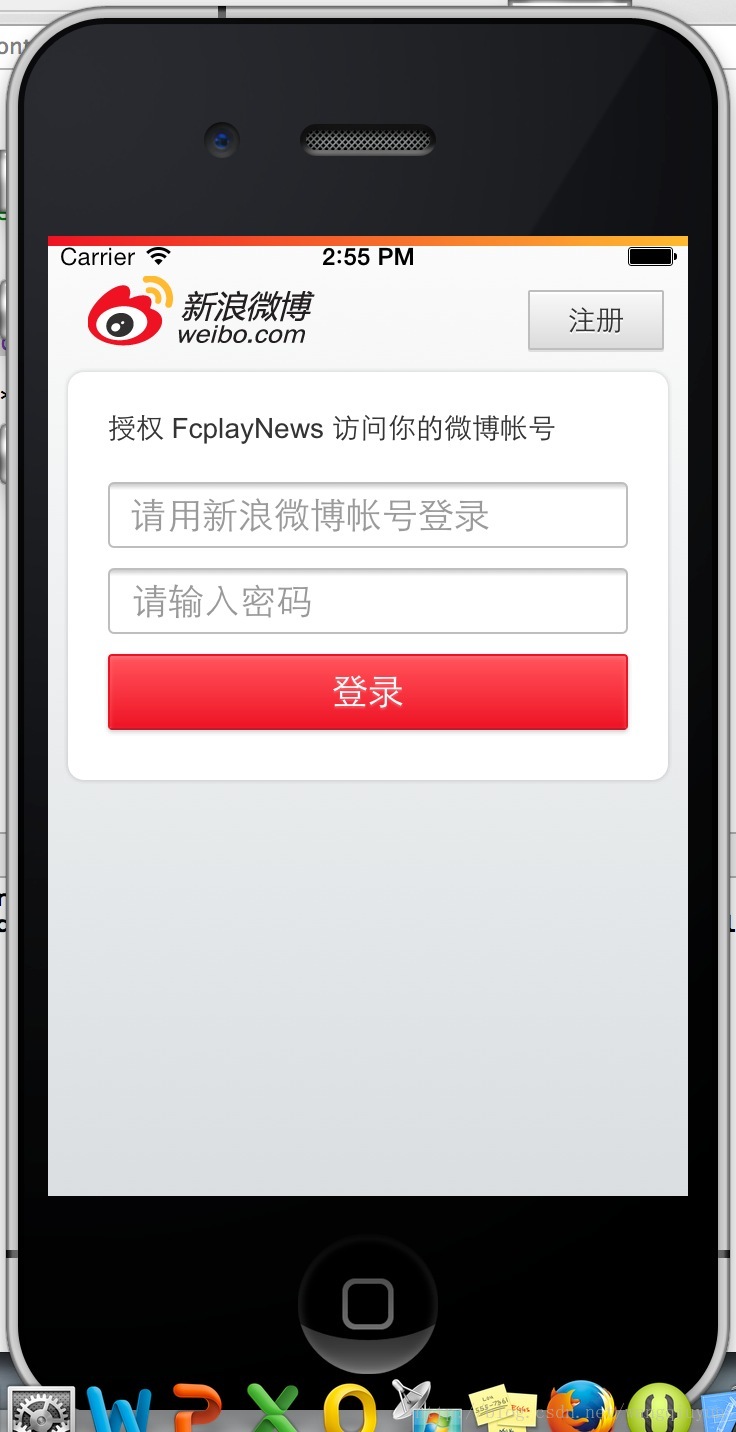
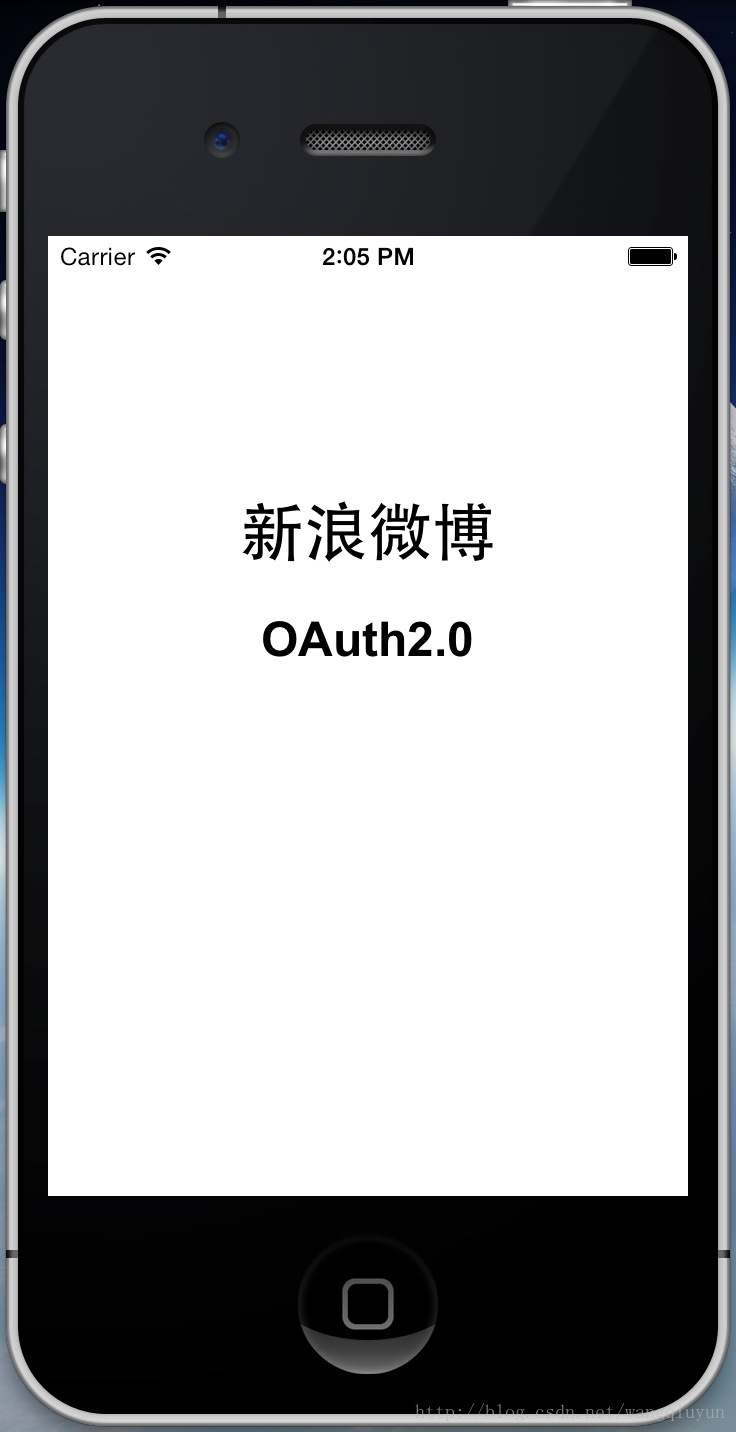
来几张图:
demo下载地址:http://download.csdn.net/detail/wangqiuyun/6851621
注意替换为你的AppKey和App Secret。


 2297
2297

 被折叠的 条评论
为什么被折叠?
被折叠的 条评论
为什么被折叠?
 到【灌水乐园】发言


