


使用darknet批量测试图片并保存在指定文件夹下
测试时:Makefile前五行一定全调为0
当我们使用darknet框架使用测试语句时,系统调用程序语句,我们需要的是加入可以连续调用图片的系统,在模型载入内存的情况下,完成图片检测。
1.用下面代码替换detector.c文件(example文件夹下)的void test_detector函数(注意有3处要改成自己的路径)
全部复制并代替,三处修改路径写对
此段代码来自https://blog.csdn.net/mieleizhi0522/article/details/79989754
void test_detector(char *datacfg, char *cfgfile, char *weightfile, char *filename, float thresh, float hier_thresh, char *outfile, int fullscreen)
{
    list *options = read_data_cfg(datacfg);
    char *name_list = option_find_str(options, "names", "data/names.list");
    char **names = get_labels(name_list);

    image **alphabet = load_alphabet();
    network *net = load_network(cfgfile, weightfile, 0);
    set_batch_network(net, 1);
    srand(2222222);
    double time;
    char buff[256];
    char *input = buff;
    float nms=.45;
    int i=0;
    while(1){
        if(filename){
            strncpy(input, filename, 256);
            image im = load_image_color(input,0,0);
            image sized = letterbox_image(im, net->w, net->h);
        //image sized = resize_image(im, net->w, net->h);
        //image sized2 = resize_max(im, net->w);
        //image sized = crop_image(sized2, -((net->w - sized2.w)/2), -((net->h - sized2.h)/2), net->w, net->h);
        //resize_network(net, sized.w, sized.h);
            layer l = net->layers[net->n-1];


            float *X = sized.data;
            time=what_time_is_it_now();
            network_predict(net, X);
            printf("%s: Predicted in %f seconds.\n", input, what_time_is_it_now()-time);
            int nboxes = 0;
            detection *dets = get_network_boxes(net, im.w, im.h, thresh, hier_thresh, 0, 1, &nboxes);
            //printf("%d\n", nboxes);
            //if (nms) do_nms_obj(boxes, probs, l.w*l.h*l.n, l.classes, nms);
            if (nms) do_nms_sort(dets, nboxes, l.classes, nms);
                draw_detections(im, dets, nboxes, thresh, names, alphabet, l.classes);
                free_detections(dets, nboxes);
            if(outfile)
             {
                save_image(im, outfile);
             }
            else{
                save_image(im, "predictions");
#ifdef OPENCV
                cvNamedWindow("predictions", CV_WINDOW_NORMAL);
                if(fullscreen){
                cvSetWindowProperty("predictions", CV_WND_PROP_FULLSCREEN, CV_WINDOW_FULLSCREEN);
                }
                show_image(im, "predictions");
                cvWaitKey(0);
                cvDestroyAllWindows();
#endif
            }
            free_image(im);
            free_image(sized);
            if (filename) break;
         }
        else {
            printf("Enter Image Path: ");
            fflush(stdout);
            input = fgets(input, 256, stdin);
            if(!input) return;
            strtok(input, "\n");

            list *plist = get_paths(input);
            char **paths = (char **)list_to_array(plist);
             printf("Start Testing!\n");
            int m = plist->size;
            if(access("/home/FENGsl/darknet/data/out",0)==-1)//"/home/FENGsl/darknet/data"修改成自己的路径
            {
              if (mkdir("/home/FENGsl/darknet/data/out",0777))//"/home/FENGsl/darknet/data"修改成自己的路径
               {
                 printf("creat file bag failed!!!");
               }
            }
            for(i = 0; i < m; ++i){
             char *path = paths[i];
             image im = load_image_color(path,0,0);
             image sized = letterbox_image(im, net->w, net->h);
        //image sized = resize_image(im, net->w, net->h);
        //image sized2 = resize_max(im, net->w);
        //image sized = crop_image(sized2, -((net->w - sized2.w)/2), -((net->h - sized2.h)/2), net->w, net->h);
        //resize_network(net, sized.w, sized.h);
        layer l = net->layers[net->n-1];


        float *X = sized.data;
        time=what_time_is_it_now();
        network_predict(net, X);
        printf("Try Very Hard:");
        printf("%s: Predicted in %f seconds.\n", path, what_time_is_it_now()-time);
        int nboxes = 0;
        detection *dets = get_network_boxes(net, im.w, im.h, thresh, hier_thresh, 0, 1, &nboxes);
        //printf("%d\n", nboxes);
        //if (nms) do_nms_obj(boxes, probs, l.w*l.h*l.n, l.classes, nms);
        if (nms) do_nms_sort(dets, nboxes, l.classes, nms);
        draw_detections(im, dets, nboxes, thresh, names, alphabet, l.classes);
        free_detections(dets, nboxes);
        if(outfile){
            save_image(im, outfile);
        }
        else{

             char b[2048];
            sprintf(b,"/home/FENGsl/darknet/data/out/%s",GetFilename(path));//"/home/FENGsl/darknet/data"修改成自己的路径

            save_image(im, b);
            printf("save %s successfully!\n",GetFilename(path));
#ifdef OPENCV
            cvNamedWindow("predictions", CV_WINDOW_NORMAL);
            if(fullscreen){
                cvSetWindowProperty("predictions", CV_WND_PROP_FULLSCREEN, CV_WINDOW_FULLSCREEN);
            }
            show_image(im, "predictions");
            cvWaitKey(0);
            cvDestroyAllWindows();
#endif
        }

        free_image(im);
        free_image(sized);
        if (filename) break;
        }
      }
    }
}
2.在前面添加GetFilename(char p)函数(注意后面的注释)
全部复制(包括头文件)
此段代码来自https://blog.csdn.net/mieleizhi0522/article/details/79989754
#include "darknet.h"
#include <sys/stat.h>
#include<stdio.h>
#include<time.h>
#include<sys/types.h>
static int coco_ids[] = {1,2,3,4,5,6,7,8,9,10,11,13,14,15,16,17,18,19,20,21,22,23,24,25,27,28,31,32,33,34,35,36,37,38,39,40,41,42,43,44,46,47,48,49,50,51,52,53,54,55,56,57,58,59,60,61,62,63,64,65,67,70,72,73,74,75,76,77,78,79,80,81,82,84,85,86,87,88,89,90};

char *GetFilename(char *p)
{
    static char name[20]={""};
    char *q = strrchr(p,'/') + 1;
    strncpy(name,q,6);//注意后面的6,如果你的测试集的图片的名字字符(不包括后缀)是其他长度,请改为你需要的长度(官方的默认的长度是6)
    return name;
}
3.在darknet下重新make
一定要记住重新make,在darknet文件下
4.建立一个含有图片的文件夹
①文件名为6位的字符串

②建立一个图片绝对路径文本
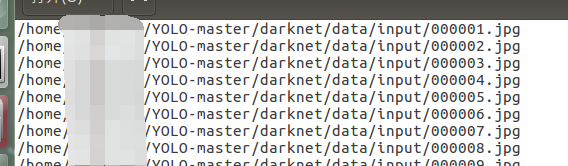
ls -R /home/******/YOLO-master/darknet/data/input/* > input.txt
展示:
5.执行批量测试命令如下
命令:./darknet detect cfg/yolov3.cfg yolov3.weights
Enter Image Path:输入input.txt的路径
./darknet detect cfg/yolov3.cfg yolov3.weights
layer     filters    size              input                output
    0 conv     32  3 x 3 / 1   608 x 608 x   3   ->   608 x 608 x  32  0.639 BFLOPs
    1 conv     64  3 x 3 / 2   608 x 608 x  32   ->   304 x 304 x  64  3.407 BFLOPs
 	.	.	.	.	.	.	.
  105 conv    255  1 x 1 / 1    76 x  76 x 256   ->    76 x  76 x 255  0.754 BFLOPs
  106 yolo
Loading weights from yolov3.weights...Done!
Enter Image Path:
6.之后就完成了,生成的图片在out文件下
我的效果展示

图片视频相互转换
视频转图片
import cv2

cap=cv2.VideoCapture("./test/test.mp4")
i=1
while True:
    ret,im=cap.read()
    cv2.imwrite("./input/%06d.jpg"%i,im)
    i = i+1
    print(i)
    if i == 72:
        break
图片转视频
import cv2
import os

im_dir = './output_yolov3'
num = 72 #这里是帧数

out = cv2.VideoWriter('aa.avi', 0, 29,(1280,720)) #每一个图片的大小必须一致与确定

for i in range(1,num):
    print(str("%06d"%i))
    im_name = os.path.join(im_dir, str("%06d"%i)+'.jpg')
    frame = cv2.imread(im_name)
    cv2.imshow("frame",frame)
    out.write(frame)
    # print(im_name)

out.release()
print('finish')


 4308
4308


 被折叠的 条评论
为什么被折叠?
被折叠的 条评论
为什么被折叠?
 到【灌水乐园】发言


