


先看图

基础效果图首先写出图片效果这是前端美工可以自己进行调整
<uni-nav-bar @clickRight="save" @clickLeft="back()" fixed="true" leftIcon="back" leftText="返回" right-text="保存"
   title="添加文章"></uni-nav-bar>

  <uni-group title="文章管理: 添加文章" top="10" mode="card">
   <view style="width: 1000rpx; margin-left: auto; margin-right: auto;">
    <view style="margin-bottom: 15rpx;">文章标题</view>
    <input singleline="true" placeholder="标题是必填项" type="text" v-model="articleTitle"
     style="border: 1px solid #000000; border-radius: 5rpx; line-height: 40rpx; height: 40rpx; width: 1000rpx; margin-bottom: 35rpx; padding: 10rpx;" />

    <view style="margin-bottom: 15rpx;">文章描述</view>
    <textarea placeholder-style="color:#F76260" placeholder="描述内容建议在70字以内" v-model="articleDescr"
     style="border: 1px solid #000000; border-radius: 5rpx; height: 300rpx; width: 1000rpx; padding: 10rpx; margin-bottom: 35rpx;" />

    <view style="margin-bottom: 15rpx;">选择标题图(图片分辨率建议为:200px * 200px)</view>
    <button type="primary" :loading="loading" :disabled="btnState" @click="upload">选择照片</button>
   </view>
  </uni-group>
  <!-- 提示框 -->
  <uni-popup ref="popup" type="dialog">
   <uni-popup-dialog mode="base" title="通知" :content="msg" :duration="2000" :before-close="true" @close="close"
    @confirm="confirm"></uni-popup-dialog>
  </uni-popup>
这是原文代码
这篇就搞定一个东西文件的代码这部分可以看成一个通用的代码往后遇到文件上传之类的可以
仿照
upload(){
				_self = this;
				//图片选择API
				uni.chooseImage({
					count:1,//一次只能选择一个文件
					sizeType: ['original','compressed'],  //可以指定上传的图片是否压缩还是原图 默认全有
					sourceType:['album']  ,//从相册选择图片
					success: function(res){
						const tempFilePaths = res.tempFilePaths;//const声明后其值不可变
						//uni-app的图片上传API
						const uploadTask = uni.uploadFile({
							url:'http://localhost:8070/upload/file',
							filePath:tempFilePaths[0],
							name:'file',
							success:function(uploadFileRes){
								_self.relativePath = uploadFileRes.data;

							}
						});

						uploadTask.onProgressUpdate(function(res){
							_self.percent = res.progress;//获得文件上传的进度
							console.log("上传进度:"+res.progress);
							console.log("已经上传的进度:"+res.totalBytesSent);
							console.log("预计需要上传的数据总长度:"+res.totalBytesExpectedToSend);
						});
					}
				});

			}
各个的含义也进行了标注
注意
_self 需要在开头就进行定义方便使用
下面是中转站return里所需要的东西同样含义也进行了注释
return{
				msg:null,
				articleTitle:null,//文章标题
				articleDescr:null,//文章简介
				btnState:false,//上传禁止使用按钮  flase是不禁用
				percent:0,//进度条
				loading:false,//是否显示进度条
				fileName:null,//上传的名称
				relativePath:null,//文件上传后 后台返回的路径
				cid:null
			}
这部分内容在uni-app中的API文档中都是可以找到的
下载上传就是和网络相关的就在网络里找同样
接下来是IDEA里的先

加入这两文件
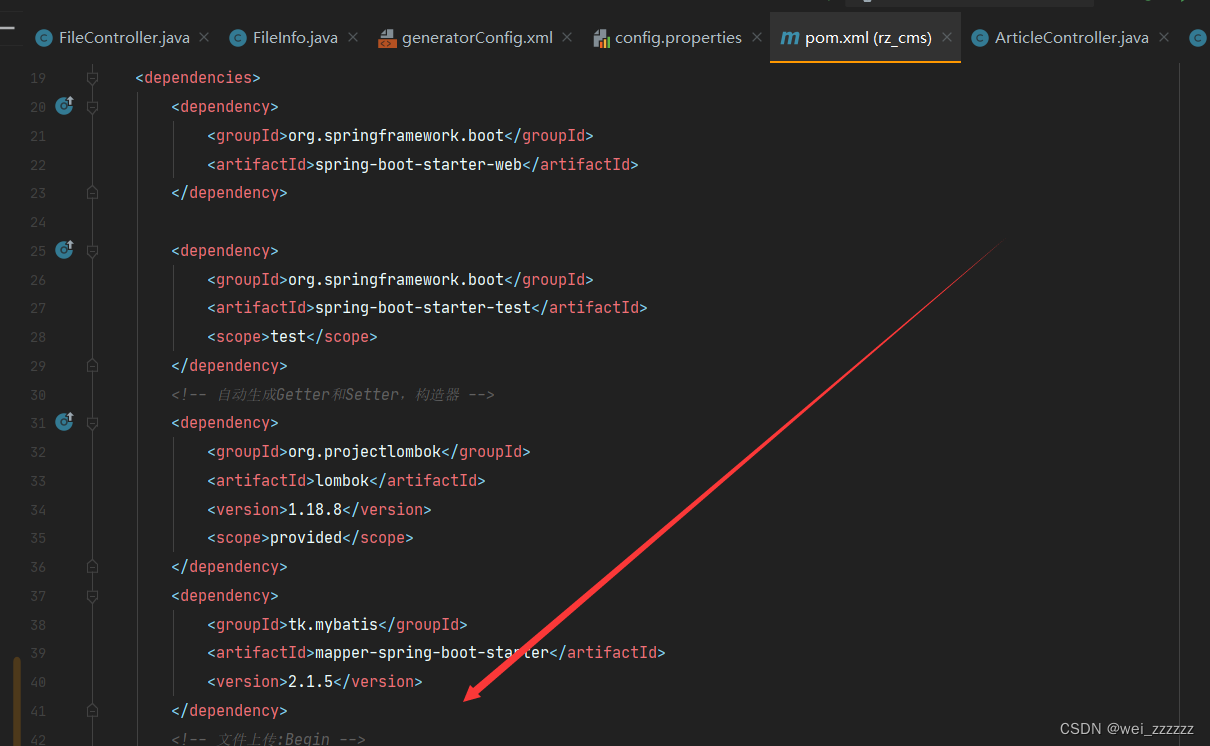
再在pom.xml文件下加入
 <dependency>
            <groupId>commons-fileupload</groupId>
            <artifactId>commons-fileupload</artifactId>
            <version>1.3.1</version>
        </dependency>
        <!-- 文件上传:End -->
        <!--跨服务器上传:Begin -->
        <dependency>
            <groupId>com.sun.jersey</groupId>
            <artifactId>jersey-client</artifactId>
            <version>1.19</version>
        </dependency>
        <dependency>
            <groupId>com.sun.jersey</groupId>
            <artifactId>jersey-core</artifactId>
            <version>1.19</version>
        </dependency>
位置在这里下面
最后创建FileController
//文件的跨域上传
    @CrossOrigin(origins = "*")
    @PostMapping("file")
    @ResponseBody
    public String upload(MultipartFile file){
        String result=null;

        try {
            FileInfo fileInfo = JesyFileUploadUtil.uploadFile(file, "http://localhost:8060");
       result =fileInfo.getAbsolutPath();
        } catch (IOException e) {
            e.printStackTrace();
            result ="";
        }
        return result;
    }
加入代码段实现文件上传


 592
592


 被折叠的 条评论
为什么被折叠?
被折叠的 条评论
为什么被折叠?
 到【灌水乐园】发言


