


 本文介绍了iOS开发中StackView的五大关键用法,包括快速入门、创建对称设计、选择布局方向、调整属性以及嵌套使用,帮助初学者掌握高效布局技巧。
stackview
When it comes to iOS Development, design is everything. Your app may have the best features and the best utilities for a specific task, but a user will close and delete your app in a heartbeat if the design lacks a clean, simplistic and engaging design. The goal is to create an app that has a clean design that enhances the users experience.
谈到iOS开发W¯¯母鸡,设计就是一切。 您的应用程序可能具有针对特定任务的最佳功能和最佳实用程序,但是如果设计缺乏简洁,简单和引人入胜的设计,则用户会心跳关闭并删除您的应用程序。 目标是创建一个具有简洁设计的应用程序,以增强用户体验。
让我们看一下为什么要在下一个项目中使用StackView。 (Let’s take a look at why you should be using StackView for your next project.)
1. StackView易于入门 (1. StackView is EASY to get started with)
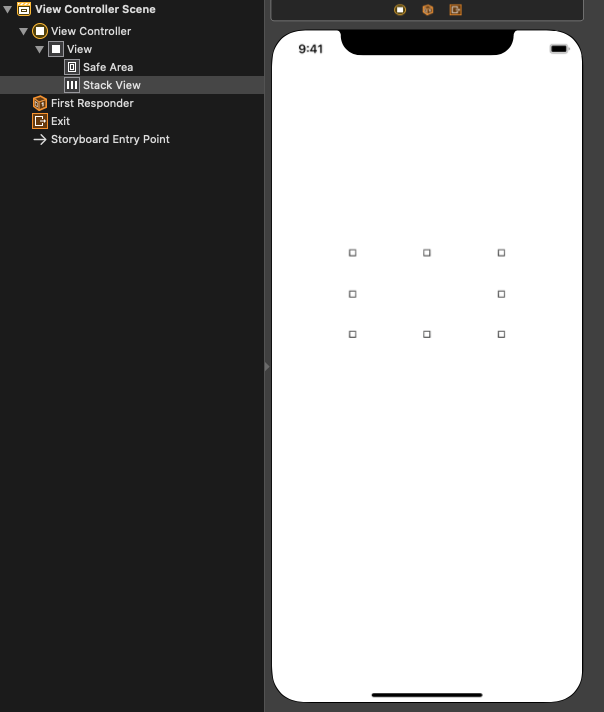
There are two ways you can add a StackView to your ViewController. If your starting out with a fresh new project all you have to do is navigate to your Objects Library and type in “stack” in the search box. From there you have the option of choosing a horizontal or vertical stack view. That’s it! If everything was done correctly you should see a horizontal StackView under the ViewController->View scene.
您可以通过两种方式将StackView添加到ViewController。 如果您是从一个新的新项目开始,那么您要做的就是导航到对象库,然后在搜索框中键入“ stack”。 从那里,您可以选择水平或垂直堆栈视图。 而已! 如果一切都正确完成,您应该在ViewController-> View场景下看到一个水平StackView。
If your wondering, wait, how do you know thats a horizontal StackView? Take a closer look at the highlighted StackView to the left, the three lines in the box indicate that it’s horizontal.
如果您想知道,等等,您怎么知道那是一个水平的StackView? 仔细查看左侧突出显示的StackView,框中的三行指示其为水平。
2.创建对称设计FAST (2. Create a symmetric design FAST)
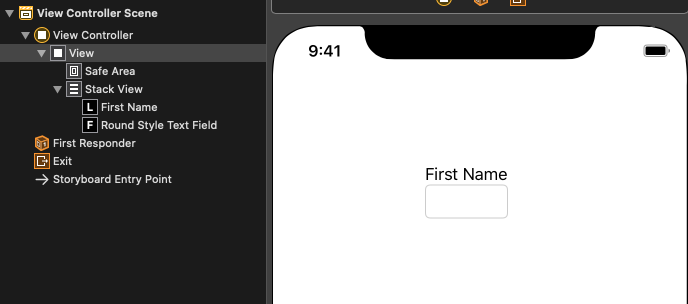
Let’s say you are creating a contact form. A contact form almost always has these fields: First Name, Last Name, Phone, Email, City, State, Submit Button and of course the text fields to enter in the requested information. You may be thinking, “Okay and… whats wrong with adding all of the labels and text fields to the view and then adding each constraint?”, the answer is — there’s absolutely nothing wrong with that. However, why spend the extra time messing with constraints and widths/heights of your labels/text fields when you can let StackView handle that for you. Below you can see the power of StackView, the width of the StackView auto adjusts based on the largest item within itself, in this case the “First Name” label.
假设您正在创建联系表单。 联系人表单几乎总是具有以下字段:名,姓,电话,电子邮件,城市,州,提交按钮,当然还有文本字段,用于输入所需的信息。 您可能会想:“好吧……将所有标签和文本字段添加到视图中,然后添加每个约束,这有什么不对?”,答案是–绝对没有错。 但是,为什么要花费额外的时间弄乱标签/文本字段的约束和宽度/高度,才能让StackView为您处理。 在下面您可以看到StackView的功能,StackView的宽度会根据自身中最大的项目(在本例中为“名字”标签)自动调整。

3.在垂直或水平StackView之间选择 (3. Choose between Vertical or Horizontal StackView)
StackView is a great way to quickly design your view and you have the option of going with a vertical or horizontal StackView. Remember earlier how I explained how to add a StackView to your view? Well, good news for you, that’s not the only way! Let’s say you already have some elements added to your view; a label, a text field, and a button. Xcode provides a nice feature where you can select elements in the view and embed them into a StackView. Enough talking though, let’s take a look.
StackView是快速设计视图的好方法,您可以选择使用垂直或水平StackView。 还记得以前我曾解释过如何向您的视图添加StackView吗? 好吧,这对您来说是个好消息,这不是唯一的方法! 假设您已经在视图中添加了一些元素; 标签,文本字段和按钮。 Xcode提供了一个很好的功能,您可以在视图中选择元素并将其嵌入到StackView中。 足够多的交谈,让我们看一下。
Heres a short clip on how to select elements in the view and easily embed them into a StackView.
这是有关如何选择视图中的元素并将其轻松嵌入到StackView中的简短剪辑。
In the next section you’ll learn how to adjust the properties of a StackView to make it visually more appealing.
在下一节中,您将学习如何调整StackView的属性以使其在视觉上更具吸引力。
4.轻松调整StackView属性 (4. Adjusting StackView properties is a breeze)
Now that you have a StackView you can customize it to your needs by selecting the ‘Attributes Selector’ in Xcode. From there you’ll see a Stack View section
有了StackView之后,您可以通过在Xcode中选择“属性选择器”来根据需要对其进行自定义。 从那里,您将看到“堆栈视图”部分

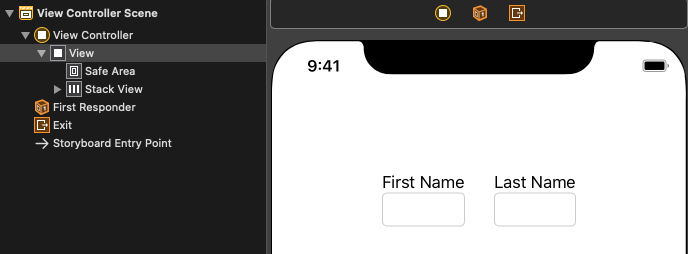
In this menu you can make all of the changes you need to your StackView. Did you mean to make it a horizontal StackView instead of vertical? No problem, just press on the Axis option and select ‘Horizontal’, and just like that the change is made. Watch the recording below to get a feel for what I’m talking about.
在此菜单中,您可以对StackView进行所需的所有更改。 您是否要使其成为水平StackView而不是垂直StackView? 没问题,只需按“轴”选项并选择“水平”,就可以进行更改。 观看下面的录音,以了解我在说什么。
This is how you can easily change the StackViews look and feel. Try it yourself!
这是您可以轻松更改StackViews外观的方式。 自己尝试!
5.将StackView嵌入另一个StackView (5. Embed a StackView with another StackView)

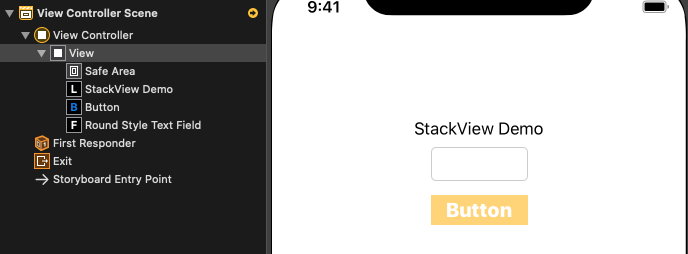
Yes, it’s possible and when used properly it’s quite effective at bringing your design together. Let’s take the StackView we created earlier as our base, remember this one?
是的,这是可能的,而且如果使用得当,它可以非常有效地将您的设计整合在一起。 让我们以之前创建的StackView作为基础,还记得这一点吗?
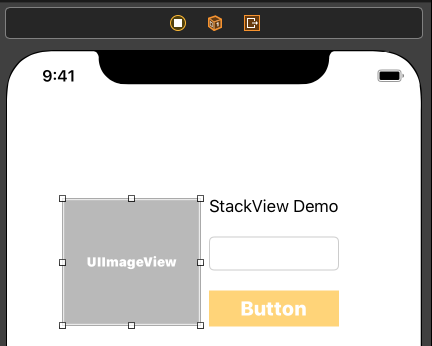
For this demo I want to add an icon to the left of the StackView. I could just drag an ImageView place it to the left of the StackView, add some constraints and call it a day, but why not embed the two together into a StackView and never have to worry about them being misaligned on the screen? Let’s go ahead and do that.
对于此演示,我想在StackView的左侧添加一个图标。 我可以将一个ImageView拖到StackView的左侧,添加一些约束并称之为一天,但是为什么不将两者嵌入到StackView中,而不必担心它们在屏幕上未对齐? 让我们继续做。
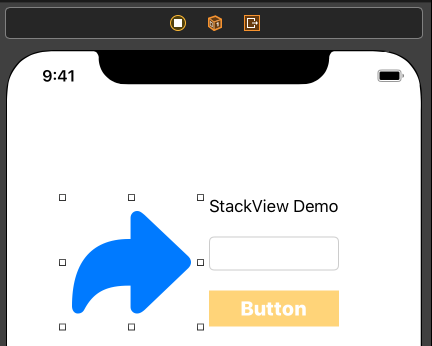
The next step is to select the ImageView and the StackView -> embed the two together into another StackView as shown below. Woahhh… what happened to the icon, why’s it so small now!?
下一步是选择ImageView和StackView->将两者嵌入到另一个StackView中,如下所示。 哇……图标发生了什么,为什么现在这么小!?
Don’t worry, theres a simple fix for that. Remember the Attributes Selector section for StackViews, click on it and find Distribution, now select Fill Equally to get the ImageView sized accordingly.
不用担心,有一个简单的解决方案。 记住StackViews的“属性选择器”部分,单击它并找到“分布”,现在选择“均等填充”以相应地获得ImageView的大小。
There you have it, you learned some basic yet very important tips on working with StackViews. The best way to truly learn how to work with them is to actual practice. Go ahead and play around in Xcode, you’ll quickly see the benefits to using StackViews.
有了它,您学习了一些使用StackViews的基本但非常重要的技巧。 真正学习如何与他们合作的最好方法是实际练习。 继续使用Xcode进行试验,您将很快看到使用StackViews的好处。
请继续关注更多iOS内容! (Stay tuned for more iOS content!)
翻译自: https://medium.com/@avg5074/5-secrets-every-beginner-should-know-about-stackview-2361083713cc
stackview


 被折叠的 条评论
为什么被折叠?
被折叠的 条评论
为什么被折叠?
 到【灌水乐园】发言


