


ios swift 阴影
SWIFT编程 (SWIFT PROGRAMMING)
Thanks to CoreAnimation and CALayer, we can easily apply to any UIView objects a custom shadow effect, through its layer property.
多亏了CoreAnimation和CALayer ,我们可以通过其layer属性轻松地将任何自定义阴影效果应用于任何UIView对象。
In this article we’ll see how to create 5 well known types of shadows:
在本文中,我们将介绍如何创建5种众所周知的阴影类型:
- Drop Shadows 阴影
- Basic Contact Shadows 基本接触阴影
- Contact Shadows with Depth 深度接触阴影
- Flat Contact Shadows 平面接触阴影
- Curved Shadows 弯曲的阴影
But first, let’s see the 5 properties of the layer that we will use to create cutomized shadows.
但是首先,让我们看一下将用于创建定制阴影的图层的5个属性 。
shadowColor (shadowColor)
Customize the color of the shadow. Default color is UIColor.black.cgColor, which make a dark shadow, but you can also set a light color to create a glow effect, or any other color.
自定义阴影的颜色。 默认颜色是UIColor.black.cgColor ,它会产生深色阴影,但您也可以设置浅色以创建发光效果,或其他任何颜色。
shadowOpacity (shadowOpacity)
Customize opacity of the shadow, between 0 and 1. A value of 0 means the shadow will not be visible.
自定义阴影的不透明度,介于0和1之间。 值为0表示阴影不可见。
shadowRadius (shadowRadius)
Customize the blur level of the shadow. A value of 0 means the shadow will not be blurred at all, it will be entirely flat.
自定义阴影的模糊级别。 值为0 表示阴影完全不会模糊,而是完全平坦。
shadowOffset (shadowOffset)
Customize the position of the shadow from the view. This property is especially useful if you want to add depth to your interface. A CGSize.zero value means the shadow will be perfectly aligned with it parent view.
从视图中自定义阴影的位置。 如果要向界面添加深度,此属性特别有用。 CGSize.zero值表示阴影将与其父视图完美对齐。
shadowPath (shadowPath)
Customize the shape of the shadow. Default value for this property is nil which means UIKit will determine by itself the shape of the parent view.
自定义阴影的形状。 此属性的默认值为nil ,这意味着UIKit将自行确定父视图的形状。
Not setting a shadowPath makes shadow generation a lot slower, so it’s a good practice to set a path to this property, even for a basic shadow with square shape.
不设置shadowPath会使阴影生成慢很多,因此,即使对于方形的基本阴影,设置此属性的路径也是一个好习惯。
This property is especially interesting if you want to make shadows of custom shapes.
如果要制作自定义形状的阴影,此属性特别有趣。
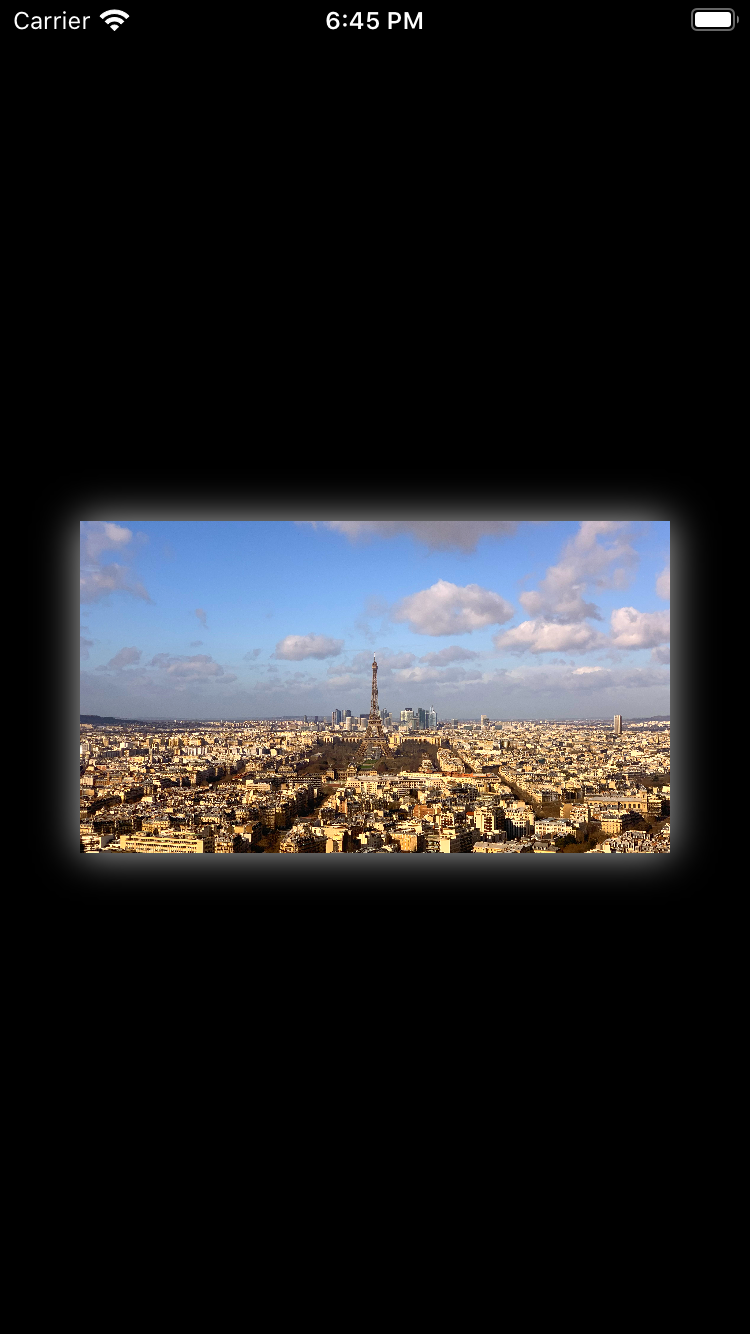
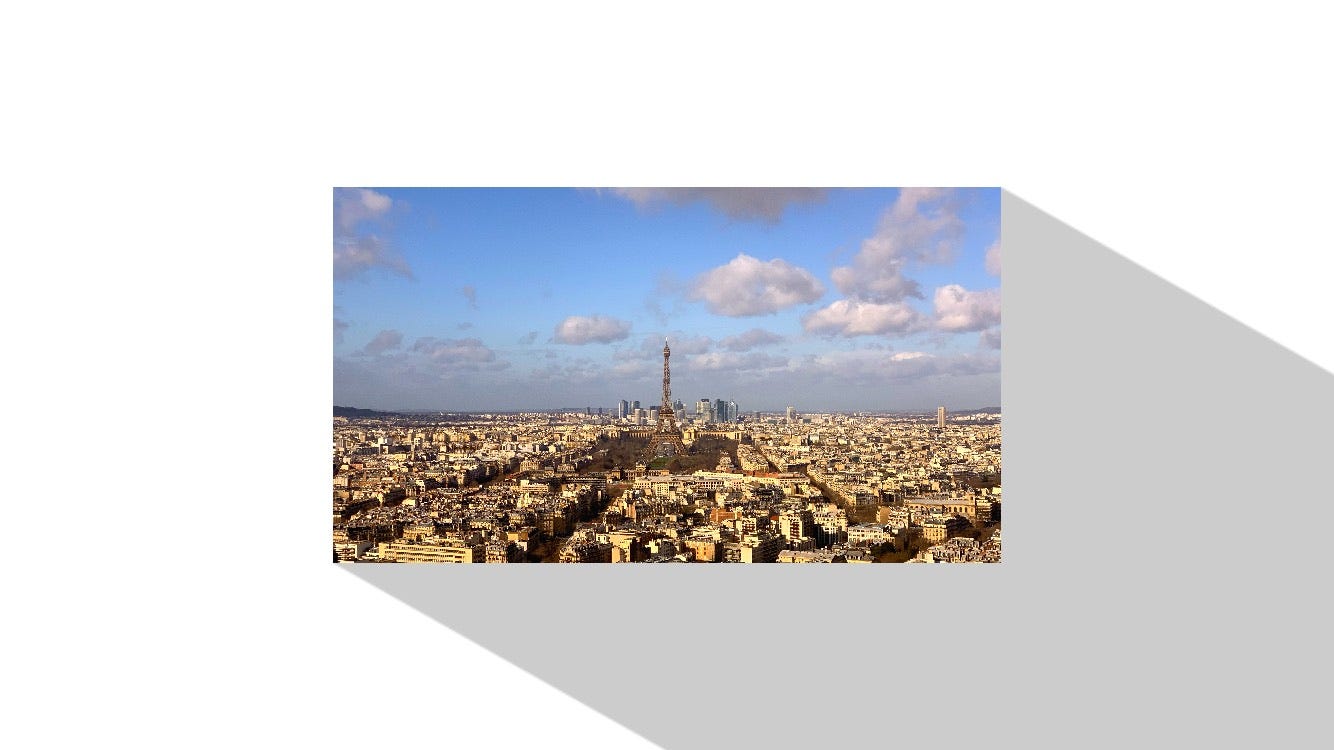
1.阴影 (1. Drop Shadows)
Drop shadows are the classic shadows that you can see most of the time on apps and websites. It only uses opacity, radius and offset properties, to add an impression of depth to the interface by simulating elevation of components and its position from a light source.
阴影是您大多数时间在应用程序和网站上可以看到的经典阴影。 它仅使用不透明度,半径和偏移属性,通过模拟组件的高程及其在光源中的位置来为界面添加深度印象。
You can specify a path for this basic shadow by creating a UIBezierPath from your view bounds.
您可以通过从视图范围创建UIBezierPath来为此基本阴影指定路径。
You may also need to set the layer’s masksToBound property to true if the shadow isn’t showing up. By doing so, you’re allowing the layer content to be drawn outside of the layer bounds.
如果未显示阴影,则可能还需要将图层的masksToBound属性设置为true 。 这样,您就可以在图层边界之外绘制图层内容。


You can set a non-zero shadow offset position to customize the shadow position. Remember that to keep a smooth interface, it is usually better to set a similar offset between views as the shadow is supposed to be set based on light orientation.
您可以设置非零阴影偏移位置以自定义阴影位置。 请记住,要保持平滑的界面,通常最好在视图之间设置类似的偏移量,因为应该根据光线方向设置阴影。

The shadowRadius property will let you customize the blur applied to the shadow. Here is an example with a radius of 1, 10 and 50.
shadowRadius属性将使您可以自定义应用于阴影的模糊。 这是半径为1、10和50的示例。


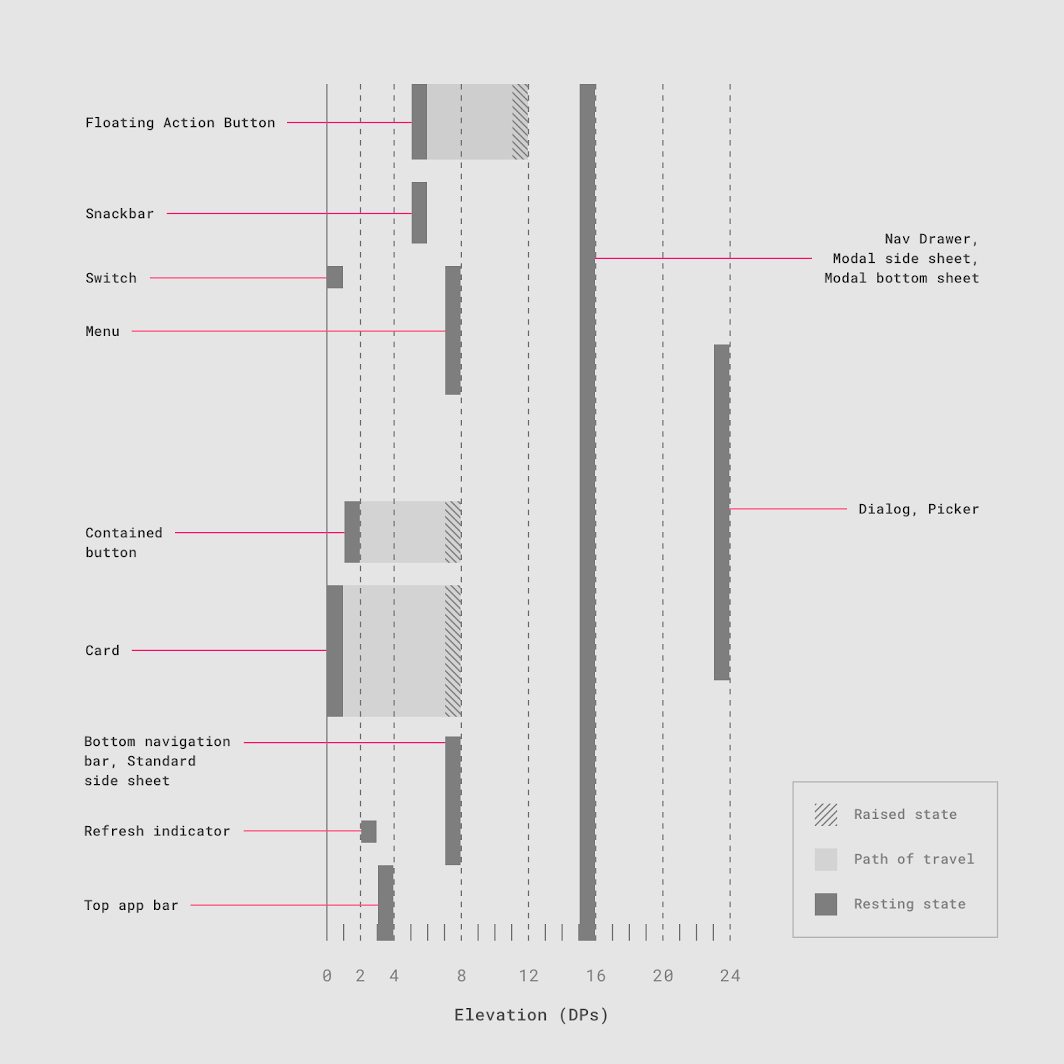
If you want to learn more about how to define a good elevation logic to apply to shadows in your app, there is a good documentation on material.io. It has been designed for apps themed with material design, but it still good informations and practices that can be used for every apps or websites, including iOS Apps.
如果您想了解更多有关如何定义良好的高程逻辑以应用于应用程序中的阴影的信息,请参阅material.io 。 它是针对以材料设计为主题的应用程序而设计的,但它仍然是可用于每个应用程序或网站(包括iOS应用程序)的良好信息和实践。
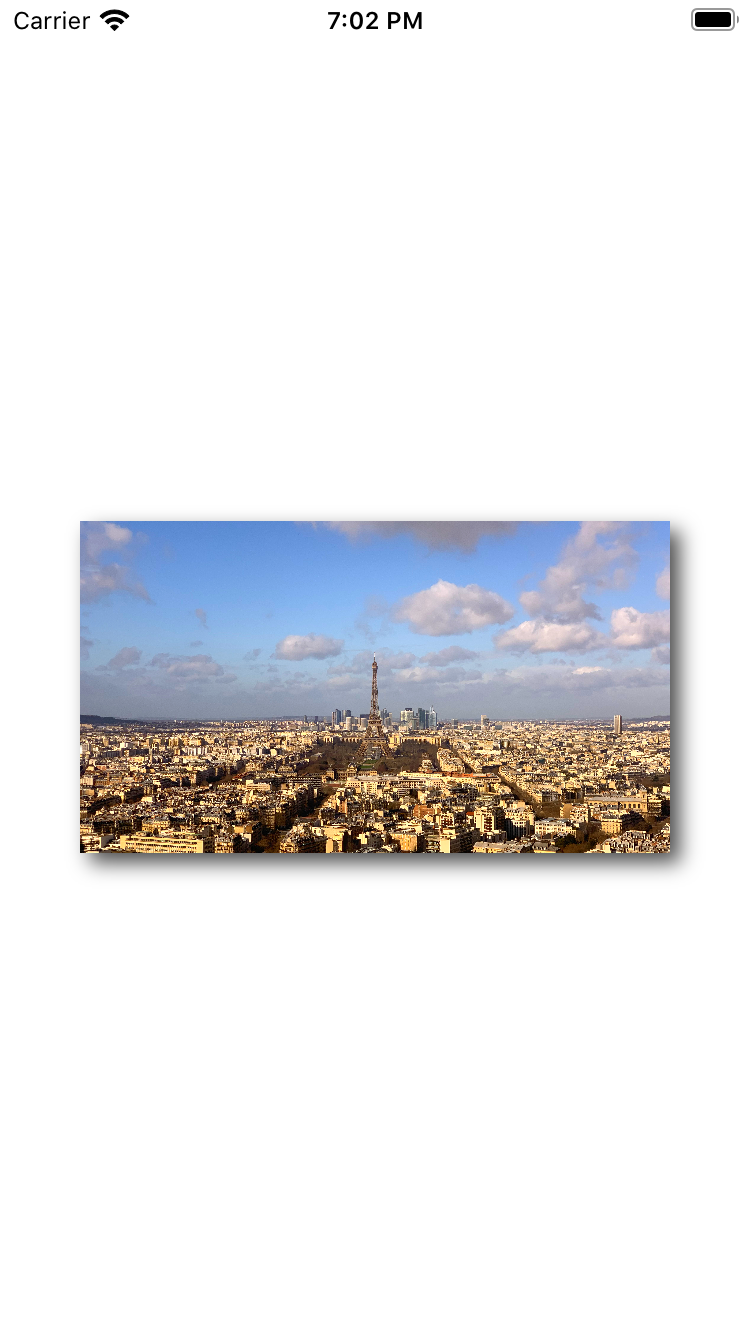
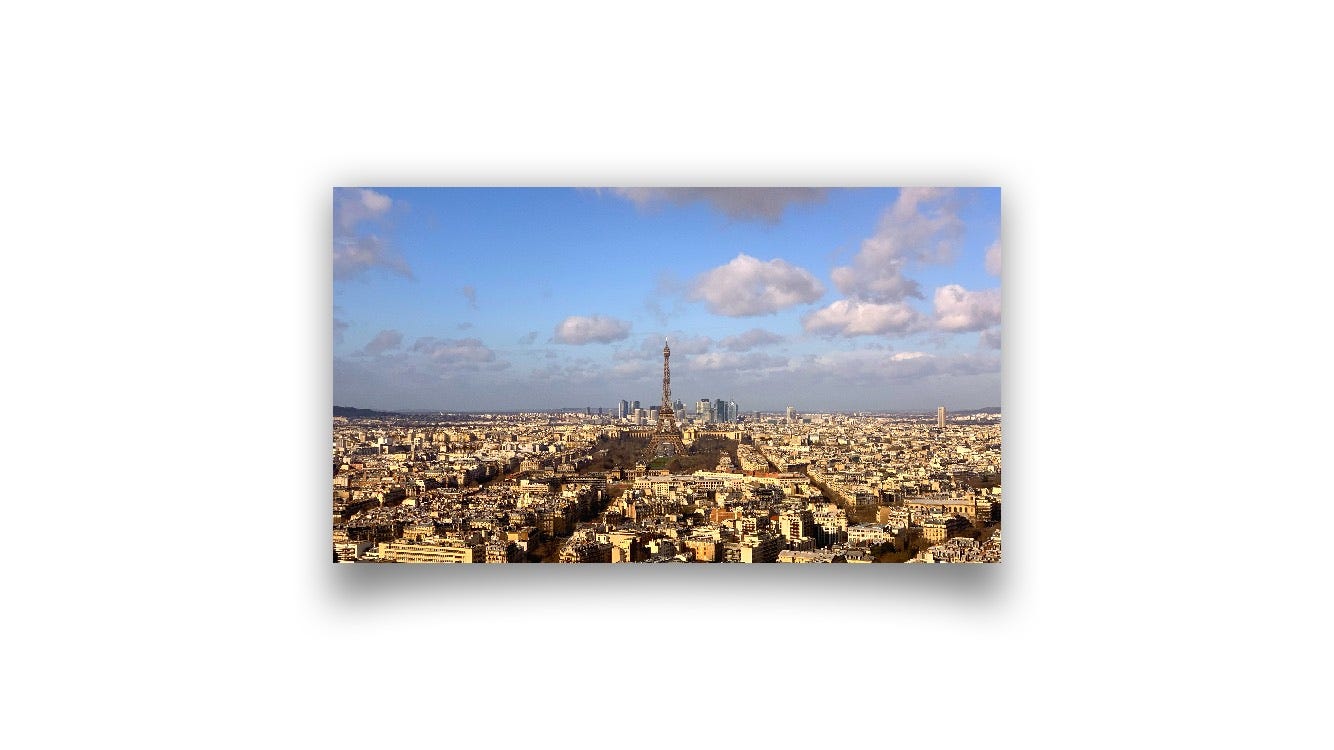
2.接触阴影 (2. Contact Shadows)
Contact shadows describe the kind of shadow you see when an object is in contact with a surface or near it.
接触阴影描述了当对象与表面接触或其附近时所看到的阴影的类型。
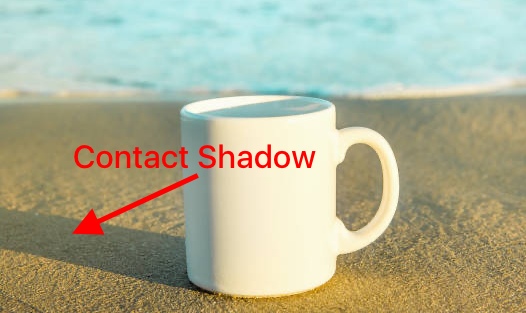
To add a custom contact shadow to a view, we’ll need to create a path that has the shape of the shadow we want: a flat oval.
要向视图中添加自定义接触阴影,我们需要创建一个具有所需阴影形状的路径:一个扁平的椭圆形。
A negative size will make the shadow looks smaller than the image. And a distance greater than 0 will make the view look distant from other views.
负size将使阴影看起来比图像小。 大于0的距离将使该视图看起来与其他视图相距遥远。
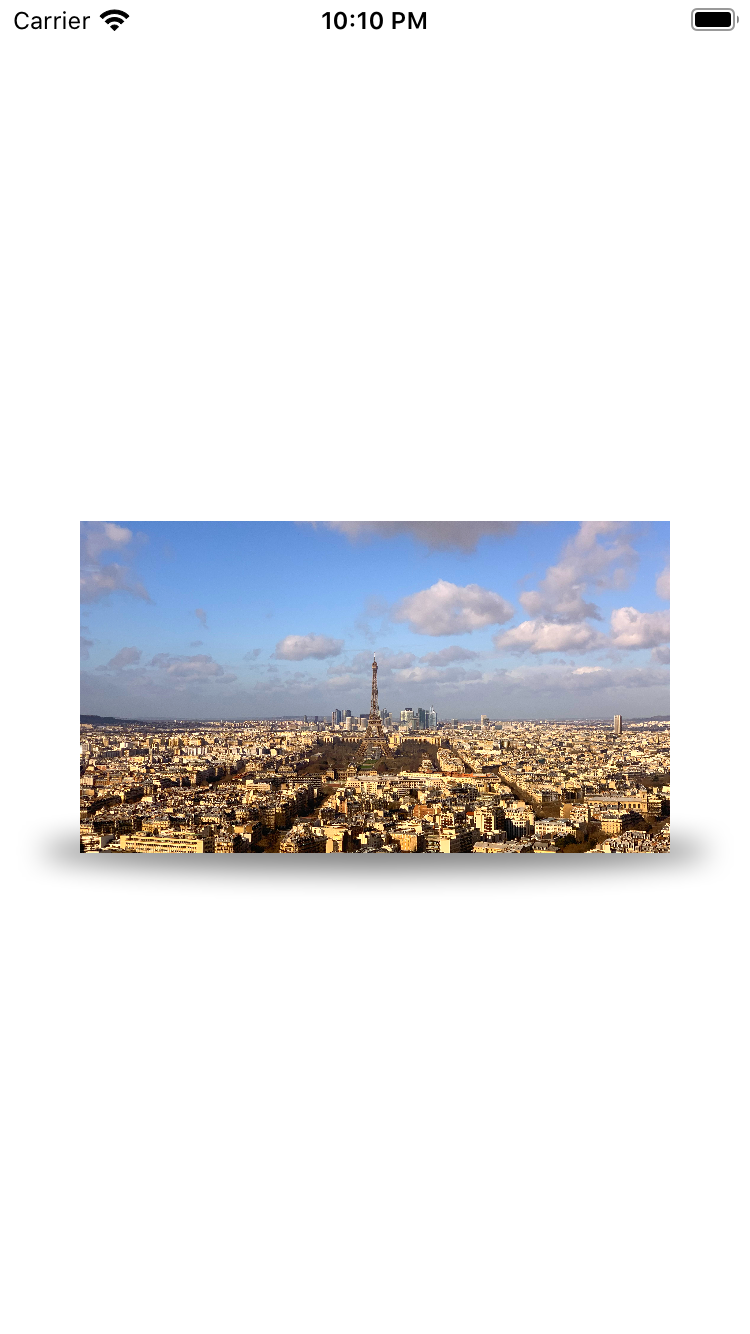
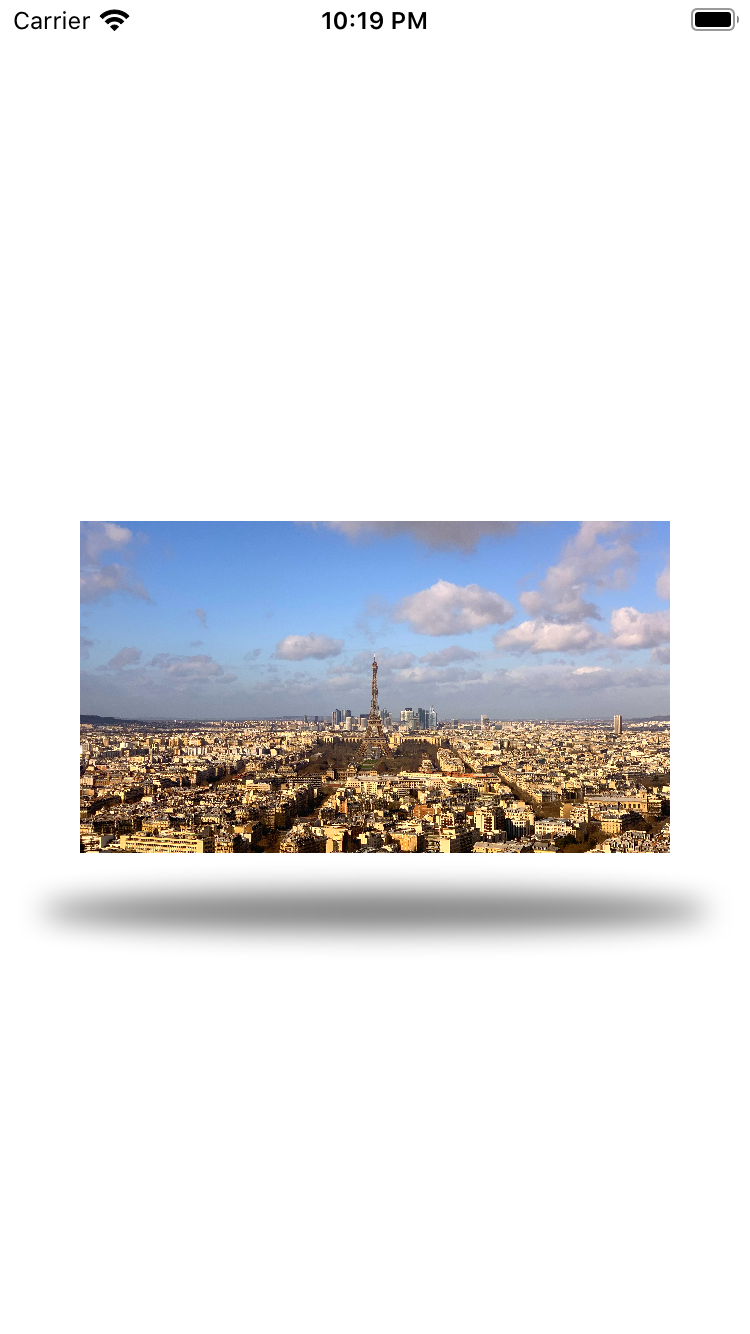
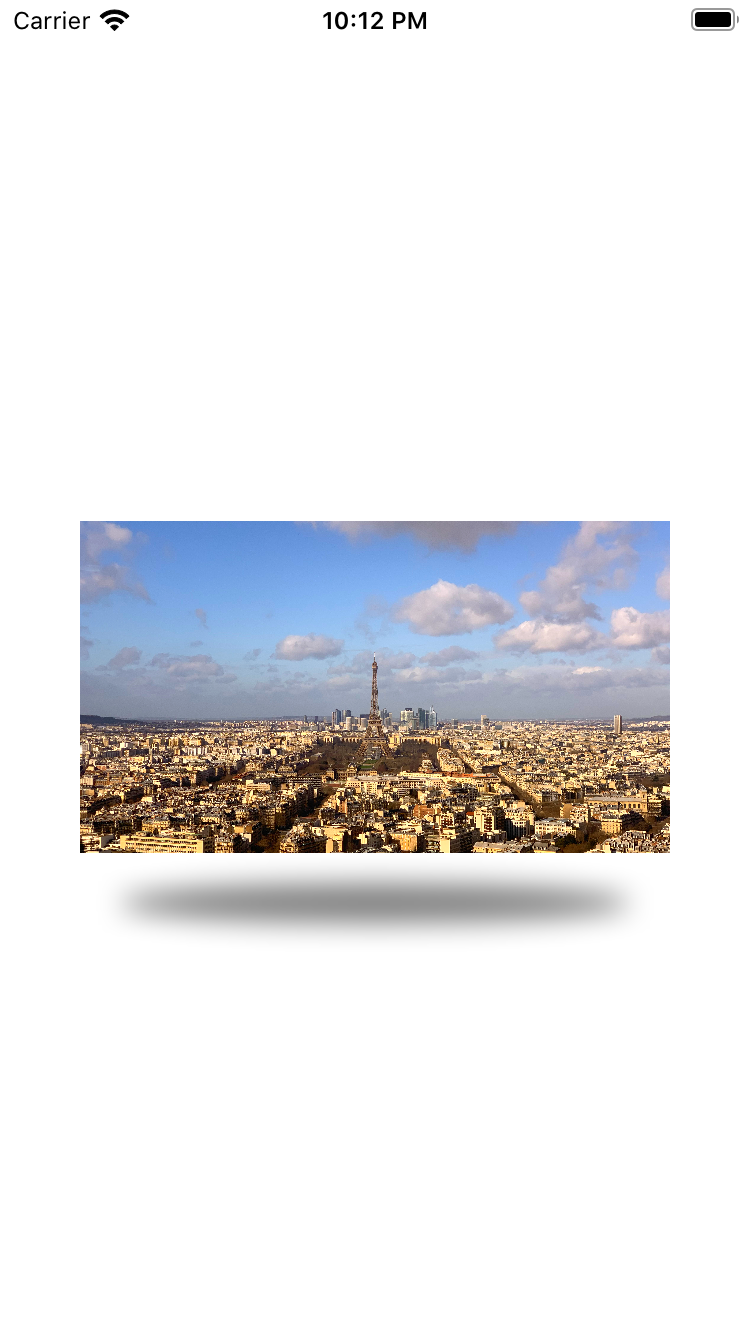
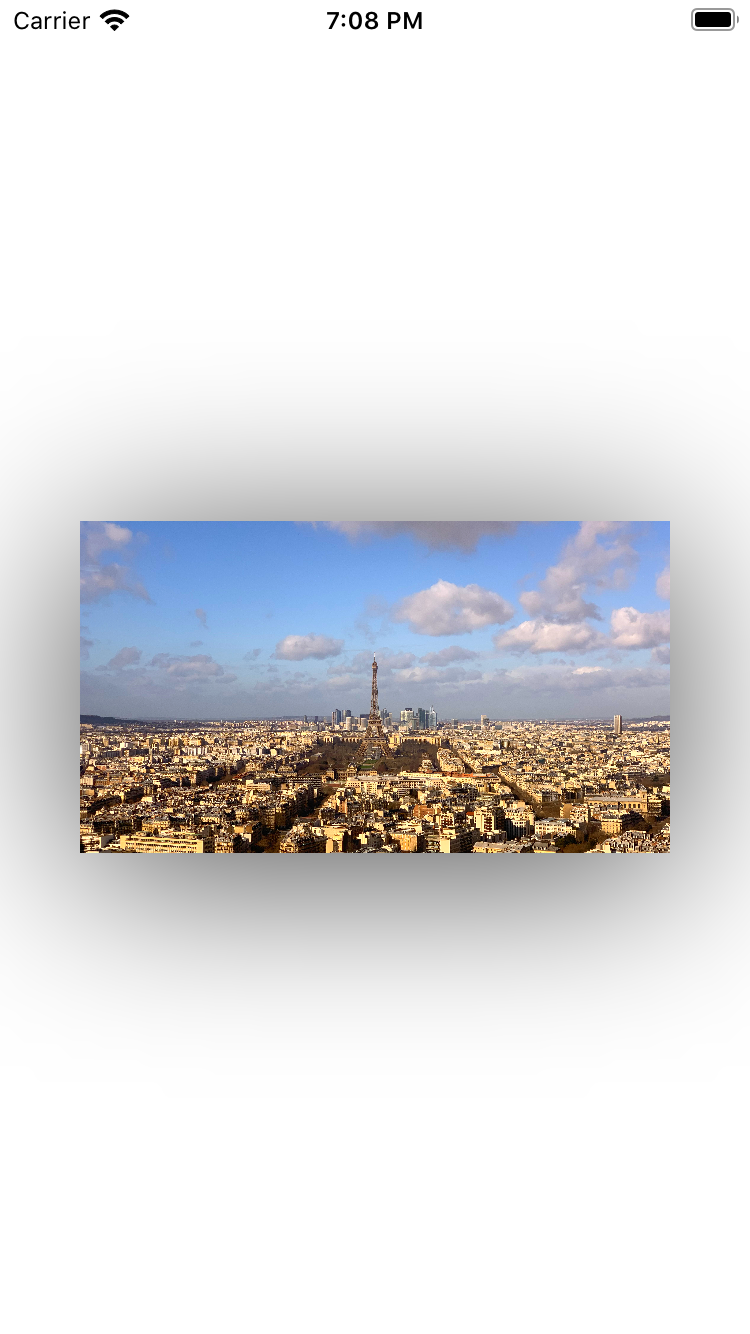
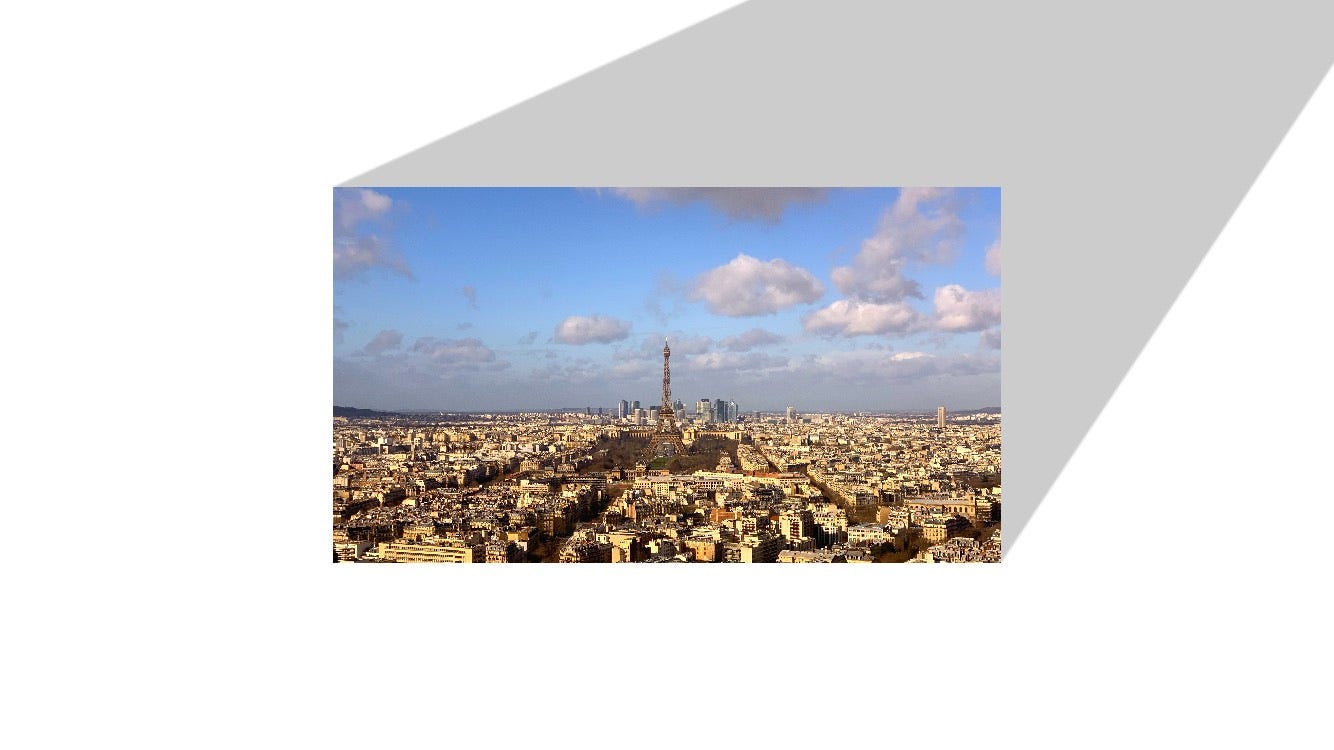
3.深度接触阴影 (3. Contact Shadows with Depth)
While the previous Contact Shadow make it looks like the light is above the view, we can add more depth with this effect so the view will looks like a 3D object with a light source ahead or behind the view.
尽管先前的“接触阴影”使光源看起来像在视图上方,但我们可以使用此效果添加更多的深度,因此视图看起来像是3D对象,光源在视图的前面或后面。
To create this effect, you will need to manually create the shadowPath representing a custom shape. Check the code below:
要创建此效果,您将需要手动创建表示自定义形状的shadowPath 。 检查以下代码:
You can change the scale value to make the shadow looks smaller or larger.
您可以更改比例值以使阴影看起来更小或更大。
If you put a negative value to scale.height, the shadow will appear behind the view: it changes depth direction.
如果将scale.height设置为负值,则阴影将出现在视图后面:它将更改深度方向。
With the offset property you can horizontally move the light source, thus twist the shadow to make it looks accordingly to the light origin.
使用offset属性,您可以水平移动光源,从而扭曲阴影以使其看起来与光源一致。
4.平面接触阴影 (4. Flat Contact Shadows)
This shadow effect has its place especially in modern design. It is getting more and more popular with flat design now being the norm.
这种阴影效果在现代设计中尤为重要。 如今,平面设计已成为越来越流行的规范。
For this effect, we’ll use the code base of the previous Contact Shadow with Depth effect. We actually only need to include a new offsetY property to make our flat effect working, and of course to reduce the shadow radius.
为此,我们将使用以前的“带深度接触阴影”效果的代码库。 实际上,我们只需要包含一个新的offsetY属性即可使我们的平面效果发挥作用,当然还可以减小阴影半径。
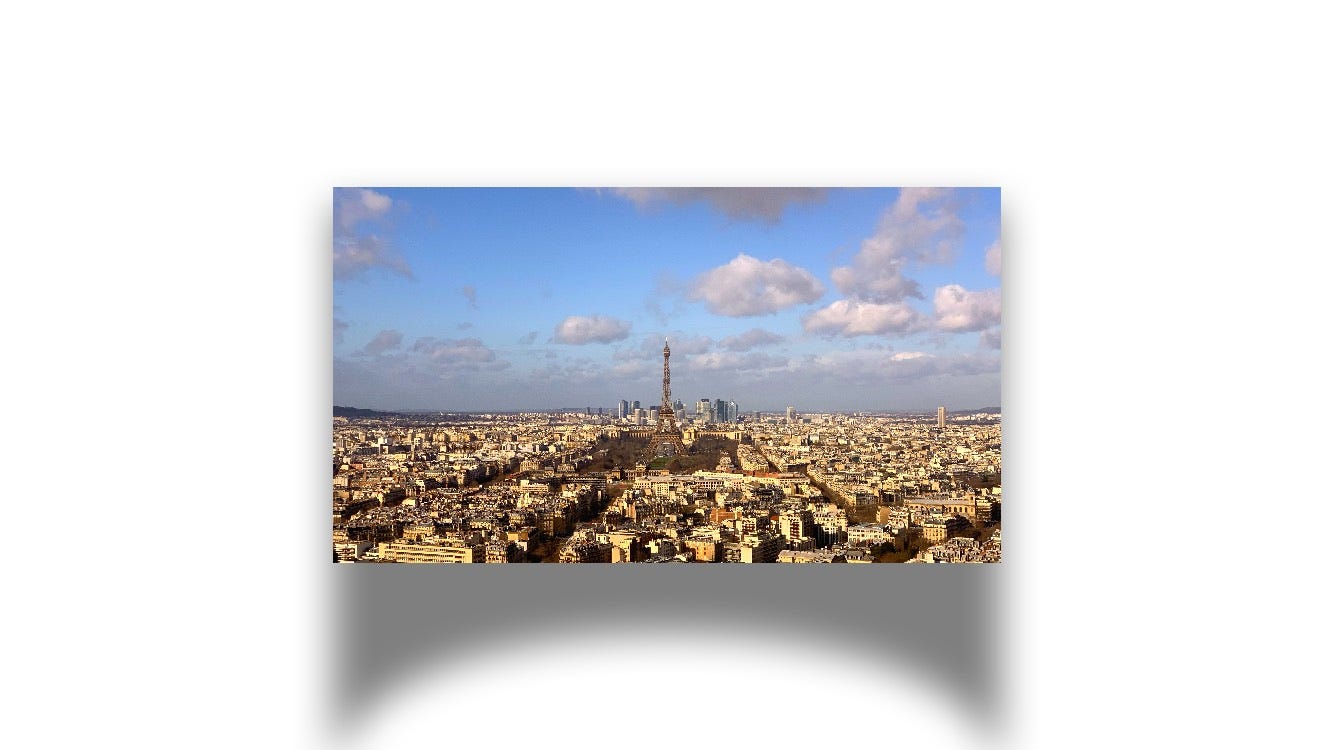
5.弯曲的阴影 (5. Curved Shadows)
For this last type of shadow, we’ll again use the shadowPath property. You may want to play a little with the values below to make a smooth shadow that will match your design needs.
对于这最后一种阴影,我们将再次使用shadowPath属性。 您可能需要对以下值进行一些调整,以制作出满足您设计需求的平滑阴影。
To make the shadow look curved, we use the addCurve function of UIBezierPath. By setting the curve property, you can customize the intensity of the curve. You can use directly the shadowOffset property of the layer to adjust it around your view.
为了让阴影看起来弯曲,我们使用addCurve的功能UIBezierPath 。 通过设置curve属性,可以自定义曲线的强度。 您可以直接使用图层的shadowOffset属性在视图周围进行调整。
回顾 (Recap)
Now you know how to add depth to your apps by adding beautiful and fully customized shadows with CALayer, and you’ve learn how to create basic and advanced shadows based on the shadowPath property. Here is a quick recap of the 5 types of shadow we saw in this article.
现在,您知道如何通过使用CALayer添加漂亮且完全自定义的阴影来增加应用程序的深度,并且学习了如何基于shadowPath属性创建基本和高级阴影。 这是我们在本文中看到的5种阴影的快速概述。
1.阴影 (1. Drop Shadows)
2.接触阴影 (2. Contact Shadows)
3.深度接触阴影 (3. Contact Shadows with Depth)
4.平面接触阴影 (4. Flat Contact Shadows)
5.弯曲的阴影 (5. Curved Shadows)
您可能还会喜欢这篇文章: (You may also like this article:)
翻译自: https://medium.com/swlh/how-to-create-advanced-shadows-in-swift-ios-swift-guide-9d2844b653f8
ios swift 阴影


 204
204

 被折叠的 条评论
为什么被折叠?
被折叠的 条评论
为什么被折叠?
 到【灌水乐园】发言


