ios小部件
Note: This is part 2 of a 3-part tutorial. Make sure to complete part 1 before continuing with this article. You can find part 3 here.
注意: 这是一个分为3部分的教程的第2部分。 在继续本文之前, 请确保完成 第1部分 。 您可以 在此处 找到 第3部分 。
Widgets on iOS can support 3 different sizes: small, medium, and large. In part 1 of this tutorial, we only added support for small widgets. Now we will add a medium widget and a large widget as well.
iOS上的小部件可以支持3种不同的大小:小,中和大。 在本教程的第1部分中,我们仅添加了对小部件的支持。 现在,我们还将添加一个中型窗口小部件和一个大型窗口小部件。
Note: You’ll need Xcode 12 Beta 2 or higher to follow this tutorial.
注意: 您需要Xcode 12 Beta 2或更高版本才能遵循本教程。
支持不同的小部件尺寸 (Supporting Different Widget Sizes)
Open up the Emojibook project on Xcode and navigate to the Emojibook_Widget.swift file. To support different widget sizes, all we have to do is modify the arguments in the supportedFamilies modifier of the Emojibook_Widget struct. So go ahead and add .systemMedium and .systemLarge to the list of supported families.
在Xcode上打开Emojibook项目,然后导航到Emojibook_Widget.swift文件。 为了支持不同的小部件尺寸,我们要做的就是修改Emojibook_Widget结构的supportedFamilies修饰符中的Emojibook_Widget 。 因此,继续将.systemMedium和.systemLarge添加到受支持的家族列表中。
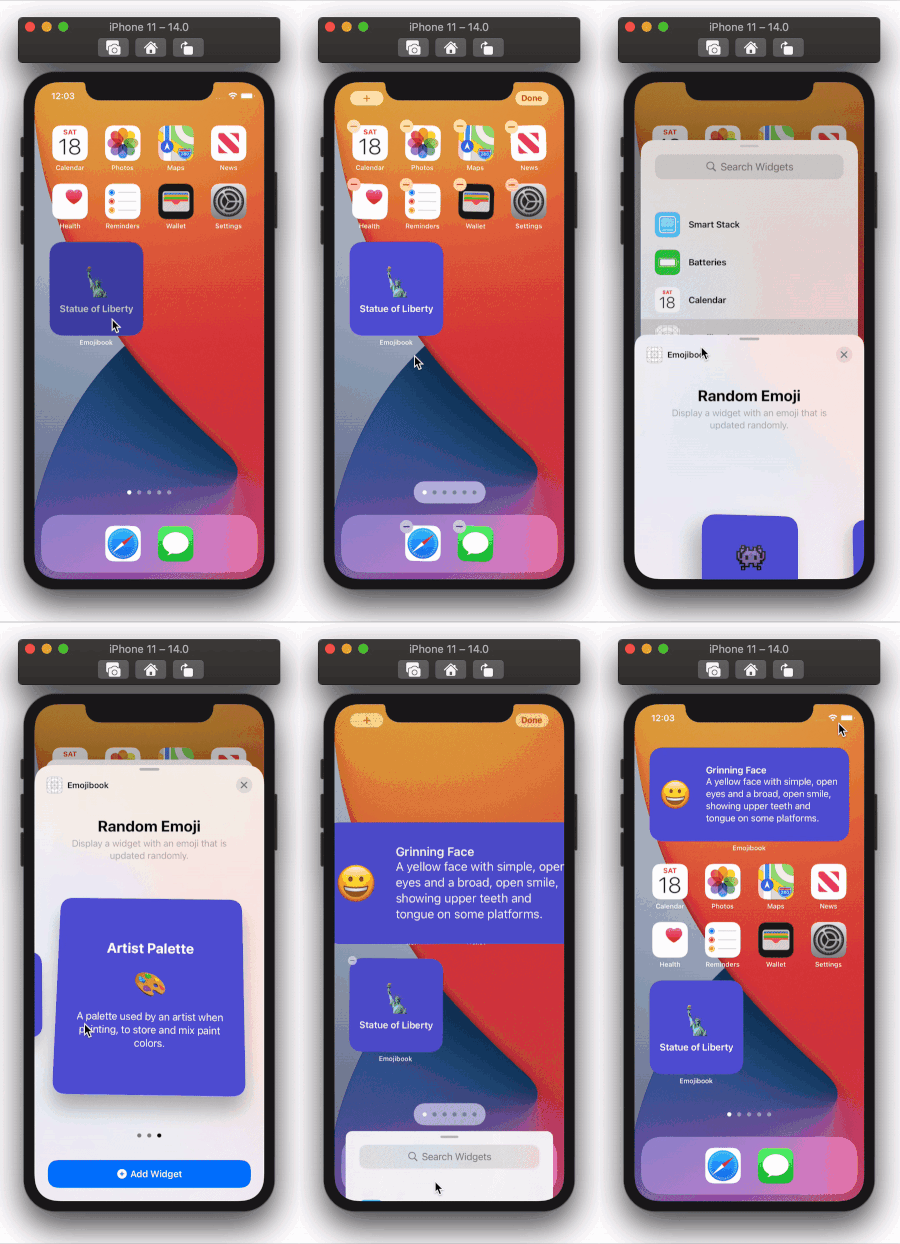
Now, run your app making sure the Emojibook WidgetExtension is the active scheme, and go into jiggle mode. Press the “+” button on the top left corner and select the Emojibook app. The Emojibook widget gallery will appear, you will now see the 3 different widget sizes you can add to your homescreen.
现在,运行您的应用程序,确保Emojibook WidgetExtension是活动方案,然后进入微动模式 。 按下左上角的“ +”按钮,然后选择Emojibook应用。 将显示Emojibook小部件库,您现在将看到可以添加到主屏幕的3种不同大小的小部件。

While these new widgets work, a lot of space is going unused, so we’re going to modify the views displayed for medium and large widgets. These widgets will show an emoji along with its name, and we’re also adding the emoji’s description. Navigate to EmojiWidgetView.swift and add a new View struct called MediumEmojiWidgetView. Its content will be similar to the small widget, but we’re adding a Text element with the emoji’s description, like so:
在这些新的窗口小部件工作时,将占用大量空间,因此我们将修改为中型和大型窗口小部件显示的视图。 这些小部件将显示表情符号及其名称,并且我们还将添加表情符号的描述。 导航到EmojiWidgetView.swift并添加一个名为MediumEmojiWidgetView的新View struct 。 它的内容类似于小部件,但是我们添加了带有表情符号描述的Text元素,如下所示:
Now add another View struct called LargeEmojiWidgetView. Its content will be the same as that of the MediumEmojiWidgetView, but it will be arranged a little differently:
现在添加另一个名为LargeEmojiWidgetView View struct 。 其内容将与MediumEmojiWidgetView内容相同,但排列方式略有不同:
Let’s also move the code under the EmojiWidgetView struct into a new SmallEmojiWidgetView View struct.
让我们还将EmojiWidgetView struct下的代码移动到新的SmallEmojiWidgetView View struct 。
We will now modify EmojiWidgetView to include a WidgetFamily property. We can access our widget’s widgetFamily by using the Environment property wrapper. This allows us to read the widget’s widgetFamily value directly from our EmojiWidgetView’s environment.
现在,我们将修改EmojiWidgetView以包括WidgetFamily属性。 我们可以使用Environment属性包装器来访问小部件的widgetFamily 。 这使我们可以直接从EmojiWidgetView的环境中读取小部件的widgetFamily值。

Environment property wrapper.
Environment属性包装器。
Based on the value of the family property we will determine the size of our widget and return one the views we just added. To do this, we will also need to add the ViewBuilder property wrapper to the body of our View.
根据family属性的值,我们将确定小部件的大小,并返回刚才添加的视图之一。 为此,我们还需要将ViewBuilder属性包装器添加到View的body中。
Let’s run our widget and open the widget gallery to see how our widget will look in different sizes.
让我们运行窗口小部件并打开窗口小部件库,以查看窗口小部件在不同尺寸下的外观。

Cool! Our medium and large widgets look better and make good use of screen real estate. Now let’s work on adding deep links to our app.
凉! 我们的中型和大型小部件看起来更好,并且可以充分利用屏幕空间。 现在让我们为应用程序添加深层链接。
小部件深层链接 (Widget Deep Links)
Let’s add deep links so that our app will open the EmojiDetailsView we built in part 1 when launching it through the small widget. The details view will show data for the emoji that was in the widget when it was tapped. To do this, we will use the widgetURL modifier to supply a url to our SmallEmojiWidget, this is the url that will be opened when the widget is tapped. We will then use the onOpenURL view modifier to handle the widget’s url, and open the corresponding details sheet.
让我们添加深层链接,以便我们的应用程序通过小部件启动时,将打开在第1部分中构建的EmojiDetailsView 。 详细信息视图将显示点击时在小部件中的表情符号数据。 为此,我们将使用widgetURL修饰符为我们的SmallEmojiWidget提供一个URL,这是在点击该窗口小部件时将打开的URL。 然后,我们将使用onOpenURL视图修饰符来处理小部件的url,并打开相应的详细信息表。
First things first, we need to update our EmojiDetails struct to include a unique URL property. We will use an emoji’s name to construct the url, making sure to remove any whitespaces in the string; for example, the “🤯” emoji’s url will be emoji://ExplodingHead.
首先,我们需要更新EmojiDetails struct以包括唯一的URL属性。 我们将使用表情符号的name来构造url,并确保删除字符串中的所有空格。 例如,“🤯”表情符号的网址将为emoji://ExplodingHead 。
Now, in EmojiWidgetView.swift, we will add the widgetURL modifier to our SmallEmojiWidgetView:
现在,在EmojiWidgetView.swift ,我们将widgetURL修饰符添加到我们的SmallEmojiWidgetView :
To actually open the details sheet, we need to handle this url in EmojibookListView.swift. We will first add a new variable with the State property wrapper to keep track of the current EmojiDetails instance visible in the sheet, if any.
要实际打开详细信息表,我们需要在EmojibookListView.swift处理此URL。 我们将首先使用State属性包装器添加一个新变量,以跟踪表中可见的当前EmojiDetails实例(如果有)。
@State private var visibleEmojiDetails: EmojiDetails?
@State private var visibleEmojiDetails: EmojiDetails?
The visibleEmojiDetails variable can be updated from two places: either when handling the widget url, or when pressing on an item in the emoji list. Using the sheet view modifier, the sheet will automatically be updated and displayed any time visibleEmojiDetails changes its value.
可以从两个位置更新visibleEmojiDetails变量:处理窗口小部件URL或按表情符号列表中的项目时。 使用工作sheet视图修饰符, visibleEmojiDetails更改其值,该工作表将自动更新并显示。
We will add the onOpenURL modifier, and here we will try to find the EmojiDetails for the emoji that was tapped on the widget. Once we have it, we will update visibleEmojiDetails with it. We will also need to make some updates to each Button in our list, so that each button’s action will update visibleEmojiDetails as well. In the end, our EmojibookListView will look like so:
我们将添加onOpenURL修饰符,在这里我们将尝试找到在小部件上点击的表情符号的EmojiDetails 。 有了它后,我们将使用它更新visibleEmojiDetails 。 我们还需要对列表中的每个Button进行一些更新,以便每个按钮的操作也将更新visibleEmojiDetails 。 最后,我们的EmojibookListView将如下所示:
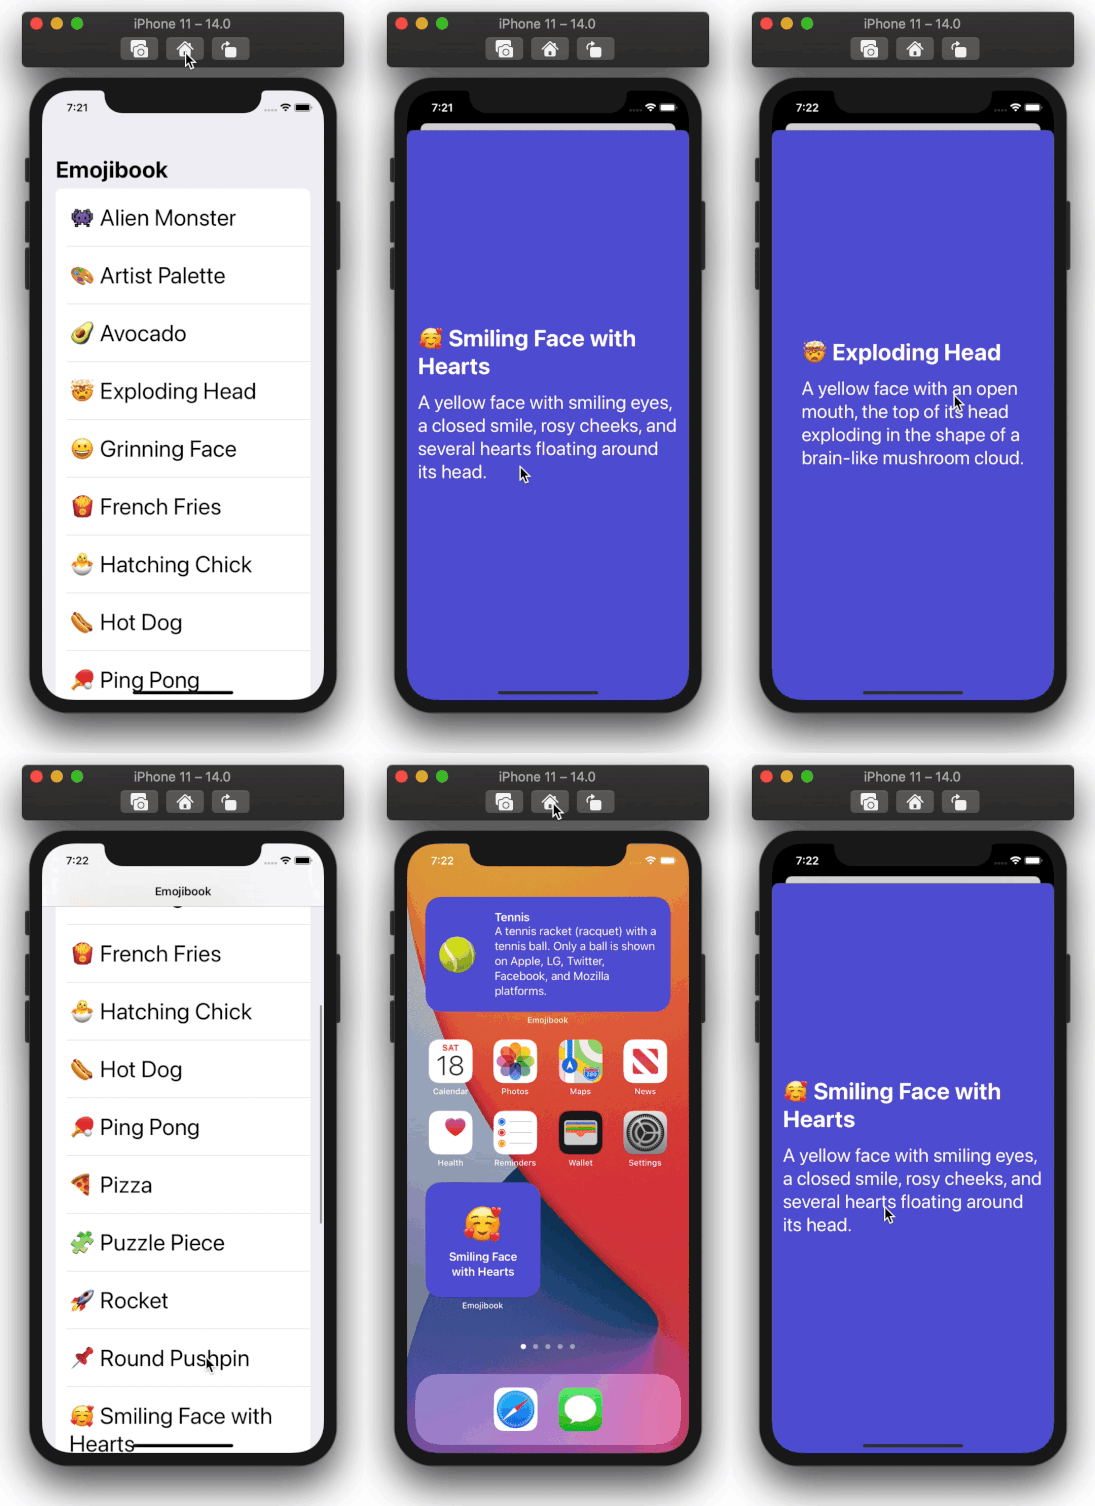
Let’s go ahead and test our deep links. Make sure the Emojibook app is the active scheme, then click play to build and run. When you press the small widget, the app should now go directly to the EmojiDetailsView with data corresponding to the emoji in the widget.
让我们继续测试我们的深层链接。 确保Emojibook应用程序是活动方案,然后单击播放以构建并运行。 当您按下小控件时,应用程序现在应直接进入EmojiDetailsView ,其中EmojiDetailsView与控件中的表情符号相对应的数据。

Thanks for reading! I hope you enjoyed this article and found it useful. You can find the completed part 2 app on GitHub.
谢谢阅读! 我希望您喜欢这篇文章并觉得它有用。 您可以在GitHub上找到完整的第2部分应用程序。
Next up: In part 3 of this tutorial, I will show you how to use SiriKit intents to make user-configurable widgets. A user will be able to select an EmojiDetails of their choice to display in the widget.
下一步:在本教程的第3部分中,我将向您展示如何使用SiriKit意图制作用户可配置的小部件。 用户将可以选择自己选择的EmojiDetails显示在小部件中。
To learn more about WidgetKit, make sure to check out Apple’s awesome resources:
要了解有关WidgetKit的更多信息,请确保查看Apple的出色资源:
翻译自: https://medium.com/swlh/build-your-first-ios-widget-part-2-c69b193b9612
ios小部件


 被折叠的 条评论
为什么被折叠?


