


A little while ago I wrote an article on how to set up the react-navigation package for react-native projects. When writing that article I had only been exposed to react navigation 4.x and wrote a quick how-to on setting navigation within a mobile application. After having used react-navigation 5.x a little bit, I wanted to write another quick tutorial on once again setting up basic navigation within your react-native application.
不久前,我写了一篇文章 ,介绍如何为本机项目设置react-navigation包。 在撰写该文章时,我只接触过React Navigation 4.x,并撰写了有关在移动应用程序中设置导航的快速操作方法。 在使用了react-navigation 5.xa一点之后,我想写另一个快速的教程,关于在您的react-native应用程序中再次设置基本导航。
安装 (Installation)
Regardless of how you initialize a react-native project you will need to install the core library. CD in to your project directory and run the following line in your terminal:
无论您如何初始化本机项目,都将需要安装核心库。 CD进入您的项目目录,并在终端中运行以下行:
$ npm install @react-navigation/nativeNext we need to install the dependencies. If you initialized your project using the expo-cli you will need to run the following line terminal:
接下来,我们需要安装依赖项。 如果使用expo-cli初始化了项目,则需要运行以下行终端:
$ expo install react-native-gesture-handler react-native-reanimated react-native-screens react-native-safe-area-context @react-native-community/masked-viewOn the other hand if you initialized your project using the react-native-cli then run the following line:
另一方面,如果您使用react-native-cli初始化了项目,请运行以下行:
$ npm install react-native-reanimated react-native-gesture-handler react-native-screens react-native-safe-area-context @react-native-community/masked-viewFinally we are going to install the ‘Stack’ navigation library. This will provide a project with the ability to use the ‘Stack Navigator’. There are several other navigators you can choose from such as ‘Tab’ and ‘Drawer’, but ‘Stack’ provides us the general functionalities we would want in any mobile application. Like before we are going to run another line in our terminal:
最后,我们将安装“堆栈”导航库。 这将为项目提供使用“堆栈导航器”的功能。 您可以选择其他几种导航器,例如“ Tab”和“ Drawer”,但是“ Stack”为我们提供了在任何移动应用程序中所需的常规功能。 就像之前我们要在终端中运行另一行一样:
$ npm install @react-navigation/stackWith this we have installed all of our dependencies so now it is time to set up our navigation.
通过此操作,我们已经安装了所有依赖项,因此现在是时候设置导航了。
添加要导航的屏幕 (Adding Screens To Navigate To)
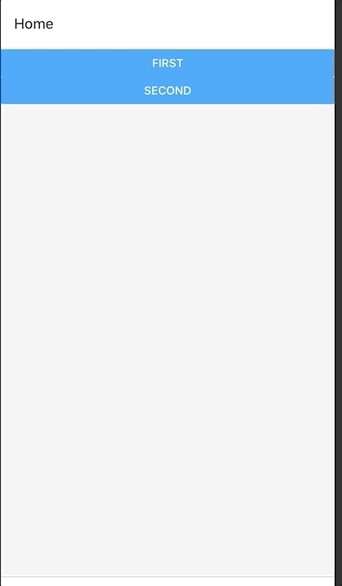
For this example our next step is to add a few screens to navigate too. I am setting up three screens below: a HomeScreen, FirstScreen, and SecondScreen. The Home Screen will render two buttons, and the First and Second will render a single string of text once we navigate to them:
对于此示例,我们的下一步是添加一些屏幕进行导航。 我将在下面设置三个屏幕:主屏幕,第一屏幕和第二屏幕。 主屏幕将呈现两个按钮,并且一旦导航到它们,“第一”和“第二”将呈现单个文本字符串:
// HomeScreenimport React from 'react'
import { View, Button } from 'react-native'const HomeScreen = () => {
  return (
    <View>
      <Button
        title='First'
      />
      <Button
        title='Second'
      />
    </View>
  )
}
export default HomeScreen...// FirstScreenimport React from 'react'
import { StyleSheet, Text, View } from 'react-native'const FirstScreen = () => {
  return (
    <View>
      <Text> First Screen </Text>
    </View>
  )
}export default FirstScreenconst styles = StyleSheet.create({})...// SecondScreenimport React from 'react'
import { StyleSheet, Text, View } from 'react-native'const SecondScreen = () => {
  return (
    <View>
      <Text> Second Screen </Text>
    </View>
  )
}export default SecondScreenconst styles = StyleSheet.create({})
设置导航器 (Setting up the Navigator)
Now that we have some screens to navigate to, our next step will be to enter our applications ‘App.js’ file and add four import statements. First, the ‘NavigationContainer’ from the ‘react navigation’ library. Second, the ‘createStackNaivigator’ function from ‘react-navigation/stack’. Finally, we will import the Home, First and Second screens.
现在我们有一些屏幕可以导航到,下一步是输入应用程序“ App.js”文件并添加四个import语句。 首先,来自“React导航”库的“ NavigationContainer”。 其次,来自“React导航/堆栈”的“ createStackNaivigator”功能。 最后,我们将导入主屏幕,第一屏幕和第二屏幕。
import { NavigationContainer } from '@react-navigation/native'
import { createStackNavigator } from '@react-navigation/stack'
import HomeScreen from './src/screens/HomeScreen
import FirstScreen from './src/screens/FirstScreen'
import SecondScreen from './src/screens/SecondScreen
Our next step will be to create our navigation stack through the ‘createStackNavigator’ function above our component:
下一步将通过组件上方的“ createStackNavigator”函数创建导航堆栈:
const Stack = createStackNavigator()Following this we can now wrap we can now remove everything in our App.js component render and add in our ‘NavigationContainer’:
接下来,我们可以打包,现在可以删除App.js组件渲染中的所有内容,并添加“ NavigationContainer”:
export default function App() {
  return (
    <NavigationContainer>
    </NavigationContainer>
  )
}
Next we can add our Stack and call on the ‘Navigator’ function so that we can set up our navigation routes:
接下来,我们可以添加堆栈并调用“导航器”功能,以便我们可以设置导航路线:
export default function App() {
  return (
    <NavigationContainer>
      <Stack.Navigator>
      </Stack.Navigator>
    </NavigationContainer>
   )
}
After this we can begin wiring up our screens by adding a Stack.Screen element inside our Stack.Navigator. To do so we will also pass each Stack.Screen a few props. A component prop and a name prop. The component prop will be a piece of ‘JSX’ that points to the appropriate component; while the name will be a string that should also correspond to the component. Finally, we also need to pass our Stack.Navigator a prop called initialRouteName which will receive a string that correspond to one of the name props under our Stack.Screen in this case our HomeScreen:
之后,我们可以通过在Stack.Navigator中添加Stack.Screen元素来开始连接屏幕。 为此,我们还将传递每个Stack.Screen一些道具。 组件属性和名称属性。 组件道具将是一块“ JSX”,指向相应的组件; 而名称将是一个字符串,也应该与组件相对应。 最后,我们还需要传递一个名为initialRouteName的属性给Stack.Navigator,该属性将接收一个与我们Stack.Screen下的名称props之一相对应的字符串,在本例中为HomeScreen:
export default function App() {
  return (
    <NavigationContainer>
      <Stack.Navigator initialRouteName="Home">
        <Stack.Screen
          component={HomeScreen}
          name="Home"
        />
        <Stack.Screen
          component={FirstScreen}
          name="First"
        />
        <Stack.Screen
          component={SecondScreen}
          name="Second"
        />
      </Stack.Navigator>
    </NavigationContainer>
  )
}
With this our navigator is set up we now just need to add a little bit of logic to our home screen so that we can navigate to our First and Second screens.
有了这个导航器,我们现在只需要在主屏幕上添加一点逻辑,以便我们可以导航到我们的第一屏幕和第二屏幕。
在主屏幕中连接导航器 (Wiring up the Navigator in the HomeScreen)
To finish up the setup we just need to pass the navigation prop to our HomeScreen:
要完成设置,我们只需要将导航道具传递到主屏幕即可:
const HomeScreen = ({navigation}) => {
  return (
    <View>
      <Button
        title='First'
      />
      <Button
        title='Second'
      />
    </View>
  )
}
Next we can add the on press events to our buttons and in our callback functions for those events call on the navigate function on our navigation prop passing the name of our navigation route as an argument:
接下来,我们可以将按下事件添加到按钮中,并在这些事件的回调函数中添加这些事件,并在导航道具上的导航功能上调用导航路线名称作为参数:
const HomeScreen = ({navigation}) => {
  return (
    <View>
      <Button
        title='First'
        onPress={() => navigation.navigate("First")}
      />
      <Button
        title='Second'
        onPress={() => navigation.navigate("Second")}
      />
    </View>
  )
}
With this we can now start our sever, press on the buttons and watch what happens:
这样,我们现在就可以启动服务器,按一下按钮,然后观察发生了什么:
最终代码片段 (Final Code Snippets)
import { NavigationContainer } from '@react-navigation/native'
import { createStackNavigator } from '@react-navigation/stack'
import HomeScreen from './src/screens/HomeScreen
import FirstScreen from './src/screens/FirstScreen'
import SecondScreen from './src/screens/SecondScreenconst Stack = createStackNavigator()export default function App() {
  return (
    <NavigationContainer>
      <Stack.Navigator initialRouteName="Home">
        <Stack.Screen
          component={HomeScreen}
          name="Home"
        />
        <Stack.Screen
          component={FirstScreen}
          name="First"
        />
        <Stack.Screen
          component={SecondScreen}
          name="Second"
        />
      </Stack.Navigator>
    </NavigationContainer>
  )
}... //HomeScreenimport React from 'react'
import { View, Button } from 'react-native'const HomeScreen = ({navigation}) => {
  return (
    <View>
      <Button
        title='First'
        onPress={() => navigation.navigate("First")}
      />
      <Button
        title='Second'
        onPress={() => navigation.navigate("Second")}
      />
    </View>
  )
}export default HomeScreen...// FirstScreenimport React from 'react'
import { StyleSheet, Text, View } from 'react-native'const FirstScreen = () => {
  return (
    <View>
      <Text> First Screen </Text>
    </View>
  )
}export default FirstScreenconst styles = StyleSheet.create({})...
//Second Screenimport React from 'react'
import { StyleSheet, Text, View } from 'react-native'const SecondScreen = () => {
  return (
    <View>
      <Text> Second Screen </Text>
    </View>
  )
}export default SecondScreenconst styles = StyleSheet.create({})
结论 (Conclusion)
That’s all it takes to get started with react-navigation 5x. Happy Coding!
这就是5倍React导航入门所需的全部内容。 编码愉快!
翻译自: https://medium.com/swlh/using-react-navigation-5-x-5cf899968f7b


 934
934

 被折叠的 条评论
为什么被折叠?
被折叠的 条评论
为什么被折叠?
 到【灌水乐园】发言


