


rails api ws
In rails, a serializer allows you to customize data instead of having a default render.
在Rails中,序列化程序允许您自定义数据,而不使用默认的呈现器。
In this article, we’ll look at a step by step guide to using the serializer in your application.
在本文中,我们将逐步介绍在您的应用程序中使用序列化程序的指南。
Rails API的问题 (The problem with the Rails API)
Rails is a great way to be used as an API with the render json method. However, the JSON data is often full of things you don’t want and doesn’t offer many options for customization.
Rails是一种与render json方法一起用作API的好方法。 但是,JSON数据通常充满了您不想要的东西,并且没有提供许多自定义选项。
Let’s say you want to query a list of dogs and their owners from your database. We’ll define the two models and routes:
假设您要从数据库中查询狗及其主人的列表。 我们将定义两个模型和路线:
rails g model Person
rails g model DogLet’s define our routes and controllers
让我们定义我们的路线和控制器
rails g controller Dogs
rails g controller People
Now our PeopleController will look like this:
现在,我们的PeopleController将如下所示:
We seed our database with a list of people and dogs. In your seeds.rb file, you can have:
我们用一个人和狗的列表来填充数据库。 在您的seed.rb文件中,您可以具有:
Then run the command
然后运行命令
rails db:seedThis command will help you seed your database with new data. That way, you can make API calls to retrieve them.
该命令将帮助您为数据库添加新数据。 这样,您可以进行API调用来检索它们。
Now let’s define our routes :
现在让我们定义路线:
These routes will help us query all the dogs in the database as well as the people.
这些路线将帮助我们查询数据库中的所有狗以及其他人。
Here are the two routes I am creating with the GET method:
这是我使用GET方法创建的两条路线:
GET http://localhost:3000/dogs
GET http://localhost:3000/dogs/:id
We’ll be more interested in querying the dog's endpoint.
我们将对查询狗的端点更加感兴趣。
在没有序列化器的情况下查询数据 (Querying data without a serializer)
After defining our routes, controllers, and seeding our database, we can use the available routes to query a list of dogs.
在定义了路线,控制器并为我们的数据库添加种子之后,我们可以使用可用的路线来查询狗列表。
To do that, we’ll use Postman. Postman is a software development tool that helps you make API calls and test them. If you haven’t already, I recommend you install it. Not only will it help you in this tutorial, but as well in your daily work.
为此,我们将使用邮递员。 Postman是一种软件开发工具,可帮助您进行API调用并进行测试。 如果尚未安装,建议您安装它。 它不仅对本教程有帮助,而且对您的日常工作也有帮助。
Download Postman here
在此处下载邮递员
With Postman installed, let’s start our Rails server using the default port with the command:
安装Postman后,让我们使用以下命令的默认端口启动Rails服务器:
rails server ou simply rails sNext step, open Postman:
下一步,打开邮递员:
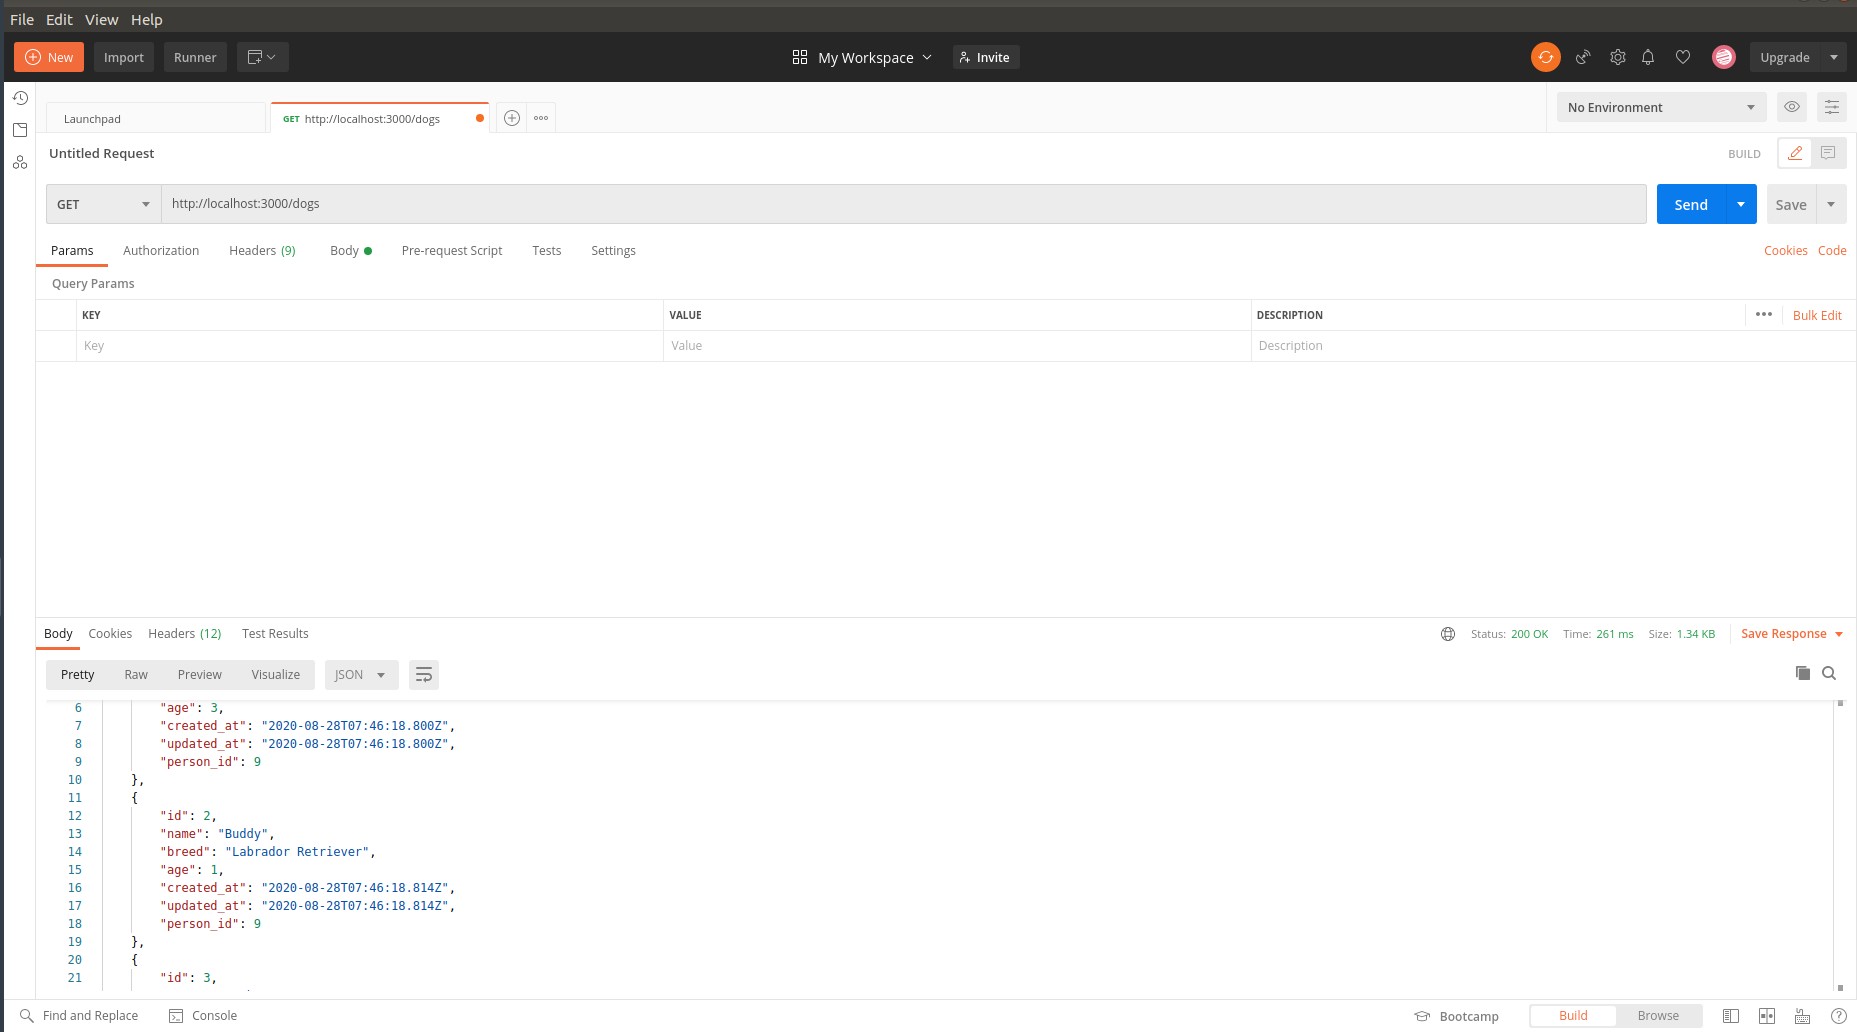
Let’s say you want to query a list of all the dogs available in the database, using the normal routes we previously said. With Postman, we can make a GET request to handle it. Make sure you start your Rails server and copy the routes into Postman (for a GET request)
假设您要使用我们之前所说的常规路由查询数据库中所有可用狗的列表。 使用Postman,我们可以发出GET请求来处理它。 确保启动Rails服务器并将路由复制到Postman(用于GET请求)
The default data will give you :
默认数据将为您提供:
[{"id": 1,"name": "Lisa","breed": "German shepherd","age": 3,"created_at": "2020-08-28T07:55:40.579Z","updated_at": "2020-08-28T07:55:40.579Z","person_id": 1},{"id": 2,"name": "Buddy","breed": "Labrador Retriever","age": 1,"created_at": "2020-08-28T07:55:40.602Z","updated_at": "2020-08-28T07:55:40.602Z","person_id": 1},{"id": 3,"name": "Rocky","breed": "Husky","age": 4,"created_at": "2020-08-28T07:55:40.625Z","updated_at": "2020-08-28T07:55:40.625Z","person_id": 1}]In this case, we are getting a list of dogs with the name, breed, person_id, etc.
在这种情况下,我们将获得名称,品种,person_id等的狗的列表。
But do you need all this information? Is there anything else you would like to know about each of those dogs? For example, each dog has its owner. But in this data, we only get a “user_id”. Not that intuitive…
但是,您是否需要所有这些信息? 您还想了解这些狗中的每条狗吗? 例如,每只狗都有其主人。 但是在此数据中,我们仅获得一个“ user_id”。 不太直观...
As well, I don’t need to know when data was created or updated. This includes some customization when the app renders. And you can do this with a serializer!
同样,我不需要知道何时创建或更新数据。 当应用渲染时,这包括一些自定义。 您可以使用序列化器来完成!
使用序列化器gem (Using the serializer gem)
The active_model_serializer gem allows you to customize the JSON file you render. Here’s the same JSON file as before, but with a serializer.
active_model_serializer gem允许您自定义呈现的JSON文件。 这是与以前相同的JSON文件,但带有序列化器。
{"id": 1,"name": "Lisa","age": 3,"breed": "German shepherd", "person": { "id": 7, "name": "John Doe"}Do you see the difference? Now, we have an owner and removed the created_at and updated_at keys. Let’s see how we can do it step by step.
你看得到差别吗? 现在,我们有了一个所有者,并删除了created_at和Updated_at键。 让我们看看我们如何逐步做到这一点。
First, let’s install our serializer. For that, we use the gem active_model_serializer. So add this line in your gemfile.
首先,让我们安装序列化程序。 为此,我们使用gem active_model_serializer。 因此,将此行添加到您的gemfile中。
gem ‘active_model_serializer’In your Rails app, run:
在您的Rails应用程序中,运行:
bundle install 创建您的第一个序列化器 (Creating your first serializer)
The next step is to create a serializer for a model you want to query data from. Let’s follow our example and decide to serialize our Dog model.
下一步是为要从中查询数据的模型创建序列化器。 让我们按照我们的示例并决定序列化我们的Dog模型。
In your terminal, run:
在您的终端中,运行:
rails generate serializer DogThis command creates a new folder called serializers (in your ‘app’ folder) and a new file called dog_serializer.rb like this:
此命令将创建一个名为serializers的新文件夹(在您的“ app”文件夹中)和一个名为dog_serializer.rb的新文件,如下所示:
The default attribute is :id . This means when we make a new call to our dog index endpoint, the serializer will take care of the render and return what is in the attributes (hence only id here)
默认属性是:id。 这意味着当我们对狗索引端点进行新的调用时,序列化程序将处理渲染并返回属性中的内容(因此此处仅包含id)
If we make a new request, we get:
如果我们提出新要求,则会得到:
[{"id": 1},{"id": 2},{"id": 3}]That’s it! Now we are taking control of the rendering of our JSON file! We can add as many elements to our attributes and it will show in our rendering.
而已! 现在,我们可以控制JSON文件的呈现了! 我们可以在属性中添加尽可能多的元素,它会显示在渲染中。
Let’s say we want to only show the id, name, breed, and age of the dog. We can add all these attributes to our serializer:
假设我们只想显示狗的ID,名称,品种和年龄。 我们可以将所有这些属性添加到序列化器中:
[{"id": 1,"name": "Lisa","age": 3,"breed": "German shepherd"},{"id": 2,"name": "Buddy","age": 1,"breed": "Labrador Retriever"},{"id": 3,"name": "Rocky","age": 4,"breed": "Husky"}]And you can put(or omit) whatever attribute of dog you want to render. This includes as well as pictures or the owner of each dog. Let’s see now how we can render the owner for each dog:
您可以放置(或忽略)要渲染的狗的任何属性。 其中包括图片或每只狗的主人。 现在让我们看看如何渲染每只狗的主人:
For that, we’ll add the following line to the DogsSerializer class:
为此,我们将以下行添加到DogsSerializer类中:
belongs_to: :personThis line adds the owner (person) while rendering the data like this:
此行在呈现数据时添加了所有者(人),如下所示:
[{"id": 1,"name": "Lisa","age": 3,"breed": "German shepherd",  "person": {    "id": 7,    "name": "John Doe",    "age": 36,    "created_at": "2020-08-29T16:54:32.605Z",    "updated_at": "2020-08-29T16:54:32.605Z"    },
... Rest of data ...]
You can even customize the “person” data by creating a serializer for the Person model:
您甚至可以通过为Person模型创建序列化器来自定义“ person”数据:
rails g serializer personThen in person_serializer.rb :
然后在person_serializer.rb中 :
This returns our customized data with only the name and id of that person:
这将返回仅包含该人姓名和ID的自定义数据:
[{"id": 1,"name": "Lisa","age": 3,"breed": "German shepherd","person": {"id": 7,"name": "John Doe",},
... Rest of data ...]
That’s it! Now you understand how to use a serializer in Ruby on Rails.
而已! 现在,您了解了如何在Ruby on Rails中使用序列化器。
Using serializer is a great way to customize the data you render. Not only this, but you can also attach a picture(link) associated with the model and send its link in your JSON file as well. In this case, you’ll need to use Active Storage.
使用序列化器是自定义呈现数据的好方法。 不仅如此,您还可以附加与模型关联的图片(链接),并将其链接也发送到JSON文件中。 在这种情况下,您将需要使用Active Storage 。
翻译自: https://medium.com/swlh/rails-api-and-serializers-how-to-send-better-data-58063645a276
rails api ws


 1218
1218


 被折叠的 条评论
为什么被折叠?
被折叠的 条评论
为什么被折叠?
 到【灌水乐园】发言


