


Setting up spotless is quite easy, let’s take a look at what we did at Collect by WeTransfer to have a setup that is as much ready-to-go as possible.
设置spotless非常容易,让我们看一下我们在WeTransfer的 Collect中所做的事情,以使设置尽可能多地准备就绪 。
less什么是一尘不染? (🔍 What is spotless?)
Is a code formatter: we can define rules and it will apply them every time we execute it.
是一个代码格式化程序:我们可以定义规则,并且每次执行时都会应用它们。
It’s pretty useful in automating fixes for pretty simple (and common) formatting mistakes as in spaces, newlines, removing unnecessary imports, etc.
在自动修复非常简单(常见)的格式错误(如空格,换行符,删除不必要的导入等)时,此功能非常有用。
You can find more info at https://github.com/diffplug/spotles
您可以在https://github.com/diffplug/spotles上找到更多信息。
🛠设置 (🛠 Setup)
The setup is pretty simple (you can follow the instructions in the GitHub repo as well): add the necessary dependencies, install ktlint on your machine and define a spotless block in your project level build.gradle file and inside that block define whatever rules you need for your codebase.
设置非常简单(您也可以按照GitHub存储库中的说明进行操作):添加必要的依赖项,在计算机上安装ktlint ,并在项目级别的 build.gradle文件中定义一个spotless build.gradle块,并在该块内定义您要使用的任何规则需要您的代码库。
Something like this:
像这样:
If we want to do something nicer, we can create a dedicated gradle file and apply it to the project one. It is as simple as creating a spotless.gradle file (you name it), adding it to the root directory of our project and then, again, in the project level build.gradle file we add
如果我们想做更好的事情,我们可以创建一个专用的gradle文件并将其应用于项目。 这就像创建一个spotless.gradle文件(将其命名)一样简单,将其添加到我们项目的根目录中,然后再次在项目级别的build.gradle文件中添加
apply from: "$project.rootDir/spotless.gradle"so our project level build.gradle file will look something like
所以我们的项目级别的build.gradle文件看起来像
Now we have spotless configured on our machine and we can run it, to that simply run the command:
现在,我们已经在机器上配置了spotless ,并且可以运行它,只需运行以下命令即可:
./gradlew spotlessApplyNote that due to this line in our configuration
请注意,由于我们配置中的这一行
ratchetFrom 'origin/develop'it will run only on modified files (in relation to the develop branch in our case)
它将仅在修改后的文件上运行(在我们的案例中,相对于develop分支)
Want to try how is working?
想尝试如何运作?
Just add a class (or modify an existing one) as follows:
只需添加一个类(或修改现有的类),如下所示:
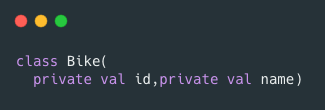
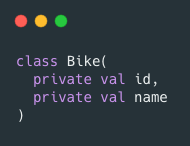
run ./gradlew spotlessApply and it should become:
运行./gradlew spotlessApply ,它应该变成:
⏲让我们在正确的时间运行 (⏲ Let’s make it run at the right time)
When could we run spotless ? Ideally before a commit, and that’s easy to achieve thanks to Git hooks. We will be looking more specifically at the pre-commit hooks.
我们什么时候可以spotless ? 理想情况下,在提交之前,使用Git hooks可以轻松实现。 我们将更具体地关注预提交挂钩。
As stated in the documentation, we can just modify (or create)the desired file (pre-commit in our case) under the folder .git/hooks and make it executable.
如文档中所述,我们只需修改(或创建) .git/hooks文件夹下的所需文件(在我们的情况下为pre-commit ),然后使其可执行即可。
so a simple bash script like this:
所以像下面这样一个简单的bash脚本:
will do the job.
会做的工作。
Wait, do we have to configure this script for each machine that will pull the project? Well… Yes.And we have two options here: going around gently forcing our lovely colleagues to configure that script or automate this process too 🤖.I went for the latter :)
等待,我们是否必须为将提取项目的每台计算机配置此脚本? 好吧...是的。我们这里有两个选择:慢慢地强迫我们可爱的同事配置该脚本或使该过程也自动化🤖。我选择了后者:)
🤖自动执行预提交脚本设置 (🤖 Automate pre-commit script setup)
Let’s go back to the spotless.gradle file (or wherever you choose to define your spotless configuration) and add this task at the end of the file:
让我们回到spotless.gradle文件(或您选择定义无污点配置的任何位置)并将此任务添加到文件末尾:
Let me explain in detail what’s going on there.In the first two lines
让我详细解释那里发生了什么。在前两行中
def gitHooksDirectory = new File("$project.rootDir/.git/hooks/")
if (!gitHooksDirectory.exists()) gitHooksDirectory.mkdirs()
we just make sure that the necessary directories that will hold the Git hooks are in place and, if not, create them.Then we create a new file (as said before it must be named pre-commit) and we write our script into that file.
我们只是确保将用于保存Git钩子的必要目录放置到位,如果没有,则创建它们,然后创建一个新文件(如前所述,必须将其命名为pre-commit ),然后将脚本写入其中文件。
new File("$project.rootDir/.git/hooks", "pre-commit").text = """
    #!/bin/bash
    echo "Running spotless check"
    ./gradlew spotlessApply
"""
Finally, we make that file executable.
最后,我们使该文件可执行。
"chmod +x .git/hooks/pre-commit".execute()And we are done! We now have a fully automated code formatting check and relative fixes applied automatically! 🚀
我们完成了! 现在,我们有了全自动的代码格式检查功能,并且自动应用了相关的修复程序! 🚀
🗒注意 (🗒 Notes)
如果在spotless配置期间Gradle引发错误 (If Gradle raises an error during the spotless configuration)
Cannot add task ‘clean’ as a task with that name already existsthen just remove the clean task in your build.gradle file:
然后只需删除build.gradle文件中的clean任务:
task clean(type: Delete) {delete rootProject.buildDir}Android Studio配置 (Android Studio configuration)
Make sure you have single class imports enabled in the settings for kotlin files (and java ones if you have java in your project)
确保在kotlin文件的设置中启用了single class imports (如果项目中包含Java,则设置为Java)
翻译自: https://medium.com/swlh/spotless-on-android-3716459cecd7


 426
426


 被折叠的 条评论
为什么被折叠?
被折叠的 条评论
为什么被折叠?
 到【灌水乐园】发言


