


heroku
Django,Heroku,网络开发 (Django, Heroku, Web Development)
As we know Django is python based open-source framework which follows MVC(Model View Controller) architectural pattern used in the rapid development of the website with clean design without worrying too much about setting up an environment to start.
我们知道Django是基于python的开放源代码框架,该框架遵循MVC(模型视图控制器)体系结构模式,该模式用于具有简洁设计的网站的快速开发中,而无需过多地担心要设置启动环境。
I am using python 3.8.3 version and VS code as my text editor. deploying a Django project on Heroku is often difficult. To deploy it with ease some steps are needed to be followed :
我将python 3.8.3版本和VS代码用作文本编辑器。 在Heroku上部署Django项目通常很困难。 要轻松部署它,需要遵循一些步骤:
Create a Heroku account :
创建一个Heroku帐户 :
creating a Heroku account is very simple. visit https://dashboard.heroku.com/ so signup as a new account by tapping on signup button located in the top-right corner
创建一个Heroku帐户非常简单。 请访问https://dashboard.heroku.com/,以便通过点击右上角的注册按钮来注册为新帐户

After successful signup and login proceed to next step.
成功注册并登录后,继续下一步。
2. Create a Django app :
2. 创建一个Django应用程序 :
create a fresh Django app using -
使用-创建一个新的Django应用-

or you can use your project make sure you are inside your project folder where manage.py file is present.
或者您可以使用您的项目,请确保您位于存在manage.py文件的项目文件夹中。
3. Create a Virtual Environment and Install required dependencies :
3. 创建一个虚拟环境并安装所需的依赖项 :

Install basic libraries using pip like pip install Django and most important install gunicorn(WSGI application server) and white noise.
使用pip安装基本库,例如pip install Django和最重要的install gunicorn(WSGI应用程序服务器)和白噪声。

After installation of all libraries run the command :
安装所有库之后,运行以下命令:

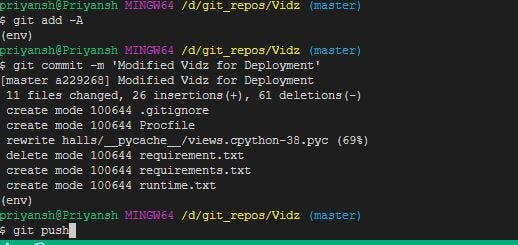
It creates a new file in the root directory which consists of all libraries used in Django named requirements.txt which helps Heroku to install dependencies before deploying.
它在根目录中创建了一个新文件,该文件由Django中使用的所有库(名为requirements.txt)组成,该文件可帮助Heroku在部署之前安装依赖项。
4. Create an App on Heroku site :
4. 在Heroku网站上创建一个应用程序 :

By clicking on creating new app add the name you want for your app then open settings tabs, tap on add build pack and tap on python to set python as your build pack and save changes.
通过单击创建新应用程序,添加您想要的应用程序名称,然后打开设置选项卡,点击添加构建包,然后点击python以将python设置为您的构建包并保存更改。

5. Addition of required files :
5. 添加所需文件 :

Now create two new files runtime.txt in which specify the version of python used and other Procfile with no extension.
现在创建两个新文件runtime.txt,其中指定使用的python版本和其他没有扩展名的Procfile。

here gunicorn in place of vidz you need to enter your project folder name which contains settings.py file
在这里,用gunicorn代替vidz,您需要输入包含settings.py文件的项目文件夹名称
5. Changes in settings.py file
5. settings.py文件中的更改

Click on your Heroku project then tap on an open app button present in the top right corner it opens up the link where the project will be deployed. copy the link and paste it in settings.py allowed host section with local server to run it locally and change DEBUG to false as well.
单击您的Heroku项目,然后点击右上角的打开的应用程序按钮,它将打开一个链接,其中将部署项目。 复制链接并将其粘贴到settings.py本地服务器的允许主机部分中,以在本地运行该链接,并将DEBUG也更改为false。

Now add white noise as middleware in Django settings.py middleware section.
现在,在Django settings.py middleware部分中将白噪声添加为中间件。

Add STATIC_ROOT to configure static files
添加STATIC_ROOT以配置静态文件

6. Connect GitHub repository to Heroku :
6. 将GitHub存储库连接到Heroku :
After changes push the project to Github
更改后将项目推送到Github
In Heroku deploy section connect GitHub repository by tapping on connect to Github.
在Heroku部署部分,通过点击连接到Github连接GitHub存储库。

After completion tap on deploy
完成后,点击部署

Voila, Project is Deployed.
瞧,项目已部署。
结论: (Conclusion:)
Hopefully, this article about Django project deployment clears your imagination about deployment and also encourages you to learn more about web development.
希望这篇关于Django项目部署的文章可以清除您对部署的想象,并鼓励您学习有关Web开发的更多信息。
Thank you so much for reading this, also share this article.
非常感谢您阅读本文,也分享这篇文章。
Feel free to connect:
随时连接:
LinkedIN ~ https://www.linkedin.com/in/priyanshsinghal/
LinkedIn〜 https://www.linkedin.com/in/priyanshsinghal/
Instagram ~ https://www.instagram.com/18_priyansh/
Instagram〜https: //www.instagram.com/18_priyansh/
Github ~ https://github.com/priyansh18
Github〜https: //github.com/priyansh18
Follow for more…
关注更多…
Cheers.
干杯。
翻译自: https://medium.com/django-framework-real-world-projects/deploy-django-project-on-heroku-13b191e311b6
heroku


 921
921

 被折叠的 条评论
为什么被折叠?
被折叠的 条评论
为什么被折叠?
 到【灌水乐园】发言


