


In this tutorial we will create a React app using the official Redux+Typescript template and add OAuth 2.0 user authorization. The OAuth 2.0 authorization in this tutorial is used to connect to Spotify’s Web API, but can be used for any service with the same authorization flow. The web app created in this tutorial is a stand-alone client-side web app with no server-side application needed.
在本教程中,我们将使用官方的Redux + Typescript模板创建一个React应用,并添加OAuth 2.0用户授权。 本教程中的OAuth 2.0授权用于连接到Spotify的Web API ,但可以用于具有相同授权流程的任何服务。 本教程中创建的Web应用程序是独立的客户端Web应用程序,不需要服务器端应用程序。
tl;drCode result in this template. But I still recommend following the tutorial :)
tl; dr 该模板中的代码结果。 但我仍然建议您按照教程进行:)
Npm is required for this tutorial and can be installed here.
Npm是本教程必需的,可以在 此处 安装 。
讲解 (Tutorial)
Step 1: Create a React app with Typescript and Redux
步骤1:使用Typescript和Redux创建一个React应用
Run the command below:
运行以下命令:
npx create-react-app my-app --template redux-typescriptYour app is now installed with a premade example of a counter to show how you can use the Redux store. Change directory to my-app ( cd my-app ) and run the following command to run the app locally:
现在,您的应用已安装了一个预制的计数器示例,以展示如何使用Redux存储。 将目录更改为my-app ( cd my-app )并运行以下命令以在本地运行该应用程序:
npm startYou should see the counter example in your browser at http://localhost:3000.
您应该在浏览器中的http:// localhost:3000上看到计数器示例。
The basics: To understand the basics of the template code let us start by looking at index.tsx in the src folder. The line <Provider store={store}> makes the Redux store available to all nested components, which is currently the <App /> component. The App component is defined in App.tsx and is the main React component. By looking at the contents of App.tsx we see the Counter component being included with <Counter /> along with the rest of the text we can see at localhost:3000. All code for the counter is in the src/features/counter folder. The Counter component is written in Counter.tsx and the code for managing its Redux state is in counterSlice.ts. The Redux store itself is defined in store.ts in the src/app folder.
基础知识:要了解模板代码的基础知识,让我们从查看src文件夹中的index.tsx开始。 <Provider store={store}>行使Redux存储对所有嵌套组件(当前为<App />组件)可用。 App组件在App.tsx中定义,并且是主要的React组件。 通过查看App.tsx的内容,我们看到<Counter />包含了Counter组件,以及我们可以在localhost:3000看到的其余文本。 计数器的所有代码都在src / features / counter文件夹中。 Counter组件用Counter.tsx编写,用于管理其Redux状态的代码在counterSlice.ts中 。 Redux存储本身在src / app文件夹的store.ts中定义。
Don’t worry if you don’t understand everything at the moment. It will be more clear as you follow the next steps.
如果您目前不了解所有内容,请不要担心。 按照以下步骤操作将更加清晰。
Optional step: Upload to a git repository
可选步骤:上传到git存储库
With your favorite Git-repository manager (GitHub/GitLab/Bitbucket/…): Create an empty repository without readme, gitignore or license. Copy the url of the repo. On your computer: change working directory to my-app and push your code:
使用您最喜欢的Git存储库管理器(GitHub / GitLab / Bitbucket /…):创建一个没有自述文件,gitignore或许可证的空存储库。 复制仓库的URL。 在您的计算机上:将工作目录更改为my-app并推送您的代码:
cd my-app
git remote add origin remote_repository_url
git push -u origin master
Step 2: Acquire relevant OAuth 2.0 information
步骤2:获取相关的OAuth 2.0信息
We need the following for our authorization setup:
我们需要以下内容来进行授权设置:
- Authorization URL 授权网址
- Client ID 客户编号
- Redirect URI 重定向URI
- Scopes 范围
Quick explanation: Authorization URL is the base URL to the authorization service (e.g.: https://accounts.spotify.com/authorize). Client ID is an identifier for your specific application. Redirect URI is where the authorization service should redirect the user after a successful login through their service (usually the URL of your application). The scopes define what type of user data you want to access with your application.
快速说明: 授权URL是授权服务的基本URL(例如: https : //accounts.spotify.com/authorize )。 客户ID是您特定应用程序的标识符。 重定向URI是授权服务在成功通过用户的服务登录后(通常是应用程序的URL)在其中重定向用户的位置。 范围定义了您希望通过应用程序访问的用户数据类型。
Authorization URL, client ID and scopes will depend on which service you are using for authorization. For this tutorial we will implement user authorization with Spotify, which is described here (implicit grant flow). The following paragraph is specific to Spotify’s web API.
授权URL , 客户端ID和范围将取决于您用于授权的服务。 在本教程中,我们将实现与Spotify的,这说明用户授权这里 (隐含补助流量)。 以下段落专门针对Spotify的Web API。
To use the Spotify API you need to register your app by logging in to the developer dashboard and register a new app. When the app is registered, press edit settings and add http://localhost:3000 to Redirect URIs. Remember to add other URI’s if you deploy your web app or you want to work locally on another port than 3000. You will find your client ID on the page of your registered app. All scopes for the Spotify API are listed here.
要使用Spotify API,您需要通过登录开发人员仪表板并注册新应用程序来注册您的应用程序。 注册该应用程序后,按编辑设置 并将http://localhost:3000添加到Redirect URIs中 。 如果您部署Web应用程序,或者要在3000以外的其他端口上本地工作,请记住添加其他URI。您可以在已注册应用程序的页面上找到客户端ID 。 这里列出了Spotify API的所有范围。
Step 3: Configure your OAuth 2.0 setup
步骤3:设定OAuth 2.0设定
Create a file called oauthConfig.ts in the src folder and paste the following code:
在src文件夹中创建一个名为oauthConfig.ts的文件,然后粘贴以下代码:
const authEndpoint = 'https://accounts.spotify.com/authorize';


const scopes = [
  'user-read-private',
];


export const getAuthorizeHref = (): string => {
  const clientId = process.env.REACT_APP_SPOTIFY_CLIENT_ID;
  const redirectUri = process.env.REACT_APP_REDIRECT_URI;
  return `${authEndpoint}?client_id=${clientId}&redirect_uri=${redirectUri}&scope=${scopes.join("%20")}&response_type=token`;
}
authEndpoint (Authorization URL) is set to Spotify’s authorization service and scopes is set to user-read-private which gives read access to the user’s subscription details. authEndpoint and scopes can be changed to your desired scenario. As you can see above, the client ID and redirect URI are stored in something called process.env, which means they are environment variables. This is done to hide them from the code for safety reasons. To set environment variables from another file in the project we need to install a package called dotenv. Run:
authEndpoint ( 授权URL ) 设置为Spotify的授权服务, 范围设置为user-read-private ,它提供对用户订阅详细信息的读取权限。 authEndpoint和范围可以更改为所需的方案。 如上所示, 客户端ID和重定向URI存储在称为process.env的文件中,这意味着它们是环境变量。 出于安全原因,这样做是为了将它们从代码中隐藏。 要从项目中的另一个文件设置环境变量,我们需要安装一个名为dotenv的软件包。 跑:
npm i dotenvCreate a file called .env.local in your root folder (the my-app folder) and add the environment variables like this:
在根文件夹( my-app文件夹)中创建一个名为.env.local的文件,并添加如下环境变量:
REACT_APP_SPOTIFY_CLIENT_ID=***YOUR_CLIENT_ID***
REACT_APP_REDIRECT_URI=http://localhost:3000
Paste the client ID acquired from the previous step of the tutorial. Change the redirect URI if you are running the app from another port than 3000 locally. Also, make sure .env.local is listed in the .gitignore file of your project. It should be there by default if you followed step 1 and created the React app with npx create-react-app.
粘贴从本教程的上一步获得的客户端ID。 如果您是从本地3000以外的其他端口运行应用程序,请更改重定向URI。 另外,请确保.env.local 在.gitignore中列出 项目的文件。 如果您按照步骤1并使用npx create-react-app创建了React应用程序,则默认情况下应该在该目录中。
Step 4: Implement the authorization
步骤4:实施授权
Finally we have gotten to the implementation. First we will create a new folder called utils to create some necessary utility functions:
最后,我们已经实现了。 首先,我们将创建一个名为utils的新文件夹,以创建一些必要的实用程序功能:
mkdir utilsCreate a new file in this folder called hashUtils.ts and paste the following code:
在此文件夹中创建一个名为hashUtils.ts的新文件,并粘贴以下代码:
export const getHashParams = () => {
  return window.location.hash
    .substring(1)
    .split("&")
    .reduce(function(initial: { [key: string]: any; }, item) {
      if (item) {
        var parts = item.split("=");
        initial[parts[0]] = decodeURIComponent(parts[1]);
      }
      return initial;
    }, {});
}


export const removeHashParamsFromUrl = () => {
  window.history.pushState("", document.title, window.location.pathname + window.location.search);
}
getHashParams helps us to extract the access token from the URL when we have logged in with our authorization service. removeHashParamsFromUrl is just there to clean up the URL afterwards so the user won’t be confused by a long and messy URL.
使用授权服务登录后, getHashParams可以帮助我们从URL中提取访问令牌。 removeHashParamsFromUrl只是用于之后清理URL,因此用户不会被冗长而混乱的URL所迷惑。
Now to the login button. We want a login button that saves the access token to the Redux state, so we will write the code in a similar way as the premade counter. We begin with creating a folder for our authorization functionality. Create a new folder called authorization in the src/features folder:
现在到登录按钮。 我们想要一个将访问令牌保存为Redux状态的登录按钮,因此我们将以类似于预制计数器的方式编写代码。 我们首先创建一个用于授权功能的文件夹。 在src / features文件夹中创建一个名为授权的新文件夹:
cd src/features/
mkdir authorization
Create two new files in the authorization folder called Authorization.tsx and authorizationSlice.ts and paste the two following code blocks in them:
在授权文件夹中创建两个新文件,称为Authorization.tsx和authorizationSlice.ts ,并将以下两个代码块粘贴到其中:
import React, { useEffect } from 'react';
import { useSelector, useDispatch } from 'react-redux';
import {
  setLoggedIn,
  setAccessToken,
  setTokenExpiryDate,
  selectIsLoggedIn,
  selectTokenExpiryDate,
} from './authorizationSlice';
import { setUserProfileAsync } from '../spotifyExample/spotifyExampleSlice';
import styles from '../counter/Counter.module.css';
import { getAuthorizeHref } from '../../oauthConfig';
import { getHashParams, removeHashParamsFromUrl } from '../../utils/hashUtils';


const hashParams = getHashParams();
const access_token = hashParams.access_token;
const expires_in = hashParams.expires_in;
removeHashParamsFromUrl();


export function Authorization() {
  const isLoggedIn = useSelector(selectIsLoggedIn);
  const tokenExpiryDate = useSelector(selectTokenExpiryDate);
  const dispatch = useDispatch();


  useEffect(() => {
    if (access_token) {
      dispatch(setLoggedIn(true));
      dispatch(setAccessToken(access_token));
      dispatch(setTokenExpiryDate(Number(expires_in)));
      dispatch(setUserProfileAsync(access_token));
    }
    // eslint-disable-next-line react-hooks/exhaustive-deps
  }, []);


  return (
    <div>
      <div className={styles.row}>
        {!isLoggedIn &&
          <button
          className={styles.button}
          aria-label="Log in using OAuth 2.0"
          onClick={() => window.open(getAuthorizeHref(), '_self')}
          >
          Log in with Spotify
          </button>}
        {isLoggedIn && <div className={styles.row}>Token expiry date: {tokenExpiryDate}</div>}
      </div>
    </div>
  );
}
We will go through how all of this works, but first let’s connect these to the rest of the code. To add the authorizationReducer in authorizationSlice.ts to the root reducer, we have to import and add it to store.ts in the src/app folder. Add this import statement to store.ts:
我们将介绍所有这些工作原理,但首先让我们将其连接到其余代码。 要将authorizationReducer中的authorizationReducer添加到根reducer,我们必须将其导入并添加到src / app文件夹中的store.ts中。 将此导入语句添加到store.ts中 :
import authorizationReducer from '../features/authorization/authorizationSlice';Then add authorization: authorizationReducer under the line where it says counter: counterReducer. Last thing we need to do is add the Authorization component to App.tsx. Add this import statement to App.tsx:
然后在显示counter: counterReducer的行下添加authorization: authorizationReducer 。 我们需要做的最后一件事是将Authorization组件添加到App.tsx中 。 将此导入语句添加到App.tsx中 :
import { Authorization } from './features/authorization/Authorization';Then add <Authorization /> over the line that says <Counter />.
然后在<Authorization /> <Counter />的行上添加<Authorization /> <Counter /> 。
How it works:
这个怎么运作:
In Authorization.tsx we define a React component with a login button. When clicked it redirects the browser window to the authorization service which in this tutorial is Spotify. When the user has logged in and granted access to the scopes we set in oauthConfig.ts, the browser is redirected back to our app with an access token and an expiry time. The token and expiry time are sent as hash parameters in the URL. These hash parameters are retrieved in lines 15–17 in Authorization.tsx and then removed from the URL at line 18. The redux state is updated in the useEffect block in lines 25–33. useEffect is a React Hook which is similar to componentDidMount and componentDidUpdate. The useEffect block will only run once because of the empty square brackets on line 33. You can read more about useEffect here.
在Authorization.tsx中,我们使用登录按钮定义一个React组件。 单击后,它将浏览器窗口重定向到授权服务,在本教程中为Spotify。 当用户登录并授予对我们在oauthConfig.ts中设置的范围的访问权限时,浏览器将使用访问令牌和到期时间重定向回我们的应用程序。 令牌和到期时间在URL中作为哈希参数发送。 这些哈希参数在Authorization.tsx的第15-17行中检索,然后从第18行的URL中删除。redux状态在useEffect块的第25-33行中更新。 useEffect是一个React Hook ,类似于componentDidMount和componentDidUpdate。 由于第33行上的方括号为空,因此useEffect块仅运行一次。您可以在此处阅读有关useEffect的更多信息。
The Authorization component keeps track of two values in the Redux state, loggedIn and tokenExpiryDate, using selectors on lines 21–22. loggedIn determines whether the component will return a login button or show the token expiry date (lines 38 and 46).
授权组件保持在Redux的状态,和的loggedIn轨道tokenExpiryDate两个值中的,使用在线路21-22选择器。 loggingIn确定组件将返回登录按钮还是显示令牌到期日期(第38和46行)。
The authorization state is defined in authorizationSlice.ts. The three values loggedIn, accessToken and tokenExpiryDate are defined in this state. The three actions setLoggedIn, setAccessToken and setTokenExpiryDate are used to change these values in the Redux state. Actions need to be dispatched, which we can see in the useEffect block in Authorization.tsx. To easily retrieve the values we have defined selectors in lines 36–38 which selects the specific value from the Redux state tree.
授权状态在authorizationSlice.ts中定义。 这三个值的loggedIn,和的accessToken是tokenExpiryDate在此状态下定义。 setLoggedIn , setAccessToken和setTokenExpiryDate这三个操作用于在Redux状态下更改这些值。 需要分派动作,这可以在Authorization.tsx的useEffect块中看到。 为了轻松获取值,我们在第36–38行中定义了选择器,该选择器从Redux状态树中选择特定值。
When the authorization reducer is added to the main reducer in state.ts, the authorization state is effectively a part of the Redux state.
当将授权缩减器以state.ts添加到主缩减器中时 ,授权状态实际上是Redux状态的一部分。
Step 5: Test the token retrieval
步骤5:测试令牌检索
At this point we have successfully made a working login button with OAuth 2.0 and saved the access token and expiry date to the Redux state. So let’s test what we have. Run npm start in the terminal and you should see the login button at http://localhost:3000. Should look something like this:
至此,我们已经成功使用OAuth 2.0制作了一个有效的登录按钮,并将访问令牌和有效期保存为Redux状态。 因此,让我们测试一下我们所拥有的。 在终端中运行npm start ,您应该在http:// localhost:3000上看到登录按钮。 应该看起来像这样:

Press the button and login through the authorization service. When you are redirected back to your app you should not be able to see the login button, but instead see the token expiry date like this:
按下按钮并通过授权服务登录。 当您重定向回您的应用程序时,您应该看不到登录按钮,而是看到令牌的到期日期,如下所示:

Remember that the expiry date is in UTC time.
请记住,到期日期为UTC时间。
A very helpful browser extension when working with Redux is Redux DevTools (for Chrome, Firefox and Edge). With Redux DevTools installed you can check the Redux state in your browser. This way you can easily verify that the access token is stored in the Redux state.
使用Redux时,非常有用的浏览器扩展是Redux DevTools (适用于Chrome , Firefox和Edge )。 安装Redux DevTools后,您可以在浏览器中检查Redux状态。 这样,您可以轻松地验证访问令牌是否以Redux状态存储。
Step 6: Use the token
步骤6:使用令牌
Now that we have the access token in the Redux state we can use it in a fetch call to retrieve information within our scopes. We will show you how to do this with a plain fetch call without any other dependencies. In our example we will use Spotify’s endpoint https://api.spotify.com/v1/me to retrieve the name and subscription type of the logged in user.
现在,我们已将访问令牌置于Redux状态,可以在访存调用中使用它来检索我们范围内的信息。 我们将向您展示如何在没有任何其他依赖项的情况下通过简单的访存调用来执行此操作。 在我们的示例中,我们将使用Spotify的端点https://api.spotify.com/v1/me来检索已登录用户的名称和订阅类型。
Create a new directory in src/features called spotifyExample and add the following three files:
在src / features中创建一个名为spotifyExample的新目录,并添加以下三个文件:
.column {
  display: flex;
  flex-direction: column;
  align-items: center;
  justify-content: center;
  margin-bottom: 16px;
}


.row {
  display: flex;
  align-items: center;
  justify-content: center;
  margin-top: 16px;
}
Now add spotifyExample: spotifyExampleReducer to store.ts and add <SpotifyExample /> under the line that says <Authorization /> in App.tsx in the same way as you did with the authorization component and reducer.
现在,将spotifyExample: spotifyExampleReducer添加到store.ts,并在App.tsx中的<Authorization />所在的行下添加<SpotifyExample /> ,方法与对授权组件和reducer的操作相同。
You are all done! Start your application and login to see the result. You should see something like this after you logged in:
大功告成! 启动您的应用程序并登录以查看结果。 登录后,您应该会看到以下内容:
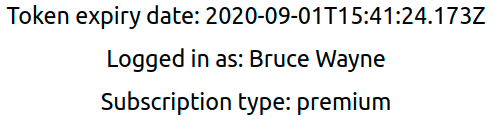
The Spotify example component and reducer are structured in the same way as the authorization component and reducer. The Redux state has been expanded with displayName and product. The fetch call is sent and handled in lines 36–54 in the function setUserProfileAsync in spotifyExampleSlice.ts. It is important that the fetch call is in an async action using AppThunk defined in store.ts, since the fetch call is run asynchronously. Read more about async logic in Redux here. As you can see in the code, making the fetch call is as easy as adding an authorization header with your token and adding it to the fetch call like this:
Spotify示例组件和精简器的结构与授权组件和精简器的结构相同。 Redux状态已使用displayName和product扩展。 在获取呼叫发送和在spotifyExampleSlice.ts功能setUserProfileAsync线36-54处理。 重要的是,获取调用必须使用store.ts中定义的AppThunk处于异步动作中,因为获取调用是异步运行的。 在此处阅读有关Redux中异步逻辑的更多信息。 如您在代码中所见,进行fetch调用就像添加带有令牌的授权标头并将其添加到fetch调用一样简单:
const myHeaders = new Headers();
myHeaders.append('Authorization', 'Bearer ' + accessToken);


fetch('https://api.spotify.com/v1/me', {
  method: 'GET',
  headers: myHeaders,
}).then(response => response.json())
  .then((data) => {
    // Do something with the data here
  }).catch((error) => {
    // Handle errors here
  });
Conclusion
结论
Congratulations! You have successfully made a fully functional React app with Typescript, Redux and Oauth 2.0 login. Feel free to check out the result code at: github.com/OskarAsplin/react-ts-redux-oauth2-template
恭喜你! 您已经成功完成了具有Typescript,Redux和Oauth 2.0登录的功能齐全的React应用程序。 随时在以下位置检查结果代码: github.com/OskarAsplin/react-ts-redux-oauth2-template
If you want inspiration for what you could do with this setup, you can check out my music festival finder: Oskarito SpotiFest. The code for the app is open source and available at github.com/OskarAsplin/spotifest.
如果您想从该设置中获得启发,可以查看我的音乐节发现者: Oskarito SpotiFest 。 该应用程序的代码是开源的,可从github.com/OskarAsplin/spotifest获取 。
Further suggestions for your app
有关您的应用的更多建议
Host your website: netlify.com (Remember to add the environment variables)Use a UI framework: 6-best-reactjs-based-ui-frameworksMaintain the Redux state after a page refresh: redux-persistAdd more pages to your app: react-router-dom, guide
托管您的网站: netlify.com (记住添加环境变量 )使用UI框架: 6-best-reactjs-based-ui-frameworks在页面刷新后保持Redux状态: redux-persist向您的应用添加更多页面: React路由器 指南
Complimentary reading
免费阅读
React: https://reactjs.org/Typescript: https://www.typescriptlang.org/Redux: https://redux.js.org/OAuth 2.0: https://oauth.net/articles/authentication/The authorization flow used in this tutorial: Spotify implicit-grant-flow
React: https: //reactjs.org/打字稿: https ://www.typescriptlang.org/ Redux: https ://redux.js.org/ OAuth 2.0: https ://oauth.net/articles/authentication/本教程中使用的授权流: Spotify隐式授予流
翻译自: https://medium.com/swlh/create-a-react-app-with-typescript-redux-and-oauth-2-0-7f62d57890df


 930
930

 被折叠的 条评论
为什么被折叠?
被折叠的 条评论
为什么被折叠?
 到【灌水乐园】发言


