


 本文介绍了如何搭建okd的单机集群,适合初学者和实验环境使用。详细步骤参照了原文链接。
okd 单机集群
Updated: 7/29/2020
更新时间:2020年7月29日
After listening to some feedback in the chat on a recent Twitch stream and the okd-wg mailing list I decided to create a guide for installing an OKD 4.5 SNC (single node cluster). This guide will use no worker nodes and only a single control-plane node with the goal of reducing the total amount of resources needed to get OKD up and running for a test drive.
在听取了有关最近的Twitch流和okd-wg邮件列表的聊天中的一些反馈之后,我决定创建一个安装OKD 4.5 SNC(单节点群集)的指南。 本指南将不使用任何工作节点,而仅使用一个控制平面节点,目的是减少启动OKD并为测试驱动器运行所需的资源总量。
虚拟机概述: (VM Overview:)
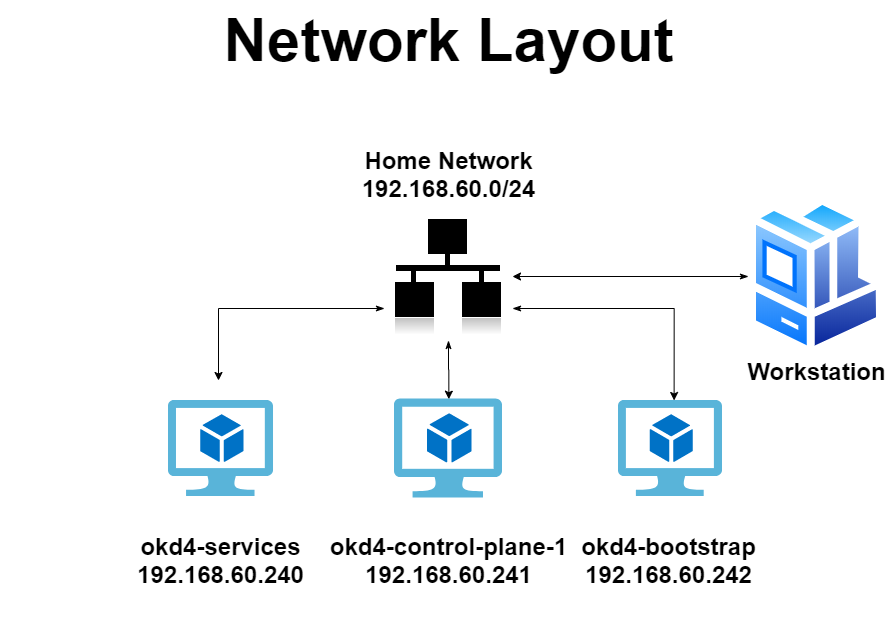
For this installation, I used an ESXi 6.5 host on my local network and allocated the total virtual machine RAM usage to 22GB. ESXi 6.5 has a minimum of 4GB of RAM but you should be able to run this on an ESXi host with 24GB of RAM. Here is a breakdown of the virtual machines and network layout:
对于此安装,我在本地网络上使用了ESXi 6.5主机,并将虚拟机RAM的总使用量分配为22GB。 ESXi 6.5至少具有4GB RAM,但是您应该能够在具有24GB RAM的ESXi主机上运行它。 这是虚拟机和网络布局的细分:
创建okd4-services VM: (Create the okd4-services VM:)
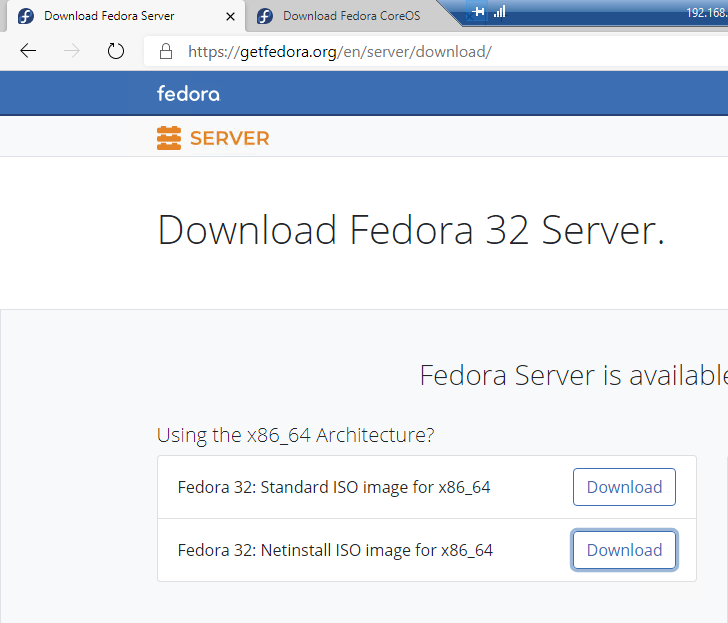
Download the Fedora Server Standard ISO and upload it to your ESXi host datastore.
下载 Fedora服务器标准ISO并将其上传到ESXi主机数据存储。
Create a new Virtual Machine. Choose Guest OS as Linux and Select CentOS 7 (64-bit).
创建一个新的虚拟机。 选择Guest OS作为Linux,然后选择CentOS 7(64位)。

Select the Datastore and customize the settings to 2 vCPU, 2GB RAM, 100GB HD. Attach the Fedora Serer ISO to the CD/DVD drive.
选择数据存储,然后将设置自定义为2个vCPU,2GB RAM,100GB HD。 将Fedora Serer ISO附加到CD / DVD驱动器。
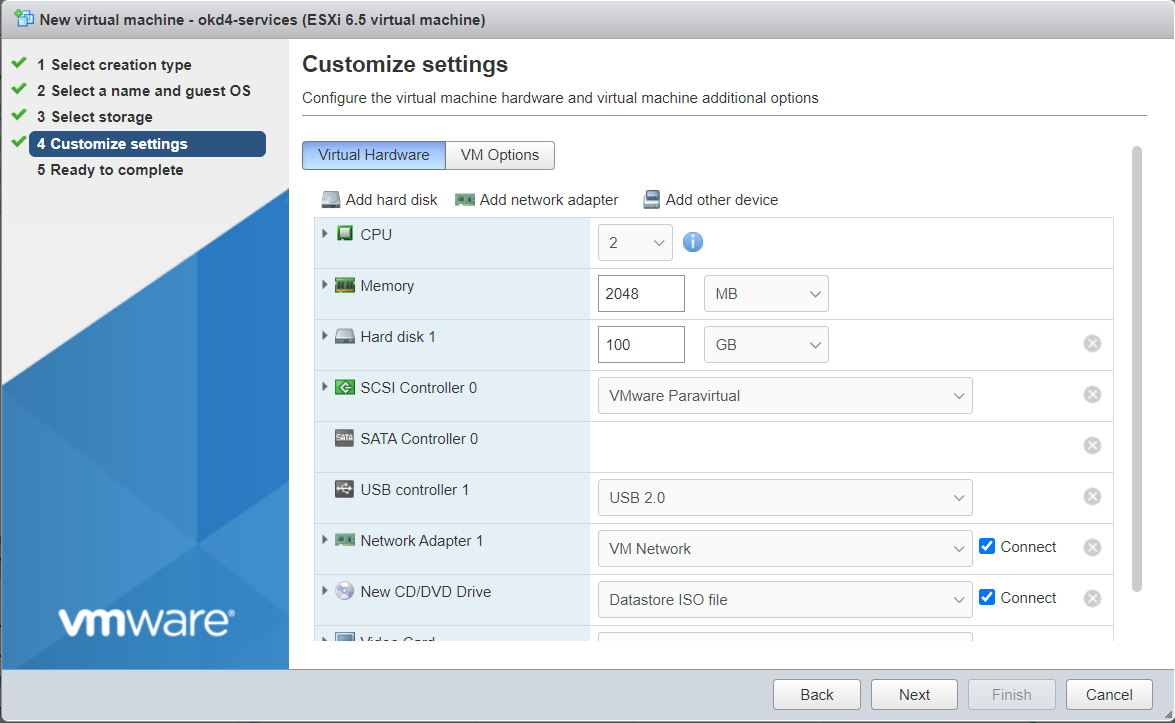
Review your settings and click Finish.
查看您的设置,然后单击“完成”。

在okd4-services VM上安装Fedora Server 32: (Install Fedora Server 32 on the okd4-services VM:)
Run through the installation.
运行安装。
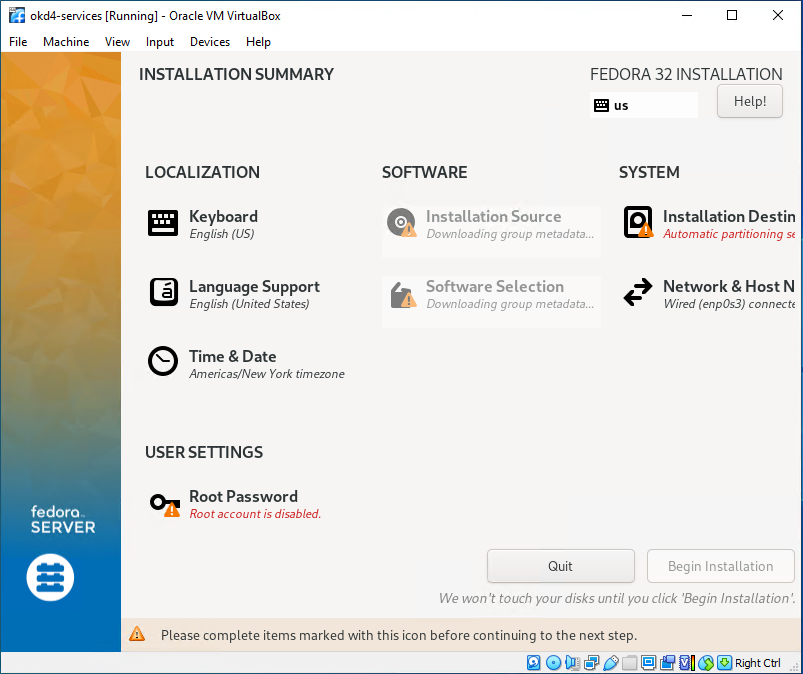
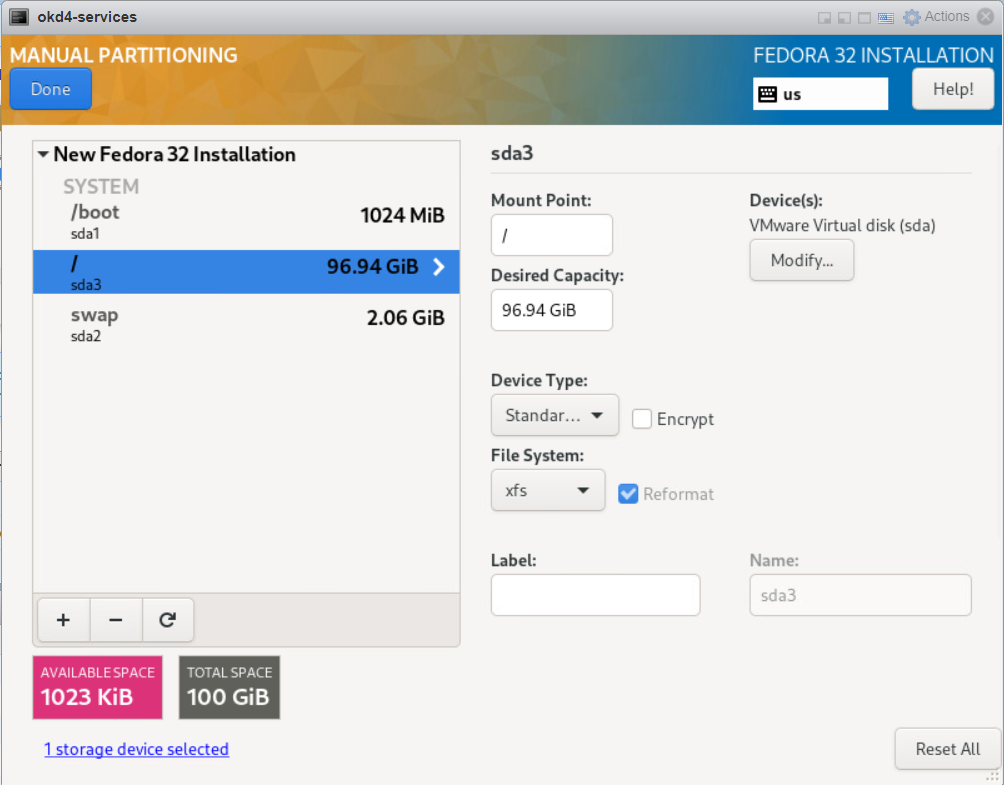
I prefer to use the “Standard Partition” storage configuration to use the entire drive at “/”. On the “Installation Destination” page, click on Custom under Storage Configuration, then Done.
我更喜欢使用“标准分区”存储配置在“ /”位置使用整个驱动器。 在“安装目标”页面上,单击“存储配置”下的“自定义”,然后单击“完成”。
On the Manual Partitioning page, select Standard Partition, then click “Click Here to Create them automatically.”
在“手动分区”页面上,选择“标准分区”,然后单击“单击此处以自动创建它们”。

Select the “/” partition and click the “-” to delete it. Then click the “+” to re-add it. At this point, it should use the entire drive. Click Done, then Accept the changes.
选择“ /”分区,然后单击“-”将其删除。 然后单击“ +”重新添加它。 此时,它应该使用整个驱动器。 单击完成,然后接受更改。
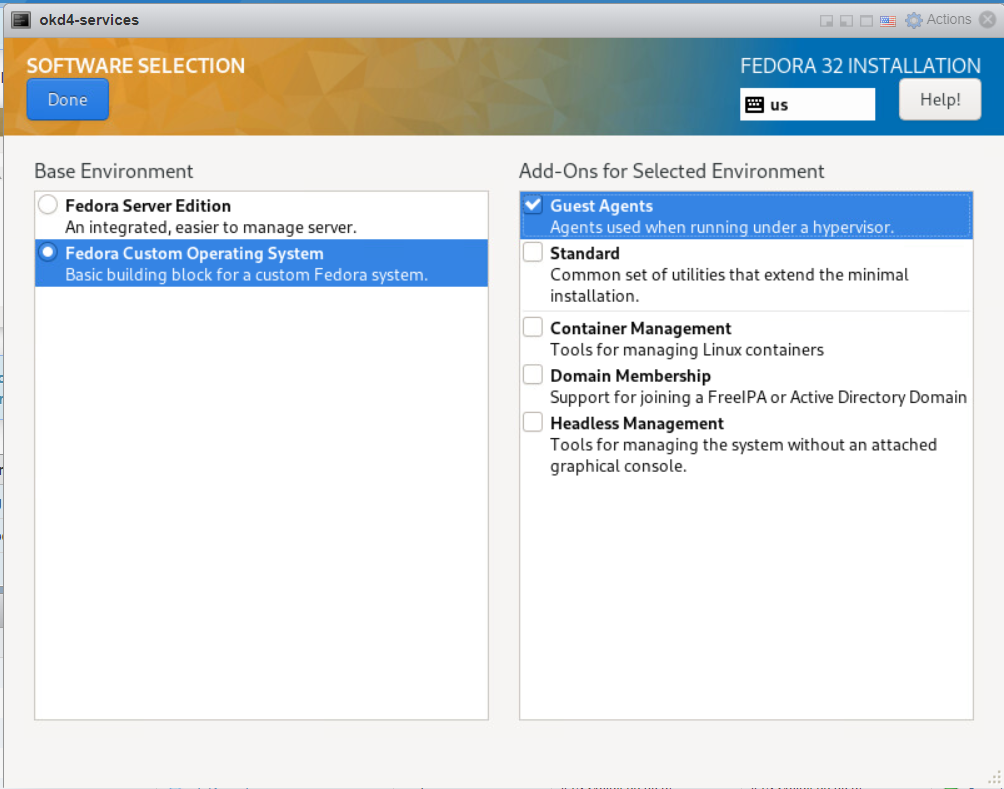
For Software Selection, choose “Fedora Custom Operating System” and include the “Guest Agents” add-on.
对于软件选择,选择“ Fedora自定义操作系统”,并包括“ Guest Agents”附加组件。
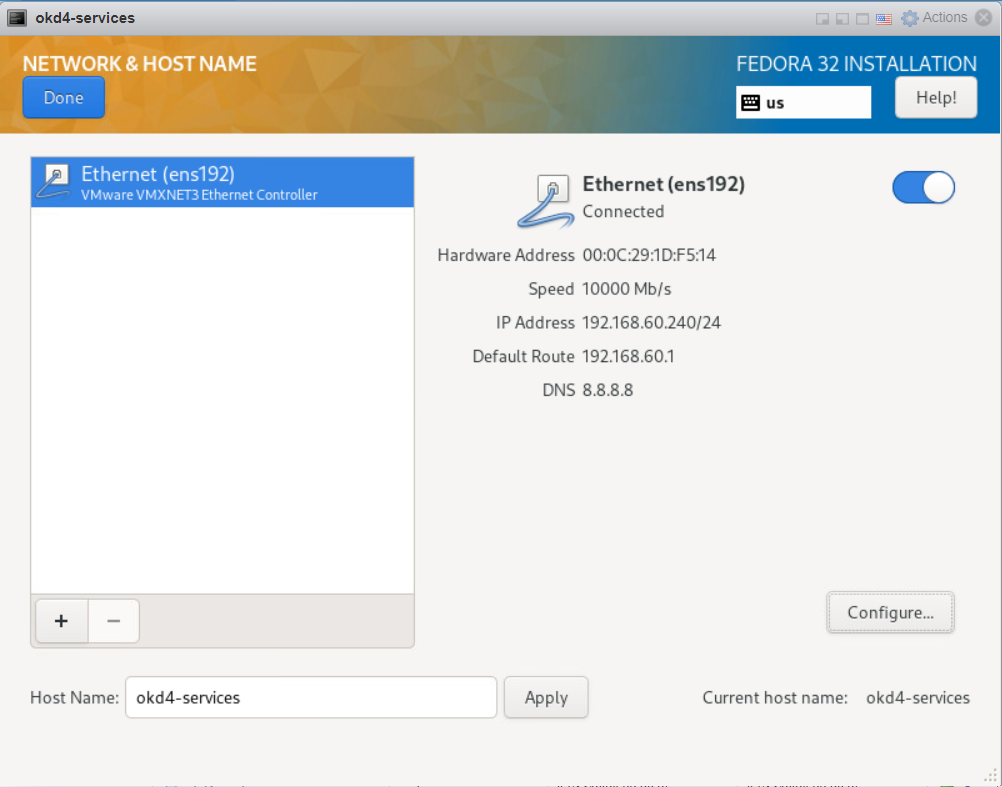
Enable the NIC connected to the VM Network and set the hostname as okd4-services, then click Apply and Done.
启用连接到VM网络的NIC,并将主机名设置为okd4-services,然后单击Apply and Done。
Set the Root password, and create an admin user. Click “Begin Installation” to start the install.
设置“ root”密码,并创建一个admin用户。 单击“开始安装”开始安装。

After the installation has completed, login, and update the OS.
安装完成后,登录并更新操作系统。
sudo dnf update -y
sudo dnf install -y git wget vim
sudo init 6
创建引导节点和主节点: (Create bootstrap and master nodes:)
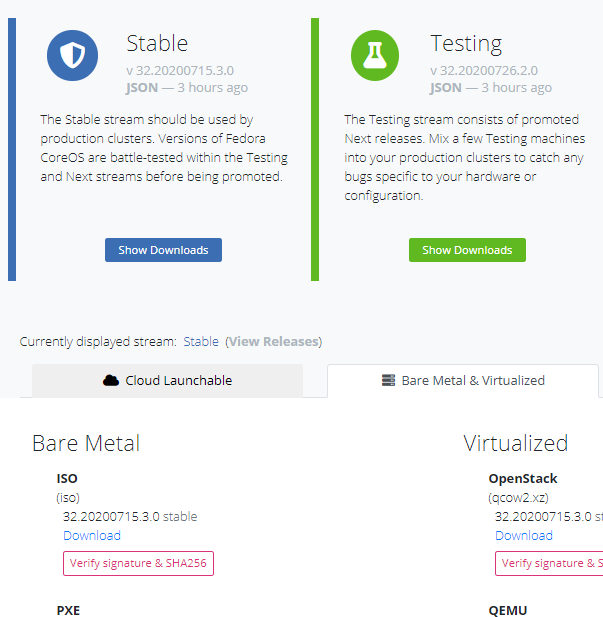
Download the Fedora CoreOS Bare Metal ISO and upload it to your ESXi datastore.
下载Fedora CoreOS裸机ISO并将其上传到ESXi数据存储。
The latest stable version at the time of writing is 32.20200715.3.0
撰写本文时,最新的稳定版本是32.20200715.3.0
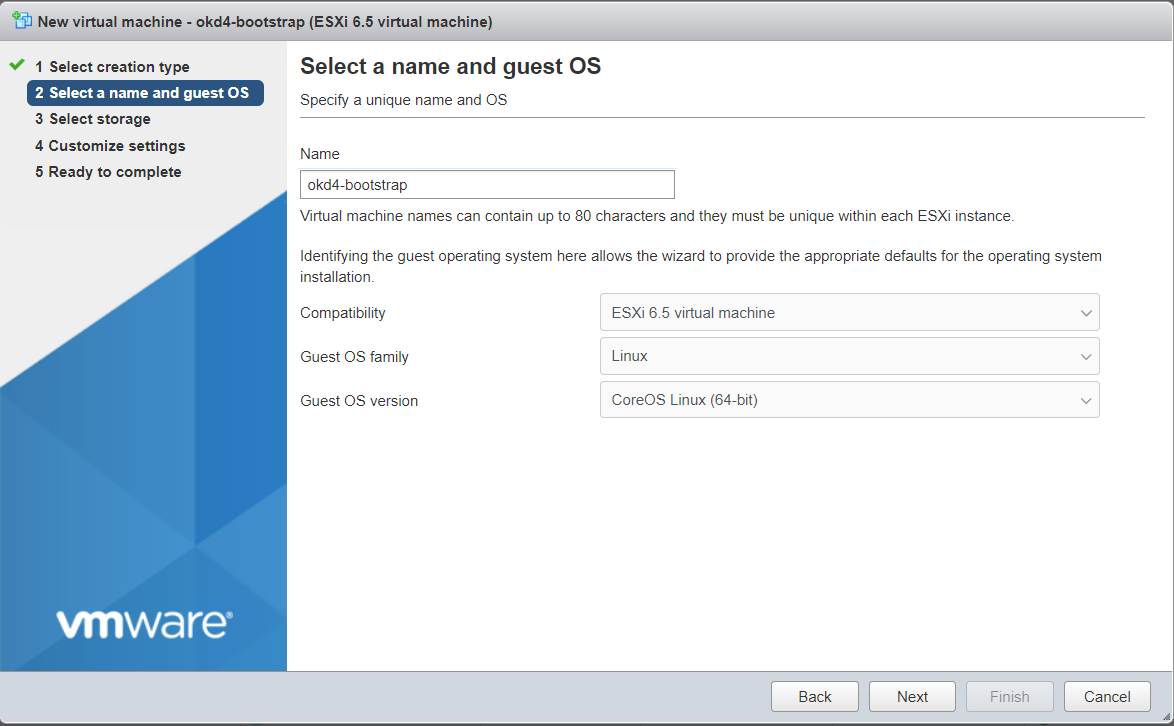
Create the two ODK nodes (okd4-bootstrap and okd4-control-plane-1) on your ESXi host using the values in the spreadsheet at the beginning of this post:
使用本文开头的电子表格中的值,在ESXi主机上创建两个ODK节点(okd4-bootstrap和okd4-control-plane-1):
okd4-bootstrap:
okd4-bootstrap:
 最低0.47元/天 解锁文章


 3309
3309

 被折叠的 条评论
为什么被折叠?
被折叠的 条评论
为什么被折叠?
 到【灌水乐园】发言


