


Jobs and Cron Jobs are very important parts of Kubernetes workloads. These Jobs help us to perform a particular task which we assigned to them.
Jobs和Cron Jobs是Kubernetes工作负载的重要组成部分。 这些工作帮助我们执行分配给他们的特定任务。
The main difference between a Job and a Cron Job is, a Job will perform a given task and once it’s completed it will stop the process and the Job runs only when we need it to run. Cron Job also does the same thing but we can schedule a Cron Job to run at a given schedule. For instance, we can schedule a Cron Job to run once every hour or we can schedule it to run at 6 am daily.
Job和Cron Job之间的主要区别在于,Job将执行给定的任务,完成后将停止该进程,并且Job仅在需要运行时才运行。 Cron Job也做同样的事情,但是我们可以安排Cron Job按给定的时间表运行。 例如,我们可以将Cron Job安排为每小时运行一次,也可以将其安排为每天早上6点运行。
In this article, I will talk about Jobs and how to configure a Job inside your application.
在本文中,我将讨论Jobs以及如何在应用程序中配置Job。
配置工作 (Configuring a job)
As you already know, we use YAML files to configure Kubernetes components inside the cluster and make changes to the existing components. Here also, we can use a YAML configuration file to create a Job in Kubernetes. Let’s see a simple Job configuration file.
如您所知,我们使用YAML文件在集群内部配置Kubernetes组件,并对现有组件进行更改。 同样在这里,我们可以使用YAML配置文件在Kubernetes中创建Job。 让我们看一个简单的Job配置文件。
apiVersion: batch/v1
kind: Job
metadata:
  name: node-app-job
spec:
  template:
    spec:
      containers:
      - name: node-app-job
        image: alpine   #your docker image
        command: ["echo", "Welcome to my Node app"]
      restartPolicy: Never
Above code, snippet represents a simple Kubernetes Job configuration file and you can add your docker image to the job configuration file. After you created the Job as above, you can apply it to the cluster using the below command.
在上面的代码中,snippet代表一个简单的Kubernetes Job配置文件,您可以将docker映像添加到Job配置文件中。 如上所述创建作业后,可以使用以下命令将其应用于集群。
$ kubectl apply -f node-app-job.yamlRun the kubectl get all command on terminal and you will see there, the job has been created. This process may take some time when you do this for the first time since it takes some time to pull your docker image from the container registry.
在终端上运行kubectl get all命令,您将在此处看到作业已创建。 首次执行此过程可能会花费一些时间,因为从容器注册表中拉出docker映像会花费一些时间。
Run kubectl get pod --watch to see events so that you can observe if there’s an error when creating the job.
运行kubectl get pod --watch以查看事件,以便您观察创建作业时是否存在错误。
To see the logs of your Job, run the below command using the pod name obtained from kubectl get all command on terminal.
要查看作业的日志,请使用从终端上的kubectl get all命令获得的pod名称运行以下命令。
$ kubectl logs <pod-name>You will see Welcome to my Node app as the output as we configured command in the above confirmation file. You can use thekubectl describe job <job-name> command to get more details about your Job.
在上述确认文件中,您将看到“ Welcome to my Node app ”作为我们配置命令的输出。 您可以使用kubectl describe job <job-name>命令获取有关Job的更多详细信息。
更改作业配置文件 (Changing the job configuration file)
Unlike deployments and services in Kubernetes, you can’t change the same job configuration file and reapply it at once. When you made changes in the Job configuration file and before you apply it to the cluster, you need to delete the previous job from the cluster.
与Kubernetes中的部署和服务不同,您不能更改相同的作业配置文件并立即重新应用。 在作业配置文件中进行更改之后,以及将其应用于集群之前,您需要从集群中删除上一个作业。
Use the below command to remove the Job from the cluster.
使用以下命令从群集中删除作业。
$ kubectl delete job <job-name>//example
> kubectl delete job node-app-job
job.batch "node-app-job" deleted
Run kubectl get all command and make sure you’ve successfully deleted the previous job from the cluster. Then you can run thekubectl apply command again and check the logs.
运行kubectl get all命令,并确保您已成功从集群中删除了先前的作业。 然后,您可以再次运行kubectl apply命令并检查日志。
Let’s change the job configuration file first and investigate the logs.
让我们先更改作业配置文件,然后调查日志。
apiVersion: batch/v1
kind: Job
metadata:
  name: node-app-job
spec:
  template:
    spec:
      containers:
      - name: node-app-job
        image: alpine
        command: ["ls"]
      restartPolicy: Never
I changed the command in the configuration file and this will output the directories in the alpine docker image. Also, you can change the docker image and the command as you prefer.
我在配置文件中更改了命令,这将在高山码头工人镜像中输出目录。 另外,您可以根据需要更改docker映像和命令。
完成和并行 (completions & parallelism)
Generally, when we create a Job, it creates a single pod and performs the given task. You’ve already experienced it via the above example. But using completions we can initiate several pods one after the other.
通常,当我们创建一个Job时,它会创建一个pod并执行给定的任务。 您已经通过上面的示例进行了体验。 但是,使用completions我们可以一个接一个地启动多个吊舱。
apiVersion: batch/v1
kind: Job
metadata:
  name: node-app-job
spec:
  completions: 2
  template:
    spec:
      containers:
      - name: node-app-job
        image: alpine
        command: ["echo", "Welcome to my Node app"]
      restartPolicy: Never
Once you added completions you’ll see two pods are created for this job. Use the kubectl get pods --watchcommand to see them.
添加completions您将看到为该作业创建了两个吊舱。 使用kubectl get pods --watch命令查看它们。
// kubectl get pods --watch outputpod/node-app-deployment-5c4694f5b-7tf8r   1/1     Running
pod/node-app-job-7pdp9                    0/1     Completed
pod/node-app-job-9924d                    0/1     ContainerCreating
You can useparallelism to run multiple pods at the same time. parallelism also used under the spec as below.
您可以使用parallelism同时运行多个Pod。 parallelism也在以下spec下使用。
apiVersion: batch/v1
kind: Job
metadata:
  name: node-app-job
spec:
  completions: 2
  parallelism: 2
  template:
    spec:
      containers:
      - name: node-app-job
        image: alpine
        command: ["echo", "Welcome to my Node app"]
      restartPolicy: Never
You can set the maximum number of pods you need to run for this particular job under the completions and you can define how many pods should run parallelly under the parallelism .
你可以设置你需要为下这份工作运行荚的最大数量completions ,你可以定义多少豆荚应根据平行运行parallelism 。
In the above code block, we’ve got 2 pods and we need both the pods runs parallelly.
在上面的代码块中,我们有2个Pod,我们需要两个Pod并行运行。
// kubectl get pods --watch outputpod/node-app-deployment-5c4694f5b-7tf8r   1/1     Running
pod/node-app-job-glcn4                    0/1     ContainerCreating
pod/node-app-job-ngm5p                    0/1     ContainerCreating
backoffLimit和activeDeadlineSeconds (backoffLimit & activeDeadlineSeconds)
backoffLimit help us to limit the pod creation when our job fails to create successfully. Usually, when a pod doesn’t create properly, it will go to the Error status and initiate another pod and this process continues until you get a successfully created pod.
当我们的工作创建失败时, backoffLimit帮助我们限制pod的创建。 通常,当容器未正确创建时,它将进入“ Error状态并启动另一个容器,此过程将一直持续到获得成功创建的容器为止。
If your job contains something(ex: command error) that doesn’t allow your job to create successfully, it tries creating pods continuously. When you run kubectl get pods you’ll see several pods with Error status. But using backoffLimit you can limit the number of pods creating continuously.
如果您的作业包含不允许您的作业成功创建的内容(例如:命令错误),它将尝试连续创建容器。 当您运行kubectl get pods您会看到几个状态为Error pods。 但是,使用backoffLimit可以限制连续创建的Pod的数量。
apiVersion: batch/v1
kind: Job
metadata:
  name: node-app-job
spec:
  backoffLimit: 2
  template:
    spec:
      containers:
      - name: node-app-job
        image: alpine
        command: ["ls", "/data"]
      restartPolicy: Never
kubectl get podspod/node-app-deployment-5c4694f5b-7tf8r 1/1 Running
pod/node-app-job-8bfgj 0/1 Error
pod/node-app-job-kk8nh 0/1 Error
pod/node-app-job-x6fmk 0/1 ErroractiveDeadlineSeconds help us to decide how many seconds should the job runs. To verify this option we set sleep command inside our job to run it for 40 seconds. But using activeDeadlineSeconds: 15 we can terminate the job after 15 seconds.
activeDeadlineSeconds帮助我们确定作业应运行多少秒。 为了验证此选项,我们在作业内部设置了sleep命令以使其运行40秒。 但是使用activeDeadlineSeconds: 15我们可以在15秒后终止作业。
apiVersion: batch/v1
kind: Job
metadata:
  name: node-app-job
spec:
  activeDeadlineSeconds: 15
  template:
    spec:
      containers:
      - name: node-app-job
        image: alpine
        command: ["sleep", "40"]
      restartPolicy: Never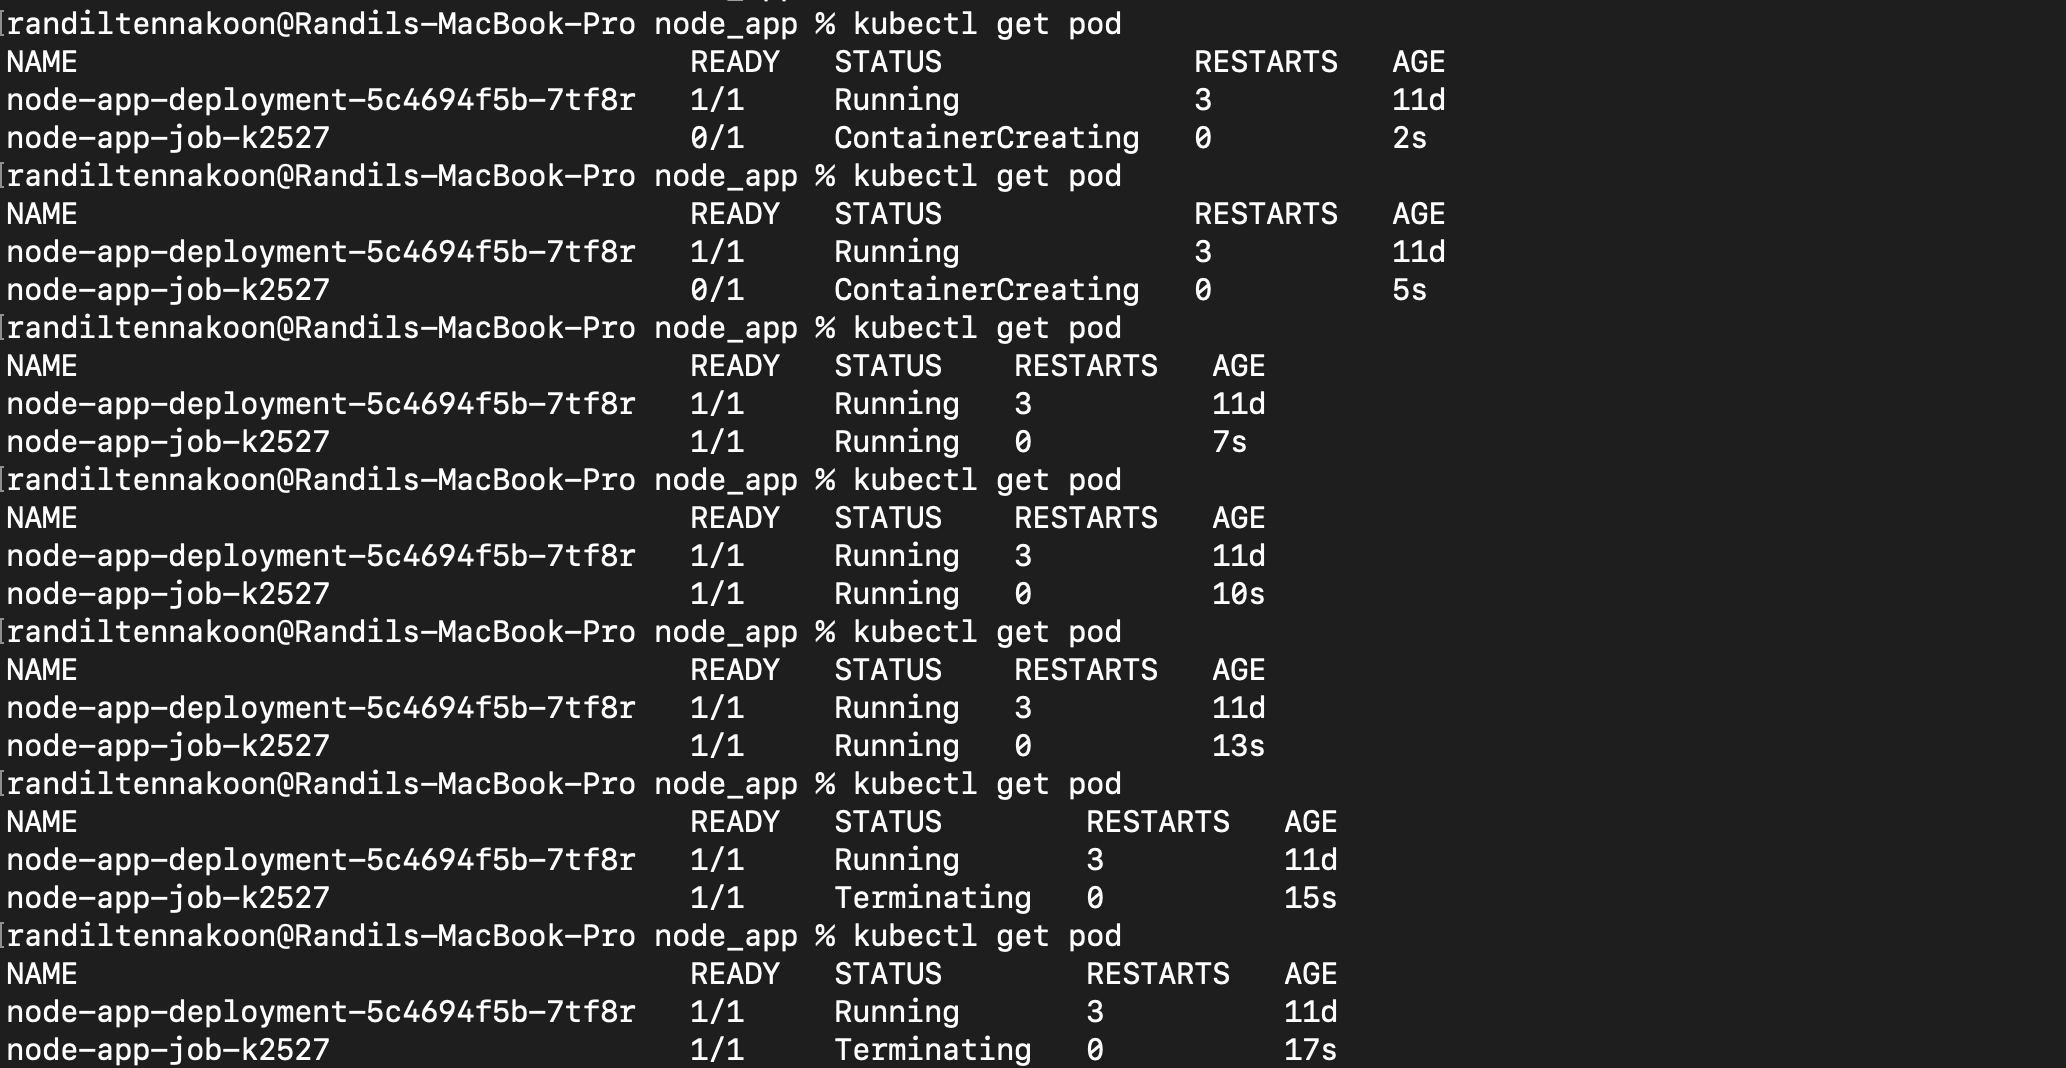
结论(Conclusion)
Congratulations! 🎉
恭喜你! 🎉
You have covered the fundamentals of Jobs in Kubernetes.
您已经了解了Kubernetes中Jobs的基础知识。
Thanks for reading. I hope you found the information useful in this article. If you found anything doubtful, leave a response below so that I can get back to you.
谢谢阅读。 希望您在本文中找到有用的信息。 如果您发现任何疑问,请在下面留下您的答复,以便我尽快与您联系。
Happy coding! 👨🏻💻
编码愉快! 💻
翻译自: https://levelup.gitconnected.com/understanding-jobs-in-kubernetes-541614ccd796


 1199
1199


 被折叠的 条评论
为什么被折叠?
被折叠的 条评论
为什么被折叠?
 到【灌水乐园】发言


