


Are you a newbie developer? Have you recently started using GitHub? This article is for all the newbie developers who want to get started with GitHub and experienced developers who still find GitHub complex and confusing.
您是新手开发人员吗? 您最近开始使用GitHub吗? 本文适用于所有希望开始使用GitHub的新手开发人员以及经验丰富的开发人员,他们仍然觉得GitHub复杂而令人困惑。
什么是GitHub? (What is GitHub?)
GitHub is a social code-hosting platform used for version control. For example, assume you and a bunch of your friends are building a new website and everyone wants to update their codes simultaneously while working on the project. In this case, GitHub helps them to build a centralized repository where everyone can upload, edit, and manage the code files.
GitHub是用于版本控制的社交代码托管平台。 例如,假设您和您的一群朋友正在建立一个新网站,并且每个人都希望在进行项目时同时更新其代码。 在这种情况下,GitHub可以帮助他们建立一个集中的存储库,每个人都可以在其中上载,编辑和管理代码文件。
You can find GitHub here: https://github.com/
您可以在这里找到GitHub: https : //github.com/
Advantages of GitHub :
GitHub的优势:
- GitHub is a very versatile and collaborative tool to use. It is ideal for working on projects of any size and makes it easy to contribute to your favorite open source projects. GitHub是一个非常通用的协作工具。 它非常适合处理任何规模的项目,并且可以轻松地为您喜欢的开源项目做出贡献。
- GitHub provides developers and researchers with a dynamic and collaborative environment, that supports peer review, commenting, and discussion. It’s an amazing tool for web workflows. GitHub为开发人员和研究人员提供了动态和协作的环境,该环境支持同行评审,评论和讨论。 这是Web工作流程的绝佳工具。
- It’s an ideal platform for creating a backup of your work instead of saving the code on a desktop or any server. 这是创建工作备份而不是将代码保存在台式机或任何服务器上的理想平台。
- GitHub on your resume can make your profile look better than others who don’t have any experience working with GitHub. 简历上的GitHub可以使您的个人资料看起来比其他没有使用GitHub经验的人更好。
GitHub’s help section and guides have articles for almost all the topics you can think of. It has excellent documentation which is very helpful for the developers.
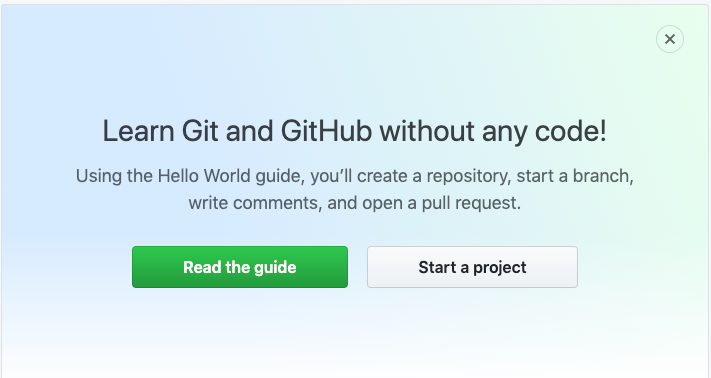
No coding required!
无需编码!
Go to https://github.com/ and create an account.
转到https://github.com/并创建一个帐户。
Once the account has been created successfully, you can do the following —
成功创建帐户后,您可以执行以下操作-
- Create and use a repository 创建和使用存储库
- Start and manage a new branch启动和管理新分支
- Commit Changes — Make changes to a file and push them to GitHub提交更改-更改文件并将其推送到GitHub
- Open and merge a pull request 打开并合并拉取请求
步骤1:创建存储库(Step 1: Create a repository)
With a repository, you can —
使用存储库,您可以-
- Organize a single project. 组织一个项目。
- Repositories can contain folders and files, images, videos, spreadsheets, and data sets, etc 存储库可以包含文件夹和文件,图像,视频,电子表格和数据集等
To create a repository —
创建存储库-
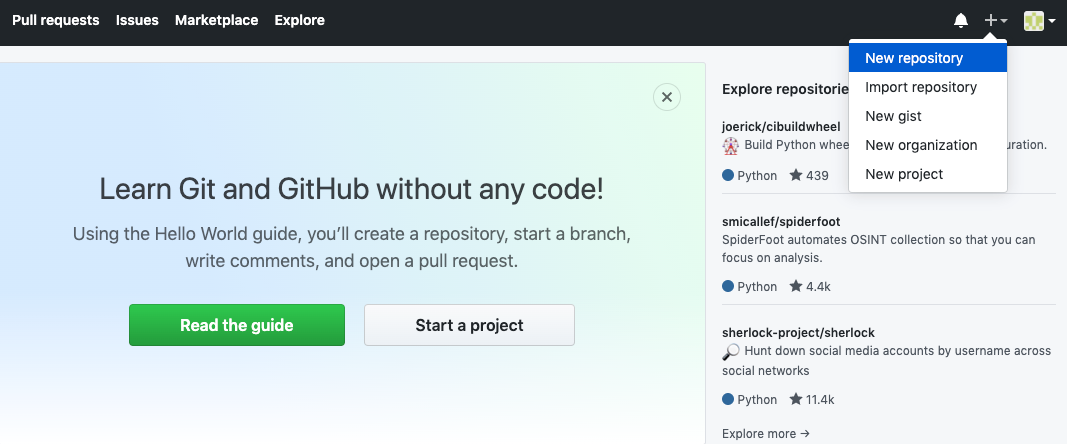
As shown in the screenshot below, In the upper right corner, next to your avatar click + and then select New repository.
如下面的屏幕截图所示,在您的头像旁边的右上角,单击+,然后选择新建存储库。
Name your repository test-repo.
将您的存储库命名为test-repo 。
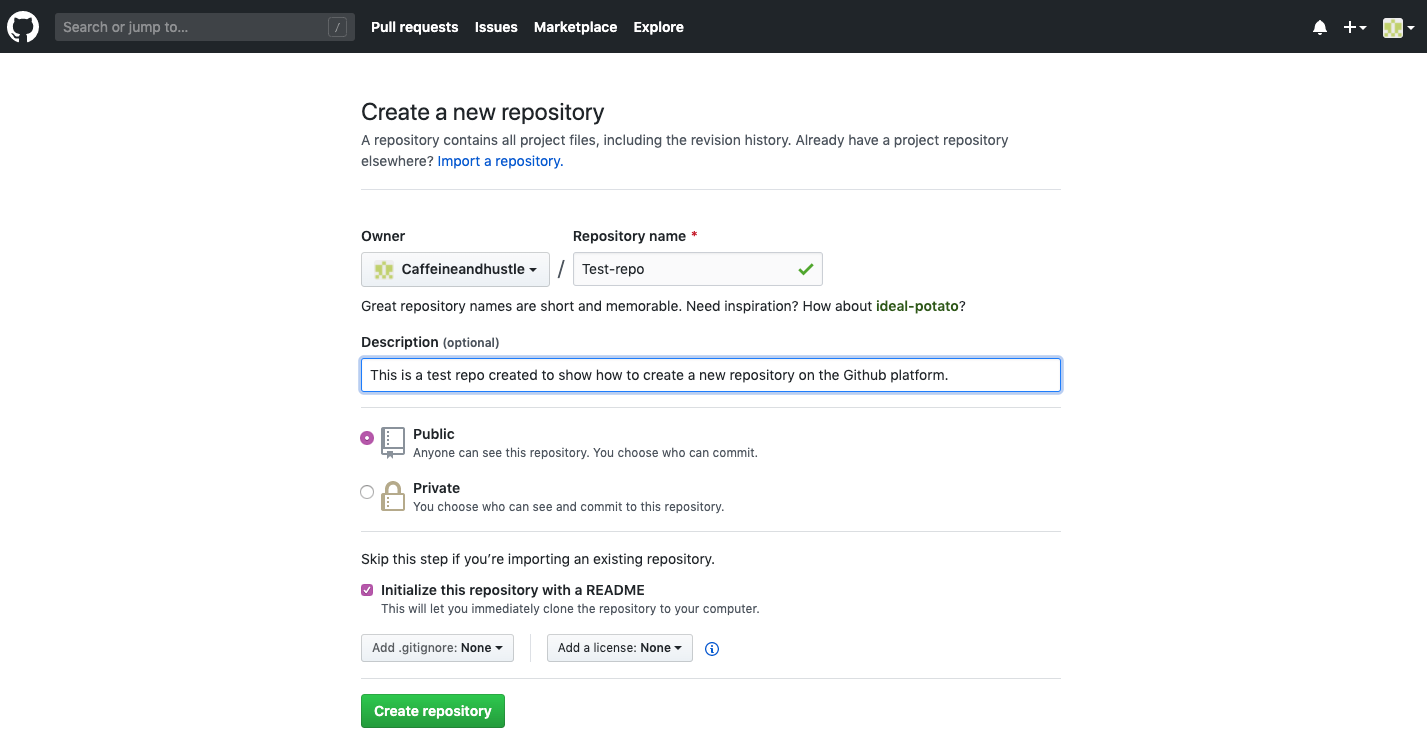
Fill the description part and select Initialize this repository with a README. You can also choose who can see and commit to your repository by choosing public and private options.
填写描述部分,然后选择使用README初始化此存储库。 您还可以通过选择公共和私有选项来选择谁可以查看并提交到您的存储库。
2.创建一个分支 (2. Create a Branch)
Branching is a feature available in most modern version control systems.
分支是大多数现代版本控制系统中可用的功能。
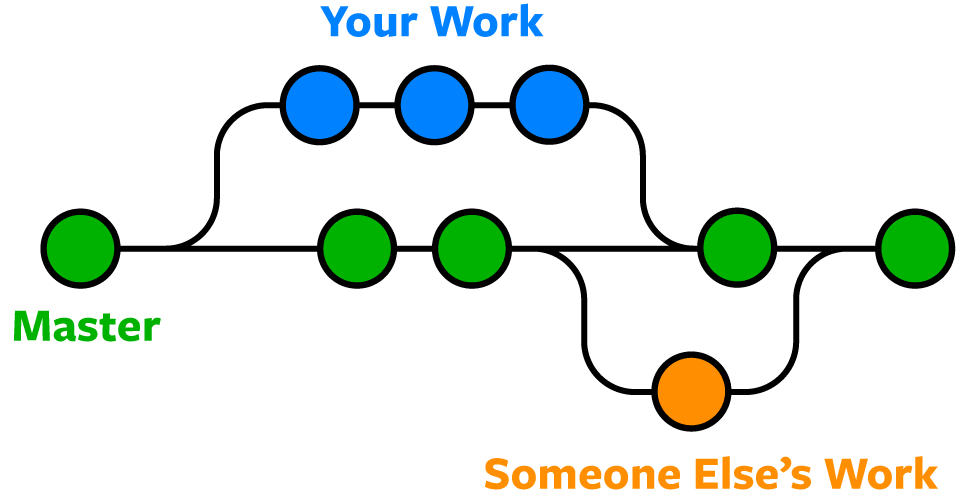
Git branches are effectively a pointer to a snapshot of your changes during the development phase. When you want to add a new feature or fix a bug, you create a new branch to encapsulate your changes. So this makes it harder for unstable or bad code to get merged into the main codebase, and it gives you the chance to clean up your code before merging it into the main branch.
Git分支实际上是指向开发阶段更改快照的指针。 当您想添加新功能或修复错误时,可以创建一个新分支来封装您的更改。 因此,这使得不稳定或错误的代码很难合并到主代码库中,并且使您有机会在将代码合并到主分支之前清理代码。
To create a branch —
创建分支—
Go to your new repository
test-repo.转到新的存储库
test-repo。Click the drop-down at the top of the file list that says branch: master. Type a branch name i.e, in this case, I gave the name readme-edits-branch and select and hit the create branch: readme-edits-brach from “master” as shown in the screenshot below.
单击文件列表顶部的分支:master的下拉列表。 输入分支名称,即,在这种情况下,我给名称提供了readme-edits-branch,然后选择并单击create分支:“ master”中的readme-edits-brach,如下面的屏幕快照所示。

Once done successfully, you can see 2 branches ( master and readme-edits-branch)as shown in the screenshot below —
成功完成后,您可以看到2个分支( master和readme-edits-branch ),如下面的屏幕快照所示-

3.提交更改(3. Commit Changes)
Commits are nothing but saved messages. Each commit has an associated commit message which is used to capture the history of your changes so that other contributors to the same project can understand what changes have been made and why.
提交只是保存的消息。 每个提交都有一个关联的提交消息,该消息用于捕获更改的历史记录,以便同一项目的其他贡献者可以了解所做的更改以及原因。
To make and commit changes —
进行并提交更改-
Click the
README.mdfile. and click the pencil icon as shown in the screenshot below to edit the file.单击
README.md文件。 并单击铅笔图标(如以下屏幕截图所示)以编辑文件。

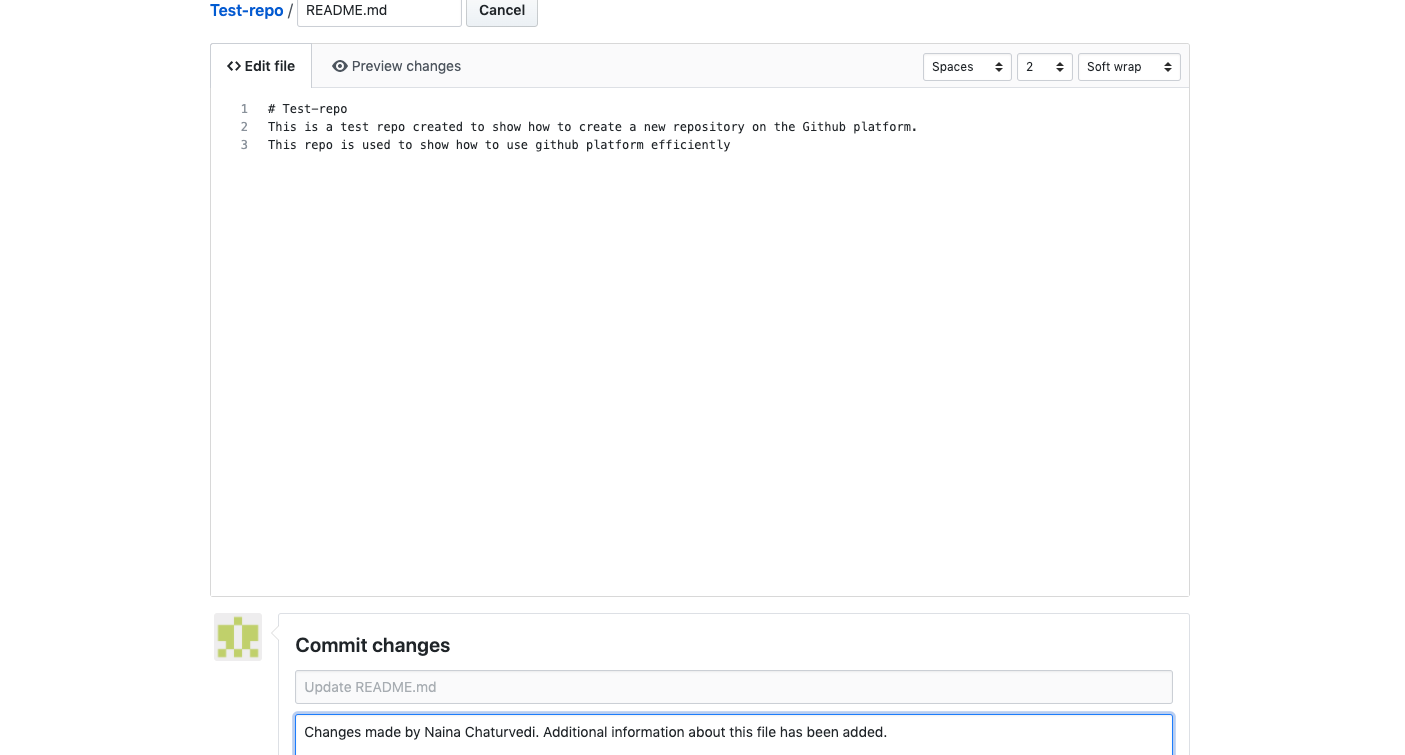
Write the changes and then in the bottom, as you can see commit changes, there you can write about yourself and info/description about the changes that have been made to the file.
写下更改,然后在底部,您可以看到提交更改,您可以在其中写下您自己以及有关对该文件所做的更改的信息/说明。
You can also preview changes and then click commit button, as shown in the screenshot below —
您还可以预览更改,然后单击“提交”按钮,如下面的屏幕截图所示-
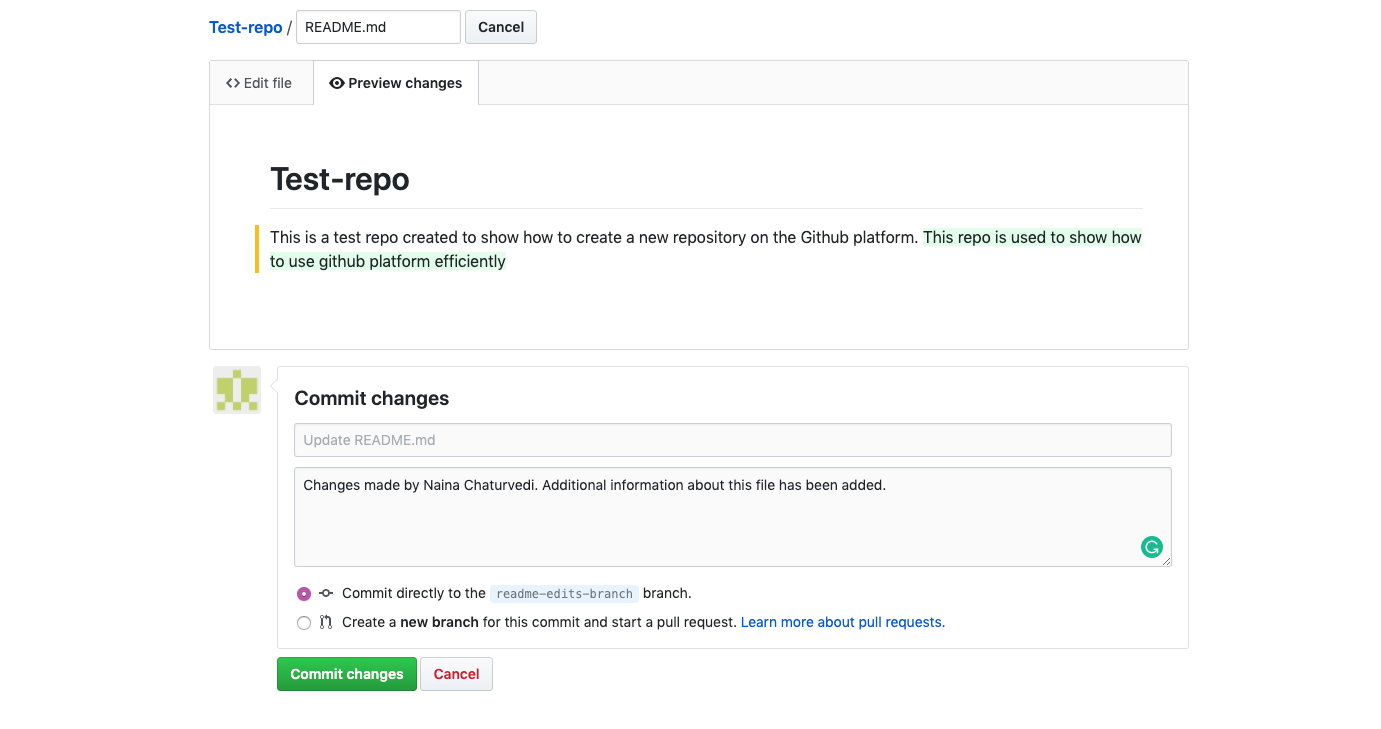
Once successfully done, these changes will be made to README file on your readme-edit-branch
成功完成后,将对您的readme-edit-branch文件readme-edit-branch自述文件进行这些更改
4.拉取请求(4. Pull Request)
Open a pull request —
打开拉取请求-
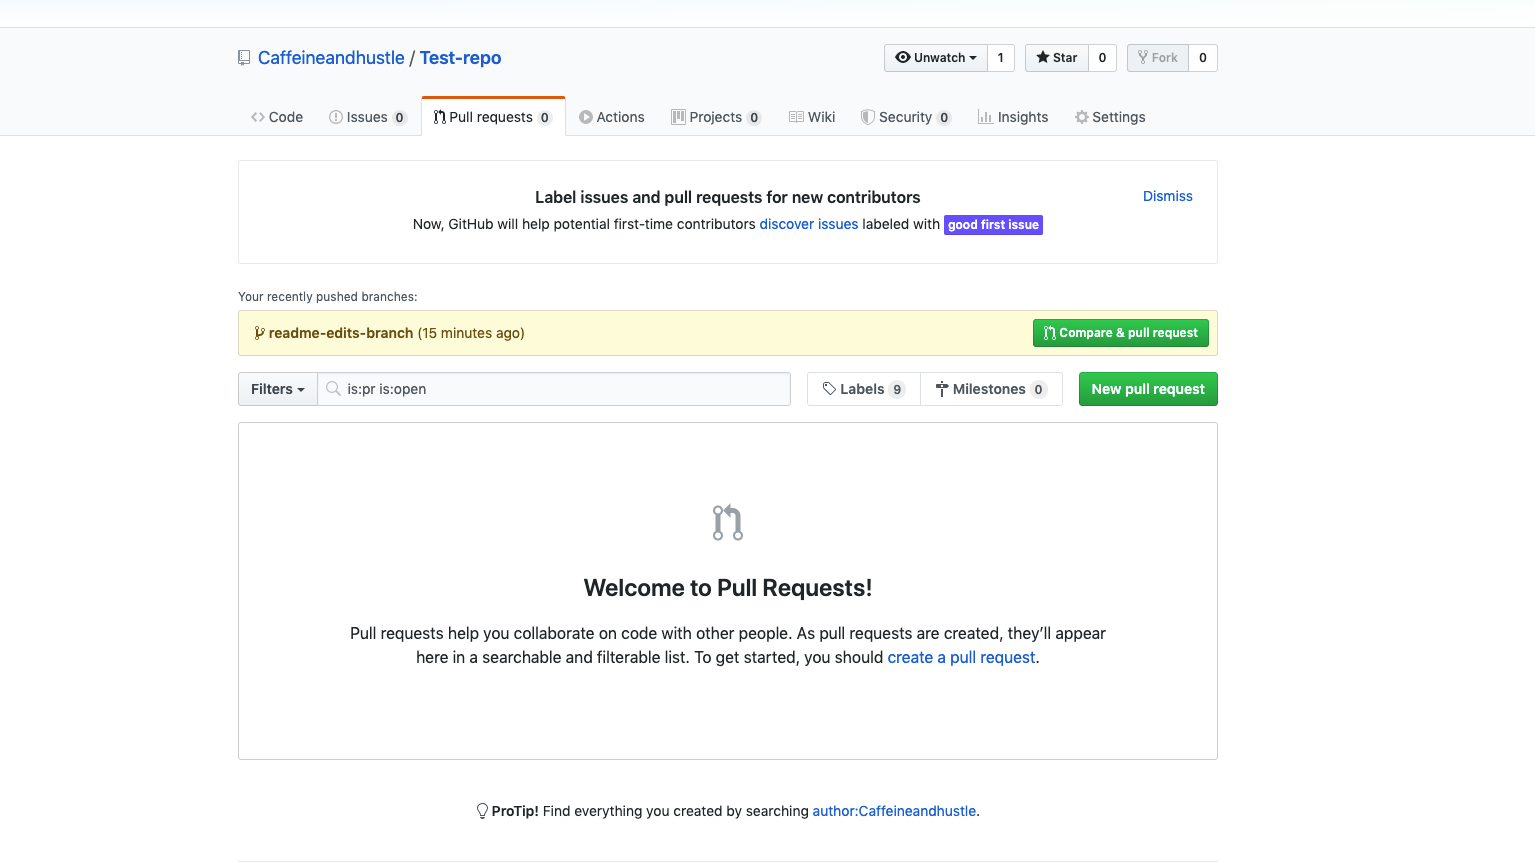
When you open a pull request, you’re proposing your changes and requesting that someone review and pull in your contribution and merge them into their branch. You can see the pull request tab next to the issues tab in the screenshot below. Click the green New pull request button.
当您打开请求请求时,您正在提出更改,并要求某人检查并提取您的贡献并将其合并到其分支中。 您可以在下面的屏幕快照中的问题标签旁边看到拉取请求标签。 单击绿色的新建拉取请求按钮。
Select the branch you made, readme-edit-branchto compare with master from the drop-down menu.
从下拉菜单中选择您创建的分支,即“ readme-edit-branch以与master进行比较。
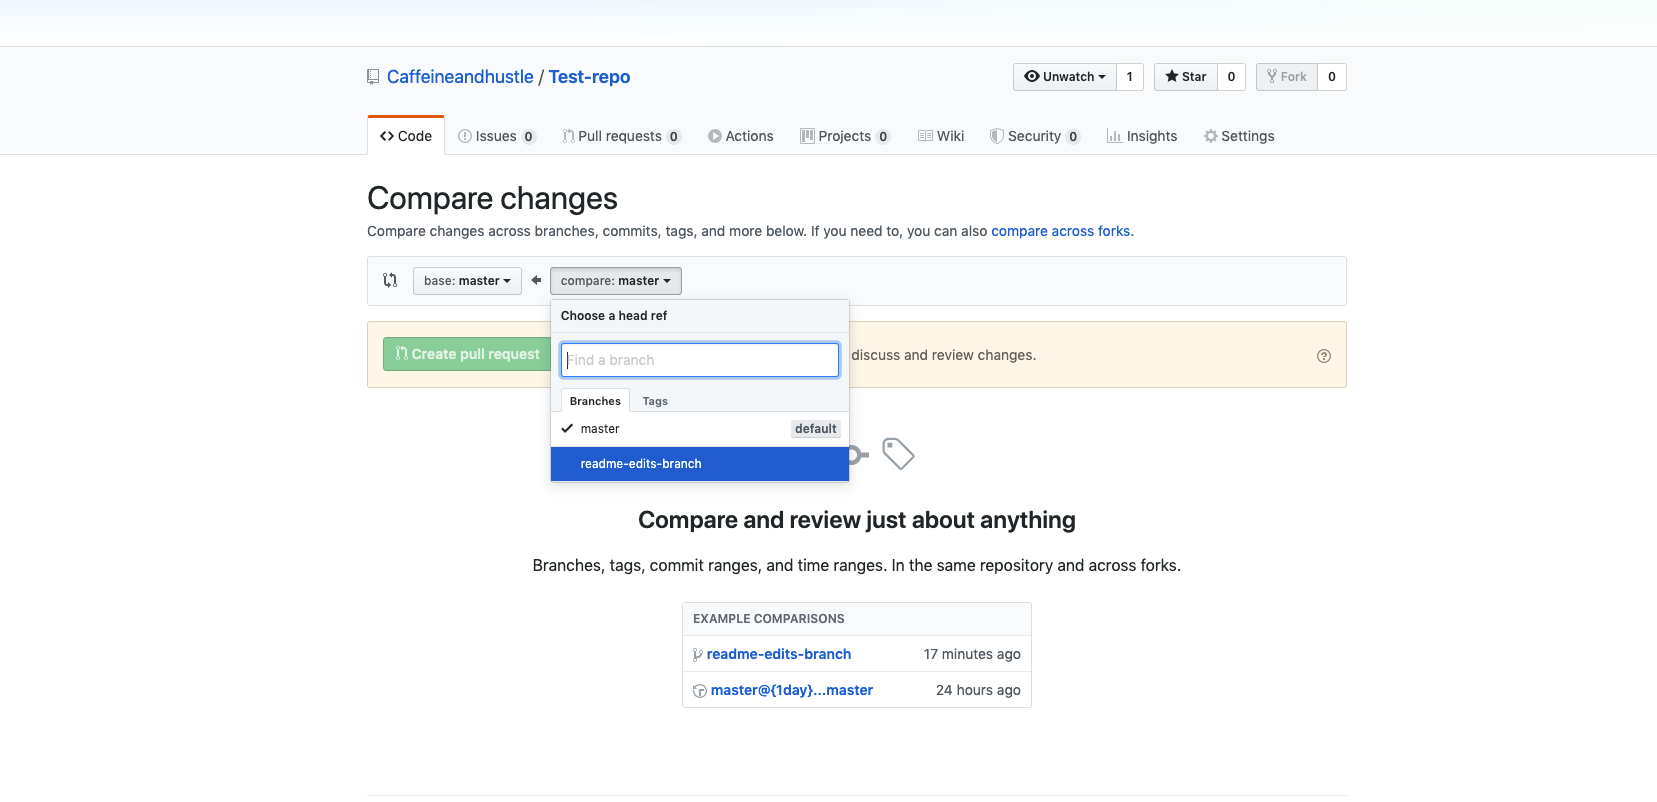
Compare the changes (changes highlighted in the green) —
比较更改(更改以绿色突出显示)—
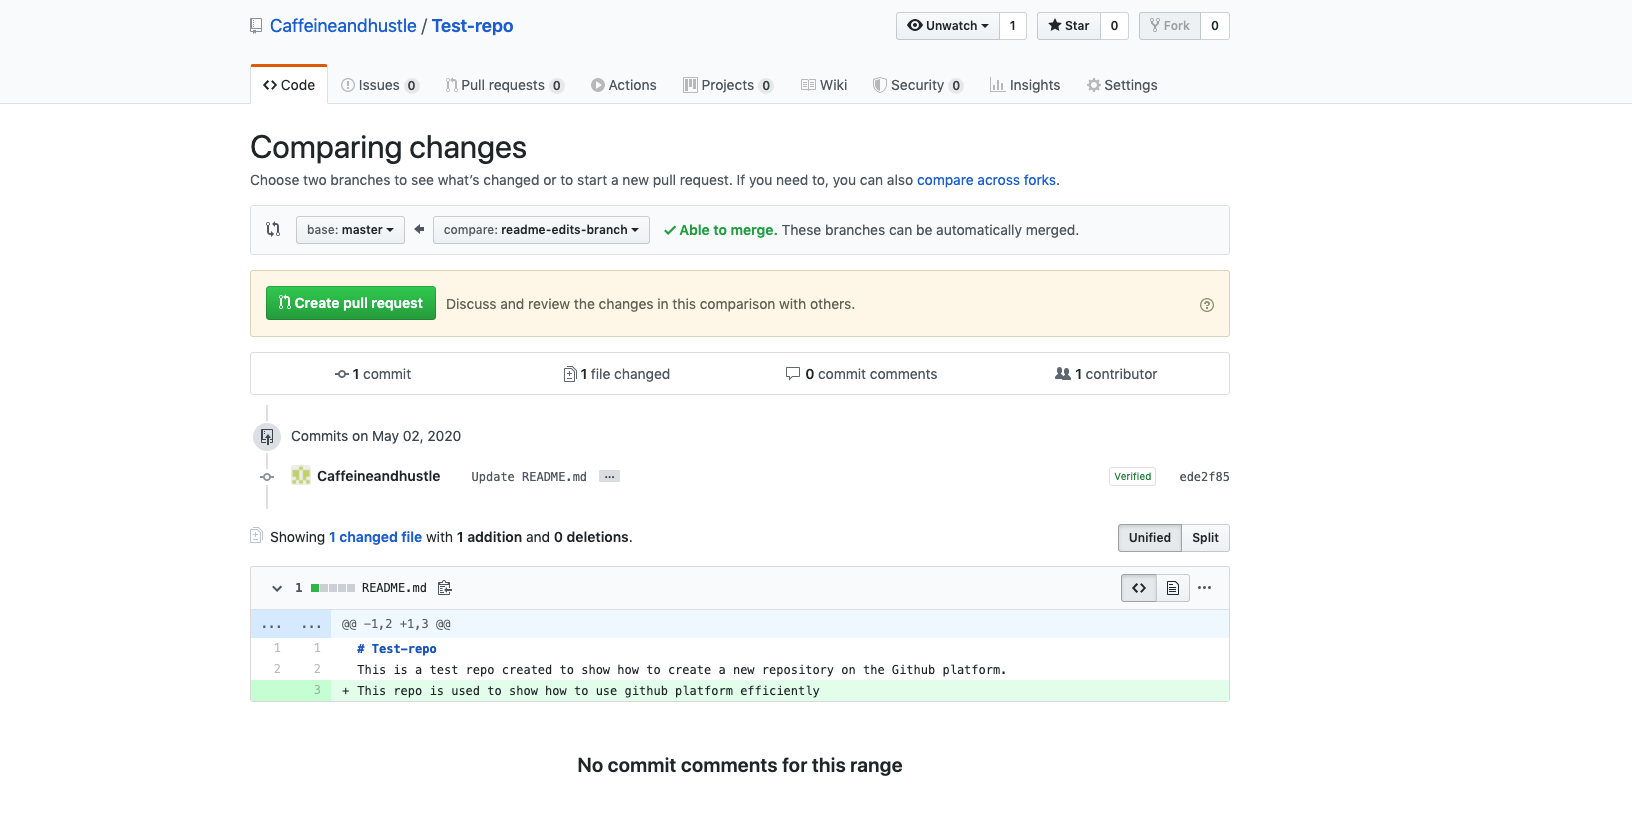
Once you are satisfied with the changes, click the Create pull request button. Once clicked, you will land to Pull request page —
对更改感到满意后,请单击创建请求请求按钮。 点击后,您将进入“拉取请求”页面-
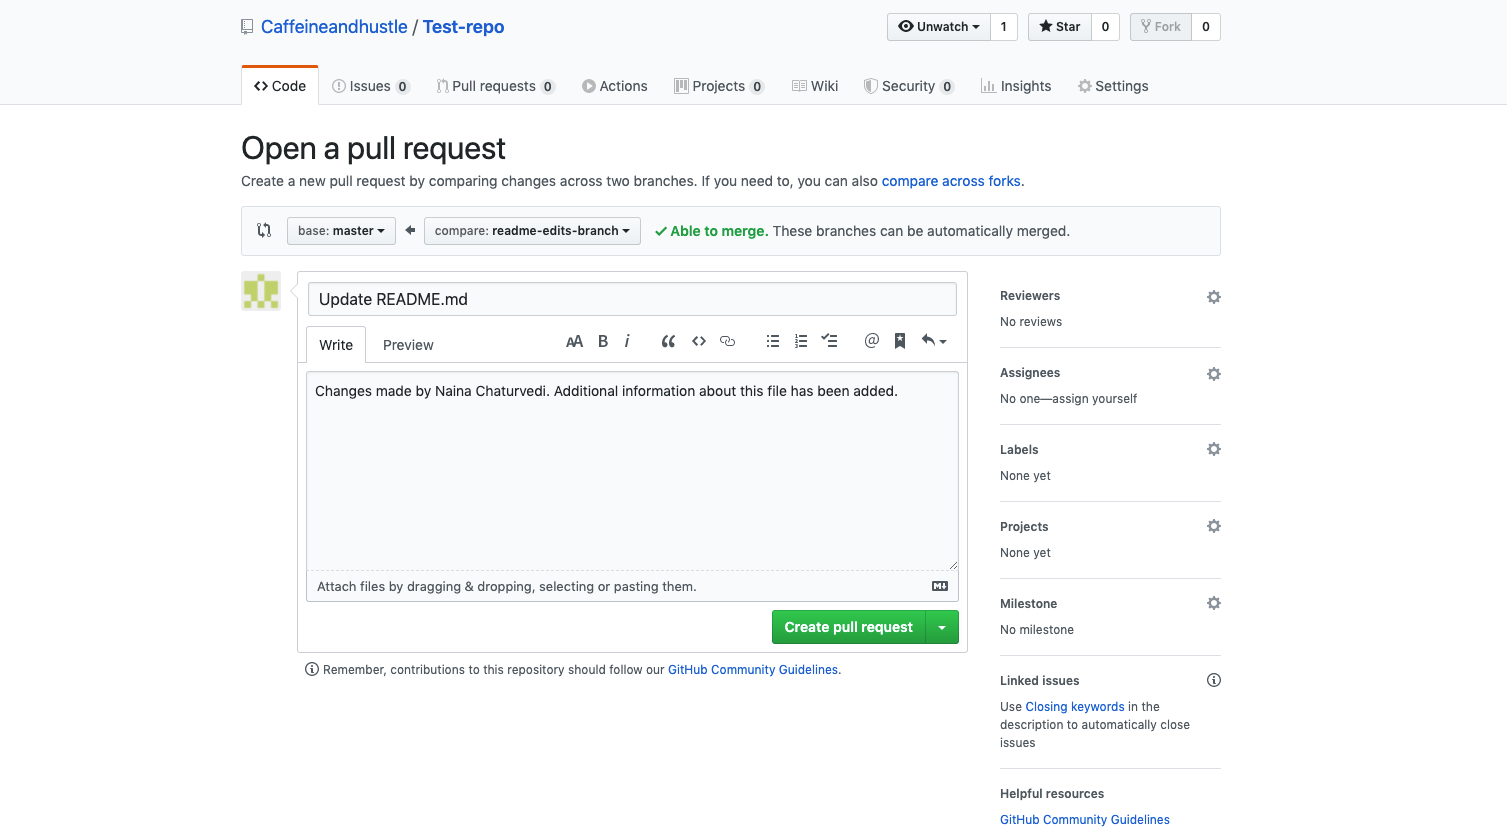
Here you can write something about the pull request and on the right-hand side, as you can see, you can assign this pull request to anyone for a review or comment.
在这里,您可以编写有关请求请求的内容,并且可以在右侧看到,您可以将此请求请求分配给任何人以进行评论或评论。
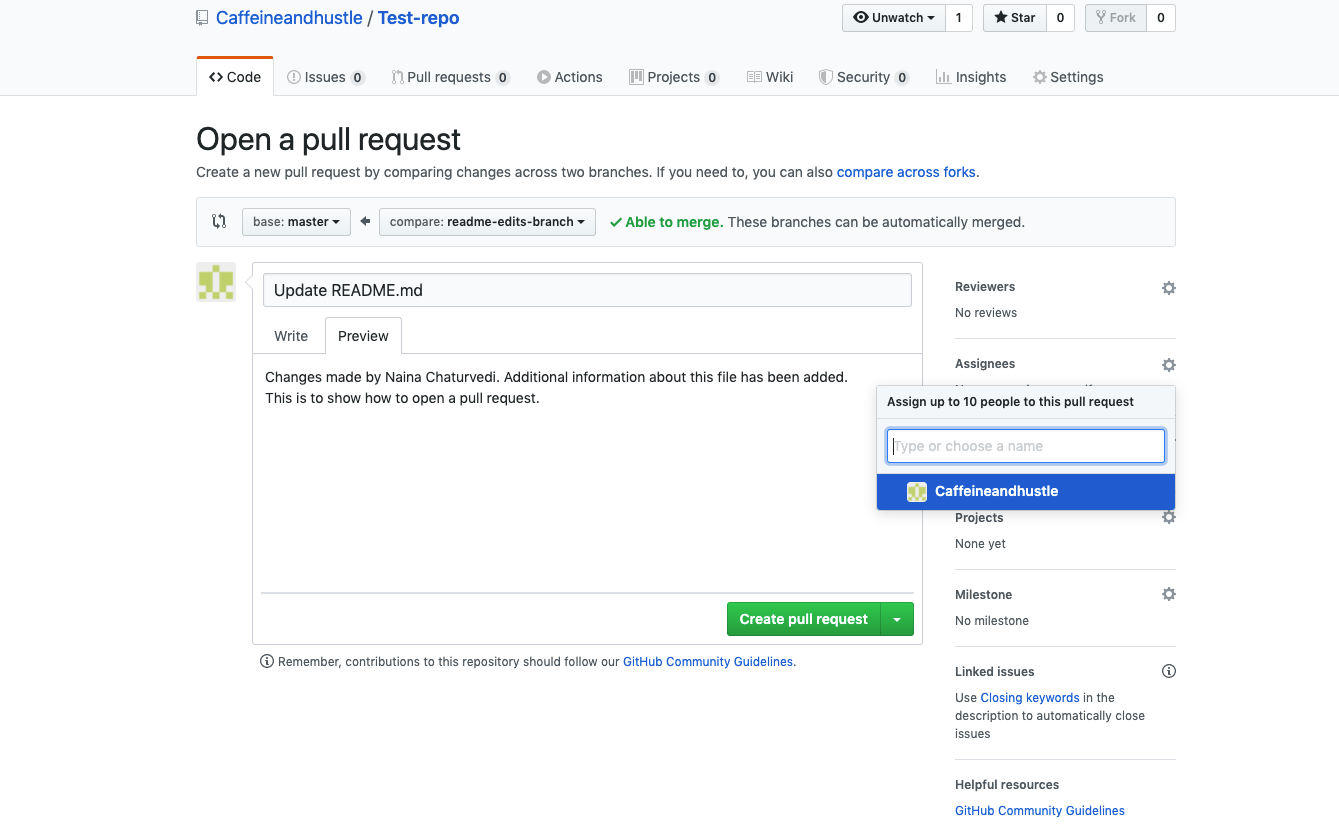
Once you are done, click Create pull request.
完成后,单击创建请求请求。
5.合并您的拉取请求 (5. Merge your Pull Request)
You can merge your changes. In this article, we are going to merge readme-edits-branch into the master branch.
您可以合并您的更改。 在本文中,我们将把readme-edits-branch合并到master分支中。
Previously in Point 4 of this article, we opened a pull request. You can see (Pull request 1) in the below screenshot —
在本文的第4点之前,我们打开了一个pull请求。 您可以在下面的屏幕截图中看到(拉取请求1)-
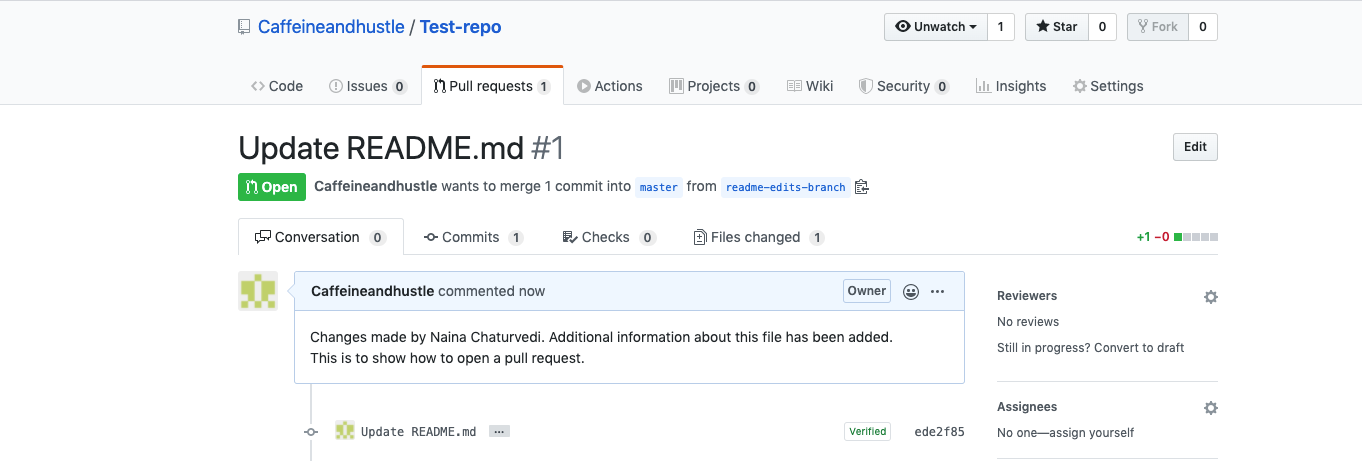
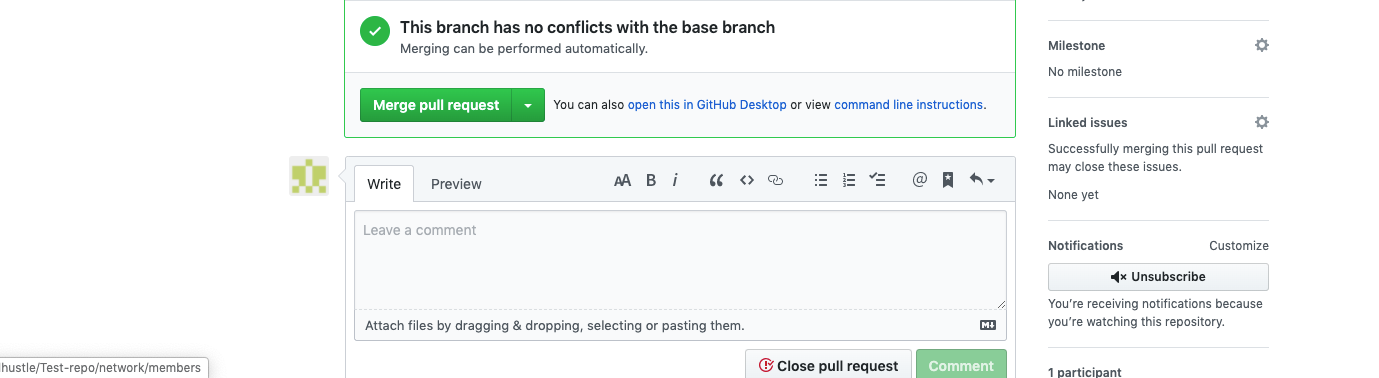
In order to Merge the Pull Request, Click on the green Merge pull request button and merge the changes to the master. Once confirmed, click Confirm Merge.
为了合并请求请求,请单击绿色的合并请求请求按钮,并将更改合并到主服务器。 确认后,单击“确认合并”。

Once successfully merged, you can see the purple boxed Merged icon —
成功合并后,您会看到紫色的方框“合并”图标-
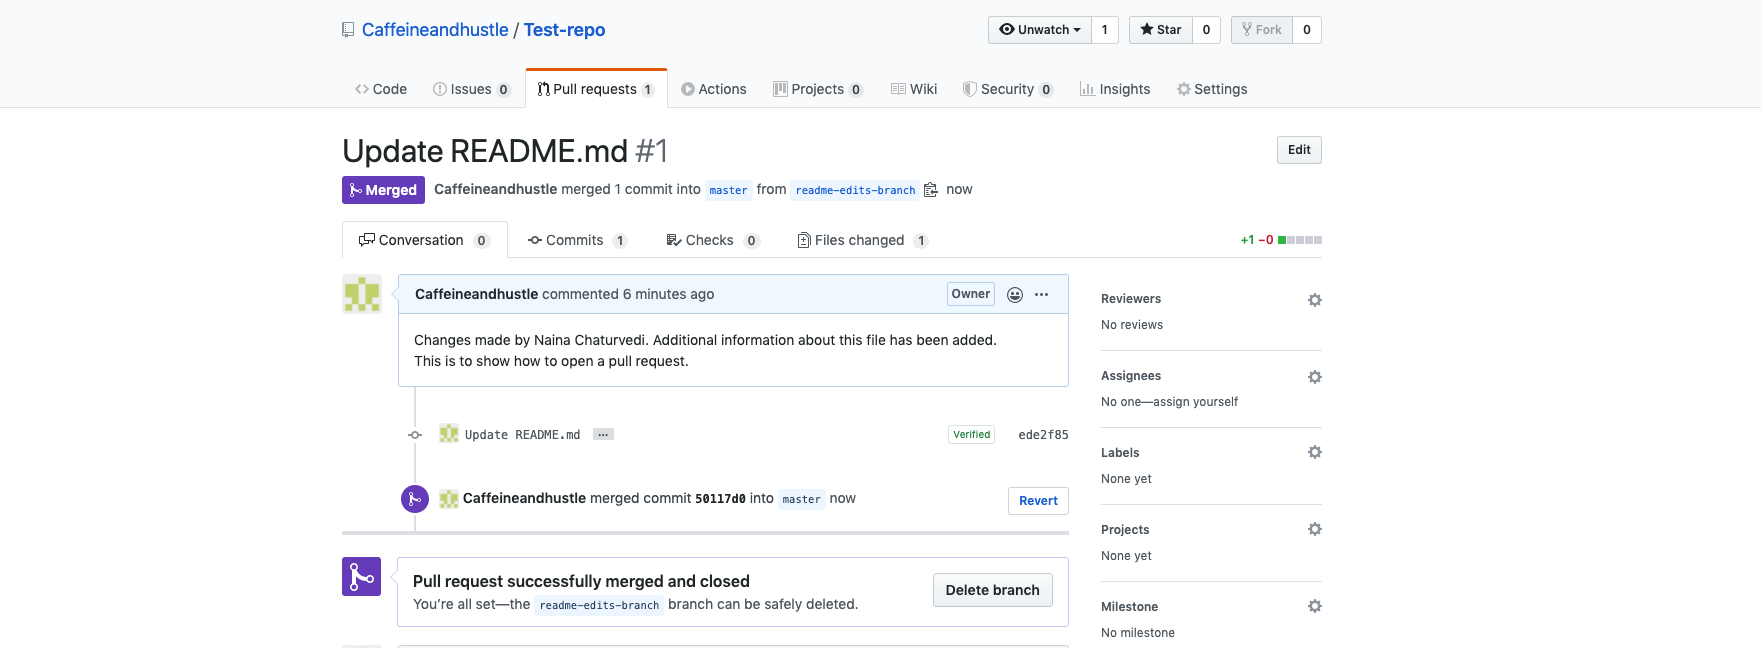
After a successful merge, you can delete the branch since its changes have been incorporated. Click Delete branch button —
成功合并后,由于已合并分支更改,因此可以删除该分支。 点击删除分支按钮-
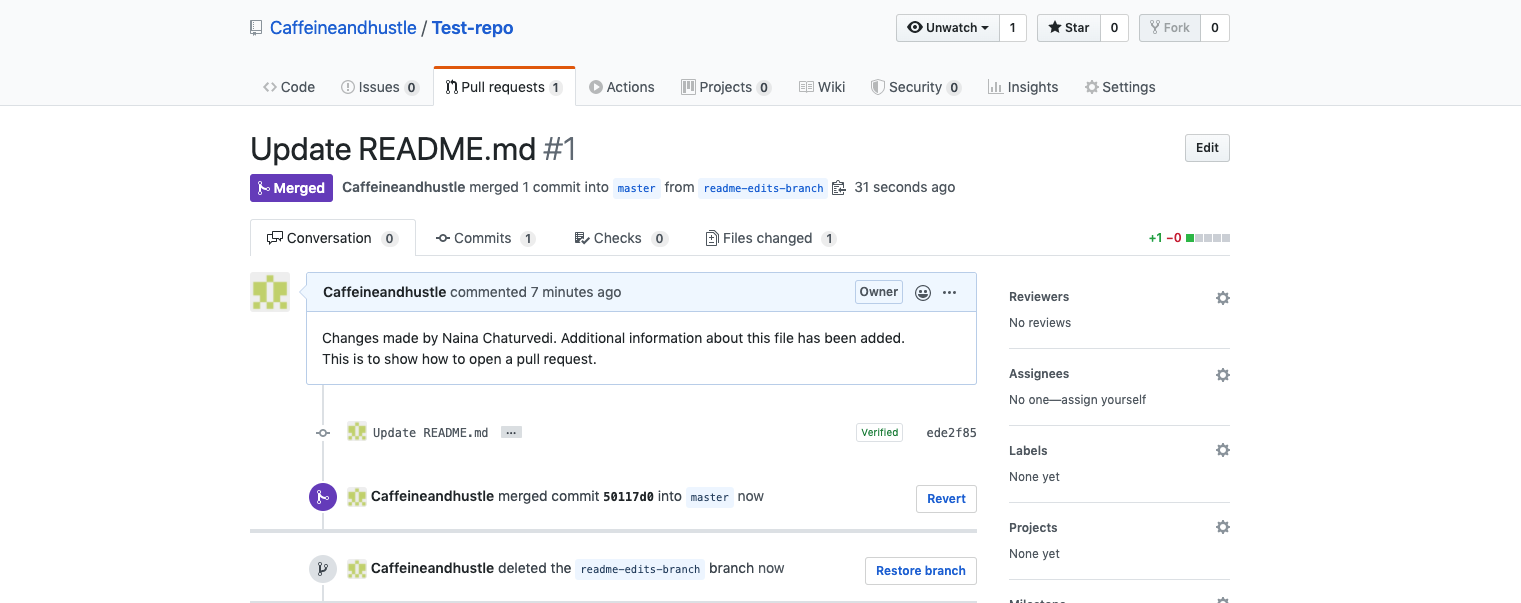
After successfully deleting the branch, you can see the message that readme-edits-branch has been deleted. Just in case, if the branch has been deleted by mistake, you can restore the branch by clicking Restore Branch button.
成功删除分支后,您会看到以下消息: readme-edits-branch已被删除。 以防万一,如果分支被误删除,则可以通过单击“还原分支”按钮来还原分支。
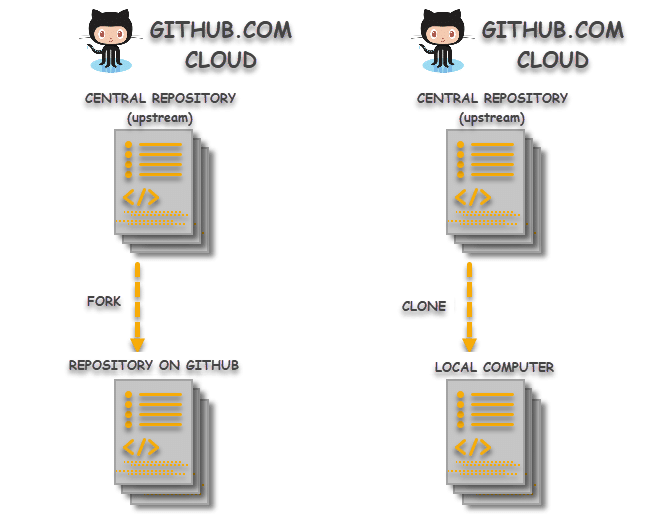
6.克隆和Fork GitHub存储库 (6. Clone and Fork GitHub Repository)
If you want to use the code which is present in the public repository then using you can directly copy the contents by cloning/downloading.
如果要使用公共存储库中存在的代码,则可以使用克隆/下载直接复制内容。
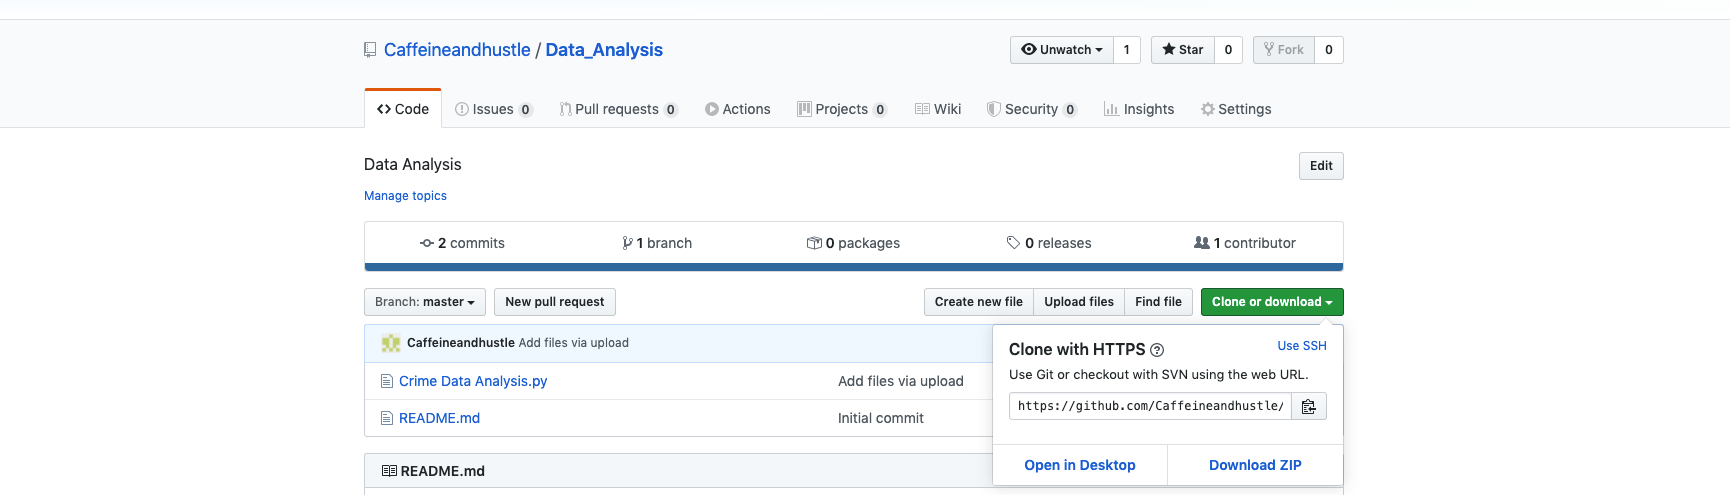
To Clone —
克隆-
Just go to the required repository and click the green-colored Clone or Download Button.
只需转到所需的存储库,然后单击绿色的“克隆”或“下载”按钮。
Forking is nothing but creating a copy of a repository. It allows you to freely experiment with changes, offer suggestions without affecting the original project, and is used to either propose suggestions or changes to someone else’s project or to use someone else’s project to build your project or use it as a starting point.
分叉不过是创建存储库的副本而已。 它使您可以自由地进行更改的试验,在不影响原始项目的情况下提供建议,并且可以用于对其他人的项目提出建议或更改,或者用于使用其他人的项目来构建您的项目或将其用作起点。
To Fork —
到叉—
Go to the repository you want to fork, for example in this article, I’m forking Jupyter repository using the fork button on the right side as shown below in the screenshot —
转到要分叉的存储库,例如,在本文中,我正在使用右侧的分叉按钮分叉Jupyter存储库,如以下屏幕快照所示-

You will get below message screen while forking —
分叉时,您将在消息屏幕下方进入—
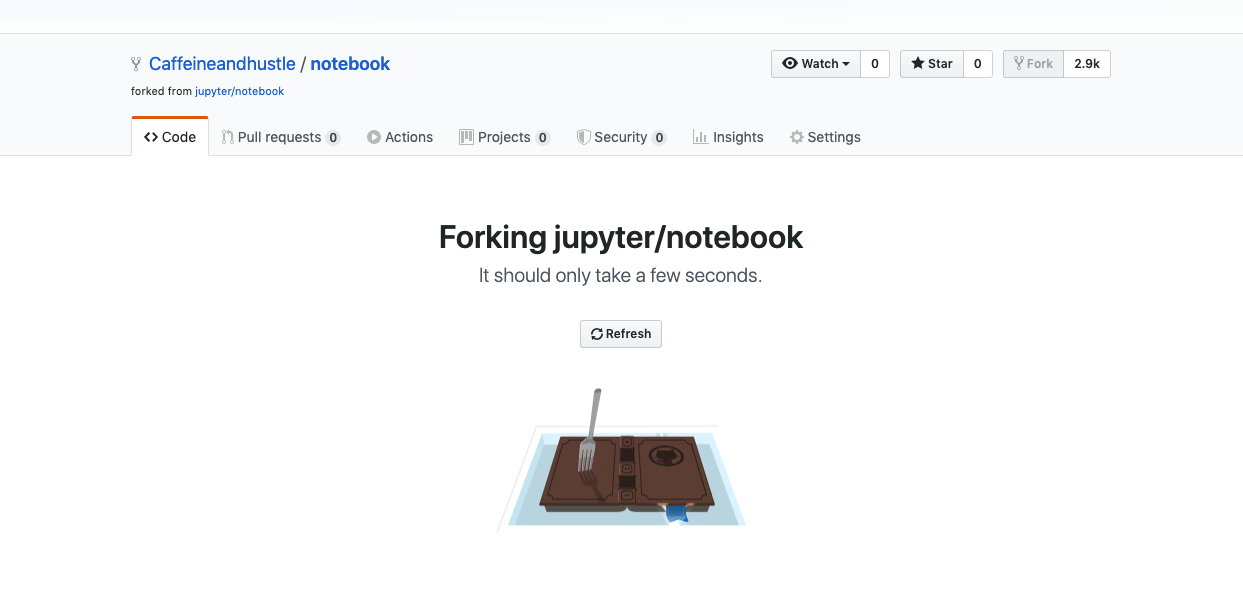
Once the forking is done successfully, go back to your account and you can see a text “forked from jupyter/notebook” —
成功完成分叉之后,请返回您的帐户,您会看到“从jupyter /笔记本中分叉”的文本-

翻译自: https://medium.com/javascript-in-plain-english/the-complete-developers-guide-to-github-31060f667002


 9828
9828

 被折叠的 条评论
为什么被折叠?
被折叠的 条评论
为什么被折叠?
 到【灌水乐园】发言


