


 本文介绍了如何使用Python创建一个电报机器人,该机器人能够远程控制灯泡的开关,实现智能照明管理。通过电报API与机器人交互,实现人工智能与物联网设备的结合。
电报机器人
In this project, we’ll create a Telegram Bot using python-telegram-bot and deploy it to Heroku. It is also programmed to control a feed on Adafruit. The program sends values of 1 and 0 to the feed and turns the status indicator on or off.
在这个项目中,我们将使用python-telegram-bot创建一个Telegram Bot,并将其部署到Heroku。 它也被编程为控制Adafruit的饲料。 程序将值1和0发送到源,并打开或关闭状态指示器。
在开始之前 (Before starting)
You will have to sign up for the following services:
您将必须注册以下服务:
a Heroku account, which is a free cloud platform
Heroku帐户,这是一个免费的云平台
a Telegram account, on which we will build our bot
一个电报帐户,我们将在该帐户上构建我们的机器人
an Adafruit account
Adafruit帐户
指令(Commands)
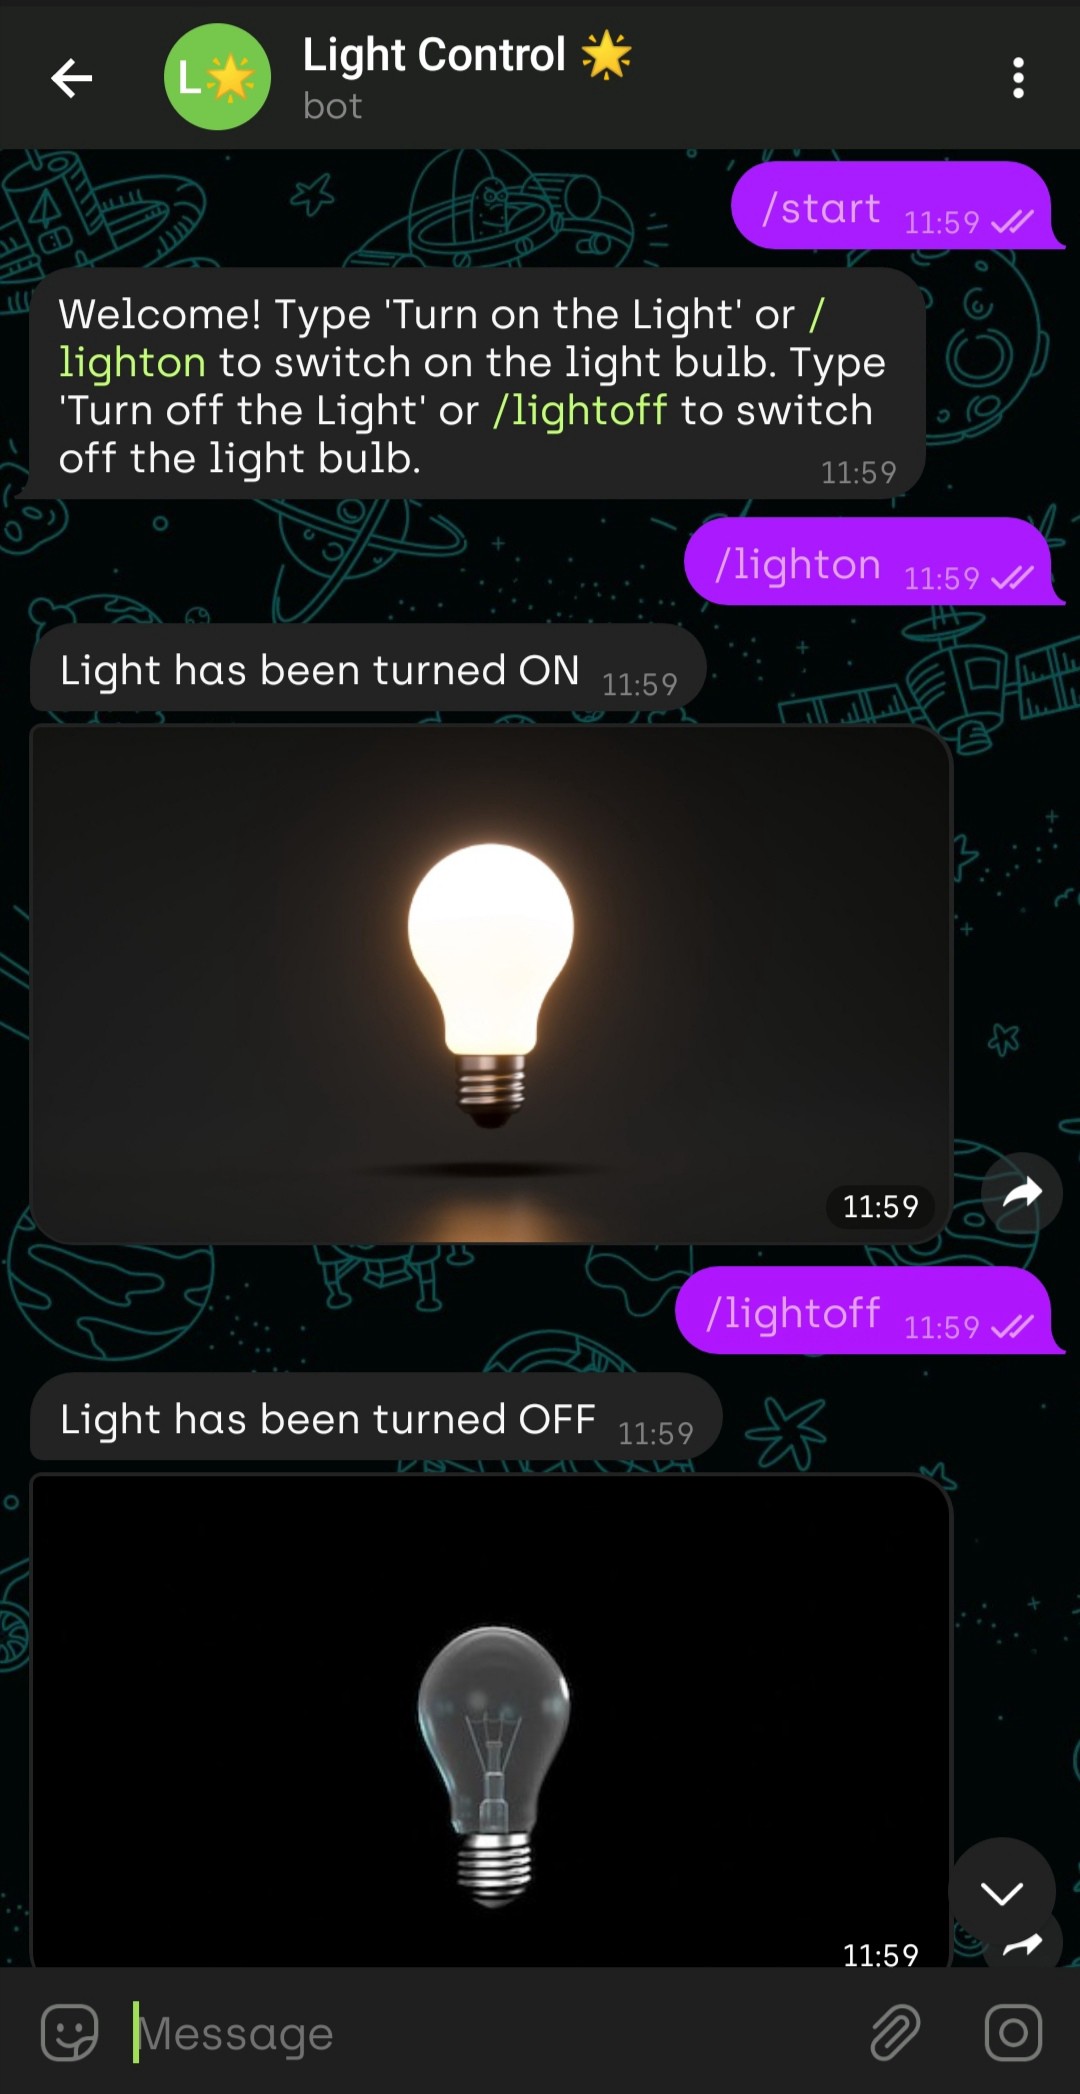
This bot takes 3 commands: /start ,/lighton and /lightoff
该机器人需要3个命令: /start , /lighton和/lightoff
Command
/startwill return a message instructing the user to give the appropriate inputs命令
/start将返回一条消息,指示用户进行适当的输入/lightonwill display the message “Light has been turned ON”. It will also return an image of a lit bulb and will send a value to Adafruit indicating that its ON./lighton将显示消息“灯已打开”。 它还将返回点亮的灯泡的图像,并将向Adafruit发送一个值,指示其点亮。/lightoffwill display the message “Light has been turned OFF”. It will also return an image of an unlit bulb and will send a value to Adafruit indicating that its OFF./lightoff将显示消息“灯已关闭”。 它还将返回灯泡未点亮的图像,并将向Adafruit发送一个值,指示其熄灭。
If any unknown command is given, the bot will reply with the message indicating that it hasn’t understood your command.
如果给出了任何未知命令,则该漫游器将回复该消息,表明它不理解您的命令。
在电报上创建机器人 (Creating the Bot on Telegram)
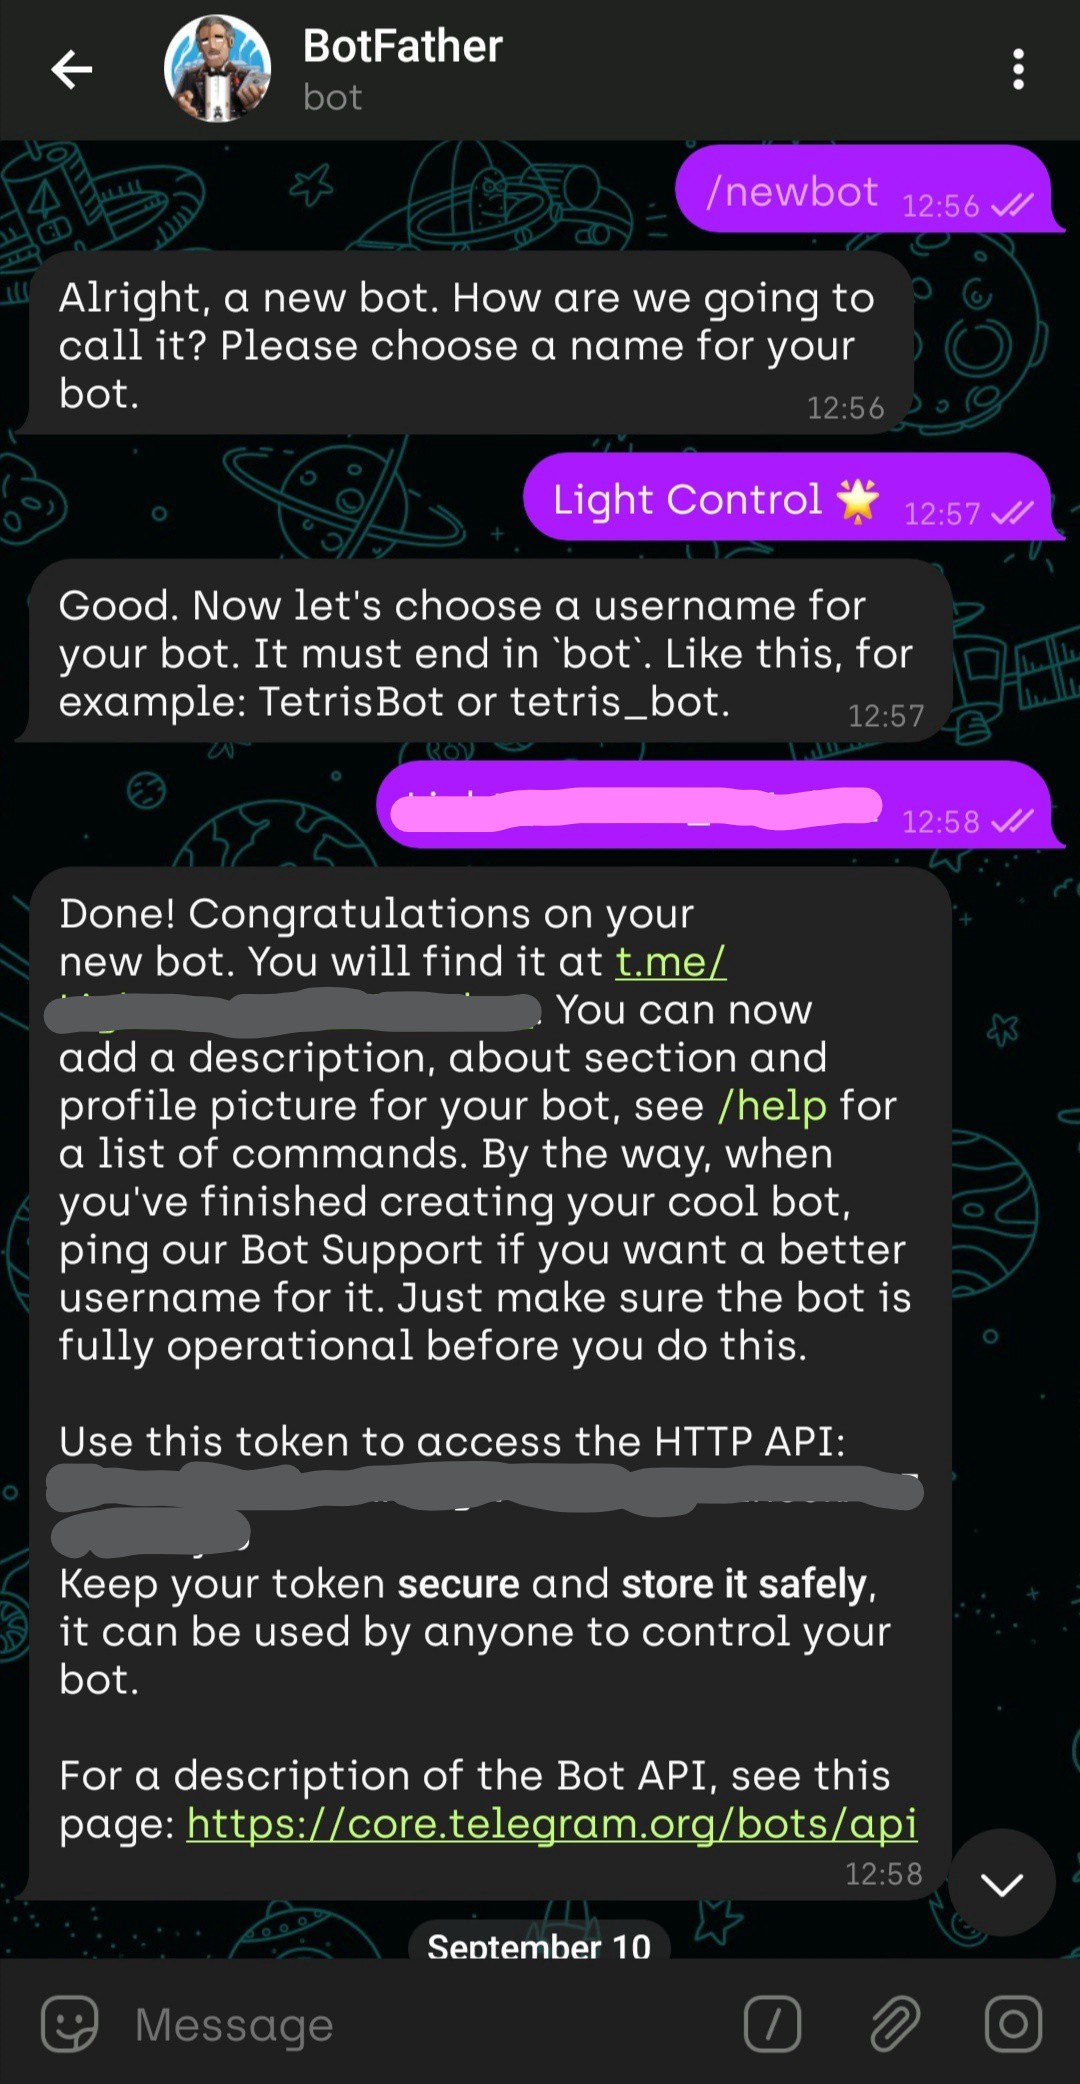
Create a bot on the Telegram app on your phone. Bots on Telegram can be created using BotFather. The process is shown below. Commands are prefixed with a / . After creating your bot, save the token given carefully. This is required to access the Telegram Bot HTTP API. Also, click on the link given (t.me/your-bot) to access your bot.
在手机上的Telegram应用上创建一个机器人。 可以使用BotFather创建Telegram上的Bot。 该过程如下所示。 命令以/开头。 创建漫游器后,请仔细保存给出的令牌。 这是访问Telegram Bot HTTP API所必需的。 另外,单击给出的链接(t.me/your-bot)以访问您的机器人。
从Adafruit获取API密钥(Getting the API keys from Adafruit)
Your keys from Adafruit is required to access its API and send values to the required feed. This can, in turn, be programmed to be connected to an Arduino, which can receive the values you send.
需要Adafruit提供的密钥才能访问其API并将值发送到所需的供稿。 依次将其编程为连接到Arduino,可以接收您发送的值。
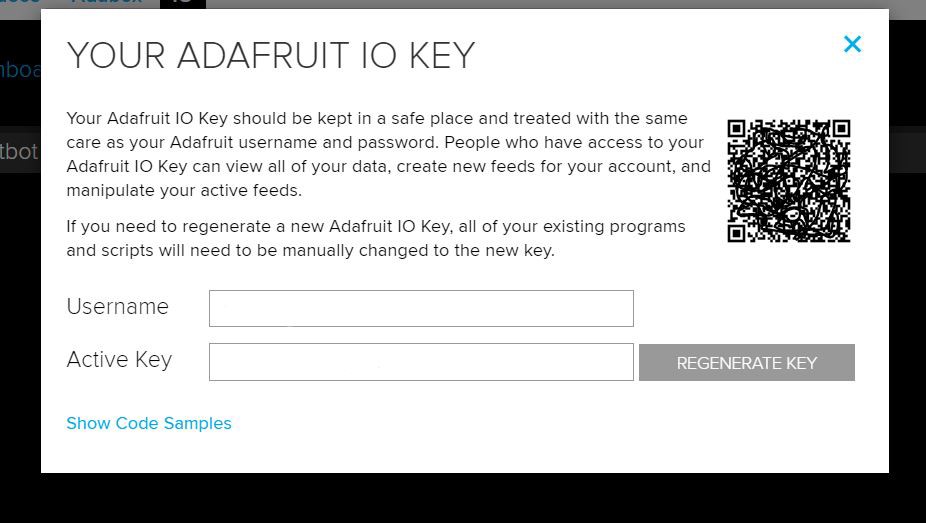
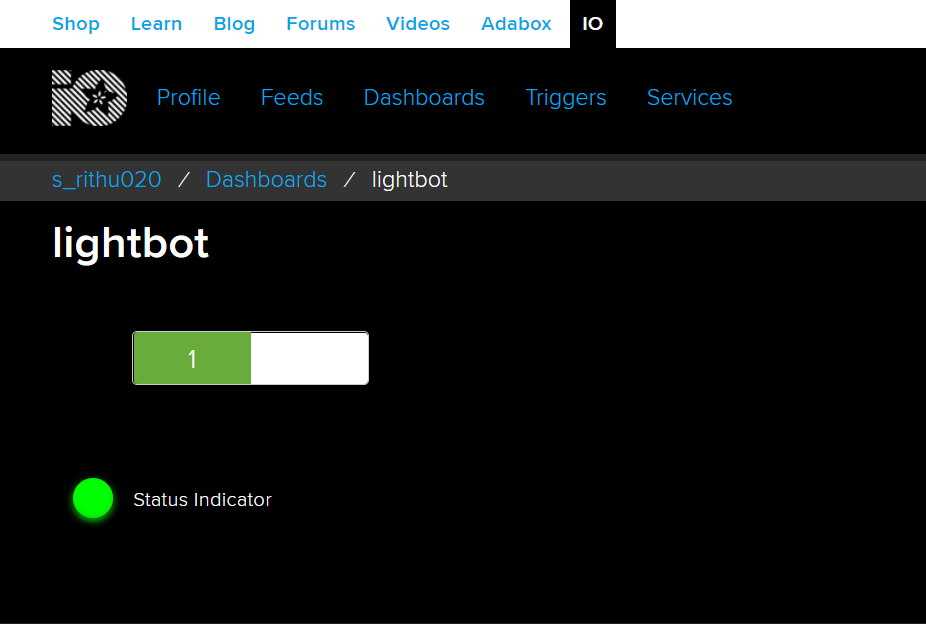
Along with this, create a feed and a dashboard on Adafruit and set it to ‘public’.
与此同时,在Adafruit上创建一个提要和一个仪表板,并将其设置为“ public”。
使用Python编码机器人 (Coding the Bot Using Python)
The bot is coded with Python. Apart from this, a Procfileand a requirements.txt file should be created on GitHub. The Procfile is required to create a dyno for your app on Heroku. The requirements file is required for Heroku to install the necessary libraries to run Python and Adafruit.
该机器人使用Python编码。 除此之外, Procfile应该在GitHub上创建一个Procfile和requirements.txt文件。 需要Procfile才能在Heroku上为您的应用创建dyno。 Heroku需要必备文件来安装运行Python和Adafruit所需的库。
from telegram.ext import Updater,CommandHandler,MessageHandler,Filters
from Adafruit_IO import Client,Feed,Data
import os
ADAFRUIT_IO_USERNAME = os.getenv('ADAFRUIT_IO_USERNAME')
ADAFRUIT_IO_KEY = os.getenv('ADAFRUIT_IO_KEY')
aio = Client('ADAFRUIT_IO_USERNAME','ADAFRUIT_IO_KEY')
TELEGRAM_TOKEN = os.getenv('TELEGRAM_TOKEN')
def start(bot, update):
print(str( update.effective_chat.id ))
bot.send_message(chat_id = update.effective_chat.id, text="Welcome! Type 'Turn on the Light' or /lighton to switch on the light bulb. Type 'Turn off the Light' or /lightoff to switch off the light bulb.")
def unknown(bot, update):
bot.send_message(chat_id=update.effective_chat.id, text="Oops, I didn't understand that. Try again!")
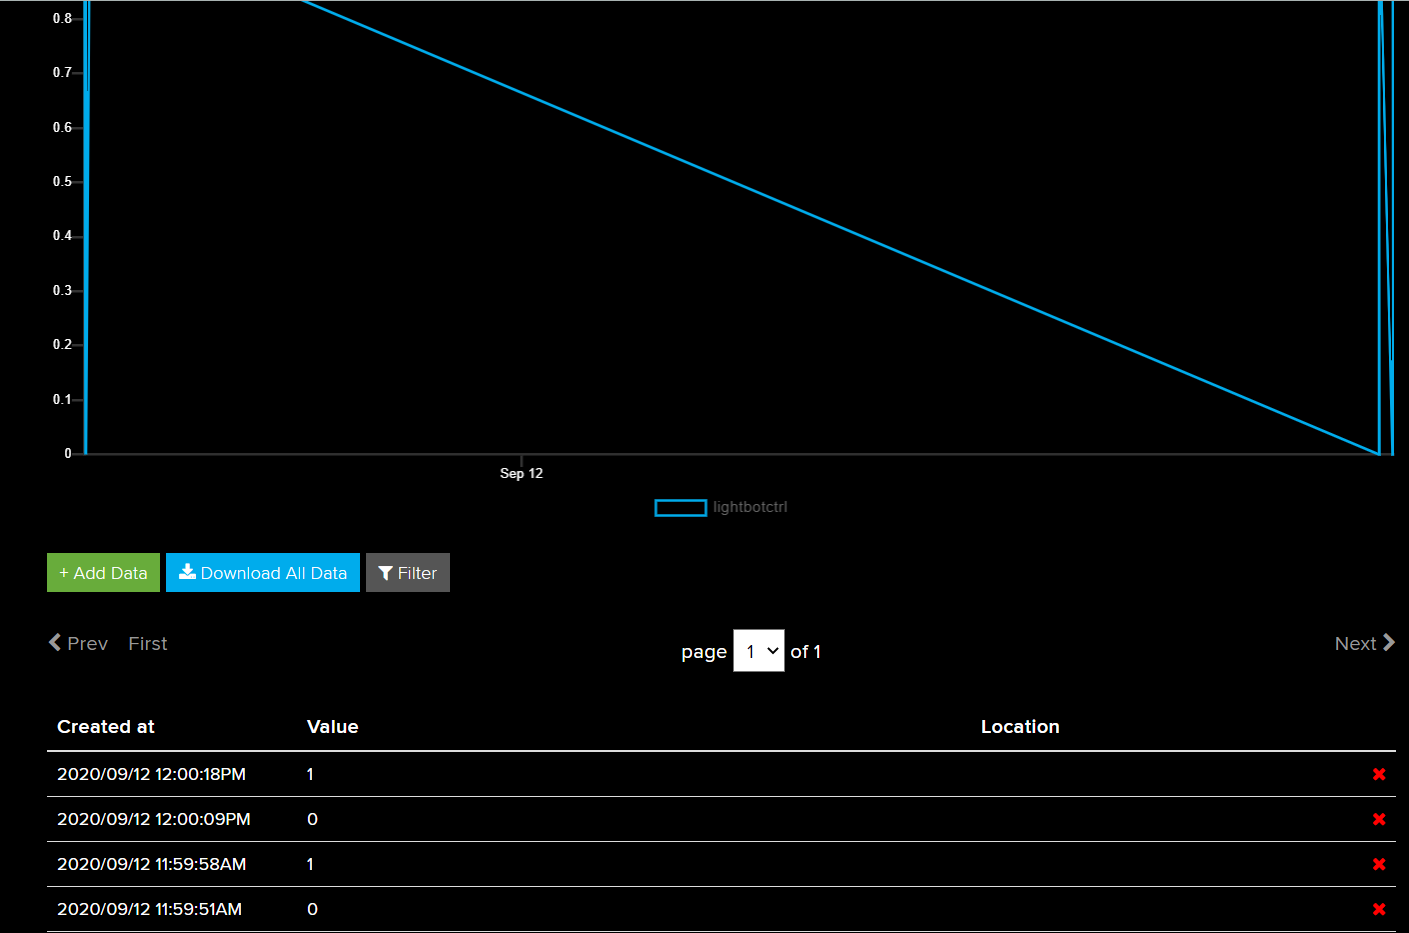
def value_send(value):
to_feed = aio.feeds('lightbotctrl')
aio.send_data(to_feed.key,value)
def lighton(bot, update):
chat_id = update.message.chat_id
bot.send_message(chat_id, text="Light has been turned ON")
bot.send_photo(chat_id, photo='https://www.securityroundtable.org/wp-content/uploads/2019/03/AdobeStock_261504199-scaled.jpeg')
value_send(1)
def lightoff(bot, update):
chat_id = update.message.chat_id
bot.send_message(chat_id, text="Light has been turned OFF")
bot.send_photo(chat_id=update.effective_chat.id,photo='https://ak.picdn.net/shutterstock/videos/1027638404/thumb/1.jpg?ip=x480')
value_send(0)
def given_message(bot, update):
text = update.message.text.upper()
text = update.message.text
if text == 'Turn on the Light':
lighton(bot,update)
elif text == 'Turn off the Light':
lightoff(bot,update)
u = Updater('TELEGRAM_TOKEN',use_context = True)
dp = u.dispatcher
dp.add_handler(CommandHandler('lighton',lighton))
dp.add_handler(CommandHandler('lightoff',lightoff))
dp.add_handler(CommandHandler('start', start))
dp.add_handler(MessageHandler(Filters.command, unknown))
dp.add_handler(MessageHandler(Filters.text, given_message))
u.start_polling()
u.idle()Check out my GitHub repository for comments and other files!
查看我的GitHub存储库以获取评论和其他文件!
在Heroku上部署应用程序 (Deploying the app on Heroku)
Create a new account or use an existing one to build an app in Heroku. Name your app suitably and click next. Here, we will connect our GitHub account to Heroku as the ‘Deployment Method’ instead of using Heroku CLI. Search your repository and connect it. Also, enable ‘Automatic Deploys’.
创建一个新帐户或使用现有帐户在Heroku中构建应用程序。 为您的应用命名,然后单击下一步。 在这里,我们将GitHub帐户作为“部署方法”连接到Heroku,而不是使用Heroku CLI。 搜索您的存储库并连接它。 另外,启用“自动部署”。
Go to the ‘Settings’ page and set your ‘Config Vars’ to values containing your Adafruit username, password, and Telegram API token. Create a ‘Procfile’ on your connected GitHub repo and refresh the ‘Overview’ tab page on Heroku. On doing this, you will see that it has recognized your ‘Procfile’ under ‘Dyno formation’. Click on ‘Configure Dynos’ and set it to ON.
转到“设置”页面,然后将“配置变量”设置为包含Adafruit用户名,密码和Telegram API令牌的值。 在连接的GitHub存储库上创建“ Procfile”,并刷新Heroku上的“概述”标签页。 这样做时,您将看到它已经识别出“ Dyno编队”下的“ Procfile”。 单击“配置Dynos”并将其设置为ON。
With these steps, your app should start building and get deployed successfully.
通过这些步骤,您的应用程序应开始构建并成功部署。
结果 (Results)
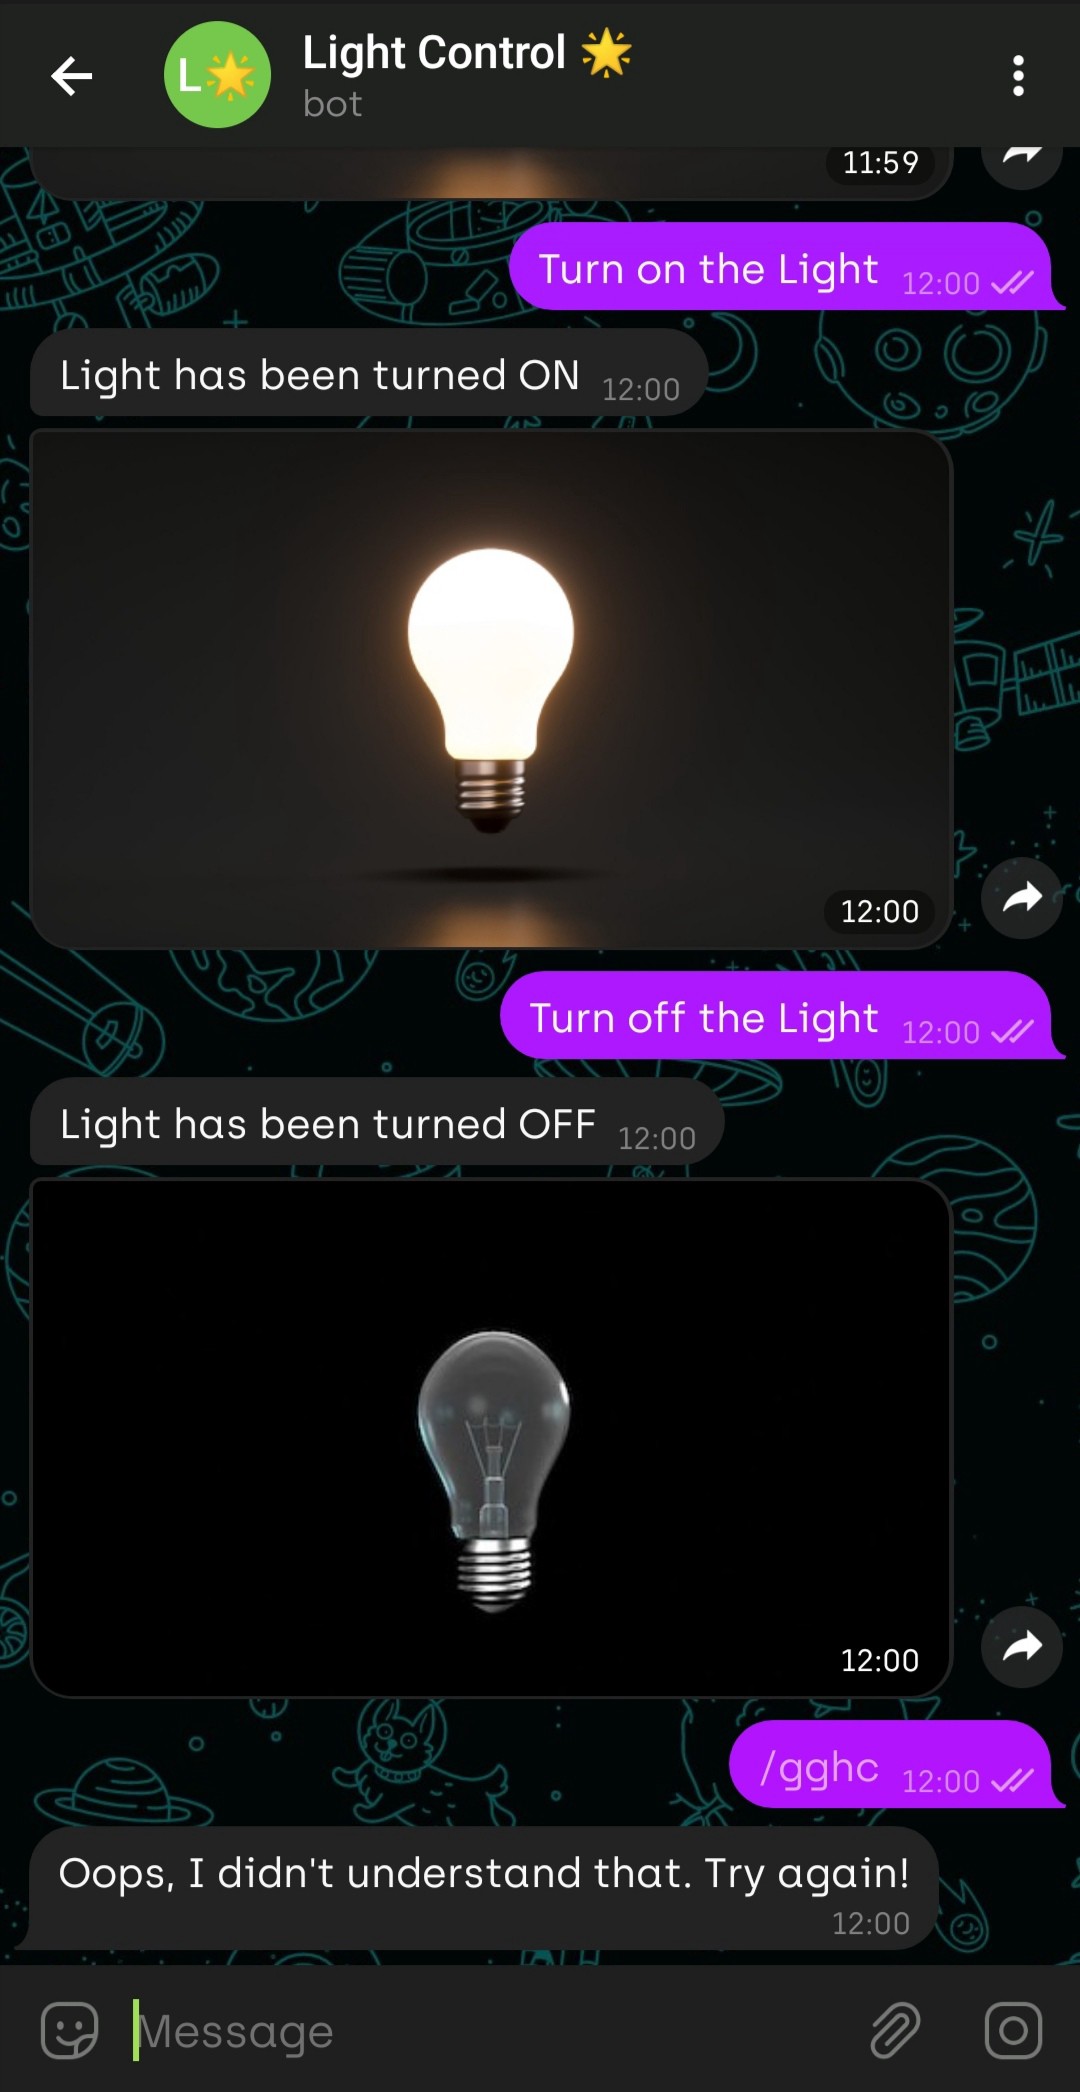
The bot responds to the commands appropriately and also sends the values to Adafruit through Heroku.
机器人会适当地响应命令,并通过Heroku将值发送给Adafruit。

Thank you for reading!
感谢您的阅读!
翻译自: https://medium.com/analytics-vidhya/telegram-bot-to-control-a-light-bulb-using-python-4b84319434b1
电报机器人


 5090
5090

 被折叠的 条评论
为什么被折叠?
被折叠的 条评论
为什么被折叠?
 到【灌水乐园】发言


