


In order to authenticate a React.js web application using Google OAuth2 , you first need to sign into the Google API Console. Select the “Credentials” menu item and then “CREATE PROJECT”.
为了使用Google OAuth2对React.js Web应用程序进行身份验证,您首先需要登录Google API控制台。 选择“凭据”菜单项,然后选择“创建项目”。
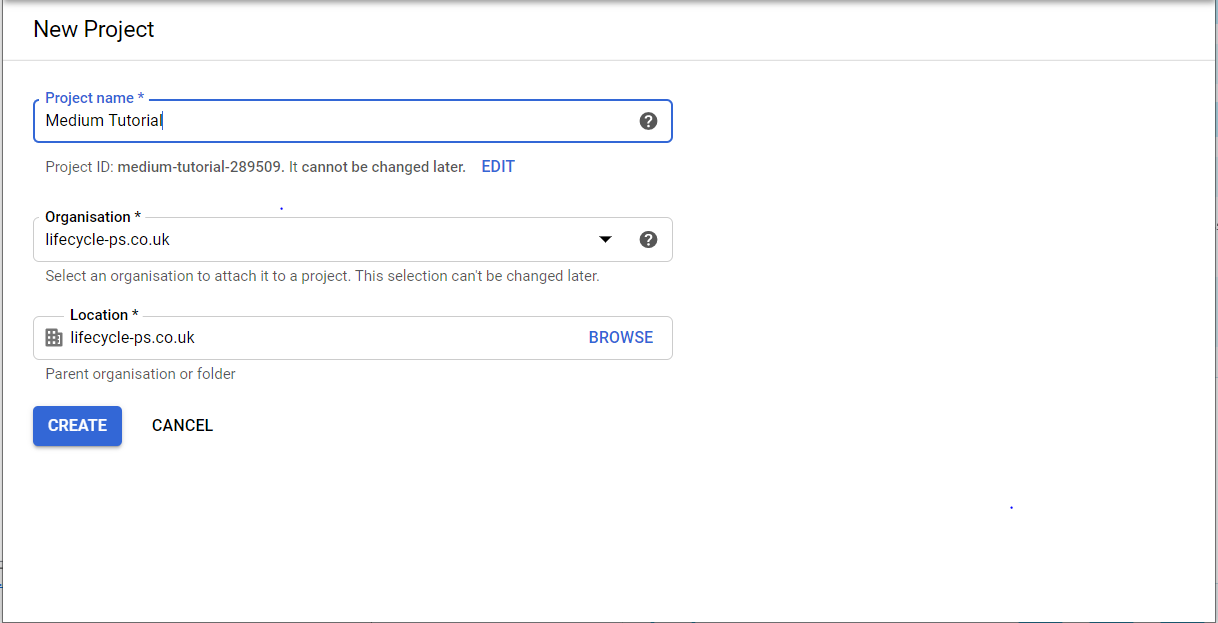
For the purpose of this tutorial I just called my project “Medium Tutorial”. Selecting an Organisation and Location is mandatory. I’m not sure exactly where I created this as I did it a long time ago. I think if I remember correctly it was part of the Google Developers sign up.
出于本教程的目的,我仅将我的项目称为“中型教程”。 必须选择组织和位置。 我不确定我很早以前就在哪里创建了它。 我想,如果我没记错的话,那是Google Developers注册的一部分。
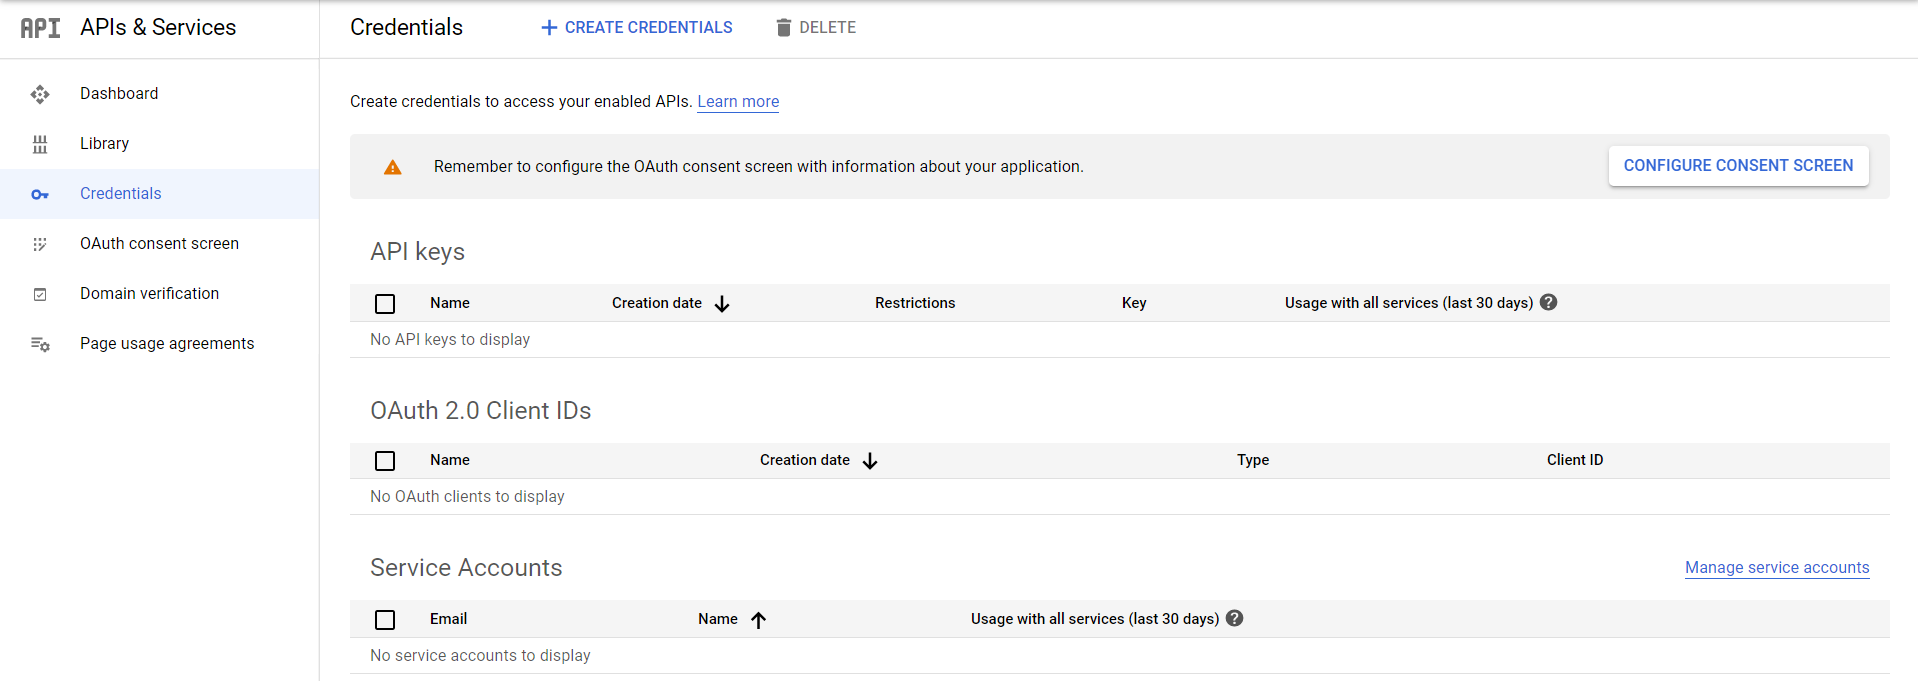
You will need to “CONFIGURE CONSENT SCREEN”. You can see it in the screenshot below next to the warning message.
您将需要“ CONFIGURE CONSENT SCREEN ”。 您可以在以下警告消息旁边的屏幕截图中看到它。
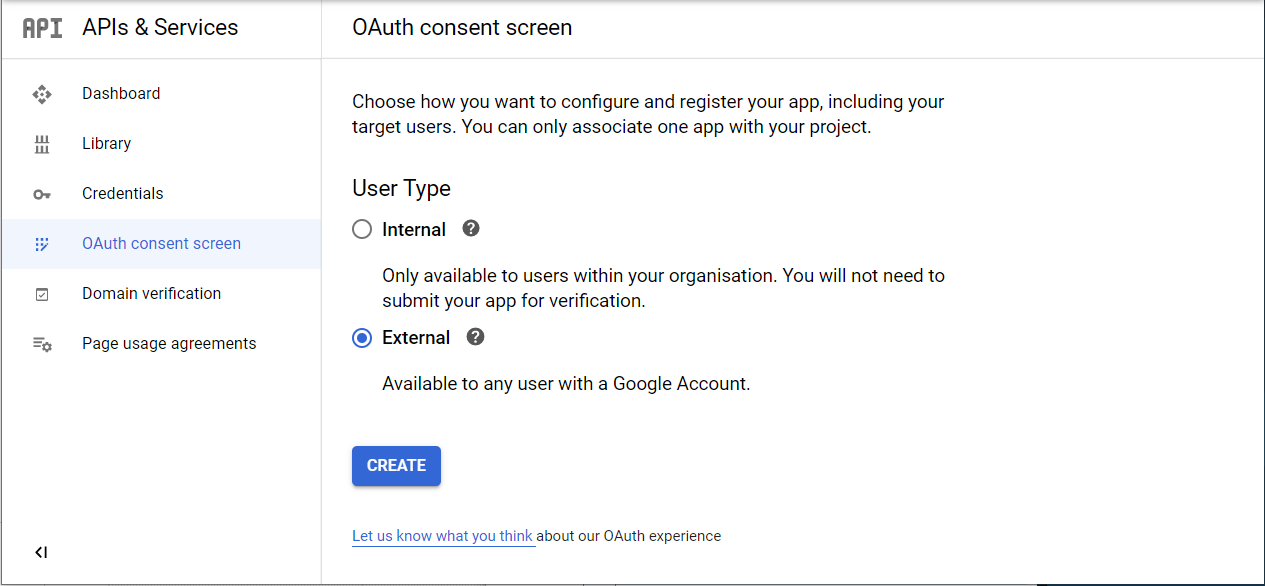
Unless you have an internal company specific requirement you will probably want to select “External” here and click “CREATE”.
除非您有公司内部的特定要求,否则您可能需要在此处选择“外部”,然后单击“创建”。
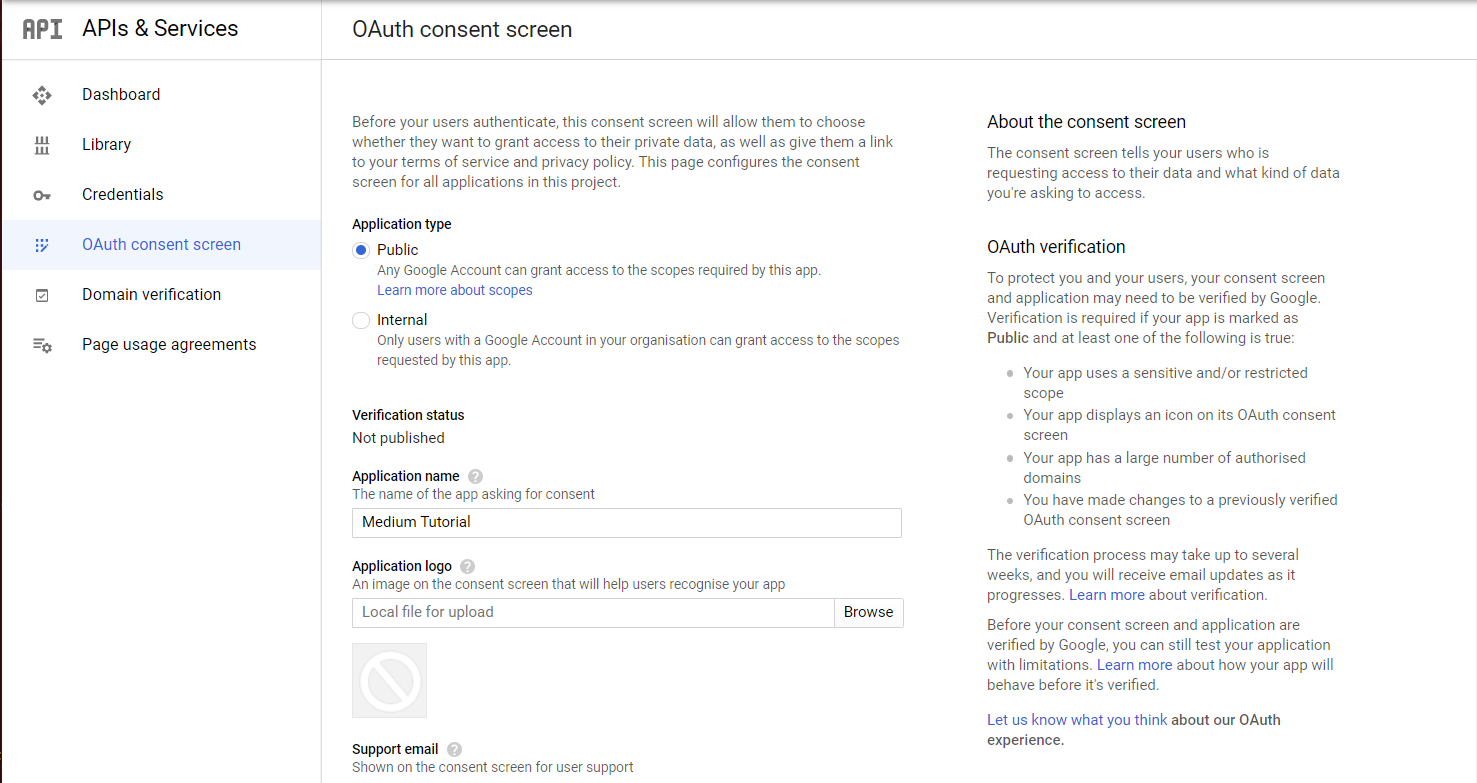
The “OAuth consent screen” is fairly self explanatory. All you really are required to do here is just set the “Application name”. The rest of the default values are fine but I recommend going through them anyway.
“ OAuth同意屏幕”相当容易解释。 您真正需要做的只是设置“应用程序名称”。 其余的默认值都可以,但是我还是建议您通过它们。
Back on the “Credentials” page, select the “+ CREATE CREDENTIALS”, then “OAuth client ID”.
返回“凭据”页面,选择“ + CREATE CREDENTIALS ”,然后选择“ OAuth客户端ID ”。

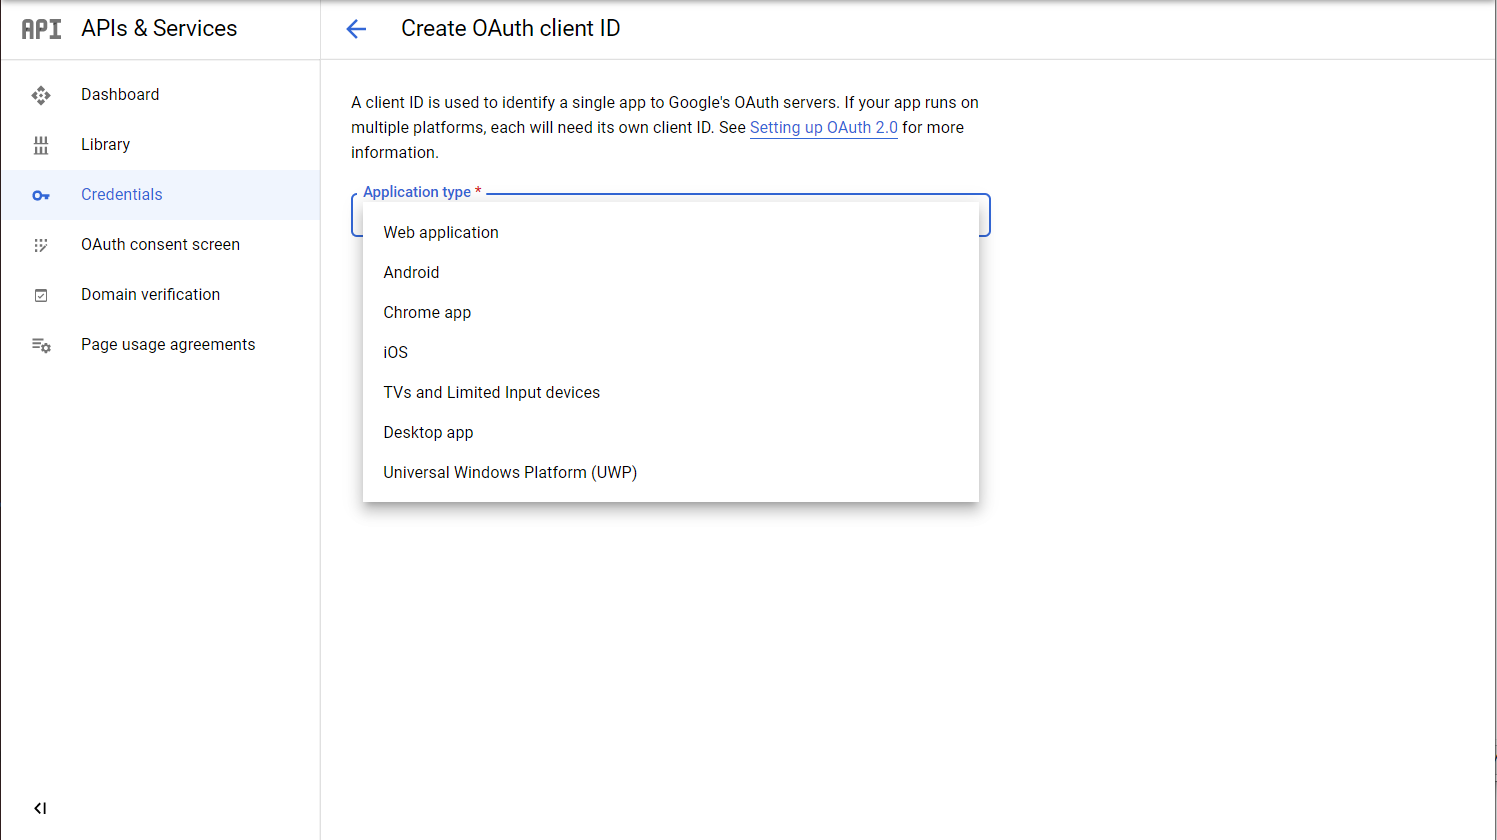
For a React.js web application, and for the purpose of this tutorial, you will want to select “Web application” below.
对于React.js Web应用程序,以及本教程的目的,您将需要在下面选择“ Web应用程序”。
On this page you need to set the “Name”, in this case “Medium Tutorial”. You will also want to add “Authorised JavaScript logins” by clicking “+ ADD URI” and add the URL making the OAuth2 requests.
在此页面上,您需要设置“名称”,在本例中为“中型教程”。 您还需要通过单击“ + ADD URI ”来添加“ Authorized JavaScript logins ”,并添加发出OAuth2请求的URL。
For this tutorial I’m just using “yarn start” or “npm run start” which runs locally on TCP port 3000 (http://localhost:3000) by default. I have not tried adding multiple entries but presumably this will work.
在本教程中,我仅使用默认情况下在TCP端口3000( http:// localhost:3000 )本地运行的“ yarn start ”或“ npm run start ”。 我没有尝试添加多个条目,但是大概可以正常工作。

Further down the page you will want to add “Authorised redirect URIs” by clicking “+ ADD URI”. Below I put in an invalid “https://your_website_com/authenticated” just as an example. Once Google authenticates your users they will be directed back to your site and this is your landing page for authenticated users.
在页面的更下方,您将要通过单击“ + ADD URI ”添加“ Authorized redirect URI ”。 下面,我以一个无效的“ https:// your_website_com / authenticated ”为例。 Google对您的用户进行身份验证后,他们将被带回到您的网站,这是您通过身份验证的用户的登录页面。

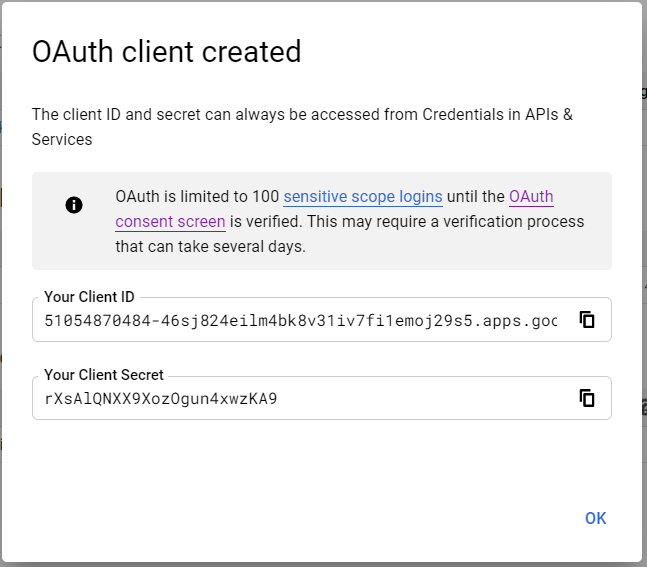
When you click “CREATE” you will be presented with a modal that looks like this. You will want to make note of “Your Client ID” and “Your Client Secret”. The values below were temporary while I created the tutorial but have been deleted now. If for any reason you don’t take note of the values here you can still view them on the “Credentials” page later.
当您点击“ CREATE ”时,您将看到一个看起来像这样的模态。 您将要记下“您的客户ID ”和“您的客户秘密”。 下面的值是我创建教程时的临时值,但现在已被删除。 如果出于某种原因您不注意此处的值,则以后仍可以在“凭据”页面上查看它们。
There is a really nice library you can install into your React.js application. It is called “react-google-login”. It mostly just works “out the box” and is installed into your project in the normal way…
您可以将一个非常漂亮的库安装到React.js应用程序中。 它称为“ react-google-login ”。 它通常只是开箱即用,并以常规方式安装到您的项目中...
yarn add react-google-loginOR
要么
npm install react-google-loginThe examples from the “README.md” work as you would expect. There is one fairly large drawback and that is the library does not manage state. You can log in and log out by clicking on their example buttons but it doesn’t seem to be able to tell you if a user is already authenticated. For example show a “Log into Google” button when a user is not authenticated and a “Log out of Google” when a user is authenticated. I figured out a way of doing this in Redux. In order to share what I have done I will assume you have a working knowledge of how Redux works.
“ README.md ”中的示例可以正常工作。 有一个相当大的缺点,那就是该库不管理状态。 您可以通过单击其示例按钮登录和注销,但似乎无法告诉您用户是否已通过身份验证。 例如,当用户未通过身份验证时,显示“登录Google ”按钮;在用户通过身份验证时,显示“注销Google ”。 我在Redux中想出了一种方法。 为了分享我所做的工作,我将假设您对Redux的工作方式有一定的了解。
First, I created my Redux constant called types/constants.js
首先,我创建了Redux常量,称为types / constants.js。
export const GOOGLE_OAUTH2 = "GOOGLE_OAUTH2";Then, I created my Redux action called actions/google.js
然后,我创建了名为action / google.js的Redux操作
import { GOOGLE_OAUTH2 } from "../types/constants";

export const googleOAuth2 = (googleResponse) => {
    return async (dispatch) => {
        if (typeof googleResponse === 'undefined') {
            googleResponse = [];
        }

        dispatch({ type: GOOGLE_OAUTH2, googleResponse });
    };
};
Then, I created my Redux reducer called reducers/reducerGoogle.js
然后,我创建了我的Redux减速器,名为reducers / reducerGoogle.js。
import { GOOGLE_OAUTH2 } from "../types/constants";

const initialState = [];

export const googleReducer = (state = initialState, action) => {
  switch (action.type) {
    case GOOGLE_OAUTH2: {
      return action.googleResponse;
    }
    default:
      return state;
  }
};
.. and updated the reducers/index.js
..并更新了reducers / index.js
import { combineReducers } from "redux";
import { googleReducer } from "./reducerGoogle"

const rootReducer = combineReducers({
    googleReducer,
});

export default rootReducer;
So that is Redux sorted… now for my test component.
这就是Redux排序的...现在是我的测试组件。
import React, { Component } from 'react';
import { connect } from 'react-redux';
import { bindActionCreators } from 'redux';
import { GoogleLogin, GoogleLogout } from 'react-google-login';
import { Modal } from 'react-bootstrap';import { googleOAuth2 } from '../actions/google';

class App extends Component {
  render() {
    let self = this;

    function LoginModal() {
      return (
        <>
          <Modal show={true}>
            <Modal.Header>
              <Modal.Title>Medium Tutorial</Modal.Title>
            </Modal.Header>
            <Modal.Body>
              <GoogleLogin
                clientId="YOUR_CLIENT_ID"
                buttonText="Sign in with Google"
                onSuccess={self.props.googleOAuth2}
                onFailure={self.props.googleOAuth2}
                cookiePolicy={'single_host_origin'}
                isSignedIn={true}
              />
            </Modal.Body>
          </Modal>
        </>
      );
    }

    function LoggedIn(props) {
      return (
        <GoogleLogout
          clientId="YOUR_CLIENT_ID"
          buttonText="Logout"
          onLogoutSuccess={self.props.googleOAuth2}
        />
      );
    }

    function LoggedOut(props) {
      return (
        <LoginModal />
      );
    }

    function HandleAuth(props) {
      const isLoggedIn = props.isLoggedIn;
      if (isLoggedIn) {
        return <LoggedIn />;
      }
      return <LoggedOut />;
    }

    return (
      <HandleAuth isLoggedIn={typeof this.props.googleReducer.accessToken !== 'undefined'} />
    );
  }
};

function mapStateToProps (state) {
  return {
      ...state,
  };
}

function mapDispatchToProps (dispatch) {
  return bindActionCreators ({ googleOAuth2 }, dispatch);
}

export default connect(mapStateToProps, mapDispatchToProps)(App);
The state of the user Google OAuth2 authentication will be stored in Redux under googleReducer. If the user is logged out googleReducer.accessToken will be undefined and if they are logged in googleReducer will be populated with loads of useful information.
用户Google OAuth2身份验证的状态将存储在Redux中的googleReducer下。 如果用户退出googleReducer.accessToken将是不确定的,如果他们在googleReducer记录将有用的信息负载来填充。
A quick way to tell if a user is logged in is if this returns true.
判断用户是否已登录的一种快速方法是返回true。
typeof this.props.googleReducer.accessToken !== 'undefined'If you enjoyed reading this article and would like me to write on any other topics please let me know in the comments or email me directly.
如果您喜欢阅读本文,并希望我写其他主题,请在评论中让我知道或直接给我发送电子邮件。
I’m the Head of the Networks Practice at Net Reply. My team specialises in networks, security and process automation including self-service dashboards. If you would like more information on this please contact me on m.whittle@reply.com. Alternatively you can learn more about us on LinkedIn and Twitter.
我是Net Reply网络部门的负责人。 我的团队专门研究网络,安全性和流程自动化,包括自助服务仪表板。 如果您想了解更多信息,请通过m.whittle@reply.com与我联系。 另外,您可以在LinkedIn和Twitter上了解有关我们的更多信息。


 1215
1215

 被折叠的 条评论
为什么被折叠?
被折叠的 条评论
为什么被折叠?
 到【灌水乐园】发言


