


kubernetes 集群
Login to https://www.digitalocean.com
登录到https://www.digitalocean.com
Select Kubernetes on left side panel under MANAGE and click on ‘Create a Kubernetes Cluster’ as highlighted in the below image.
在管理下的左侧面板上选择Kubernetes,然后单击“创建Kubernetes集群”,如下图所示。
Select the Kubernetes version and the region on which you wanted to launch the cluster.
选择Kubernetes版本以及要在其上启动集群的区域。

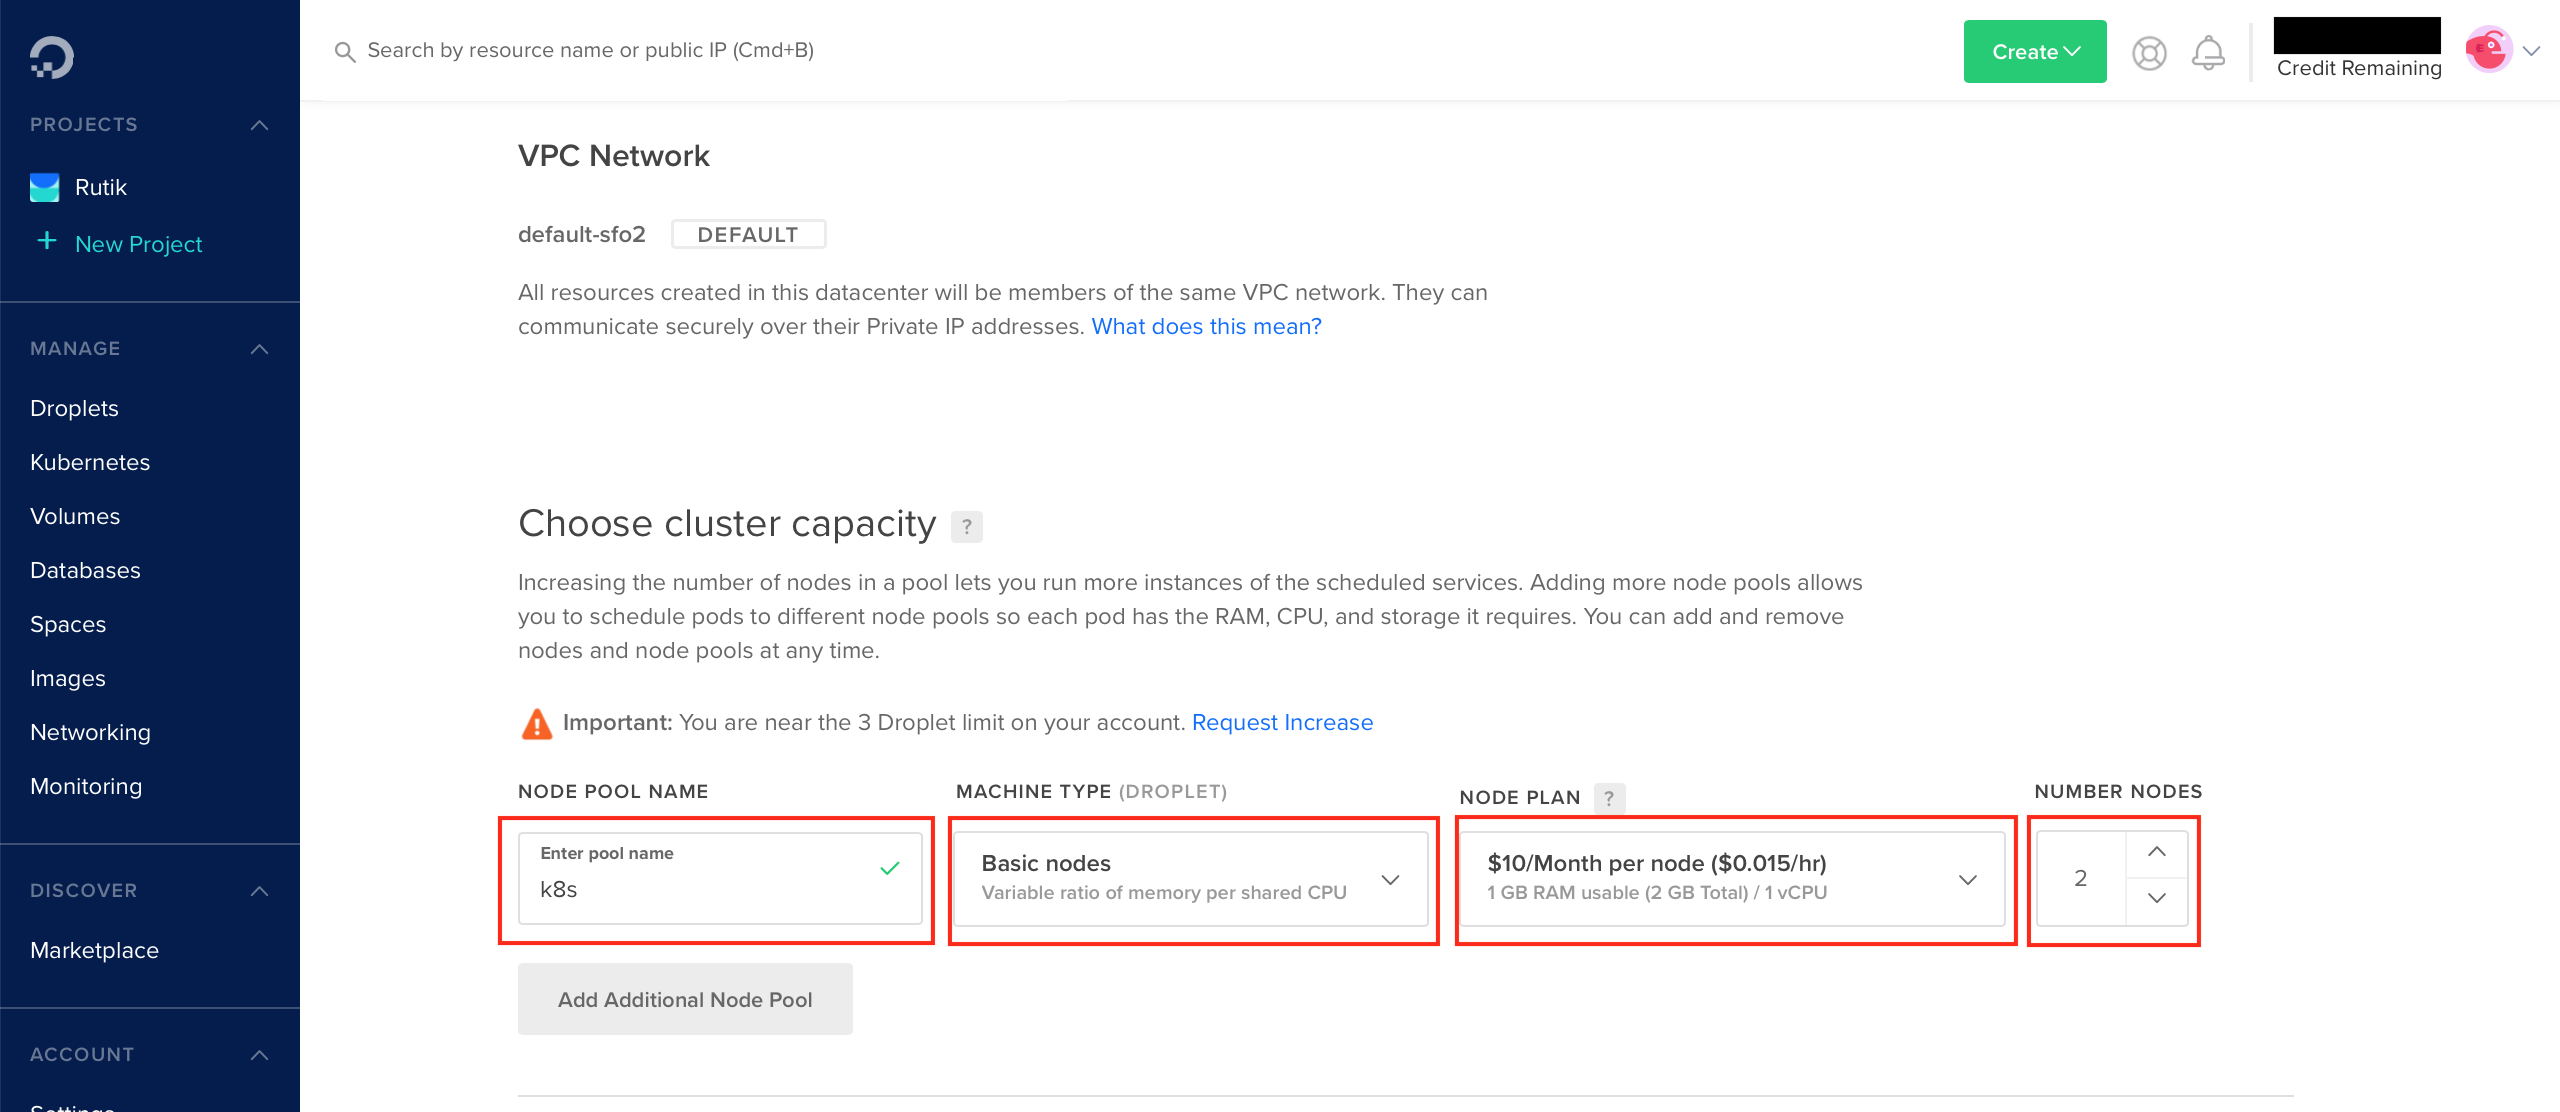
Give a name to the pool and select the Kubernetes node specification as per your workload.
为该池命名,然后根据您的工作负载选择Kubernetes节点规范。
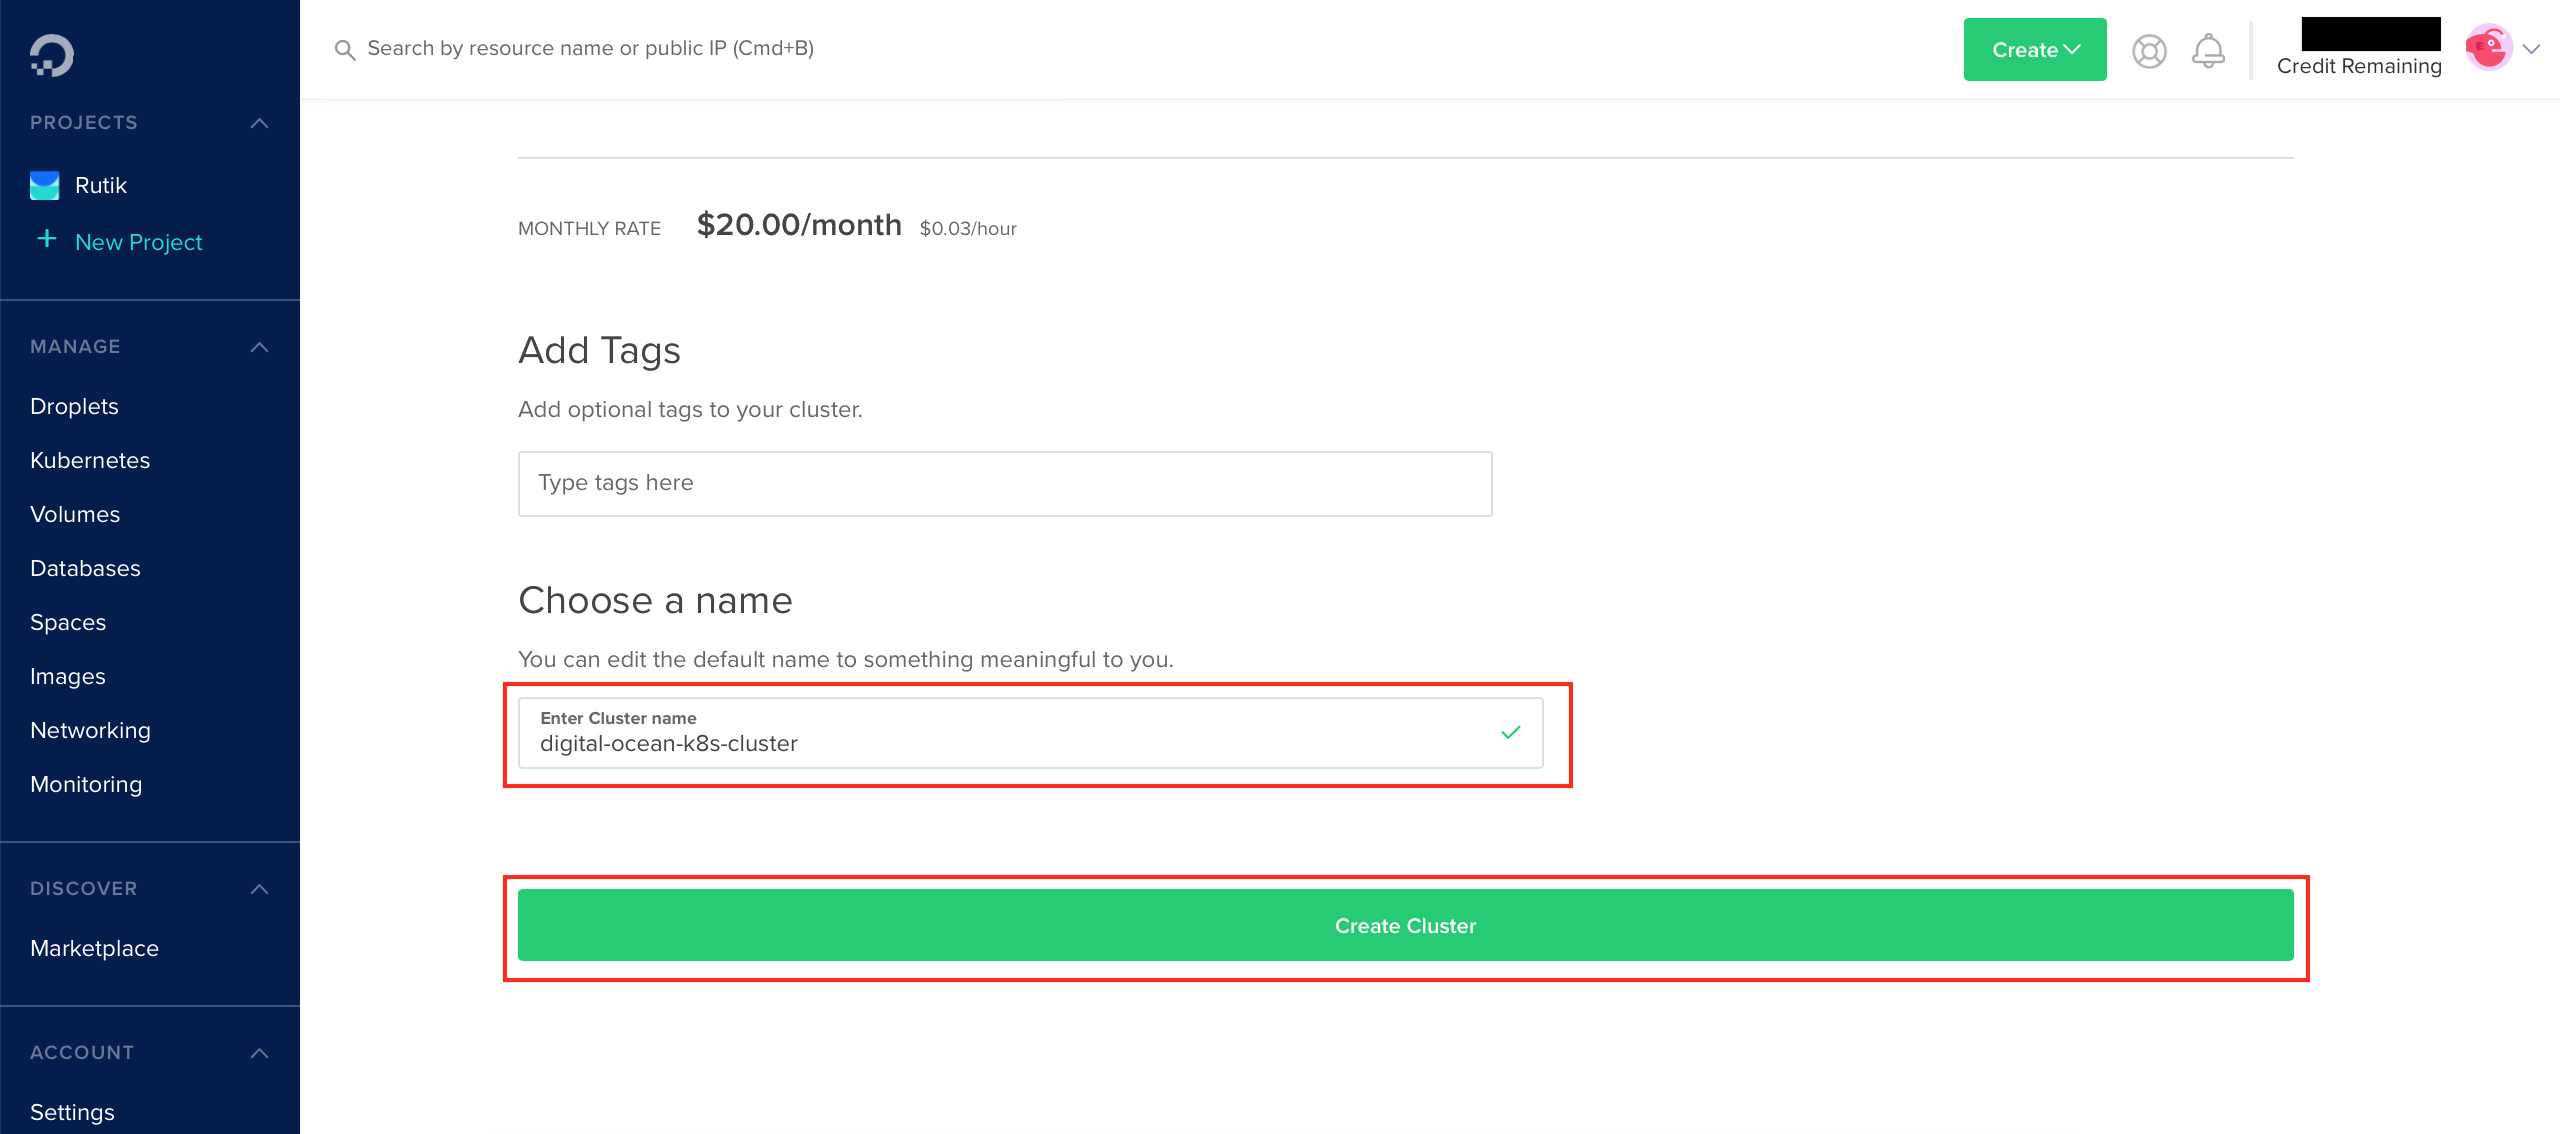
Give a name to your cluster and click on ‘Create Cluster’.
为您的群集命名,然后单击“创建群集”。
This will take few minutes to get the cluster ready.
这将需要几分钟来准备好群集。
在Digital Ocean中创建一个Droplet以集中管理集群 (Create a Droplet in Digital Ocean to Centrally Manage the Cluster)
We will create a Droplet in Digital Ocean to manage the cluster we have created.
我们将在Digital Ocean中创建一个Droplet来管理已创建的集群。
You can use your laptop to connect to the to Kubernetes cluster as well, but here I am using a Droplet as a central server to manage all the cluster.
您也可以使用笔记本电脑连接到Kubernetes集群,但是在这里,我使用Droplet作为中央服务器来管理所有集群。
You can ignore the droplet creation step if you will be using your Laptop to connect to the Kubernetes cluster.
如果您要使用笔记本电脑连接到Kubernetes集群,则可以忽略液滴创建步骤。
Please follow the below steps to create the droplet.
请按照以下步骤创建小滴。
Login to https://www.digitalocean.com
登录到https://www.digitalocean.com
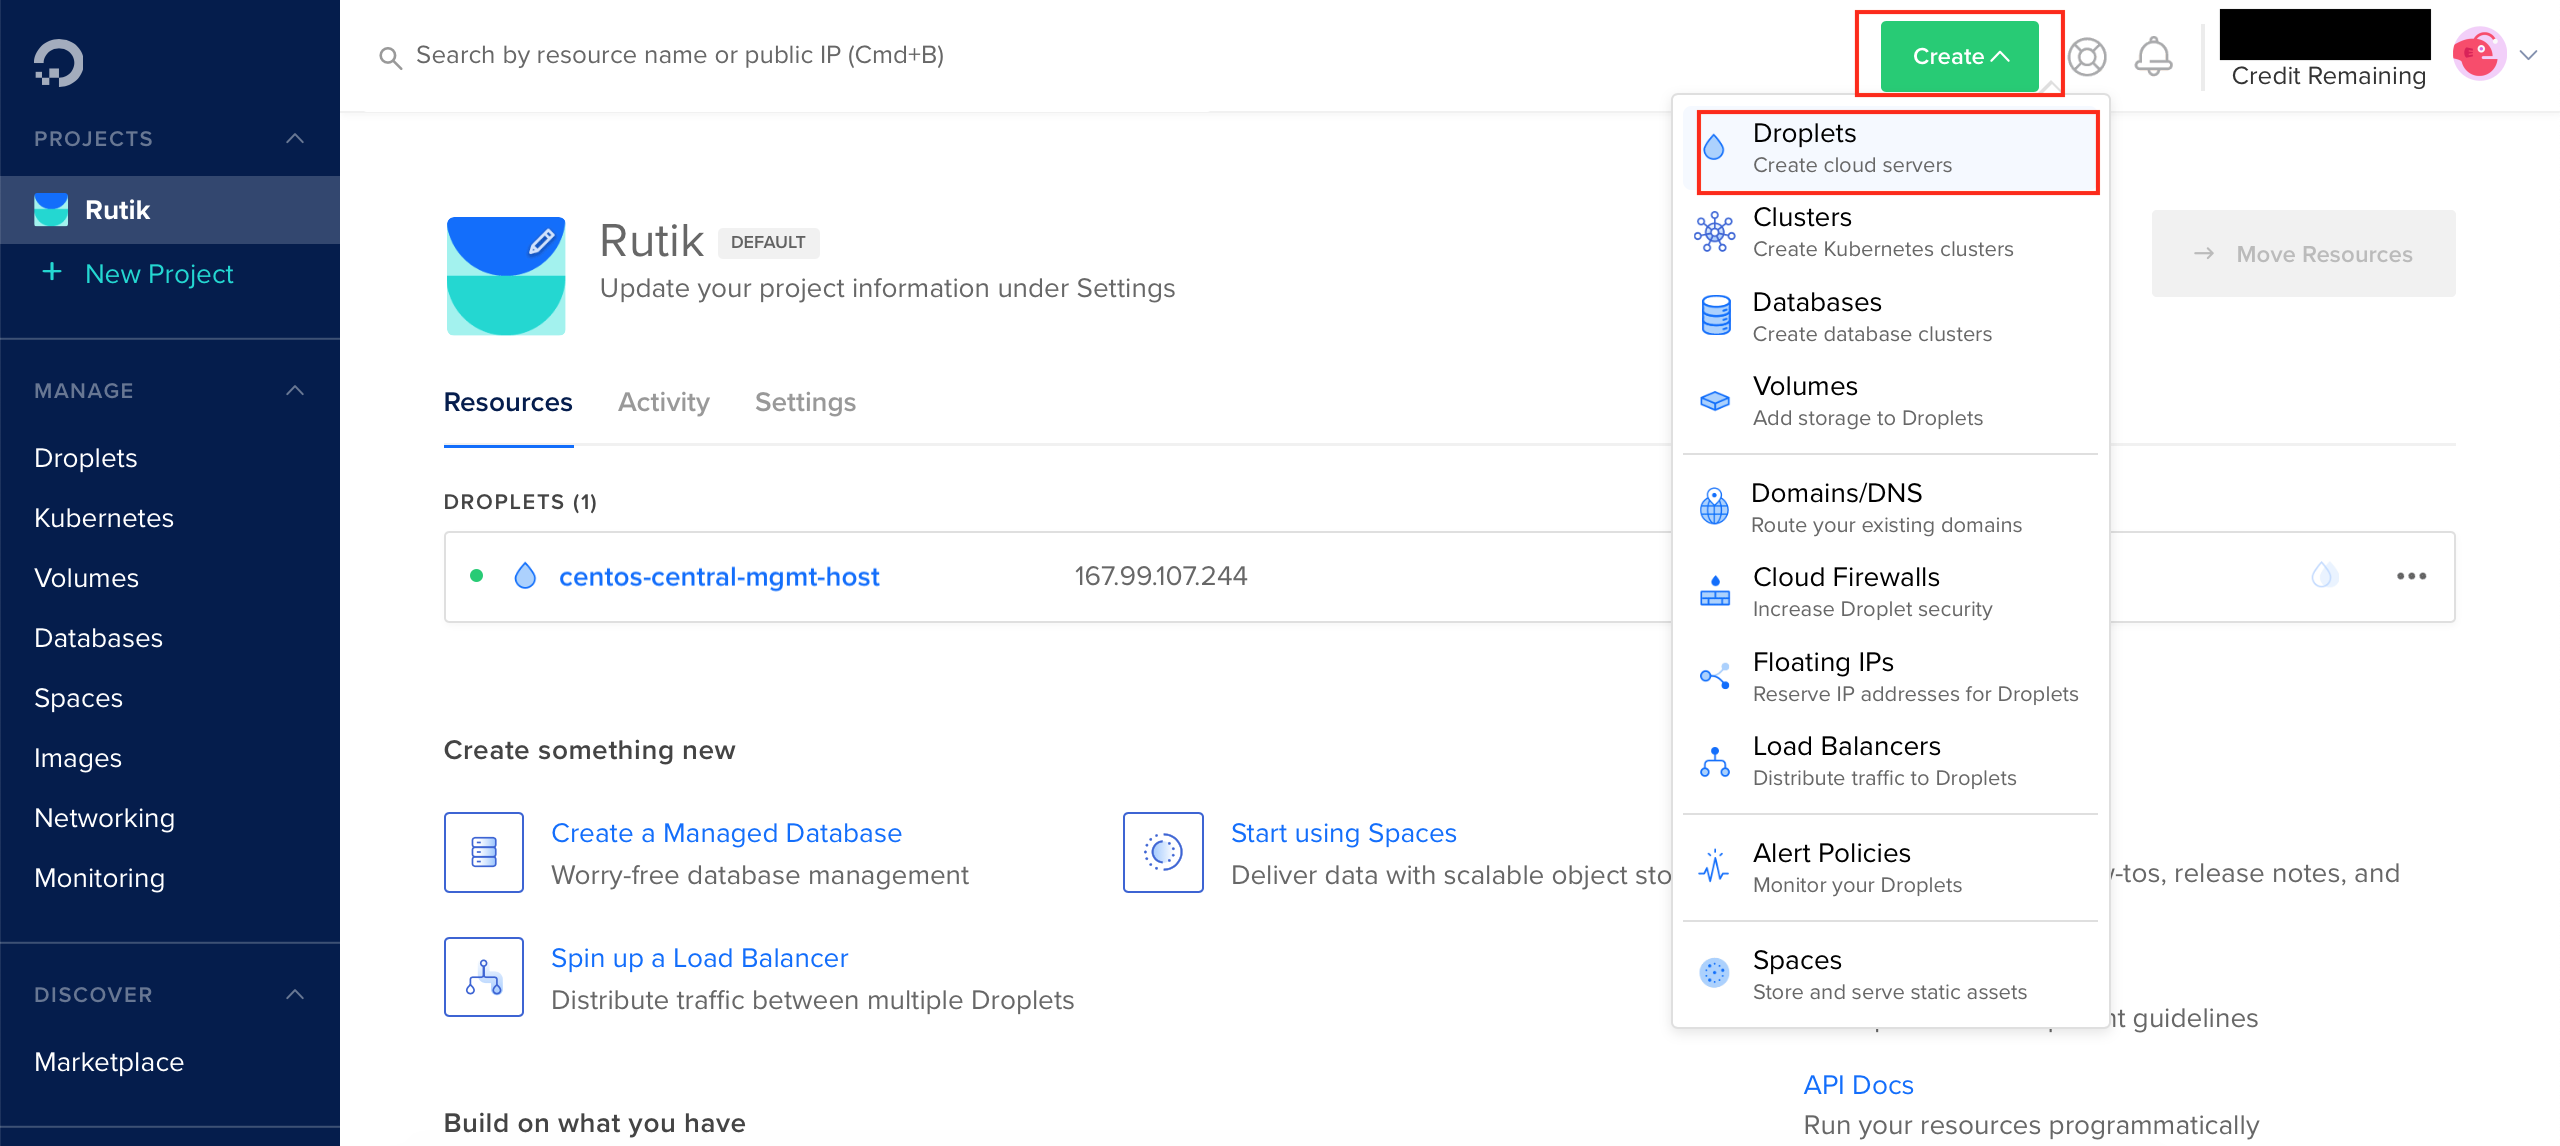
Click on Create and select Droplets as shown in the below image. We need this to connect to Kubernetes cluster using kubectl.
单击“创建”,然后选择“ Droplet”,如下图所示。 我们需要使用kubectl连接到Kubernetes集群。
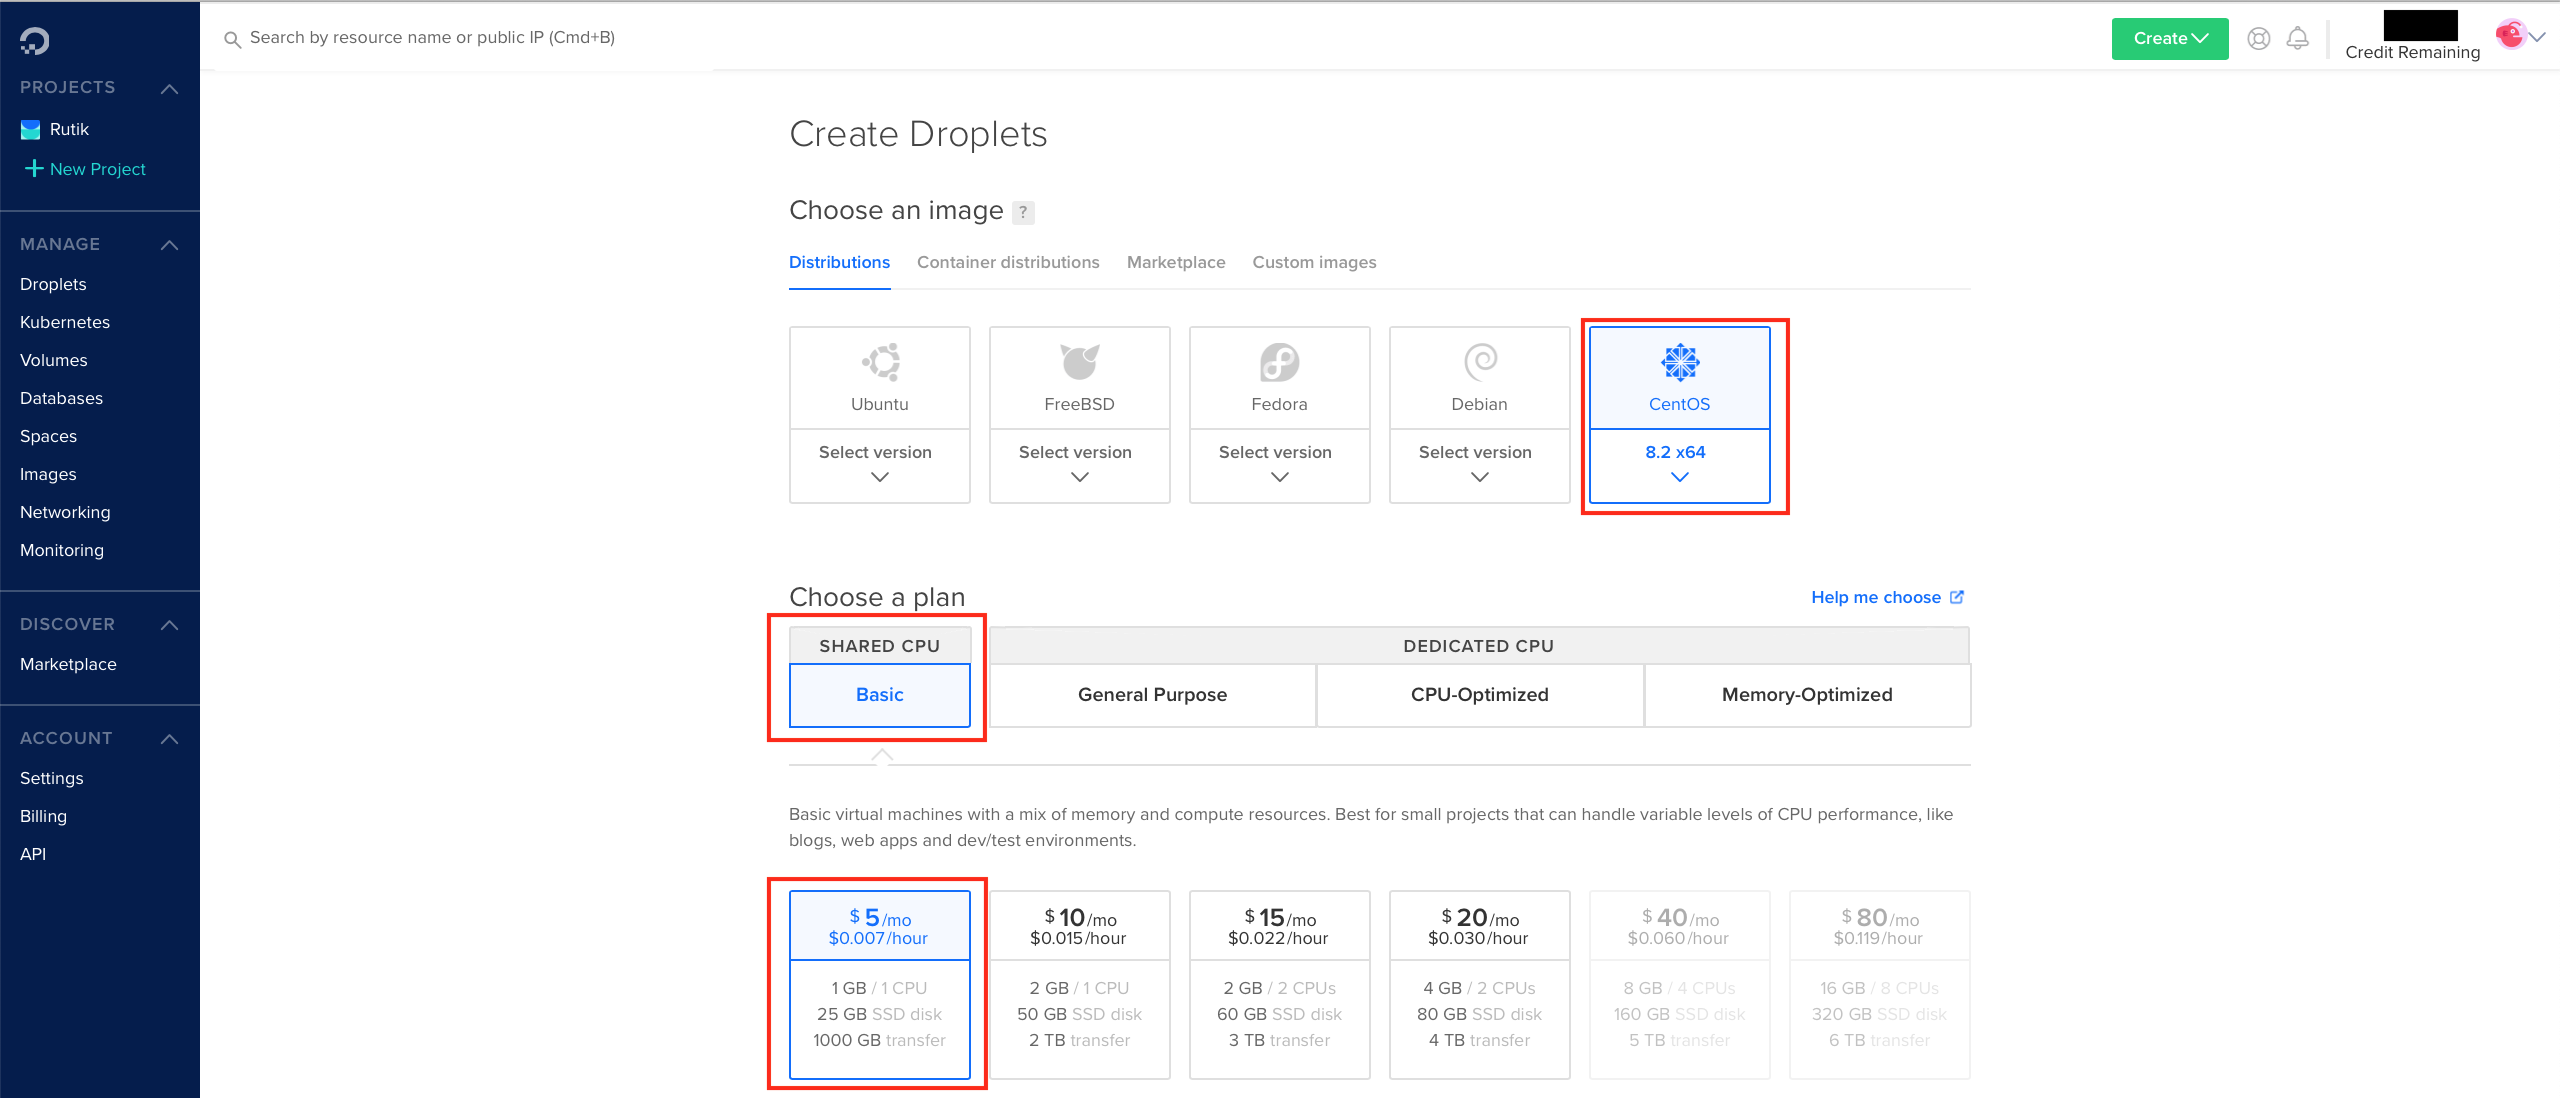
Select the OS type and host configuration. Here I have selected very basic configuration, but you can select any configuration as per your requirement.
选择操作系统类型和主机配置。 在这里,我选择了非常基本的配置,但是您可以根据需要选择任何配置。
Select the Data Center
选择数据中心

Select the Authentication method, here I will be using SSH Key to login to the host.
选择身份验证方法,这里我将使用SSH密钥登录到主机。

You can generate the SSH key using below command.
您可以使用以下命令生成SSH密钥。
# ssh-keygen
Generating public/private rsa key pair.
Enter file in which to save the key (/root/.ssh/id_rsa):
Enter passphrase (empty for no passphrase):
Enter same passphrase again:
Your identification has been saved in /root/.ssh/id_rsa.
Your public key has been saved in /root/.ssh/id_rsa.pub.
The key fingerprint is:
SHA256:7j9NIcg+SlNT76xwwhujzi6YYl7HjEqPuOXjZRgfW9k root@centos-central-mgmt-host
The key's randomart image is:
+---[RSA 3072]----+
|                 |
|          .      |
|       . o .     |
|       o= . o    |
|  . . o+E. + .   |
|   +++o.O . +    |
| .o=== +.O +     |
|++Ooo.o.. o .    |
|=Boo ++ ....     |
+----[SHA256]-----+
This will generate 2 keys under .ssh directory by default.
默认情况下,这将在.ssh目录下生成2个密钥。
# ls -lrt ~/.ssh/
-rw-------. 1 root root 589 Sep 18 17:24 authorized_keys
-rw-------. 1 root root 2622 Sep 18 18:33 id_rsa
-rw-r--r--. 1 root root 583 Sep 18 18:33 id_rsa.pub
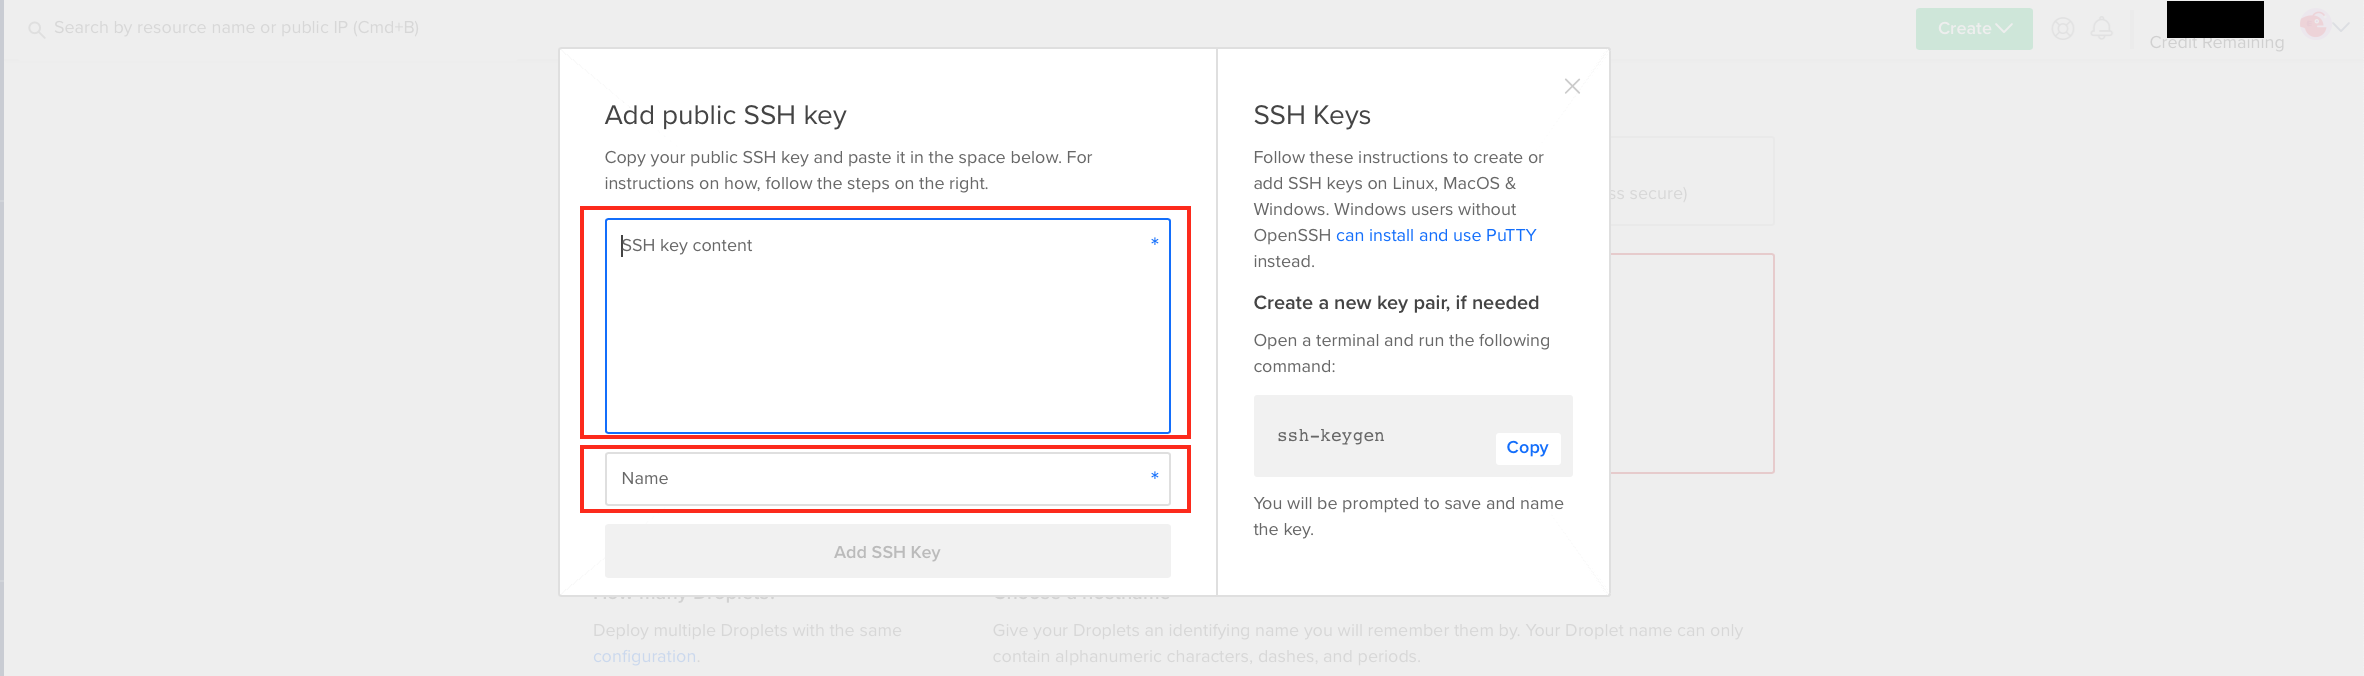
#Copy the content of the the file id_rsa.pub and enter in the ‘Add public SSH key’ section as shown in the below image and give a name to the key and click on ‘Add SSH key’.
复制文件id_rsa.pub的内容,并如下图所示输入“添加公共SSH密钥”部分,并给密钥命名,然后单击“添加SSH密钥”。
Get the IP of the hsot and connect to the host.
获取hsot的IP并连接到主机。

ssh -i id_rsa root@<ip of the host>Install kubectl on the host:
在主机上安装kubectl:
curl -LO https://storage.googleapis.com/kubernetes-release/release/`curl -s https://storage.googleapis.com/kubernetes-release/release/stable.txt`/bin/linux/amd64/kubectlchmod +x ./kubectlmv ./kubectl /usr/local/bin/kubectlkubectl version --clientReference: https://kubernetes.io/docs/tasks/tools/install-kubectl/
参考: https : //kubernetes.io/docs/tasks/tools/install-kubectl/
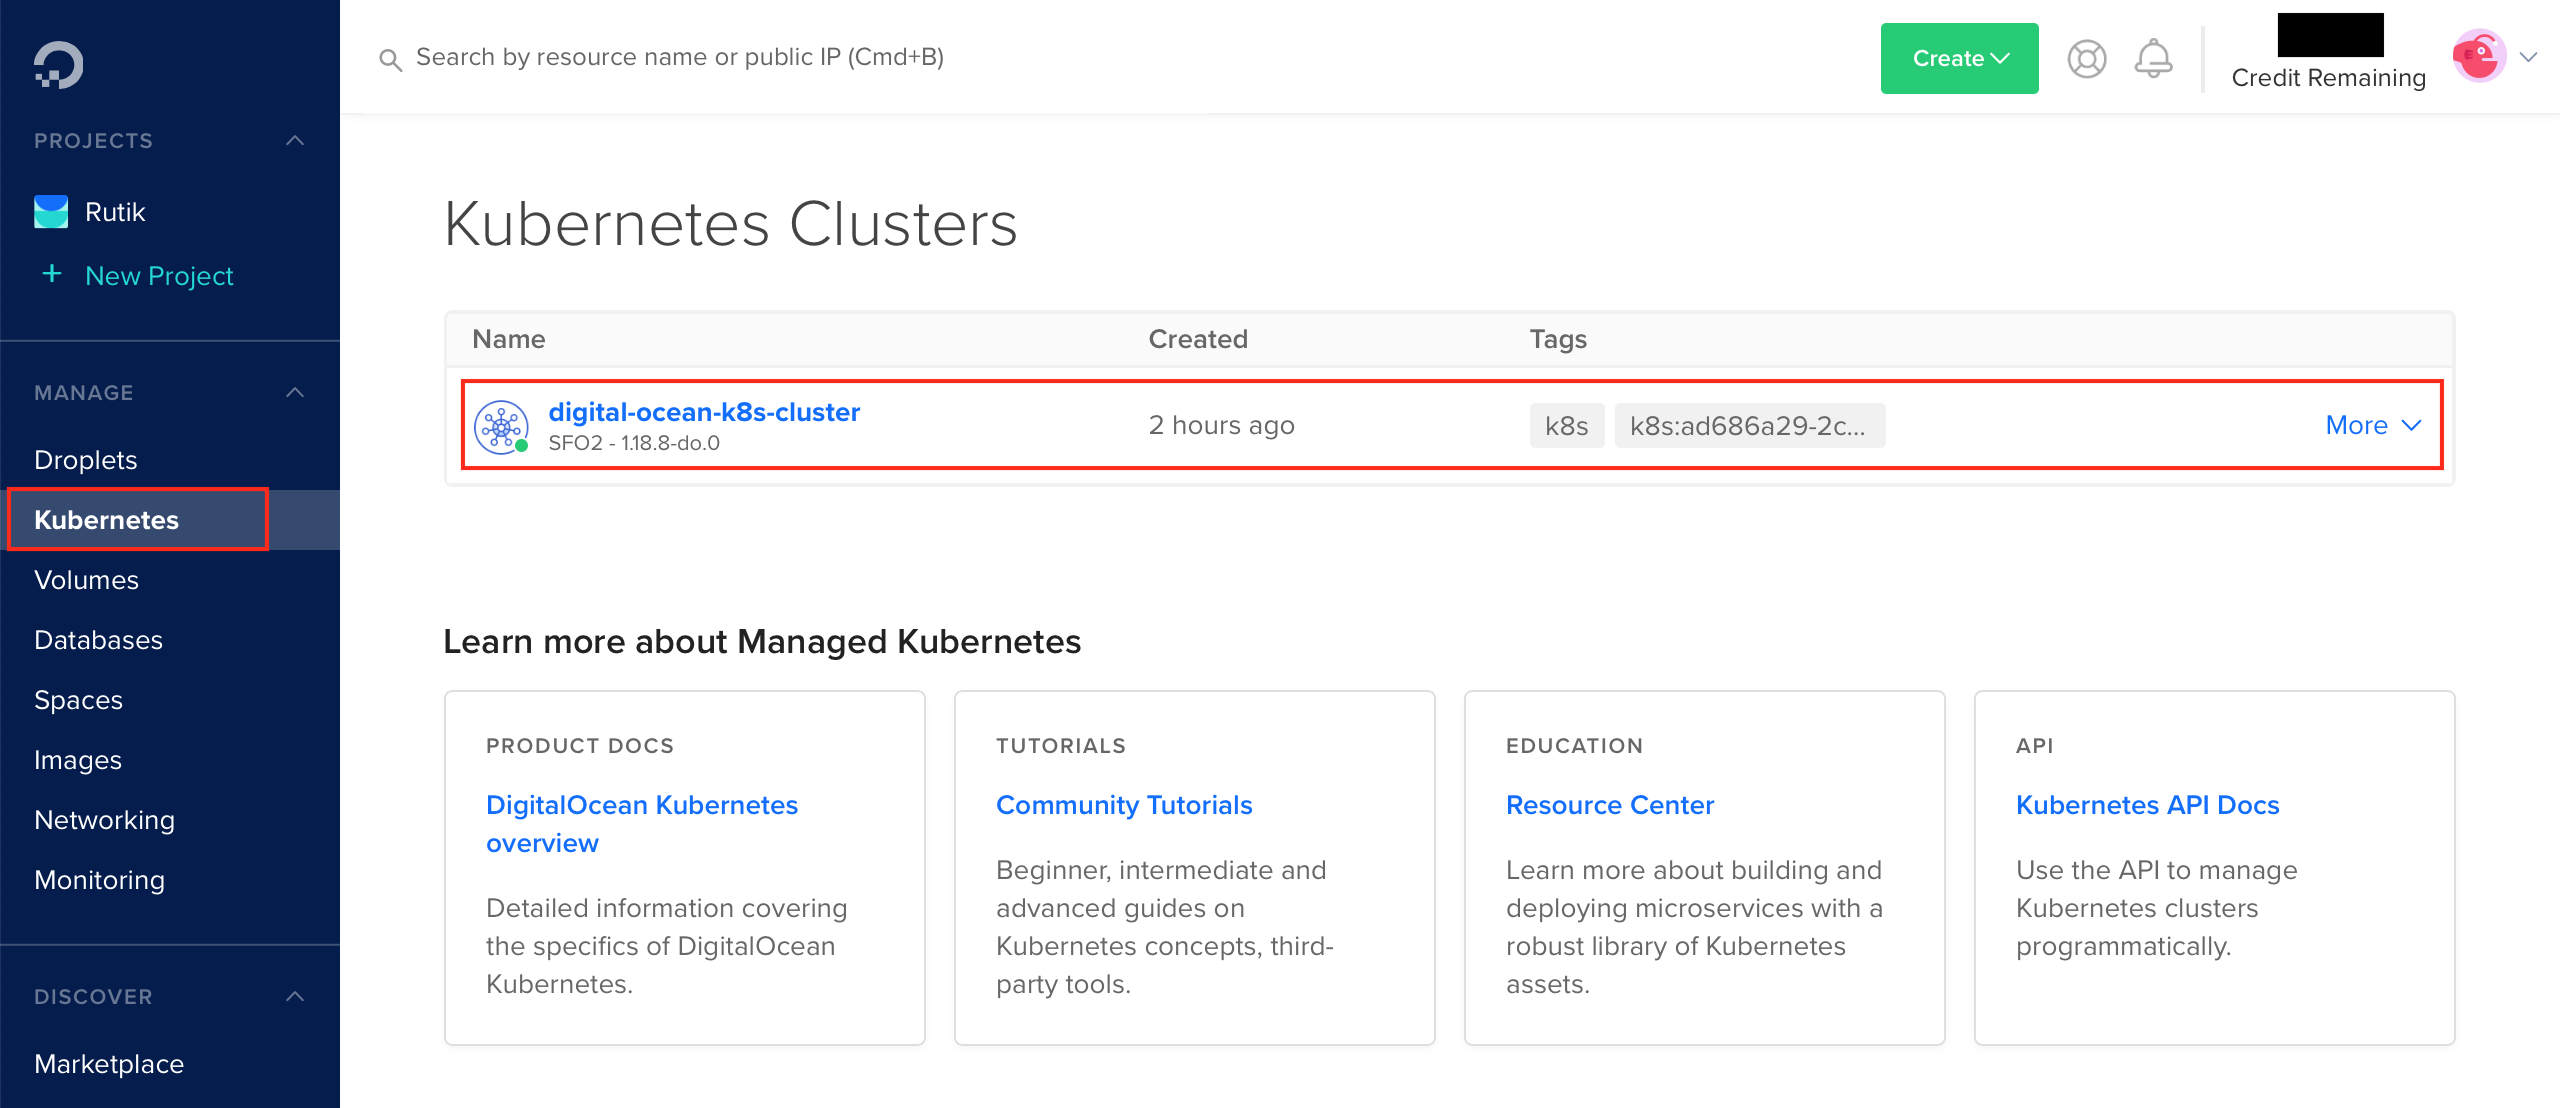
Download the Kubernets cluster config file. Go to Kubernetes under MANAGE section and click on the cluster you have created as highlighted below.
下载Kubernets集群配置文件。 转到``管理''部分下的Kubernetes,然后单击已创建的集群,如下所示。
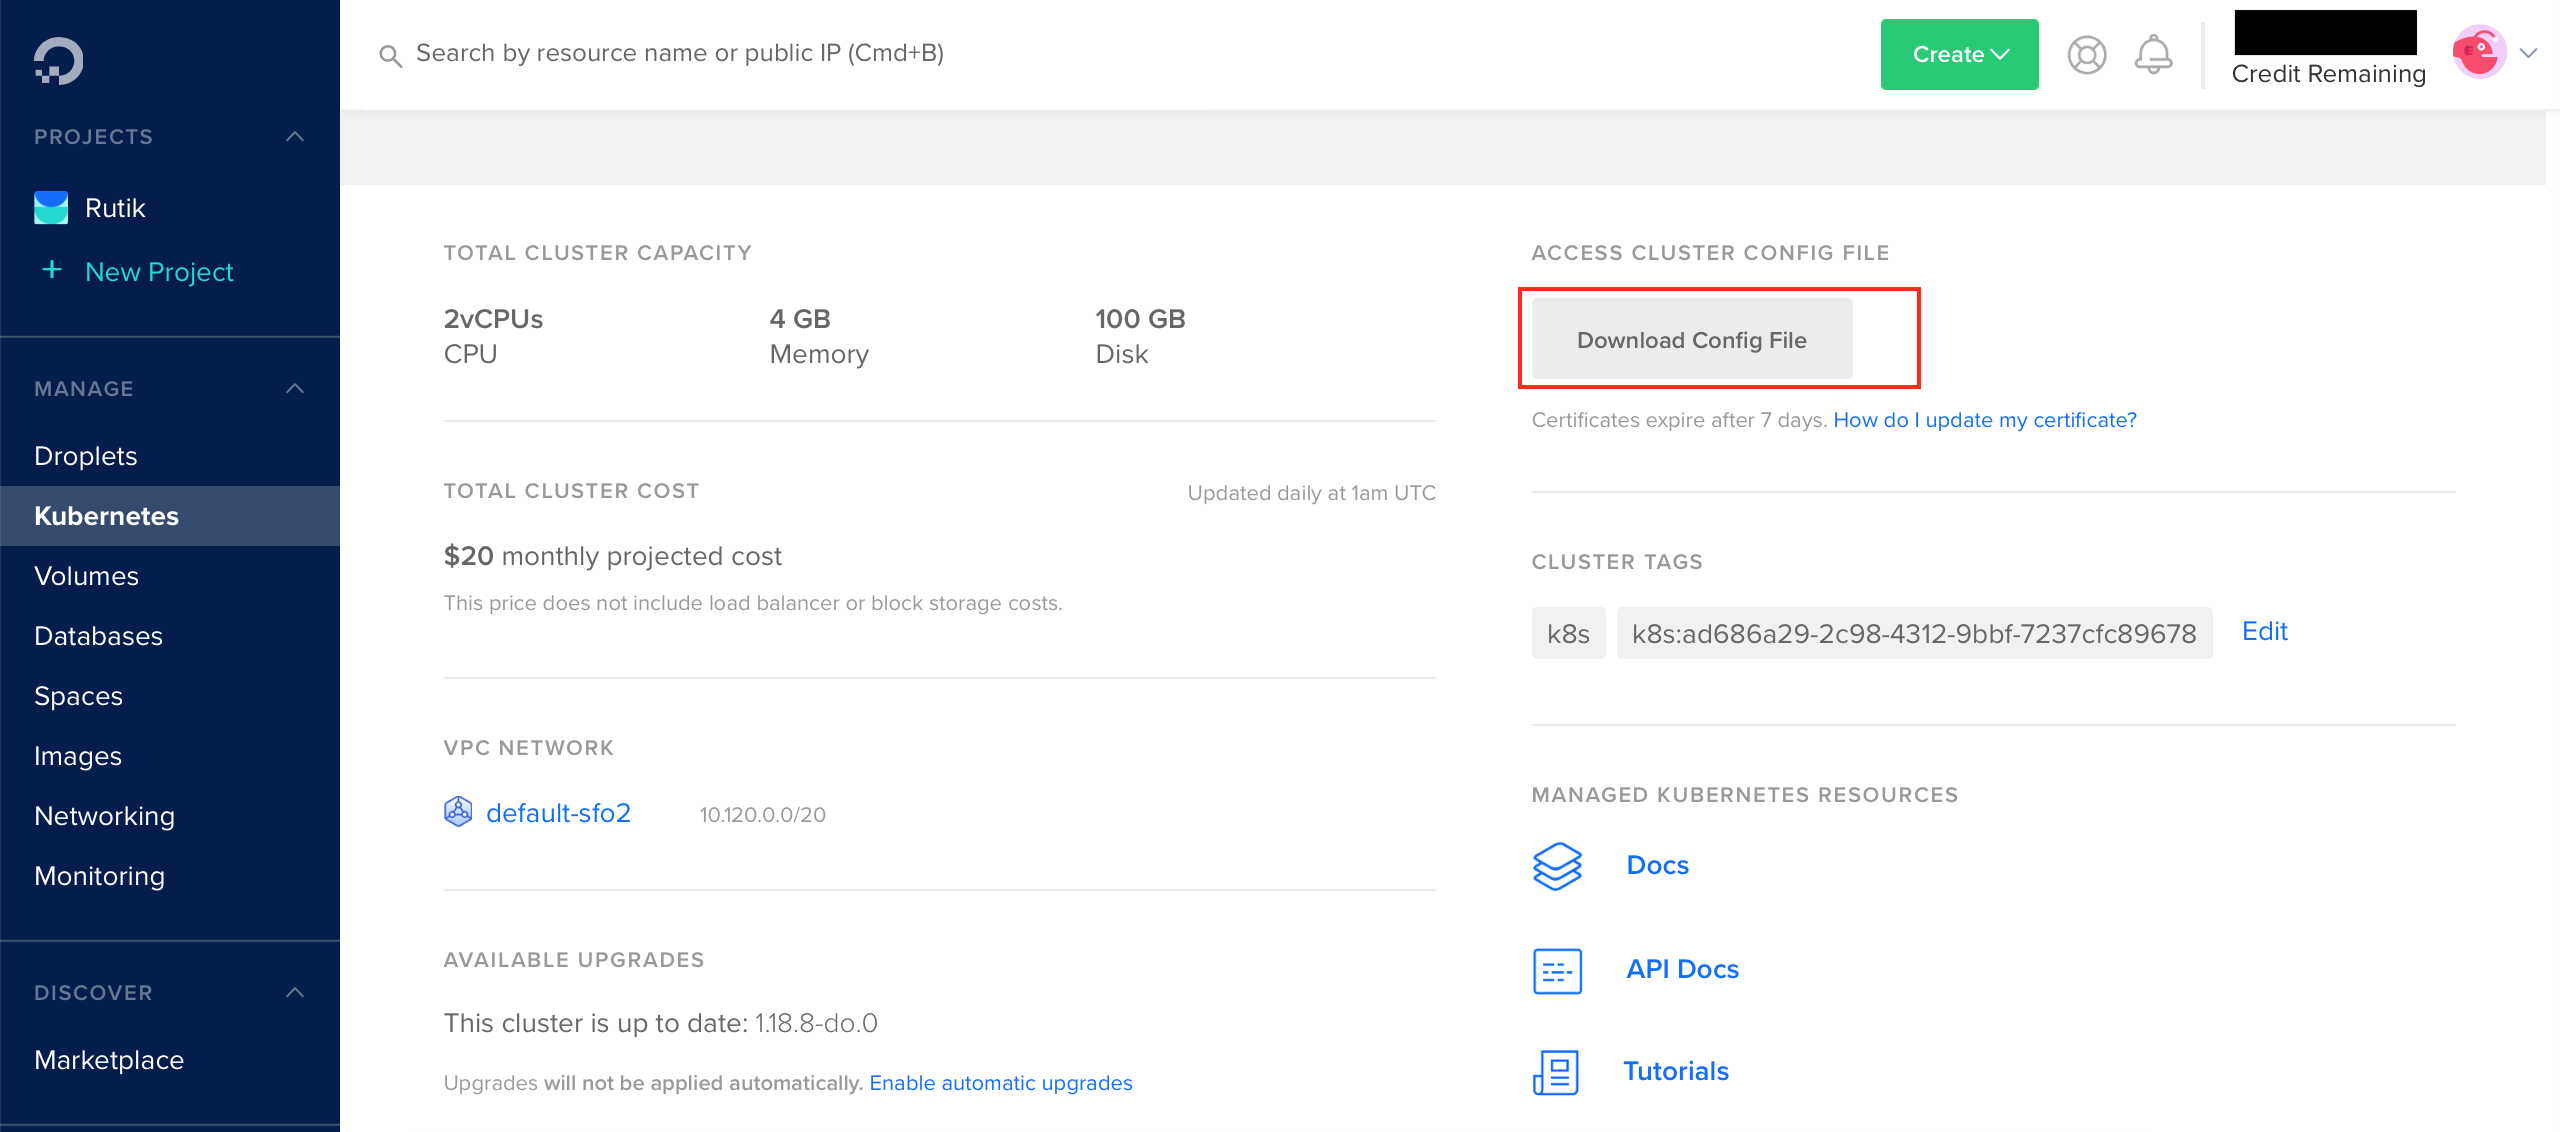
Click on the ‘Download Config File’ to download the cluster config file.
单击“下载配置文件”以下载集群配置文件。
Create .kube directory and add copy the content of the ‘cluster config file’ to config.
创建.kube目录,然后将“集群配置文件”的内容复制到config中。
[root@centos-central-mgmt-host ~]# mkdir .kube
[root@centos-central-mgmt-host ~]# cd .kube/
[root@centos-central-mgmt-host .kube]# vi config
Test the connectivity to make sure you are able to connect to the Kubernetes Cluster.
测试连接性,以确保您能够连接到Kubernetes群集。
[root@centos-central-mgmt-host ~]# kubectl get nodes
NAME STATUS ROLES AGE VERSION
k8s-36d28 Ready <none> 13m v1.18.8
k8s-36d2u Ready <none> 13m v1.18.8
翻译自: https://medium.com/@devops.rutik/kubernetes-cluster-in-digital-ocean-8de2a6415070
kubernetes 集群


 1164
1164


 被折叠的 条评论
为什么被折叠?
被折叠的 条评论
为什么被折叠?
 到【灌水乐园】发言


