


 本文介绍了如何结合Java与libgdx库进行3D游戏开发,并通过Blender创建3D模型。文章重点在于libgdx在3D游戏编程中的应用。
libgdx 3d
Or… the journey through the x, y, and z axes through the lens of a computer screen.
或 …通过x,y和z轴穿过计算机屏幕镜头的旅程。
TL; DR (TL;DR)
Using Blender to get your Model, UV unwrapped, with an image texture, correct, so that it can be easily imported into your libGDX project.
使用Blender获得正确的UV,并使用图像纹理校正模型,以便可以轻松将其导入到libGDX项目中。
您将需要什么 (What You Will Need)
Download blender if you don’t have it yet — at the time of writing it is version v2.90.0
如果还没有的话,请下载 Blender-在撰写本文时,它是v2.90.0版
fbx-conv to convert from .fbx file formats to .g3db file formats (.g3db is the native file format for libGDX) — pre-compiled packages can be downloaded from here.
fbx-conv可以将.fbx文件格式转换为.g3db文件格式(.g3db是libGDX的本机文件格式)—可以从此处下载预编译的软件包。
Things to note:
注意事项:
- There was a major UI overhaul with the vesrion 2.80+ series, so, in order to follow the instructions you will need to be on at least version 2.80. vesrion 2.80+系列对UI进行了大修,因此,为了遵循说明,您至少需要安装2.80版。
There are lots of good tutorials around using the blender programme — if you are new to the programme, the ‘Learn the basics’ videos on the thank-you page is a great way to start. However — make sure that you search for tutorials about blender 2.8 which will show the new interface.
关于使用Blender程序,有很多不错的教程-如果您是该程序的新手,那么感谢页面上的“学习基础知识”视频是一个很好的起点。 但是 -确保您搜索有关Blender 2.8的教程,该教程将显示新界面。
步骤 (The Steps)
- Delete the un-necessary components 删除不必要的组件
- Find (or create) a model 查找(或创建)模型
Convert the model (if required)
转换模型( 如果需要 )
- Import the model 导入模型
Update the scale units (if required)
更新比例单位( 如果需要 )
- UV unwrapping 紫外线展开
- Check the stretching 检查拉伸
Creating seams (if required)
创建接缝( 如果需要 )
- Adding an image material to the model 向模型添加图像材料
- Converting the model 转换模型
该模型 (The Model)
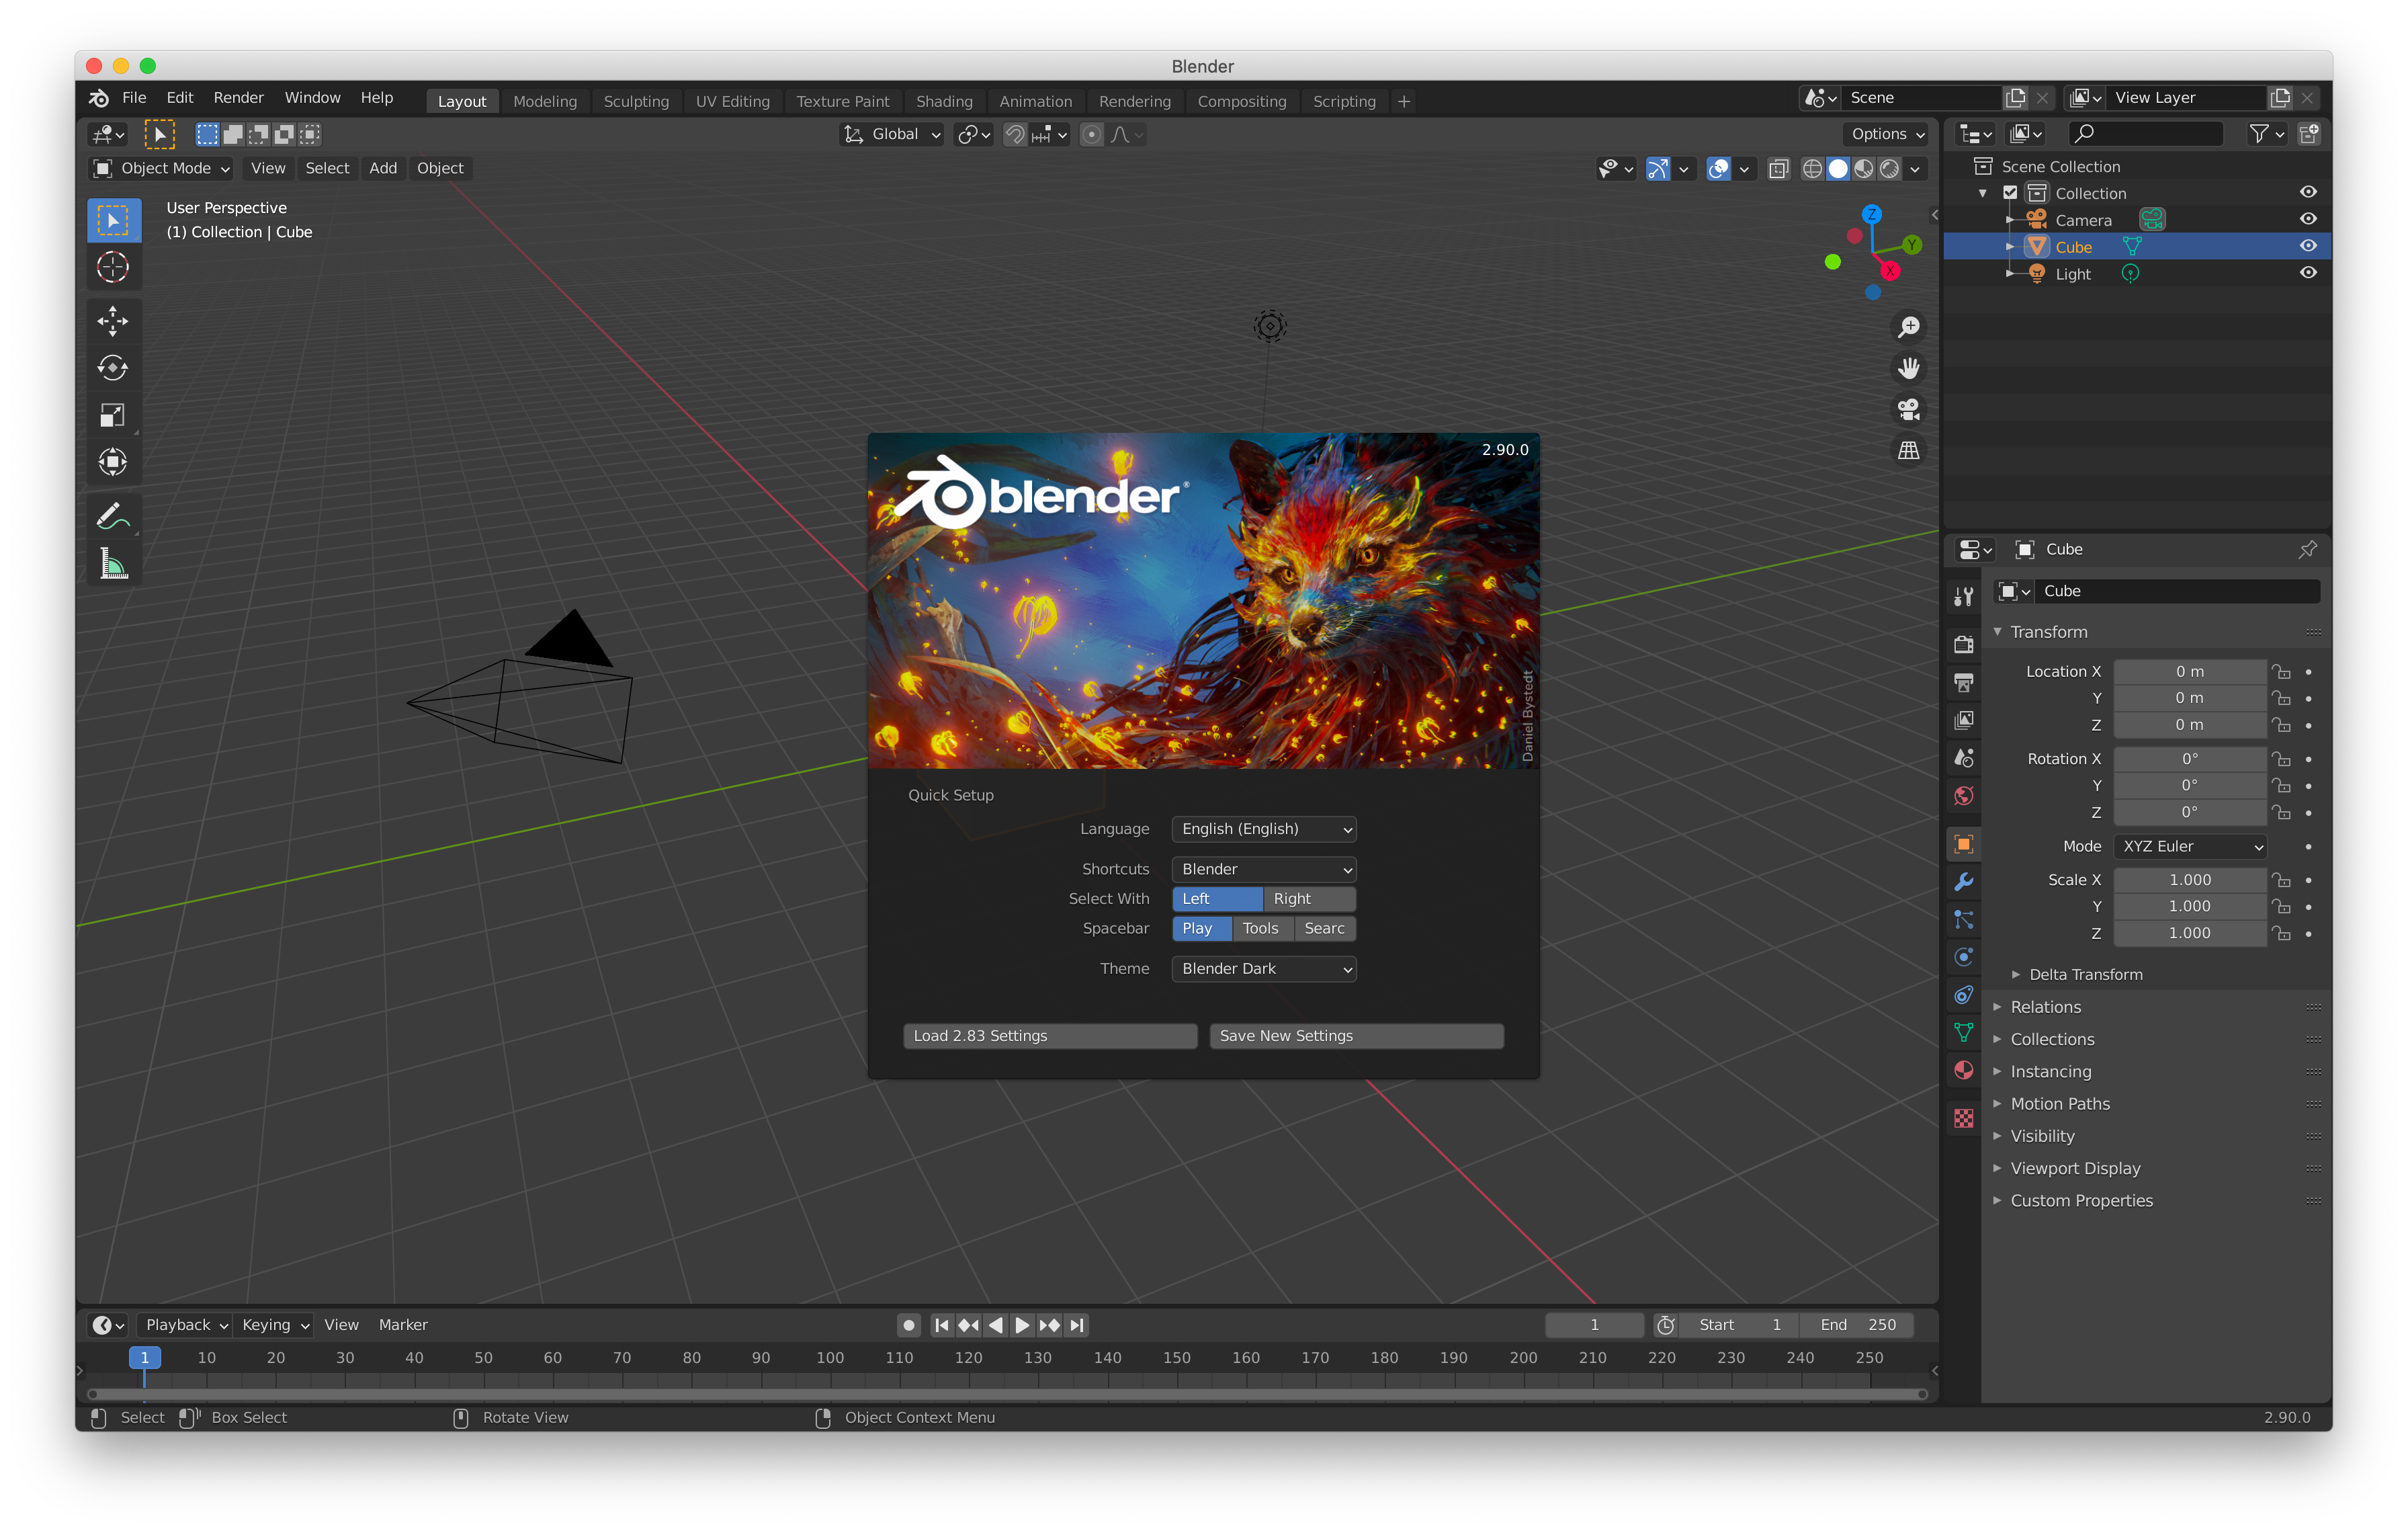
When you start up blender, it automatically creates a scene for you, with a cube (centred at 0,0,0), a camera, and a light, as shown below.
启动Blender时,它将自动为您创建一个场景,其中包含一个立方体(以0,0,0为中心),一个摄像头和一个灯光,如下所示。

步骤1-删除不必要的组件 (Step 1 —Delete the un-necessary components)
Which is to say pretty much everything :). On the top right of the window, you will see the objects within the ‘Collection’.
这就是说几乎所有的内容:)。 在窗口的右上方,您将看到“ 集合 ”中的对象。
From this area, delete the ‘Camera’, the ‘Cube’, and the ‘Light’, as they will not be used, and do not need to be exported. To do this, either
在此区域中,删除“ 相机 ”,“ 立方体 ”和“ 灯光 ”,因为它们将不使用,也不需要导出。 为此,要么
Right click on each item to get the contextual menu up and select the ‘Delete’ option, or,
右键单击每个项目以打开上下文菜单,然后选择“ 删除 ”选项,或者,
Just left click and press the ‘X’ key to delete.
只需单击鼠标左键,然后按“ X ”键即可删除。

第2步-查找(或创建)模型 (Step 2 — Find (or create) a model)
The cube is not the most exciting of models, and easily UV unwraps, and consequently doesn’t go through some of the problems that you may come acrosswith other more complex models. So, either create your own model (which is an advanced topic) or download a model from a 3d model site (for example GrabCAD) — but do be careful of licensing restrictions on your model.
立方体并不是最令人兴奋的模型,而且很容易紫外线解开,因此不会遇到其他更复杂的模型可能遇到的问题。 因此,可以创建自己的模型(这是高级主题),或者从3d模型站点下载模型(例如GrabCAD ),但请注意对模型的许可限制。
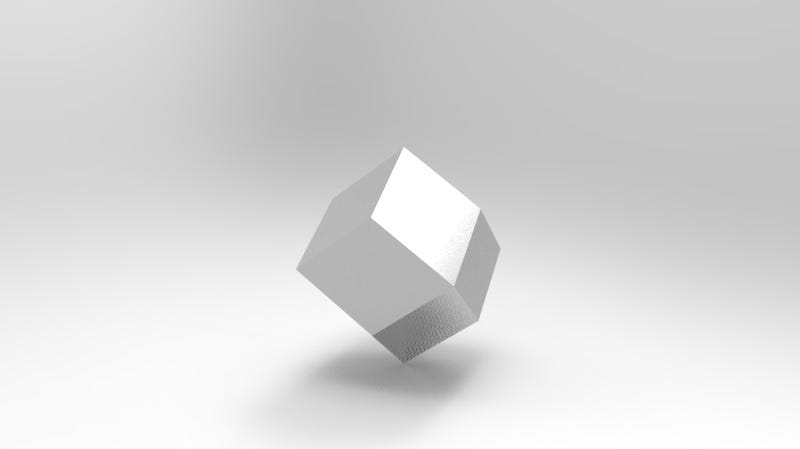
The example used here is the Rhombic Dodecahedron which looks like the following:
此处使用的示例是菱形十二面体 ,如下所示:
When downloading a model, ensure that it is easily importable into blender — the file formats that are supported:
下载模型时,请确保可轻松将其导入Blender(受支持的文件格式):
- Collada (.dae) Collada(.dae)
- Alembic (.abc) Alembic(.abc)
- Motion Capture (.bvh) 动态捕捉(.bvh)
- Scalable Vector Graphics (.svg) 可缩放矢量图形(.svg)
- Stanford (.ply) 斯坦福(.ply)
- Stl (.stl) Stl(.stl)
- FBX (.fbx) FBX(.fbx)
- glTF 2.0(.glb/.gltl) glTF 2.0(.glb / .gltl)
- Wavefront (.obj) 波前(.obj)
- X3D Extensible 3D (.x3d/.wrl) X3D可扩展3D(.x3d / .wrl)
Never fear, if you cannot find a model in any of the above formats, there are free online format converters which will do this for you.
不用担心,如果您找不到上述任何一种格式的模型,都有免费的在线格式转换器将为您完成此任务。
步骤3 —转换模型(如果需要) (Step 3 — Convert the model (if required))
A lot of the models on GrabCAD models are made with SolidWorks — which are in an .SLDPRT file format. The AnyConv.com site can easily do the conversion from .sldprt to .stl. As a side note, AnyConv supports a wide range of format conversions, all of which are enumerated here.
GrabCAD模型上的许多模型都是由SolidWorks制成的,它们都是.SLDPRT文件格式。 AnyConv.com网站可以轻松进行从.sldprt到.stl的转换 。 附带说明一下,AnyConv支持多种格式转换,所有这些都在此处列举 。
It is a simple process, all done online, no sign-up needed:
这是一个简单的过程,全部在线完成,无需注册:
Drag the file onto the box or click on the ‘CHOOSE FILE’ button,
将文件拖到框上,或单击“ 选择文件 ”按钮,
Click on the ‘CONVERT’ button
点击“ 转换 ”按钮
- Wait for it to finish… 等待它完成...
- Download the converted file 下载转换后的文件
步骤4 —导入模型 (Step 4 — Import the model)

Once the model has been imported, you will be presented with the following screen:
导入模型后,将显示以下屏幕:

步骤4 —更新比例单位(如果需要) (Step 4 — Update the scale units (if required))
By default, blender’s model scaling is far too large (generally the ‘Unit Scale’ is set to ‘1.00’) — if your model looks HUGE, you can update the scale from the right hand side menu: (make sure that the item that you want to scale is selected — or you could just press the ‘A’ key to select all).
默认情况下,blender的模型缩放比例太大(通常将“ Unit Scale ”( 单位比例 )设置为“ 1.00 ”)—如果您的模型看起来很大,则可以从右侧菜单中更新缩放比例:(请确保您已选择要缩放的比例-或只需按“ A ”键选择全部)。
Side note: A reasonable ‘Unit Scale’ is ‘0.01’ as blender uses metres, whilst libGDX uses centimetres, so dividing by 100 is a good idea.
旁注:合理的“ 单位比例 ”是“ 0.01 ”,因为搅拌机使用米,而libGDX使用厘米,因此除以100是一个好主意。

第5步-UV解包 (Step 5 — UV Unwrapping)
UV mapping or unwrapping is the process of projecting a 2D image texture onto a 3D object
UV贴图或展开是将2D图像纹理投影到3D对象上的过程
Now that the model is imported, it is time to unwrap the 3d model into 2d space so that a texture can be applied to it.
现在已经导入了模型,是时候将3d模型解包到2d空间中,以便可以对其应用纹理了。
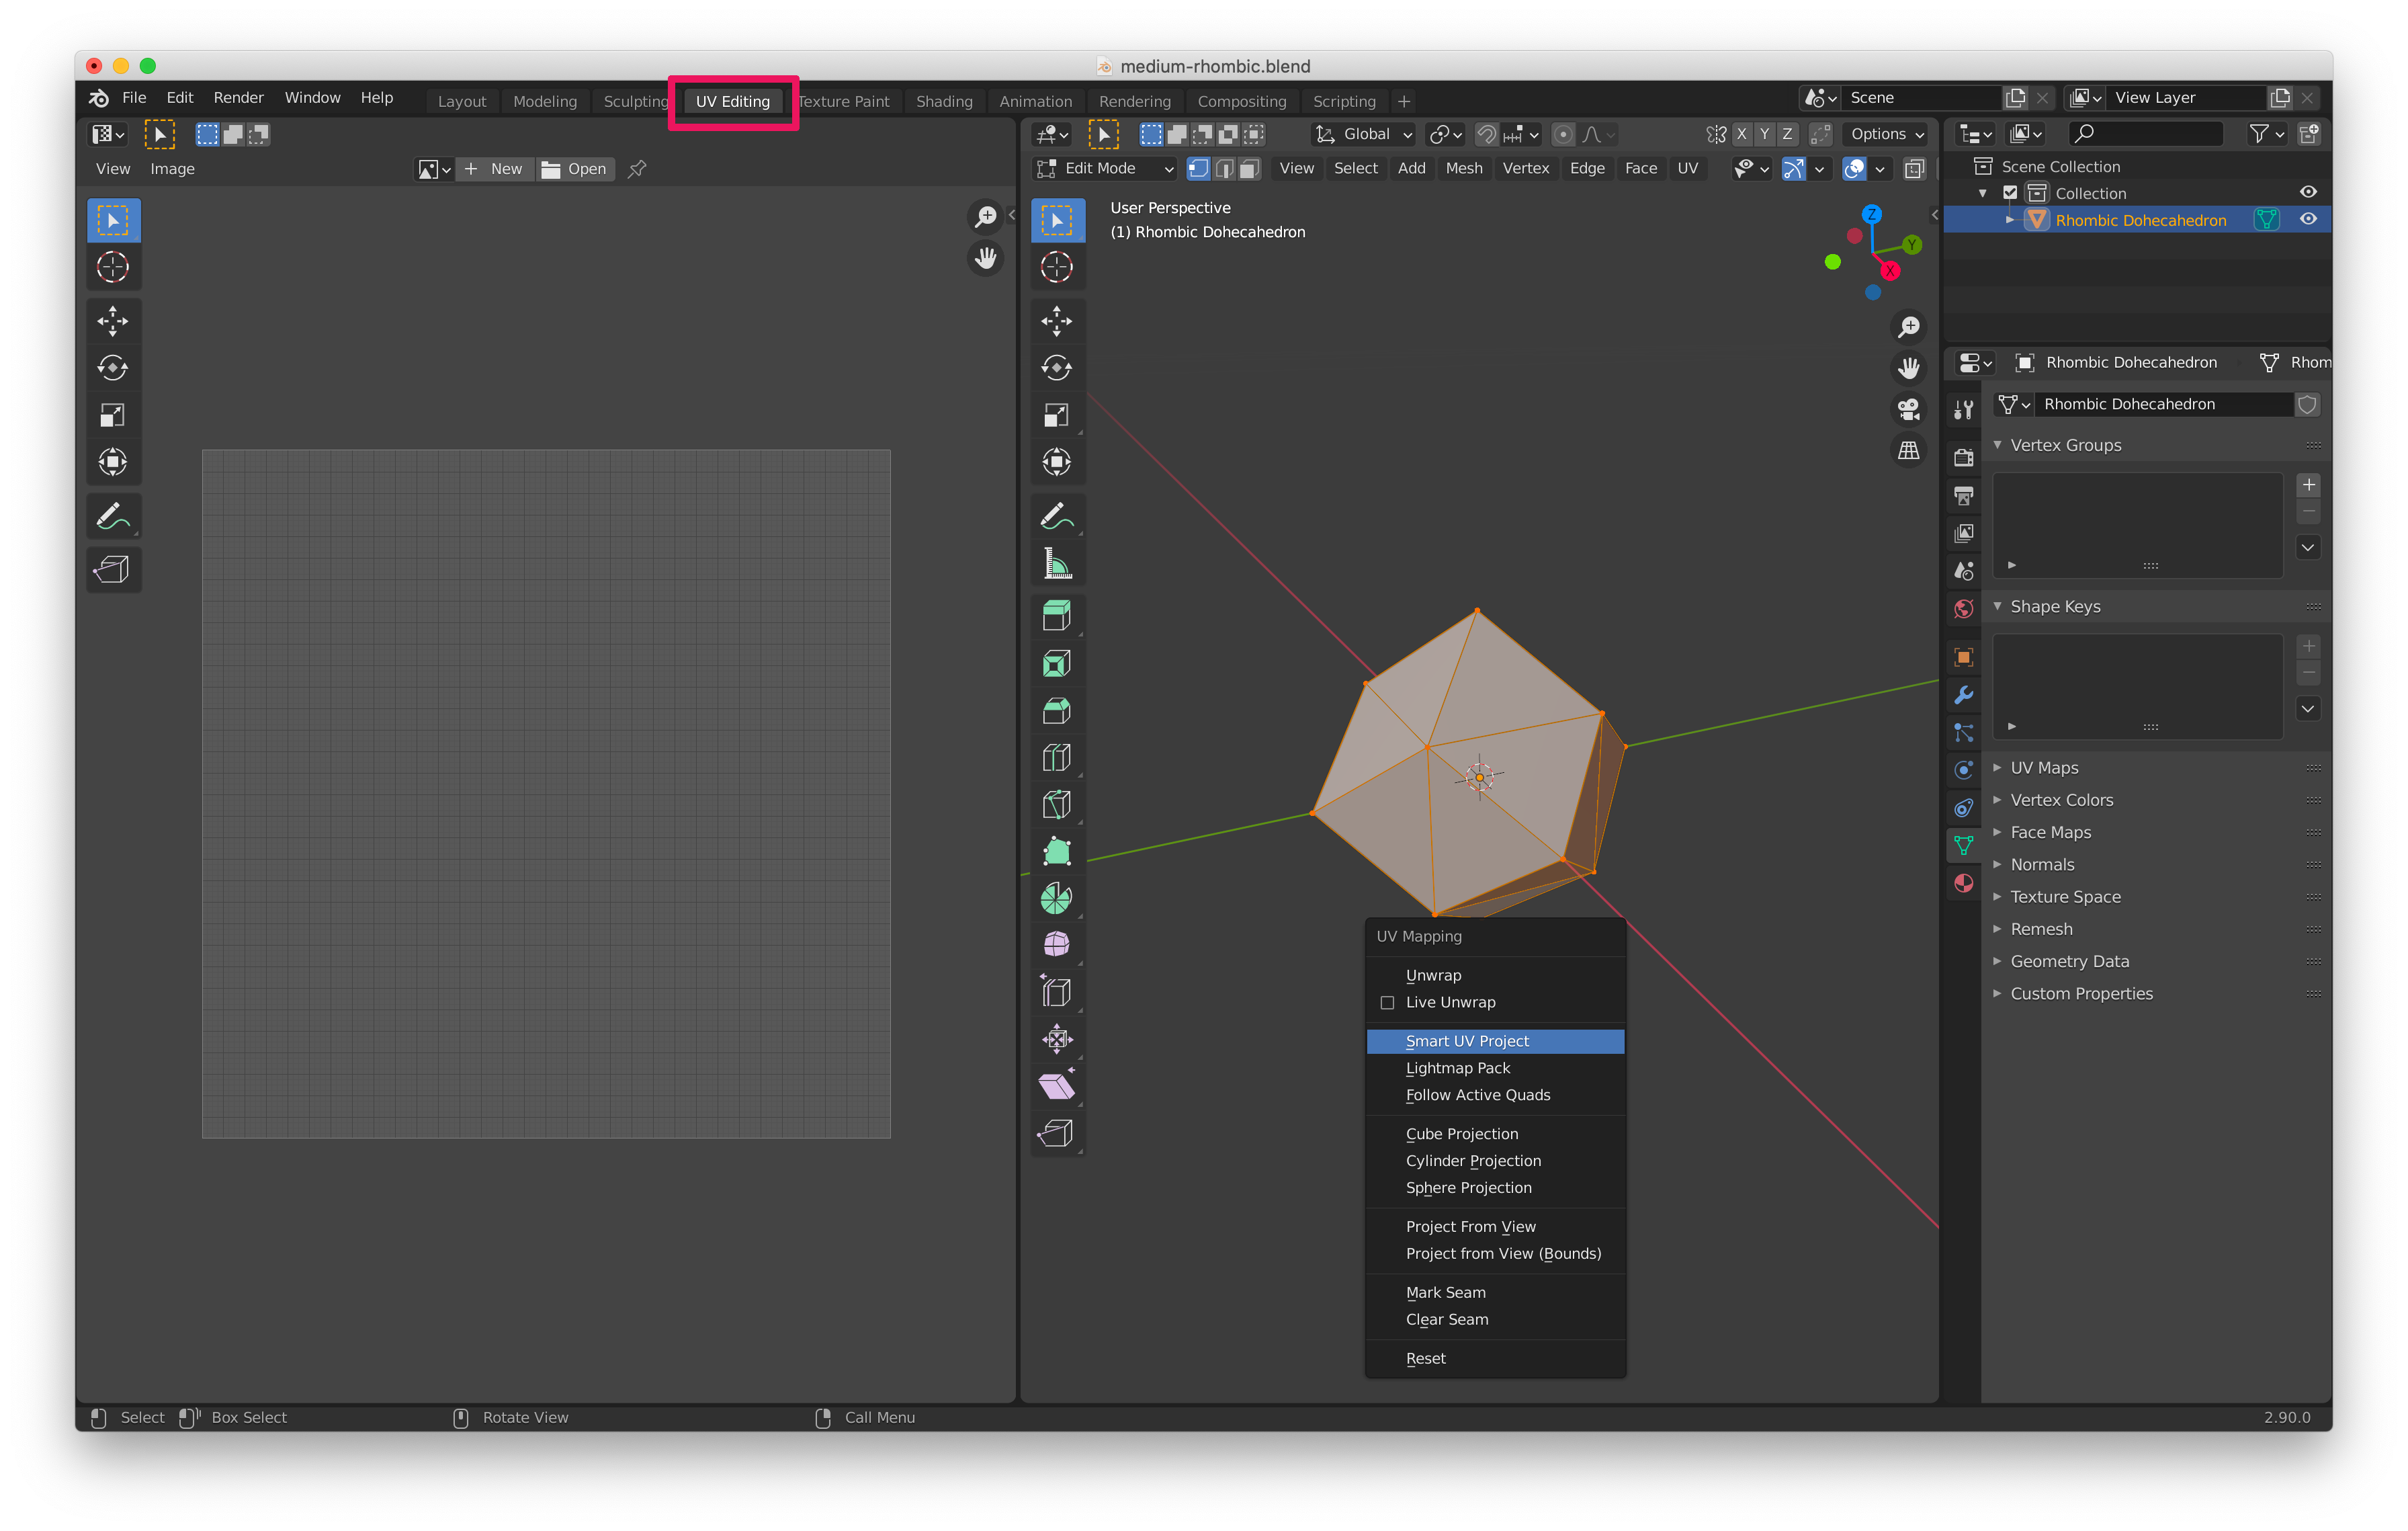
Select the ‘UV Editing’ tab from the top menu bar (highlighted above) and the two panels will be shown.
从顶部菜单栏中选择“ UV编辑 ”选项卡(上方突出显示),将显示两个面板。
If the model on the right hand side is not selected press the ‘A’ key (for select all).
如果未选择右侧的模型,请按“ A ”键(用于全选)。
Press the ‘U’ key and a context menu will be shown.
按“ U ”键,将显示一个上下文菜单。
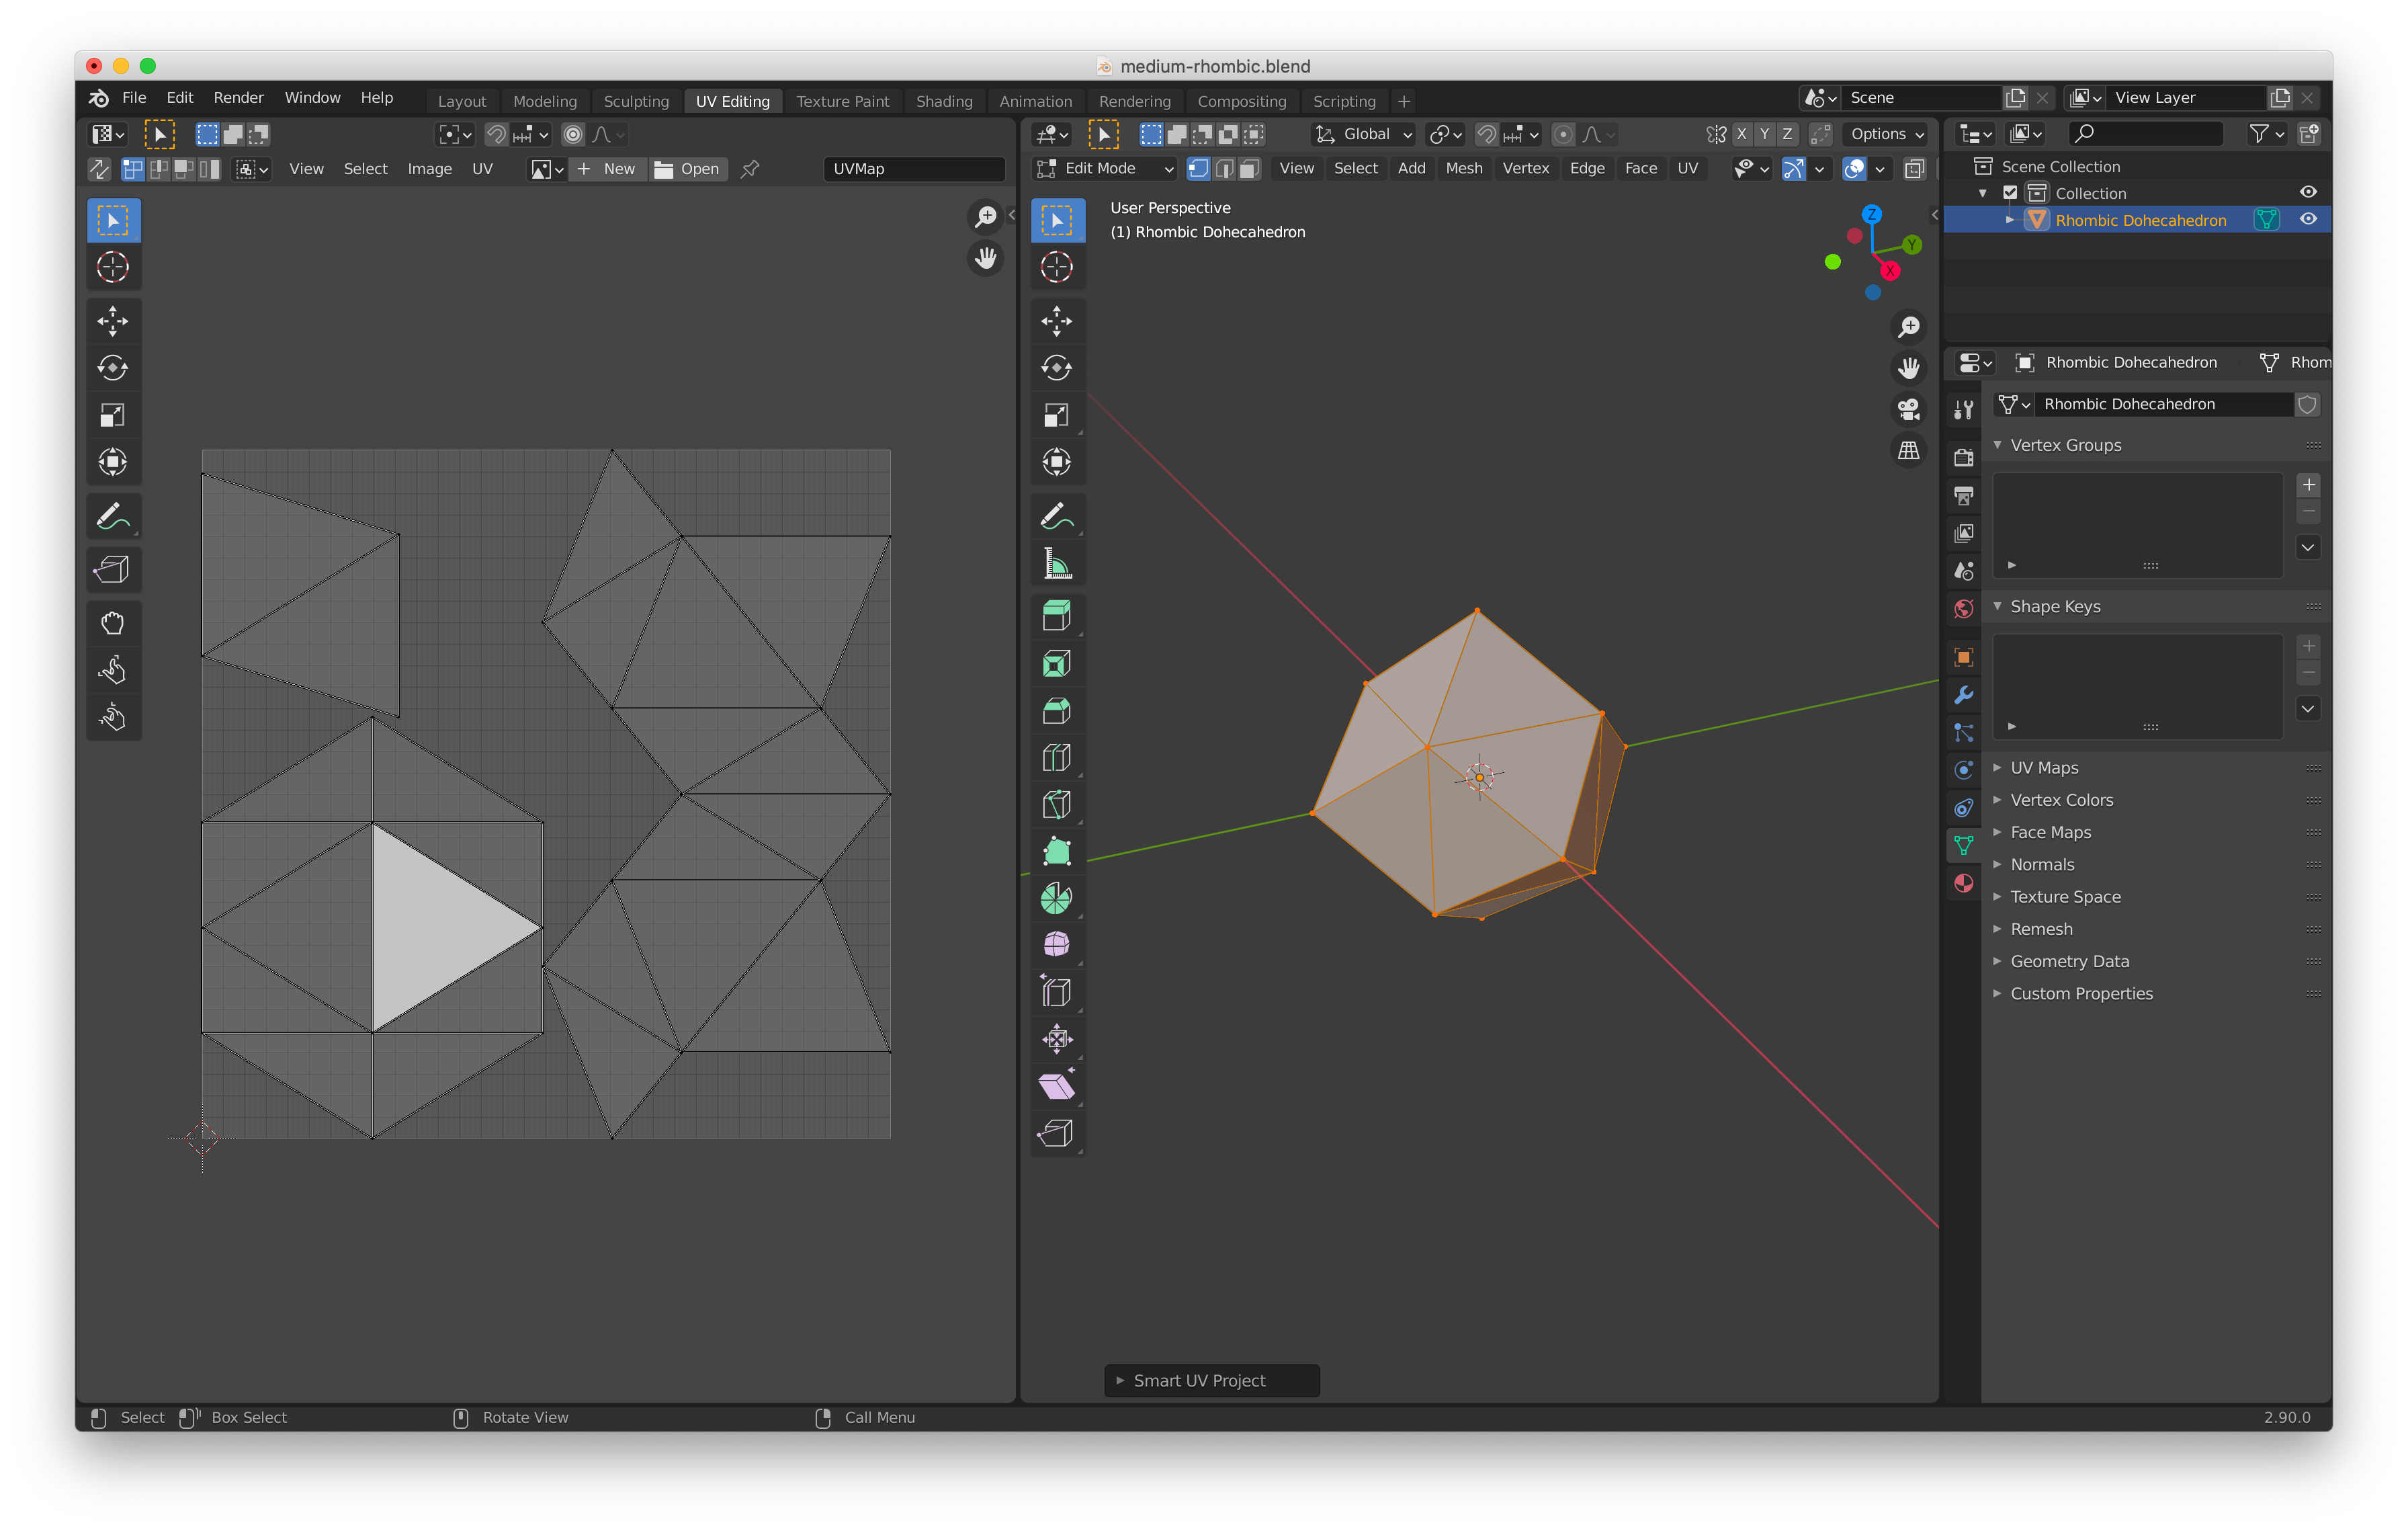
Select the ‘Smart UV Project’ option from the drop down.
从下拉列表中选择“ 智能UV项目 ”选项。
The following screen will be shown:
将显示以下屏幕:
检查拉伸 (Check the stretching)
Stretching occurs when the 3d model is projected (or laid flat) on a 2 dimensional surface, and some of the surfaces need to be stretched (or compressed) so that there is a correlation between 1 pixel in 2d space to 1 pixel in 3d space. If there is any stretching, you will need to know about it and create seams (which will be explained in the next section).
当将3d模型投影(或平放)在二维表面上时,就会发生拉伸,并且某些表面需要拉伸(或压缩),以便2d空间中的1个像素与3d空间中的1个像素之间存在相关性。 如果有任何拉伸,您将需要了解它并创建接缝(将在下一部分中进行说明)。
To view which areas are stretched there is an option hidden away in blender
要查看哪些区域被拉伸,搅拌器中隐藏了一个选项

Highlighted above is a small arrow which needs to be clicked and dragged to the left, which will reveal the options
上方突出显示的是一个小箭头,需要单击并向左拖动,以显示选项
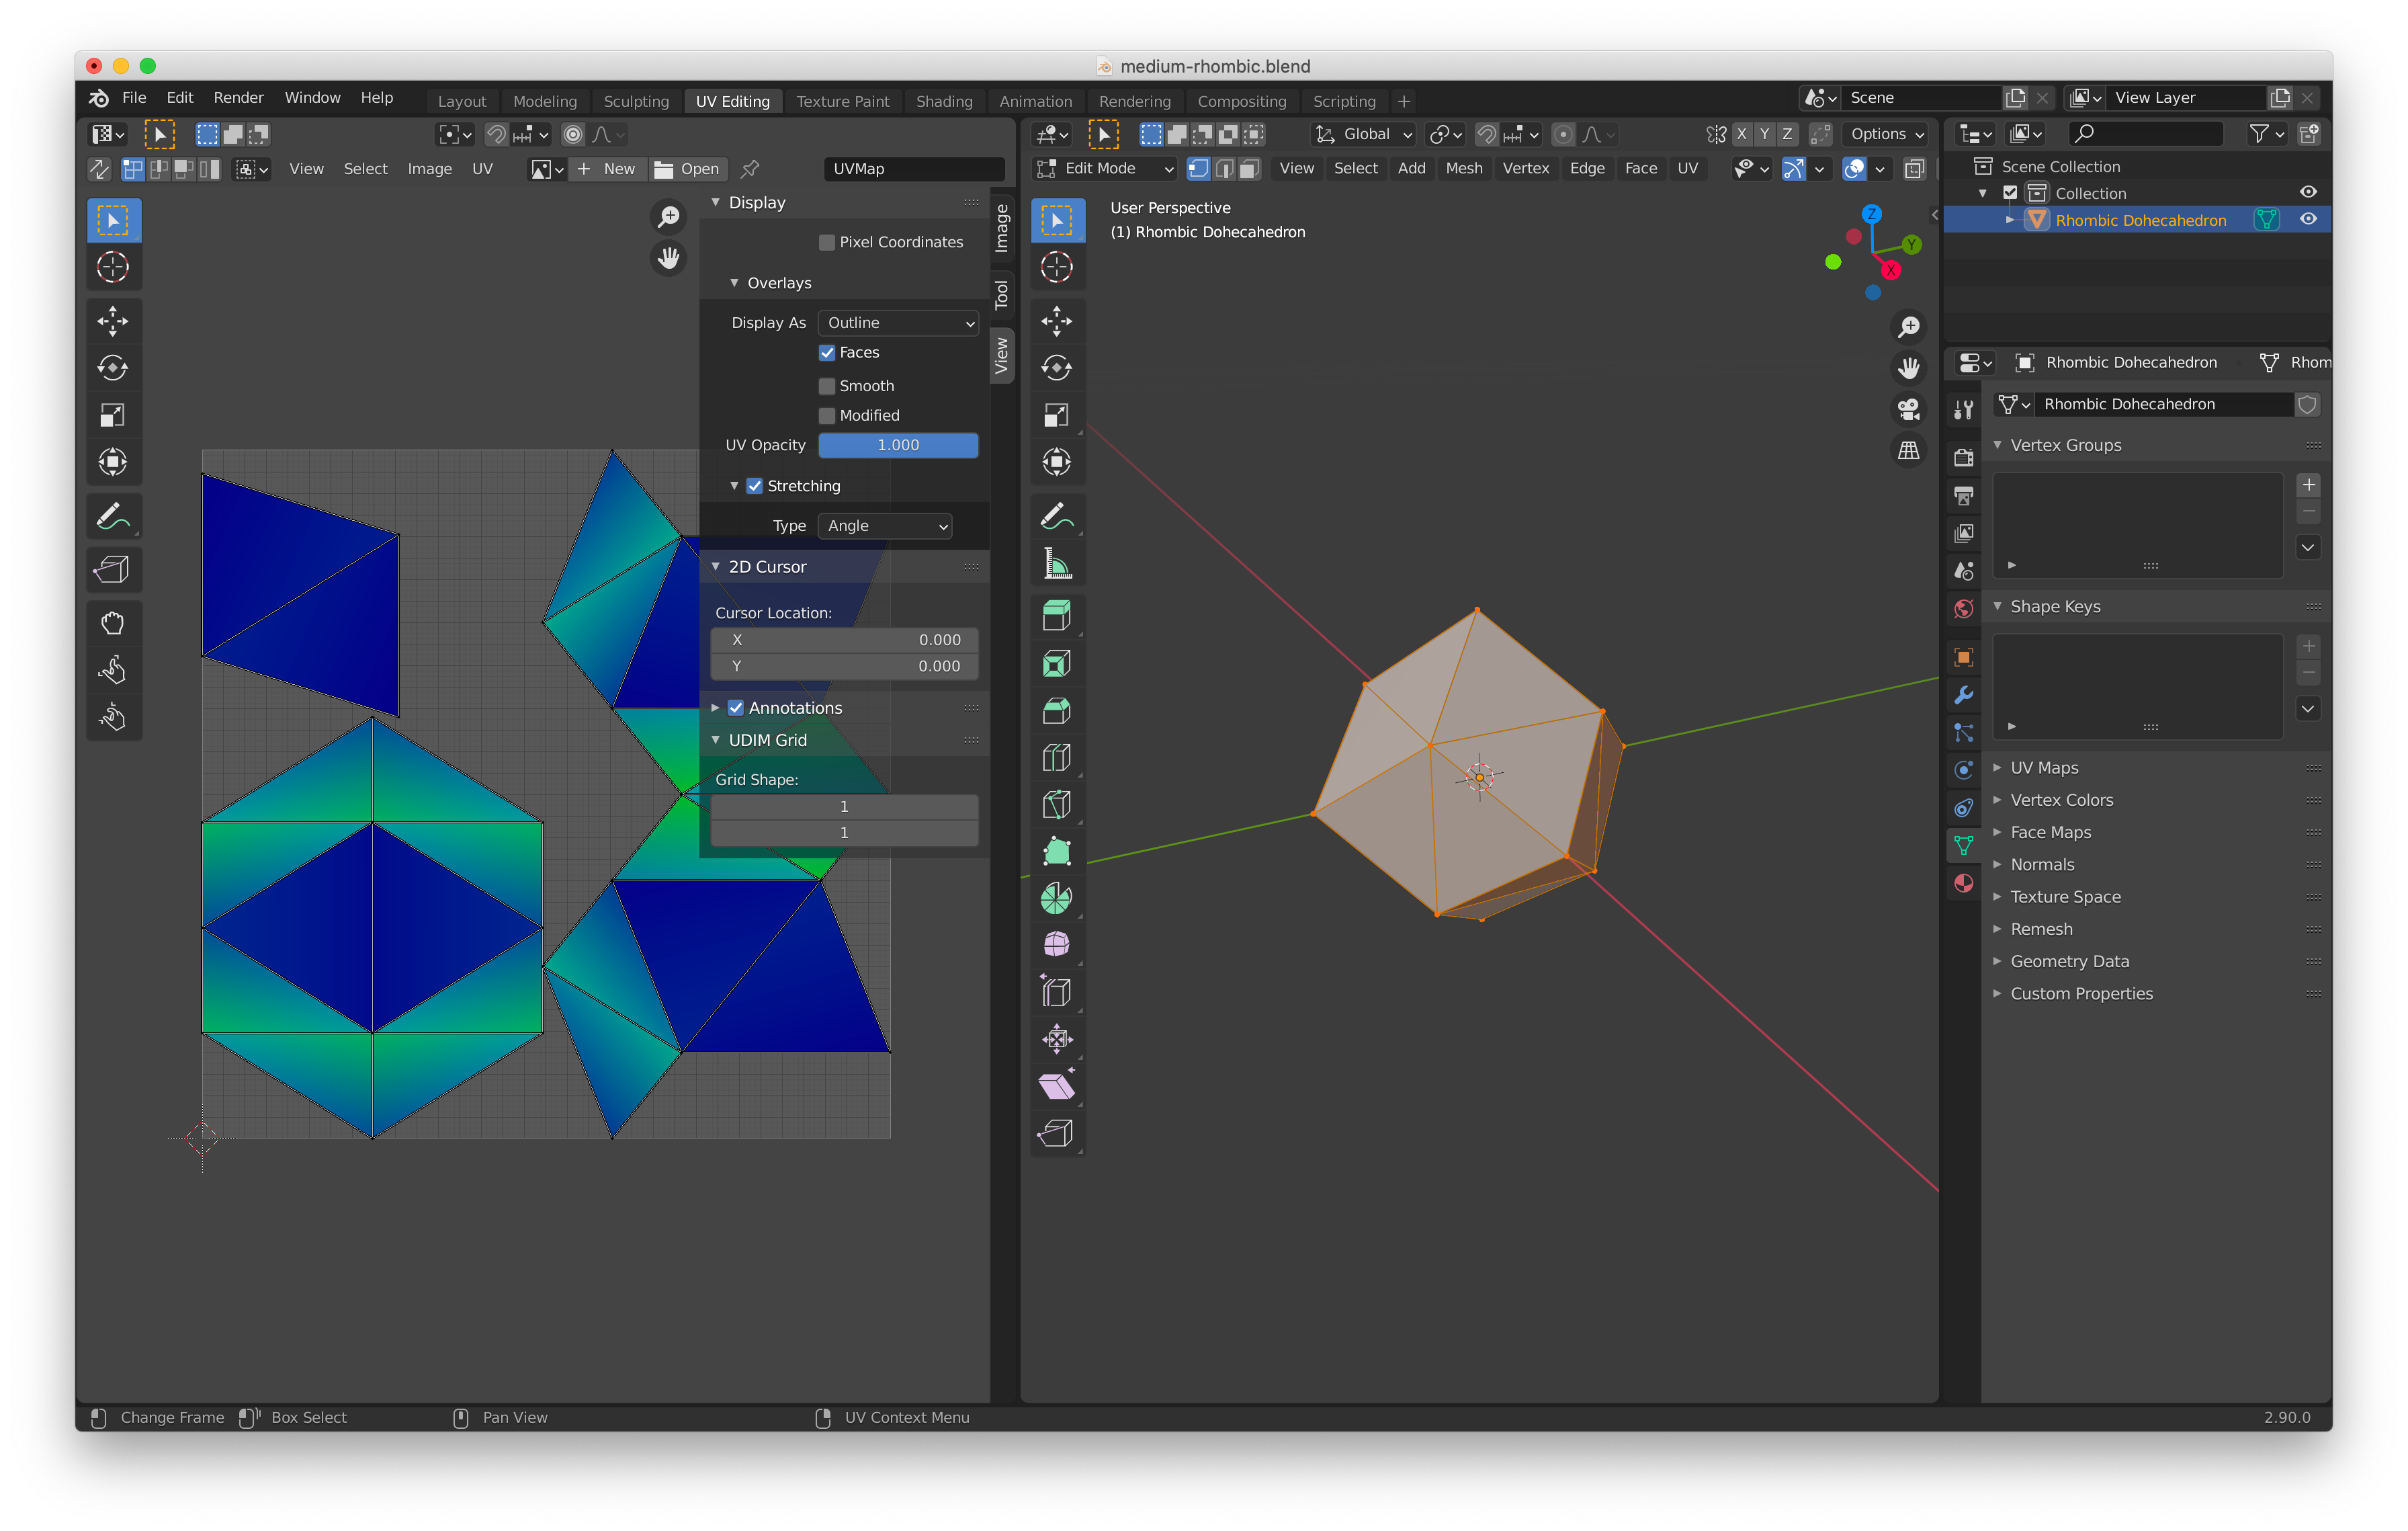
Select the ‘View’ top in the options pane
在选项窗格中选择“ 查看 ”顶部
in the ‘Overlays’ tree
在“ 叠加层 ”树中
Select the ‘Stretching’ checkbox
选中“ 拉伸 ”复选框
The ‘Type’ should be left as ‘Angle’
“ 类型 ”应保留为“ 角度 ”

This slide out menu can now be dragged back to the side until it completely disappears.
现在可以将此滑出菜单拖回侧面,直到完全消失。
The stretched areas will be shown from cooler to warmer colours:
拉伸区域将显示从较冷到较暖的颜色:
- Dark blue — not stretched 深蓝色-未拉伸
- Green — slightly stretched 绿色-略微拉伸
- Red — stretched a lot 红色-伸展很多
In the below image, there are some stretched areas (in green) and some non-stretched areas (in dark blue), which we will fix in the next section.
在下图中,有一些拉伸区域(绿色)和一些非拉伸区域(深蓝色),我们将在下一部分中进行修复。

创建接缝(如果需要) (Creating seams (if required))
Depending on the number of faces on your model an easy way to UV project the entire model is
根据模型上的面数,可以很容易地对整个模型进行UV投影。
Click on the the ‘User Perspective’ pane on the right hand side
单击右侧的“ 用户视角 ”窗格
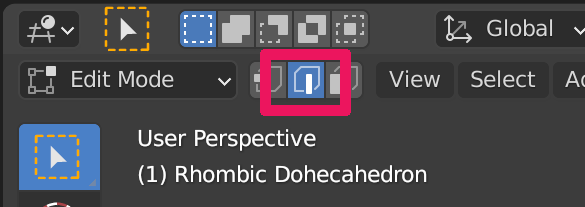
Make sure that the ‘Edge Select’ mode is on (see the menu at the top of the User Perspective screen)
确保已启用“ 边缘选择 ”模式(请参阅“用户透视图”屏幕顶部的菜单)
Press the ‘A’ key to select all
按“ A ”键选择所有
- Right Click on the model 右键单击模型
Select the ‘Mark Seam’ option (or press the ‘M’ key)
选择“ 标记接缝 ”选项(或按“ M ”键)

Press the ‘U’ key to bring up the ‘UV Mapping’ context menu
按“ U ”键调出“ UV Mapping ”上下文菜单
Select the ‘Unwrap’ option (or press the ‘U’ key)
选择“ 展开 ”选项(或按“ U ”键)
When the UV unwrapping is completed, all of the faces will have been split out into their triangular parts.
UV展开完成后,所有面将被拆分成它们的三角形部分。

This sort of UV unwrapping may not be the most suitable mode for everbody so it is possiblle to individually select the edges and mark the seams.
这种UV展开可能不是最适合所有人的模式,因此可以单独选择边缘并标记接缝。
The process is almost identical
过程几乎相同
Left click to select a edges (or use the ‘Shift’ key whilst left clicking to select multiple edges)
左键单击以选择一条边(或在按住Shift键的同时单击以选择多个边)
- Right click on the model 右键单击模型
Select the ‘Mark Seam’ option from the context menu
从上下文菜单中选择“ 标记接缝 ”选项
Rinse and repeat steps 1 to 3 until all of the seams are marked, then
冲洗并重复步骤1至3,直到所有接缝都被标记,然后
Press the ‘A’ key to select all on the model
按“ A ”键选择所有型号
Press the ‘U’ key
按“ U ”键
Select the ‘UVnwrap’ option from the context menu
从上下文菜单中选择“ UVnwrap ”选项
And you should end up with a UV map like the following:
您最终应获得如下的UV贴图:

Although the above UV Map is problematic in that it is not using all the the space efficiently, nevertheless, below is a video of the process:
尽管上面的UV Map存在问题,因为它没有有效地利用所有空间,不过,下面是该过程的视频:

第9步-将图像添加到模型 (Step 9 — Adding an image to the model)
Before I add an image, I created additional seams to mark out all of the Rhombuses. This allowed UV Mapped areas to be distributed more equally across the 2d plane (shown on the left below):
在添加图像之前,我创建了其他接缝以标记出所有菱形。 这使“ UV映射”区域在2d平面上的分布更加均匀(如下左图所示):

To add an image to the model, select the ‘Material Properties’ tab from the right hand tabbed menu highlighted below:
要将图像添加到模型,请从下面突出显示的右侧选项卡式菜单中选择“ 材料属性 ”选项卡:

Click on the ‘New’ button
点击“ 新建 ”按钮

Then click on the circle to the right of the ‘Base Color’ label, which will bring up a context menu. Select ‘Image Texture’.
然后单击“ 基础颜色 ”标签右侧的圆圈,这将弹出一个上下文菜单。 选择“ 图像纹理 ”。
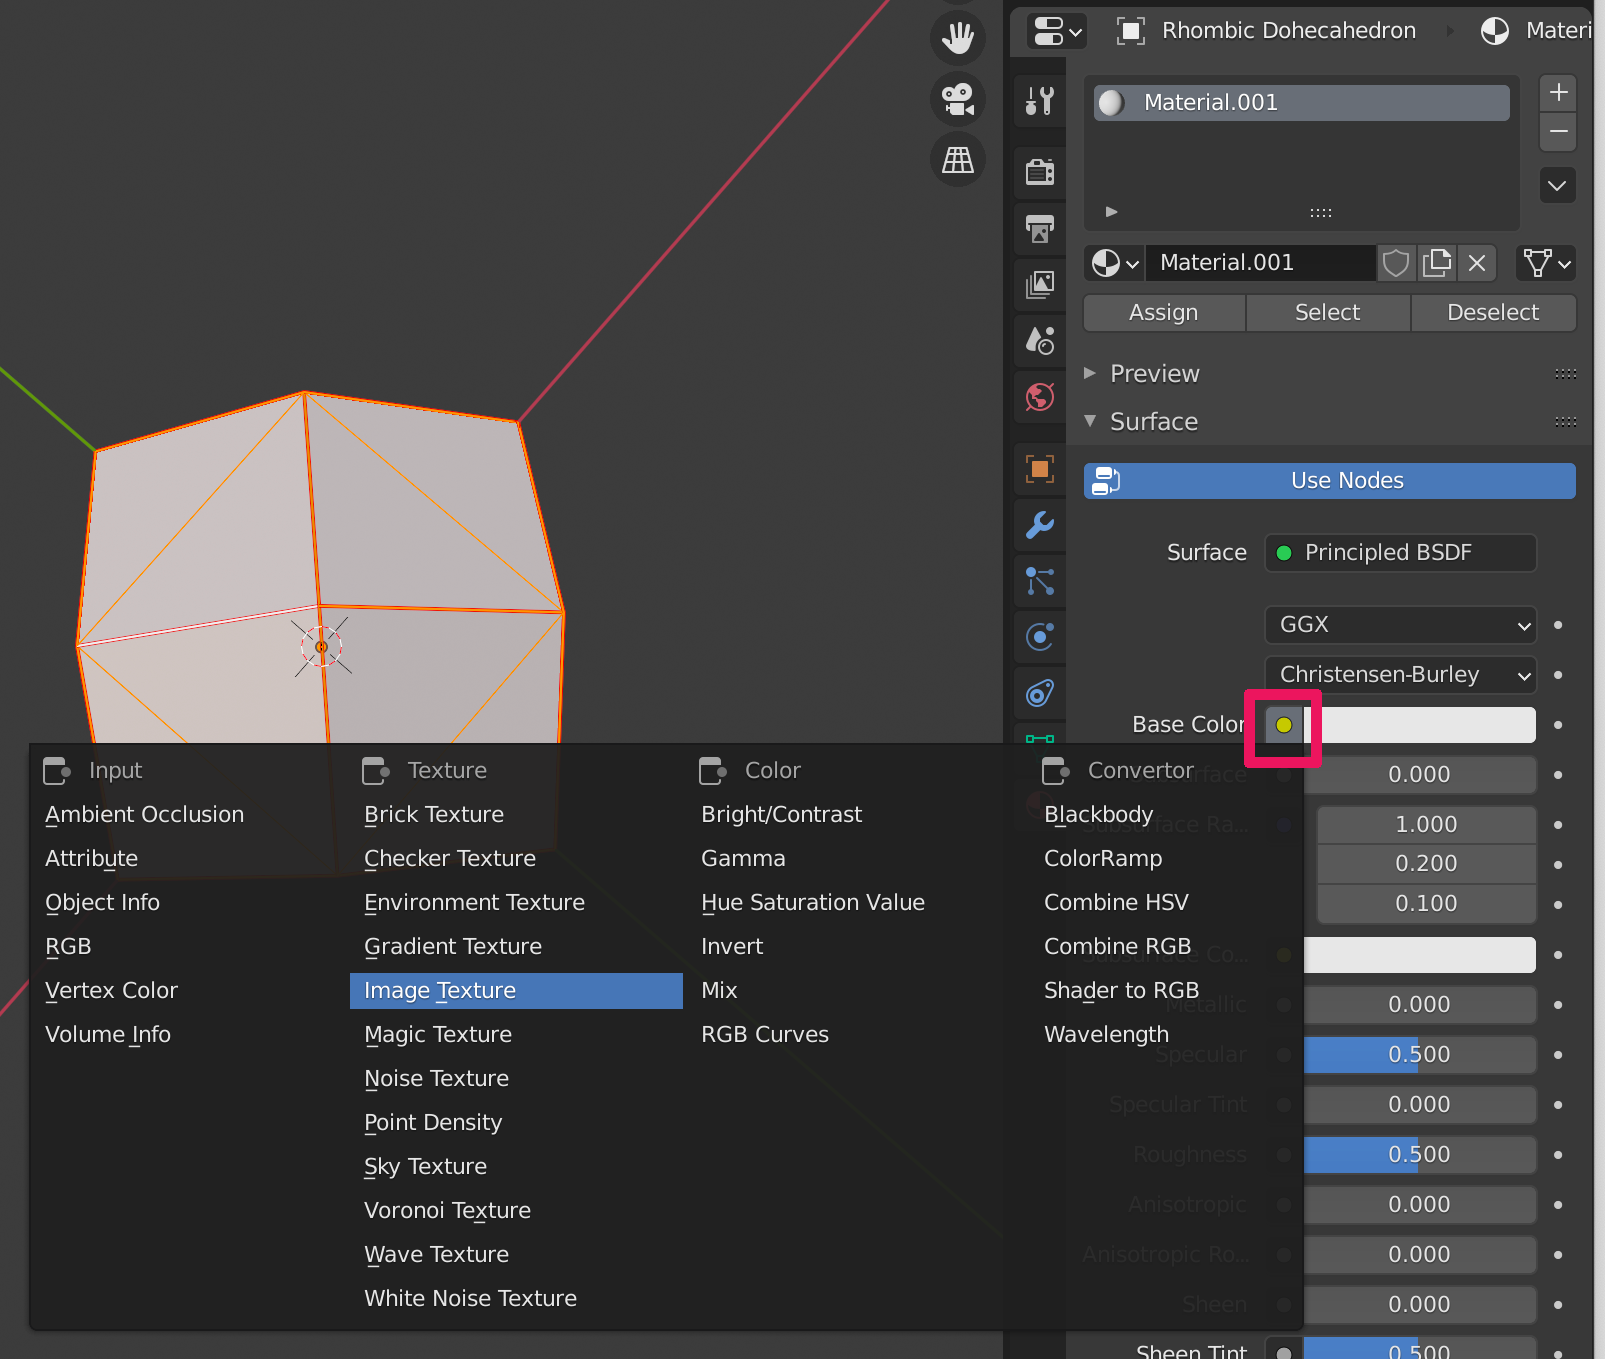
The ‘Base Color’ label will now show the value ‘Image Texture’ with an additional two buttons, namely ‘New’, and ‘Open’.
现在,“ 基本色 ”标签将显示值“ 图像纹理 ”以及另外两个按钮,即“ 新建 ”和“ 打开 ”。

Click on the ‘Open’ button, select an image and everything should be fine…
点击“ 打开 ”按钮,选择一张图片,一切都应该没问题…
The following image was used for the test, it has a white cross in the centre to show how it gets mapped from 2d to 3d.
下图用于测试,其中心有一个白色十字,以显示其如何从2d映射到3d。

Which then gets wrapped around the 3d object using the UV Map, thusly
然后使用UV Map将其包裹在3d对象周围

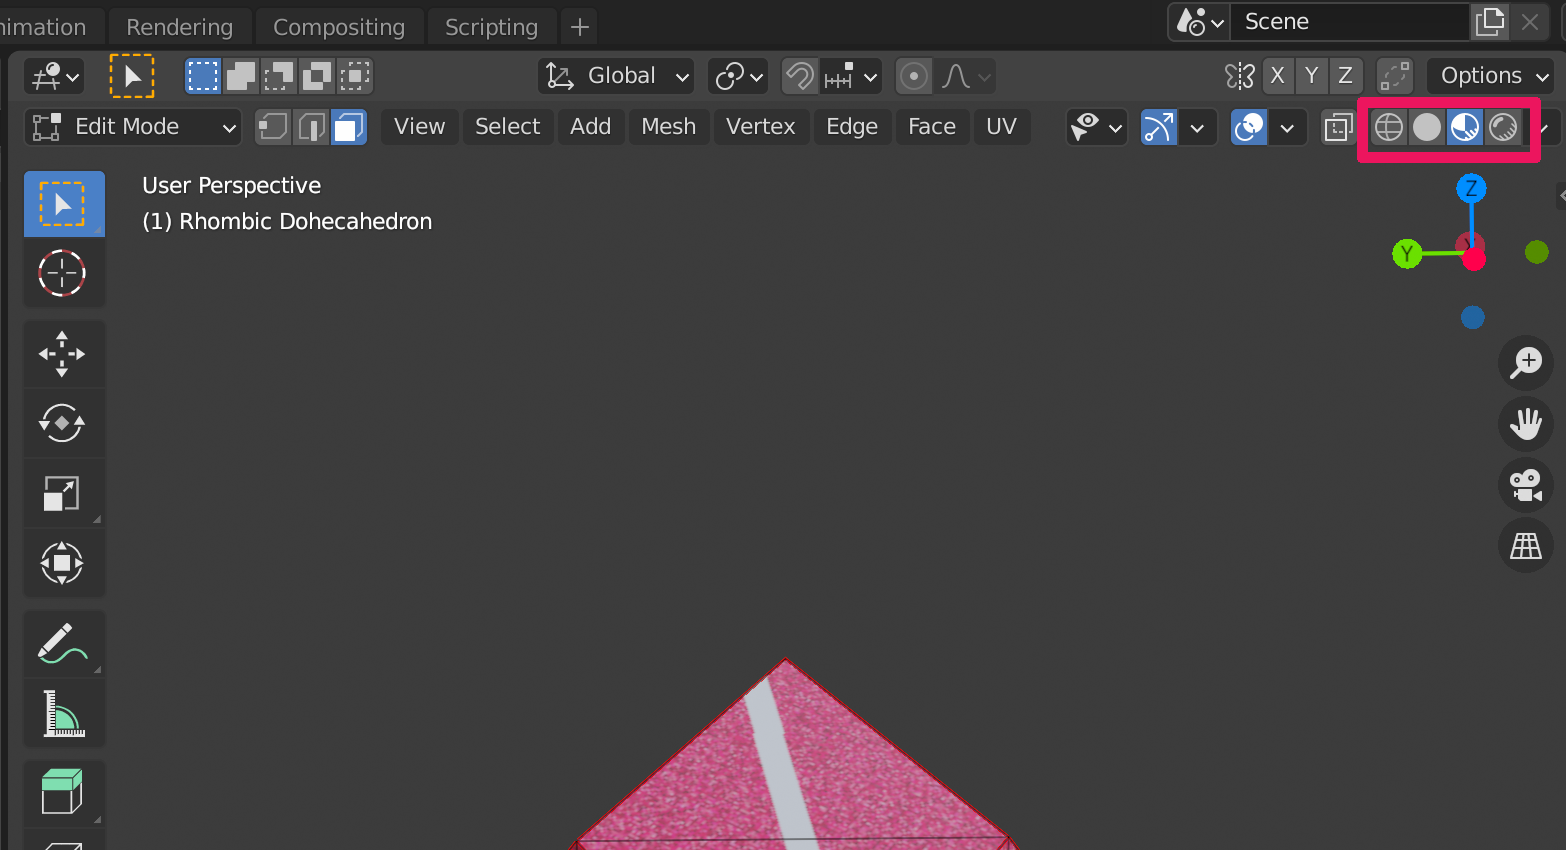
You will notice that the white cross in the image does not align completely with the sides. To ensure that every side is mapped the way in which it should against an object — the next part will go through how to ensure that an image turns up where it should.
您会注意到图像中的白色十字与侧面没有完全对齐。 为了确保将每一面映射到应与对象相对应的方式,下一部分将介绍如何确保图像出现在应有的位置。
If the image does not show on the model, your ‘Viewport Shading’ mode may still be in ‘Solid’, rather than ‘Material Preview’.
如果图像未显示在模型上,则“ 视口着色 ”模式可能仍处于“ 实体 ”模式,而不是“ 材质预览 ”模式。
This is a simple change, although you may need to reduce the size of some of the option windows to be able to click on the correct viewport shading mode which can be found in the top right hand corner of the User Perspective pane.
这是一个简单的更改,尽管您可能需要减小某些选项窗口的大小才能单击正确的视口着色模式,该模式可在“用户透视图”窗格的右上角找到。
If you cannot see the option, you will collapse the right hand menu options as shown below.
如果看不到该选项,则将折叠右侧菜单选项,如下所示。

步骤10 —导出模型 (Step 10 — Exporting the model)
The model should be exported to the .fbx file format.
模型应导出为.fbx文件格式。
Select ‘File’ from the menu
从菜单中选择“ 文件 ”
Select ‘Export’
选择“ 导出 ”
Select the ‘FBX (.fbx)’ option
选择“ FBX(.fbx) ”选项
I named it ‘medium-rhombic.fbx’, however, whatever you named it, remember the name and location to the file.
我将其命名为“ medium-rhombic.fbx ”,但是无论您如何命名,都请记住文件的名称和位置。

步骤11 —转换模型 (Step 11 — Converting the model)
fbx-conv is the programme that can translate an .fbx model into .g3db format which libgdx can use natively.
fbx-conv是可以将.fbx模型转换为libgdx可以本地使用的.g3db格式的程序。
from a terminal (or command prompt), the usage is:
从终端(或命令提示符)中,用法是:
Usage: fbx-conv.exe [options] <input> [<output>]Options:
-? : Display this help information.
-o <type>: Set the type of the output file to <type>
-f : Flip the V texture coordinates.
-p : Pack vertex colors to one float.
-m <size>: The maximum amount of vertices or indices a mesh may contain (default: 32k)
-b <size>: The maximum amount of bones a nodepart can contain (default: 12)
-w <size>: The maximum amount of bone weights per vertex (default: 4)
-v : Verbose: print additional progress information
<input> : The filename of the file to convert.
<output> : The filename of the converted file.
<type> : FBX, G3DJ (json) or G3DB (binary).
running the conversion command on the ‘medium-rhombic.fbx’ file that was exported in Step 10:
在步骤10中导出的' medium-rhombic.fbx '文件上运行转换命令:
fbx-conv -v -o G3DB medium-rhombic.fbx medium-rhombic.g3dbINFO: FBX to G3Dx converter, version 0.01.0000 x64 , FBXSDK 2019.00
STATUS: Loading source file
STATUS: FBX file version 7 4 0
PROGRESS: Import FBX 100.00%
VERBOSE: [Rhombic Dohecahedron] polygons: 24 (72 indices), control points: 14
STATUS: Converting source file
STATUS: Closing source file
VERBOSE: Listing model information:
VERBOSE: ID :
VERBOSE: Version : Hi=0, Lo=1
VERBOSE: Meshes : 1 (60 vertices, 1 parts, 72 indices)
VERBOSE: Nodes : 1 root, 1 total, 1 partsVERBOSE: Materials : 1 (1 textures)
STATUS: Exporting to G3DB file: medium-rhombic.g3db
STATUS: Closing exported file
Note the line above:
注意上面的行:
VERBOSE: Materials : 1 (1 textures)If there are no materials, then libGDX will fail to load the model, so check to make sure that a material is exported. (Hence the ‘-v’, or verbose, command line argument was used with fbx-conv).
如果没有材料,那么libGDX将无法加载模型,因此请检查以确保导出了材料。 (因此fbx-conv使用了-v或冗长的命令行参数)。
结语 (Wrap-up)
So, through this guide, you have seen how to import a model and map an image texture to it. In the next guide, I will run through how to align the image to the edges and make sure that everything looks neat and tidy.
因此,通过本指南,您已经了解了如何导入模型并将图像纹理映射到该模型。 在下一个指南中,我将介绍如何将图像与边缘对齐,并确保所有内容看起来整洁。
Important Note: You will need to have both the texture image file and the newly created .g3db file in the
重要说明:您将需要在目录中同时包含纹理图像文件和新创建的.g3db文件。
/core/assets/ directory of your libGDX project or it will not load properly.
libGDX项目的目录,否则将无法正确加载。
libgdx 3d


 474
474

 被折叠的 条评论
为什么被折叠?
被折叠的 条评论
为什么被折叠?
 到【灌水乐园】发言


