rxswift mvvm
For almost 4 years I am using MVVM for the development of iOS Apps. Managing the communication by a bunch of delegate methods and closures always felt like a bit of a hassle — but I did not know what I was missing.
在将近4年的时间里,我一直使用MVVM来开发iOS应用。 通过一堆委托方法和闭包来管理通信总是感觉有些麻烦,但是我不知道自己缺少什么。
At some point I had to develop an app in Xamarin — also using MVVM. But there was one suprise. Using Visual Studio and its bindings it was… nice.
在某些时候,我不得不在Xamarin中开发一个应用程序-也使用MVVM。 但是有一个惊喜。 使用Visual Studio及其绑定非常好。
But back to Xcode! Here the problem remains. But there is a cure! 🙏
但是回到Xcode! 问题仍然存在。 但是有治愈方法! 🙏
RxSwift和RxCocoa (RxSwift & RxCocoa)
Using it for Android development it is more or less state of the art. This was also the way I recognised there is a solution for the delegate and clousure mess.
将其用于Android开发或多或少是最新技术。 这也是我认识到可以解决委托和混乱问题的方法。
创建ViewModel (Creating the ViewModel)
import Foundation
import RxSwift
import RxCocoa


class ViewModel {


	private let imageRelay: BehaviorRelay<UIImage?> = BehaviorRelay(value: nil)
	private let labelTextRelay: BehaviorRelay<String?> = BehaviorRelay(value: nil)


	var buttonTapRelay = PublishRelay<Void>()


	private let disposeBag = DisposeBag()
	private let model: [Model]


	private var position = 0


	var imageDriver: Driver<UIImage?> {
		return self.imageRelay.asDriver()
	}


	var labelDriver: Driver<String?> {
		return self.labelTextRelay.asDriver()
	}


	init(model: [Model]) {
		self.model = model


		self.createSubscription()


		self.imageRelay.accept(model[0].image)
		self.labelTextRelay.accept(model[0].text)
	}


	private func createSubscription() {
		self.buttonTapRelay.subscribe(onNext: { _ in
			self.position = self.position + 1 >= self.model.count ? 0 : self.position + 1
			self.imageRelay.accept(self.model[self.position].image)
			self.labelTextRelay.accept(self.model[self.position].text)
		}).disposed(by: self.disposeBag)
	}
}BehaviourRelay: Stores your variable and can’t have an error. This is a very practical feature, since our UIView elements shouldn't get any errors. Please don’t misunderstand — errors that you want to show to the user will be converted to a BehaviourRelay as well, but the View itself shouldn't receive an error.
BehaviourRelay :存储您的变量并且不会出错。 这是一项非常实用的功能,因为我们的UIView元素不会出现任何错误。 请不要误会-您想要显示给用户的错误也将转换为BehaviourRelay,但是View本身不会出现错误。
PublishRelay: Used to observe user interaction. Here it will be used to watch for a Button tap.
PublishRelay:用于观察用户交互。 在这里,它将用于监视按钮点击。
Driver: Also no errors and always on the main thread. This also means no more DispatchQueue.main closures or even worse forgetting to use it! If you create the driver from some object that can receive errors you will need to handle the error in the init method.
驱动程序:也没有错误,并且始终在主线程上。 这也意味着不再需要DispatchQueue.main关闭,甚至更不要忘记使用它了! 如果从某个可能接收错误的对象创建驱动程序,则需要在init方法中处理该错误。
创建ViewController (Creating the ViewController)
import UIKit
import RxCocoa
import RxSwift


class ViewController: UIViewController {


	@IBOutlet weak var imageView: UIImageView!
	@IBOutlet weak var label: UILabel!
	@IBOutlet weak var nextButton: UIButton!


	let viewModel = ViewModel(model: Model.demoModels())

	private let disposeBag = DisposeBag()


	override func viewDidLoad() {
		super.viewDidLoad()


		self.createBindings()
	}


	private func createBindings() {
		self.nextButton.rx.tap.bind(to: self.viewModel.buttonTapRelay).disposed(by: self.disposeBag)
		self.viewModel.imageDriver.drive(self.imageView.rx.image(withDuration: 0.5)).disposed(by: self.disposeBag)
		self.viewModel.labelDriver.drive(self.label.rx.text).disposed(by: self.disposeBag)
	}
}
Bind: Bind one rx resource to another. If the one changes the other will also change.
绑定:将一个rx资源绑定到另一个。 如果一个改变,另一个也会改变。
Drive: Like a binding it will change a value if the other changes but on the Main Thread.
驱动器:像绑定一样,如果其他更改(但在主线程上),它将更改一个值。
DisposeBag: This will deinit all rx bindings and subscriptions after the disposebag released
DisposeBag:在disposebag释放后,它将取消所有rx绑定和订阅
Rx扩展 (RxExtension)
import UIKit
import RxCocoa
import RxSwift


extension Reactive where Base: UIImageView {


	func image(withDuration: TimeInterval) -> Binder<UIImage?> {
		return Binder(base) { imageView, image in


			// needed to avoid "Value of type 'UIView' has no member 'image'"
			let baseImageView = imageView


			UIView.transition(with: imageView,
							  duration: withDuration,
							  options: .transitionCrossDissolve,
							  animations: { baseImageView.image = image },
							  completion: nil)
		}
	}
}
With an extension it is possible to define your own binding / driver behaviour. In this case we will add an animation if the image is changed. This concept can be applied on every UIView element. So you can create your custom binding behaviour library.
通过扩展,可以定义自己的绑定/驱动程序行为。 在这种情况下,如果图像发生更改,我们将添加动画。 这个概念可以应用于每个UIView元素。 因此,您可以创建自定义绑定行为库。
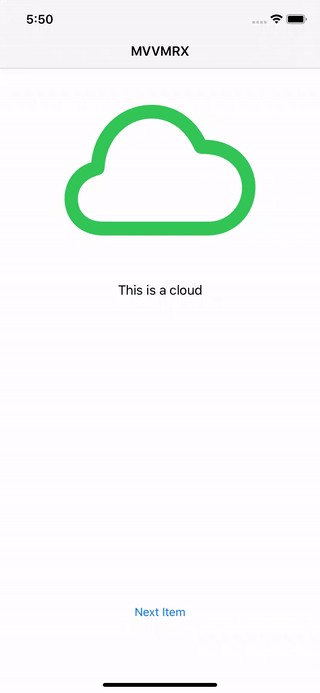
结果 (The Result)

结论 (Conclusion)
With only 3 lines of ViewController code we can handle all the UI related behaviour. For me it is a true alternative to keep the ViewController simple and clean — even in a more complex use case.
仅需三行ViewController代码,我们就可以处理所有与UI相关的行为。 对我来说,即使在更复杂的用例中,保持ViewController简单简洁也是一个真正的选择。
So if you plan to use MVVM for an iOS App give it a try 🤙
因此,如果您打算将MVVM用于iOS应用,请尝试一下🤙
翻译自: https://medium.com/swlh/how-rxswift-became-a-friend-with-mvvm-afd2ee31bb0e
rxswift mvvm


 1532
1532

 被折叠的 条评论
为什么被折叠?


