


github请求超时
One of the things I love about software engineering is that if I find myself doing a task often, I can instead choose to invest the time in automating it to save time in the long term.
我喜欢软件工程的一件事是,如果我发现自己经常执行某项任务,那么我可以选择花费时间进行自动化,以长期节省时间。
I have used this technique across many things both inside the workplace and at home.
我已经在工作场所和家里的许多地方使用了此技术。
One such example of when I have automated something was when I wanted to buy a particular house. Rather than obsessively checking the website to see if it was available, I instead wrote a web scraper in Node.js that would check the page for me. It ran every 15 minutes on a server on AWS and texted me when the house came onto the market with the details needed to reserve it.
例如,当我想购买一所特定的房屋时,便完成了一些自动化操作。 我不是执着地检查网站是否可用,而是在Node.js中编写了一个网络抓取工具来为我检查该页面。 它每15分钟在AWS的一台服务器上运行一次,并在房子上市时给我发短信,并提供了保留它的详细信息。
All this talk about automating things brings me to something I have been working on lately, which is automating common feedback on pull requests.
所有关于自动化事情的讨论都将我带到了我最近一直在研究的东西上,这就是自动化对请求请求的常见反馈。
为什么要自动执行拉取请求反馈? (Why automate pull request feedback?)
When you raise a pull request, the faster that you receive the feedback, the quicker in which it can be resolved. It is therefore worth considering that a bot that provides feedback by analysing the code will always be faster than a human.
提出拉取请求时,收到反馈的速度越快,可以更快地解决该反馈。 因此,值得考虑的是,通过分析代码来提供反馈的机器人将永远比人类更快。
Another thing to consider is that when you choose to automate your pull request feedback, you are by proxy also codifying your teams best practices. This can have a positive impact on your code because it will reduce the number of cases where code that does not follow your best practices gets missed during the normal review.
要考虑的另一件事是,当您选择自动执行拉取请求反馈时,通过代理您还可以编纂团队的最佳实践。 这可以对您的代码产生积极影响,因为它可以减少在正常检查期间遗漏了未遵循最佳实践的代码的情况。
A final reason for automating pull request feedback is that feedback from a bot carries a different emotional response to that received from a colleague. A bot is not out to personally attack someone else code so this can have a positive effect on morale.
自动执行拉取请求反馈的最终原因是,机器人发出的反馈与从同事那里收到的反馈不同。 机器人不会亲自攻击其他人的代码,因此这可以对士气产生积极影响。
That said, automation of pull request feedback should be used in parallel to human reviews. The automation is focusing on enforcing your teams best practices while a normal review would pick up issues with the overall approach to solving the problem.
就是说,拉取请求反馈的自动化应该与人工审核同时使用。 自动化的重点是加强团队的最佳实践,而正常的审查会从解决问题的整体方法中发现问题。
设置Danger.js以提供拉取请求反馈 (Setting up Danger.js to provide pull request feedback)
To begin with I am going to explain how we can setup Danger.js on a GitHub repository. In this first instance it will simply output a message on the pull request with a list of files that have been changed.
首先,我将解释我们如何在GitHub存储库上设置Danger.js。 在第一个实例中,它将仅在请求请求中输出一条消息,其中包含已更改的文件列表。
Danger.js的初始设置 (Initial setup of Danger.js)
The first step to setting up danger on your project is to create a new branch, I normally do this on the CLI
在项目上设置危险的第一步是创建一个新分支,通常我会在CLI上执行此操作
git checkout -b dangerHaving created our branch we now need to install danger from npm.
创建分支后,我们现在需要从npm安装danger 。
npm install danger --save-devHaving installed Danger.js, you now will need to create a danger file in the root of your project. For this we can use either JavaScript or TypeScript, with dangerfile.js used for JavaScript and dangerfile.ts. The main benefit I have seen from using TypeScript here is the type definitions provided with the node module are much better at giving you information about the API than the docs are.
安装了Danger.js之后,您现在需要在项目的根目录中创建一个危险文件。 为此,我们可以使用JavaScript或TypeScript,将angerfile.js用于JavaScript和angerfile.ts。 我从这里使用TypeScript看到的主要好处是,节点模块提供的类型定义比文档更能为您提供有关API的信息。
dangerfile.ts/dangerfile.js
angerousfile.ts / dangerfile.js
import {message, danger} from "danger"const newFiles = danger.git.created_files.join("- ")message("New Files in this PR: \n - " + newFiles);配置GitHub动作 (Configuring a GitHub action)
The next step is to configure a GitHub action to run Danger.js when a pull request is raised.
下一步是配置GitHub操作,以在发出拉取请求时运行Danger.js。
To do this we need to create a workflow. We do this by creating a Yaml file in the .github/workflows directory. An example of the workflow is found below:
为此,我们需要创建一个工作流程。 为此,我们在.github/workflows目录中创建Yaml文件。 下面是工作流程的一个示例:
name: Danger JS
on: [pull_request]
jobs:
  test:
    runs-on: ubuntu-latest
    steps:
    - uses: actions/checkout@master
    - name: Use Node.js 12.x
      uses: actions/setup-node@v1
      with:
        node-version: 12.x
    - name: Danger
      run: npx danger ci
      env:
        GITHUB_TOKEN: ${{ secrets.GITHUB_TOKEN }}
If we break the workflow down into its key pars:
如果我们将工作流程细分为关键指标:
name: the name of the github action that will appear on the pull request.
name :将在拉取请求中出现的github动作的名称。
on: when the action will run, in our case when a pull request is created or changed
on :动作将在何时运行,在我们的情况下是创建或更改拉取请求
jobs: a list of the jobs that will be run, in this case we specify one job titled “test”
jobs :将要运行的作业的列表,在这种情况下,我们指定一个名为“ test”的作业
steps: the steps which GitHub actions will run, in this case checking out the repository, setting up Node.js and then using it to run danger.
步骤:GitHub操作将运行的步骤,在这种情况下,签出存储库,设置Node.js,然后使用它运行危险。
拉动请求中的运行危险 (Running Danger on the pull request)
Having configured both Danger.js and a Github Action workflow we can now test this in GitHub by raising a pull request using our branch.
配置了Danger.js和Github Action工作流之后,我们现在可以在GitHub上通过使用我们的分支提出拉取请求来对此进行测试。
After raising our pull request we will need to wait a couple minutes for the action to run and then we will see the feedback on the PR posted by the github actions bot.
提出拉取请求后,我们将需要等待几分钟才能运行该操作,然后才能看到github actions机器人发布的有关PR的反馈。

其他Danger.js动作的食谱(Recipes for other Danger.js actions)
In the initial setup we simply had Danger.js leave a comment with a list of new files that are added by the pull request. While a good example for setting up has limited usefulness, in this section we will list some more recipes that you can use with Danger.js to make it more useful.
在初始设置中,我们只是让Danger.js在注释中添加了由pull请求添加的新文件的列表。 尽管一个好的设置示例的用途有限,但在本节中,我们将列出更多可与Danger.js结合使用的食谱,以使其更加有用。
如果package.json更改,请确保更新package-lock.json (Ensure package-lock.json is updated if package.json changes)
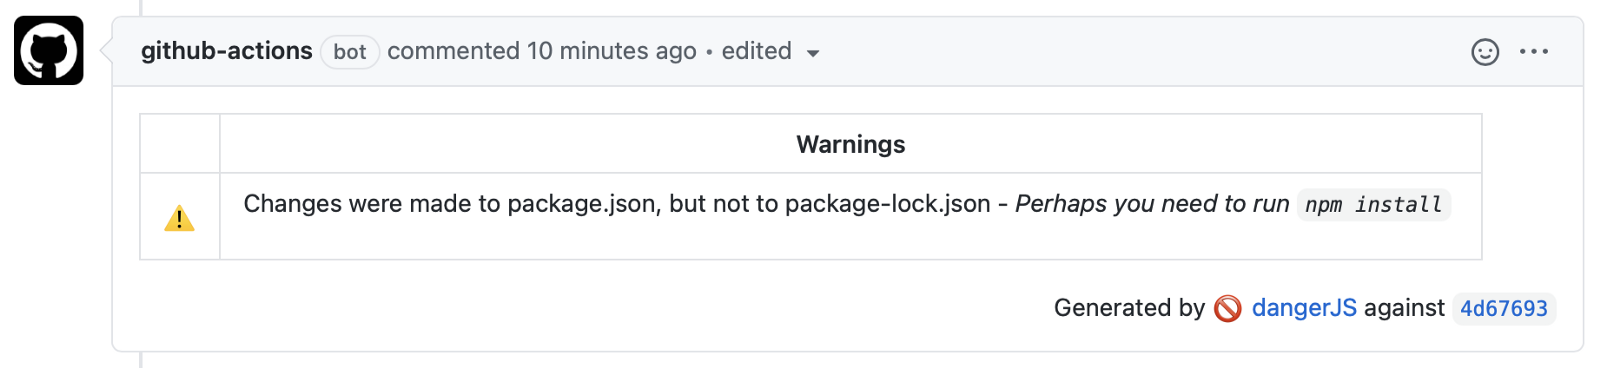
When a new node package is installed from npm it results in a change to both the package.json and package-lock.json files. Both of these should be commited to the repository so this check will ensure you don’t forget to commit the lock file if the package.json has changed.
从npm安装新的节点程序包时,将同时更改package.json和package-lock.json文件。 这两个都应提交到存储库中,因此,如果package.json更改,则此检查将确保您不会忘记提交锁定文件。
Code example
代码示例
const packageChanged = danger.git.modified_files.includes('package.json');
const lockfileChanged = danger.git.modified_files.includes('package-lock.json');const packageChanged = danger.git.modified_files.includes('package.json');
const lockfileChanged = danger.git.modified_files.includes('package-lock.json');if (packageChanged && !lockfileChanged) {
    warn(`Changes were made to package.json, but not to package-lock.json - <i>'Perhaps you need to run `npm install`?'</i>`);
}
Output on GitHub
在GitHub上输出
View recipe on GitHub: https://github.com/jonathan-fielding/danger-js-example/pull/2
在GitHub上查看食谱: https : //github.com/jonathan-fielding/danger-js-example/pull/2
鼓励较小的公关 (Encourage smaller PR’s)
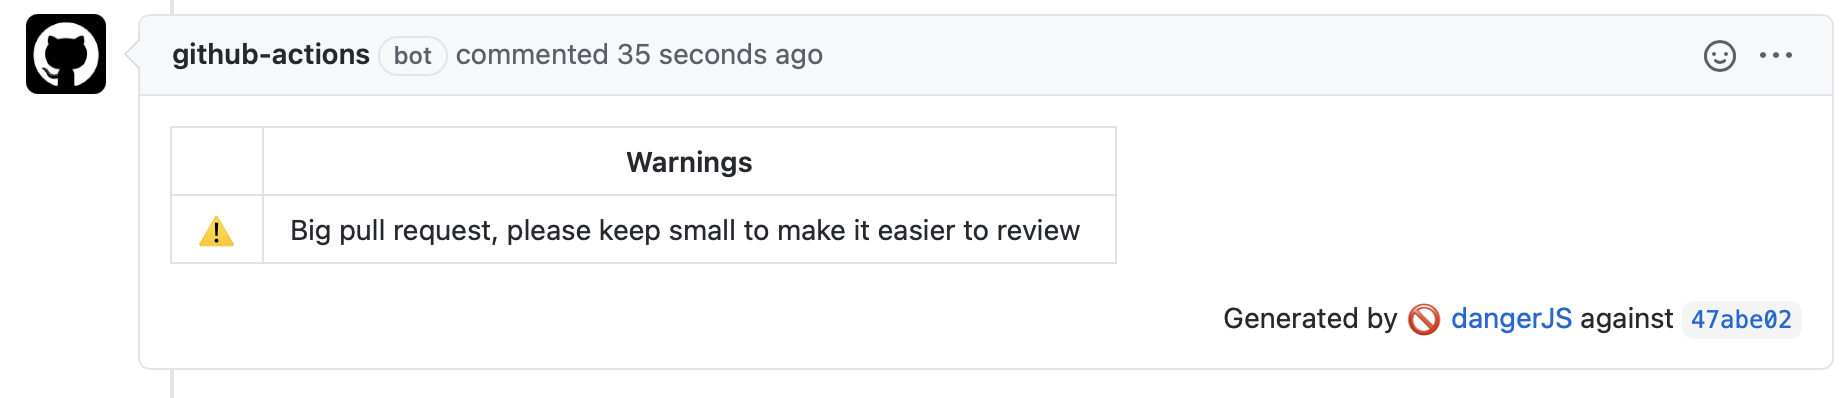
Large pull requests are difficult for a human to review accurately because it can be hard to keep track of all the different things that have changed and how they relate to one another. To encourage your team to write smaller pull requests you can get Danger.js to post a warning if the pull request is too long.
大的拉动请求对于人类来说很难准确地进行检查,因为很难跟踪所有已更改的不同事物以及它们之间的关系。 为了鼓励您的团队编写较小的拉取请求,如果拉取请求过长,可以使Danger.js发出警告。
Code example
代码示例
import {warn, danger} from "danger"const bigPRThreshold = 600;if (danger.github.pr.additions + danger.github.pr.deletions > bigPRThreshold) {
  warn('Big pull request, please keep small to make it easier to review');
}
Output on GitHub
在GitHub上输出
View recipe on GitHub: https://github.com/jonathan-fielding/danger-js-example/pull/3
在GitHub上查看食谱: https : //github.com/jonathan-fielding/danger-js-example/pull/3
鼓励有用的提交消息 (Encourage useful commit messages)
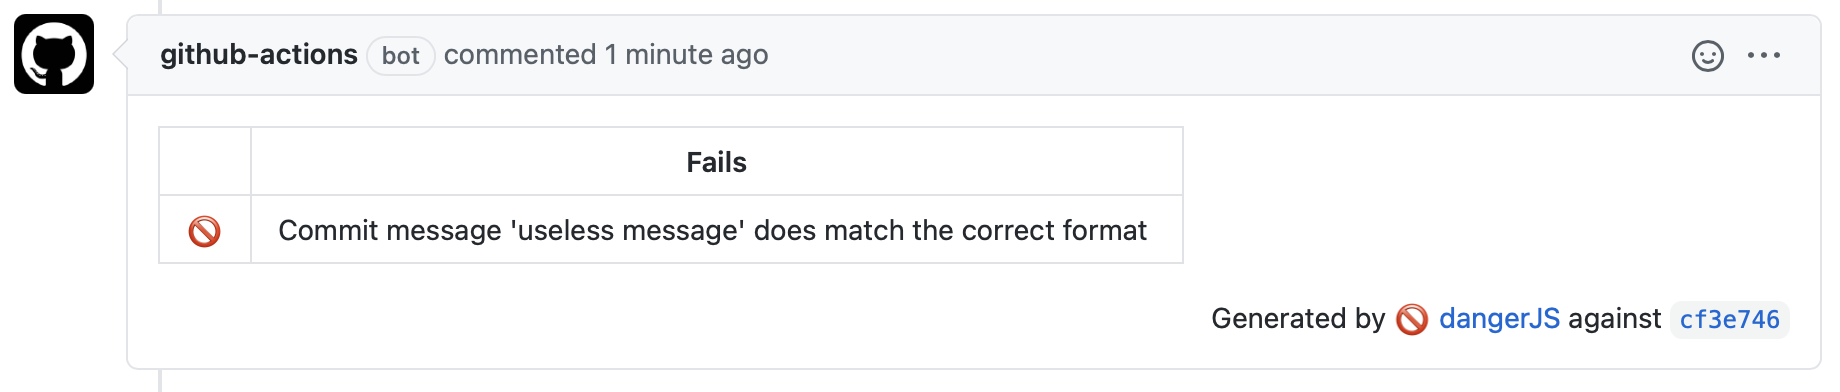
When working on projects such as JavaScript libraries which are semantically versioned it can be good for your commit messages to follow a similar structure. This helps you to remember how your next release should be versioned based on the commit messages since the last release.
当处理语义版本化的项目(例如JavaScript库)时,提交消息遵循类似的结构可能会很有帮助。 这可以帮助您记住自上一个版本以来应如何根据提交消息对下一个版本进行版本控制。
Commit message formats can be enforced quite easily with Danger.js by checking the commit messages in the PR.
通过检查PR中的提交消息,可以使用Danger.js轻松实施提交消息格式。
Code example
代码示例
import {fail, danger} from "danger"danger.git.commits.forEach(commit => {  if (!commit.message.match(/^(feat:)|(fix:)|(major:)|(chore:)/g)) {
    fail(`Commit message '${commit.message}' does match the correct format`);
  }})
Output on GitHub
在GitHub上输出
View recipe on GitHub: https://github.com/jonathan-fielding/danger-js-example/pull/4
在GitHub上查看食谱: https : //github.com/jonathan-fielding/danger-js-example/pull/4
实施Danger.js检查 (Enforcing Danger.js checks)
Having setup your Danger.js checks it is advised that you enforce Danger.js status checks passing before code can be merged into your master branch.
设置好Danger.js检查后,建议您先执行Danger.js状态检查,然后再将代码合并到master分支中。
To do this you want to head over to the repositories settings on GitHub. You then want to select add rule, and then then enable “Require status checks to pass before merging” for the branch.
为此,您需要转到GitHub上的存储库设置。 然后,您要选择添加规则,然后为分支启用“合并之前要求状态检查通过”。

结语 (Wrapping up)
In wrapping up this post, I just wanted to say that hopefully from the recipes I provided you can see that anything you do with Danger.js is just JavaScript.
在总结这篇文章时,我只是想说说,希望从我提供的食谱中可以看到,使用Danger.js所做的任何事情都只是JavaScript。
In reality, this means that you can very quickly write much more complex checks of the pull request and then take advantage of the Danger.js API to provide feedback.
实际上,这意味着您可以非常快速地编写对拉取请求的更为复杂的检查,然后利用Danger.js API提供反馈。
I hope you found this useful and I encourage you to follow me for more posts on coding, performance and accessibility.
我希望您觉得这很有用,并鼓励您关注我以获取更多有关编码,性能和可访问性的文章。
github请求超时


 4467
4467


 被折叠的 条评论
为什么被折叠?
被折叠的 条评论
为什么被折叠?
 到【灌水乐园】发言


