


ios开发swift
让我们在该UI中工作! (Let us work in that UI!)
If you are reading this post, it is likely that you read the first part and the second part.
As a refresher, here is the current status of our project:
作为回顾,这是我们项目的当前状态:
✅ Augmenting user stories using BDD scenarios;
using使用BDD场景增强用户故事;
✅ Coding high-level features using executable specifications;
using使用可执行规范对高级功能进行编码;
✅ Coding low-level features using low-level specifications;
using使用底层规范对底层特征进行编码;
🛠 Coding high-level UI features using executable specifications;
using 使用可执行文件规范对高级UI功能进行编码;
Items marked with 🛠 will be covered in this part, while items marked with ⏭ will be implemented in other parts. Items marked with ✅ are already implemented.
标有🛠的项目将在本部分中介绍,而标有⏭的项目将在其他部分中实现。 标有✅的项目已经实施。
In this context, we will continue to develop code for our Weather-App.
在这种情况下,我们将继续为我们的Weather-App开发代码。
使用可执行文件规范对高级UI功能进行编码 (Coding high-level UI features using executable specifications)
After implementing both high-level and low-level features of our App, it is time to work in the most important part from the perspective of the user, the UI.
在实现了我们的应用程序的高级和低级功能之后,就该从用户角度来看最重要的部分了。
For this part, we should use start from our original scenario (see it here), but modify its implementation to use UI interactions.
对于这一部分,我们应该从原始场景开始使用(请参见此处 ),但修改其实现以使用UI交互。
With this in mind, here is our scenario:
考虑到这一点,这是我们的方案:
Scenario — Loading forecast successfully for two citiesGIVEN the target cities are San Francisco (SFO) and Porto Alegre (POA)AND in SFO, it is 20º, “Sunny”, with a min-max of 15º and 25ºAND in POA, it is 15º, “Cloudy”, with a min-max of 10º and 20ºAND the App has started to load the forecast for the target citiesWHEN loading finishes successfullyTHEN there should be two cities loaded, SFO and POAAND the cities should be in alphabetic orderAND it should be 15º, “Cloudy”, with a min-max of 10º and 20ºAND it should be 20º, “Sunny”, with a min-max of 15º and 25º
方案- 加载成功给定的目标城市 两市预测 是旧金山(SFO)和阿雷格里港(POA),并在证券及期货条例,这是20º,“ 艳阳天”, 用最小-最大的15º 和25ºANDI N POA是 15º, “阴天”,最小-最大为 10º 和 20º, 并且应用成功开始加载目标城市的预测。 成功完成加载之后 ,应该再加载两个城市,即SFO和POA , 城市应按字母顺序排列 , 并且应为 15º, “阴天”,最小最大值为 10º 和 20º, 并且应为 20º, “ Sunny” , 其最小最大值为 15º 和25 º
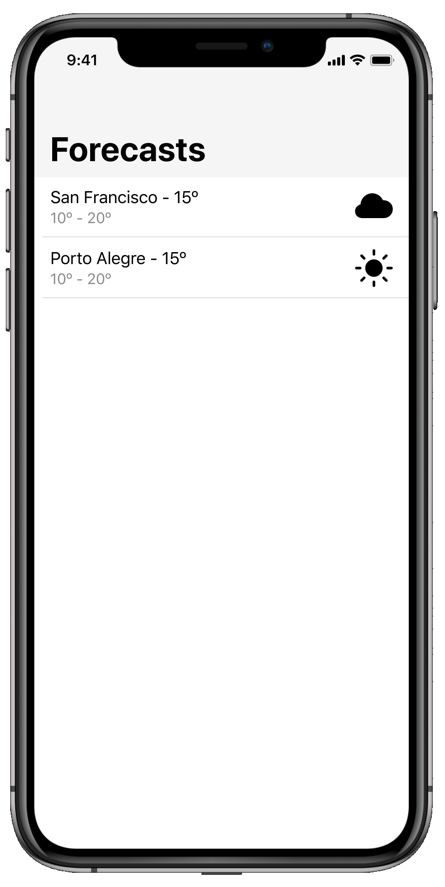
With this scenario in mind, our design team worked really hard and created an interface for this.
考虑到这种情况,我们的设计团队非常努力地工作,并为此创建了一个界面。
With this, we can begin to write code. We will continue to use the three-step process we have been using so far:
这样,我们就可以开始编写代码了。 我们将继续使用到目前为止一直使用的三步过程:
- Write a failing test. 编写失败的测试。
- Make the test pass. 使测试通过。
- Refactor. 重构。
步骤1 —编写失败的测试 (Step 1 — Writing a failing test)
Since we are using the same scenario we have used in the first part of the tutorial, we will replicate the same test which was used there, written with Quick & Nimble, but we will do so in the UI Tests target.
由于我们使用的是本教程第一部分中使用的相同场景,因此我们将复制使用Quick & Nimble编写的相同测试,但我们将在UI Tests目标中进行复制。
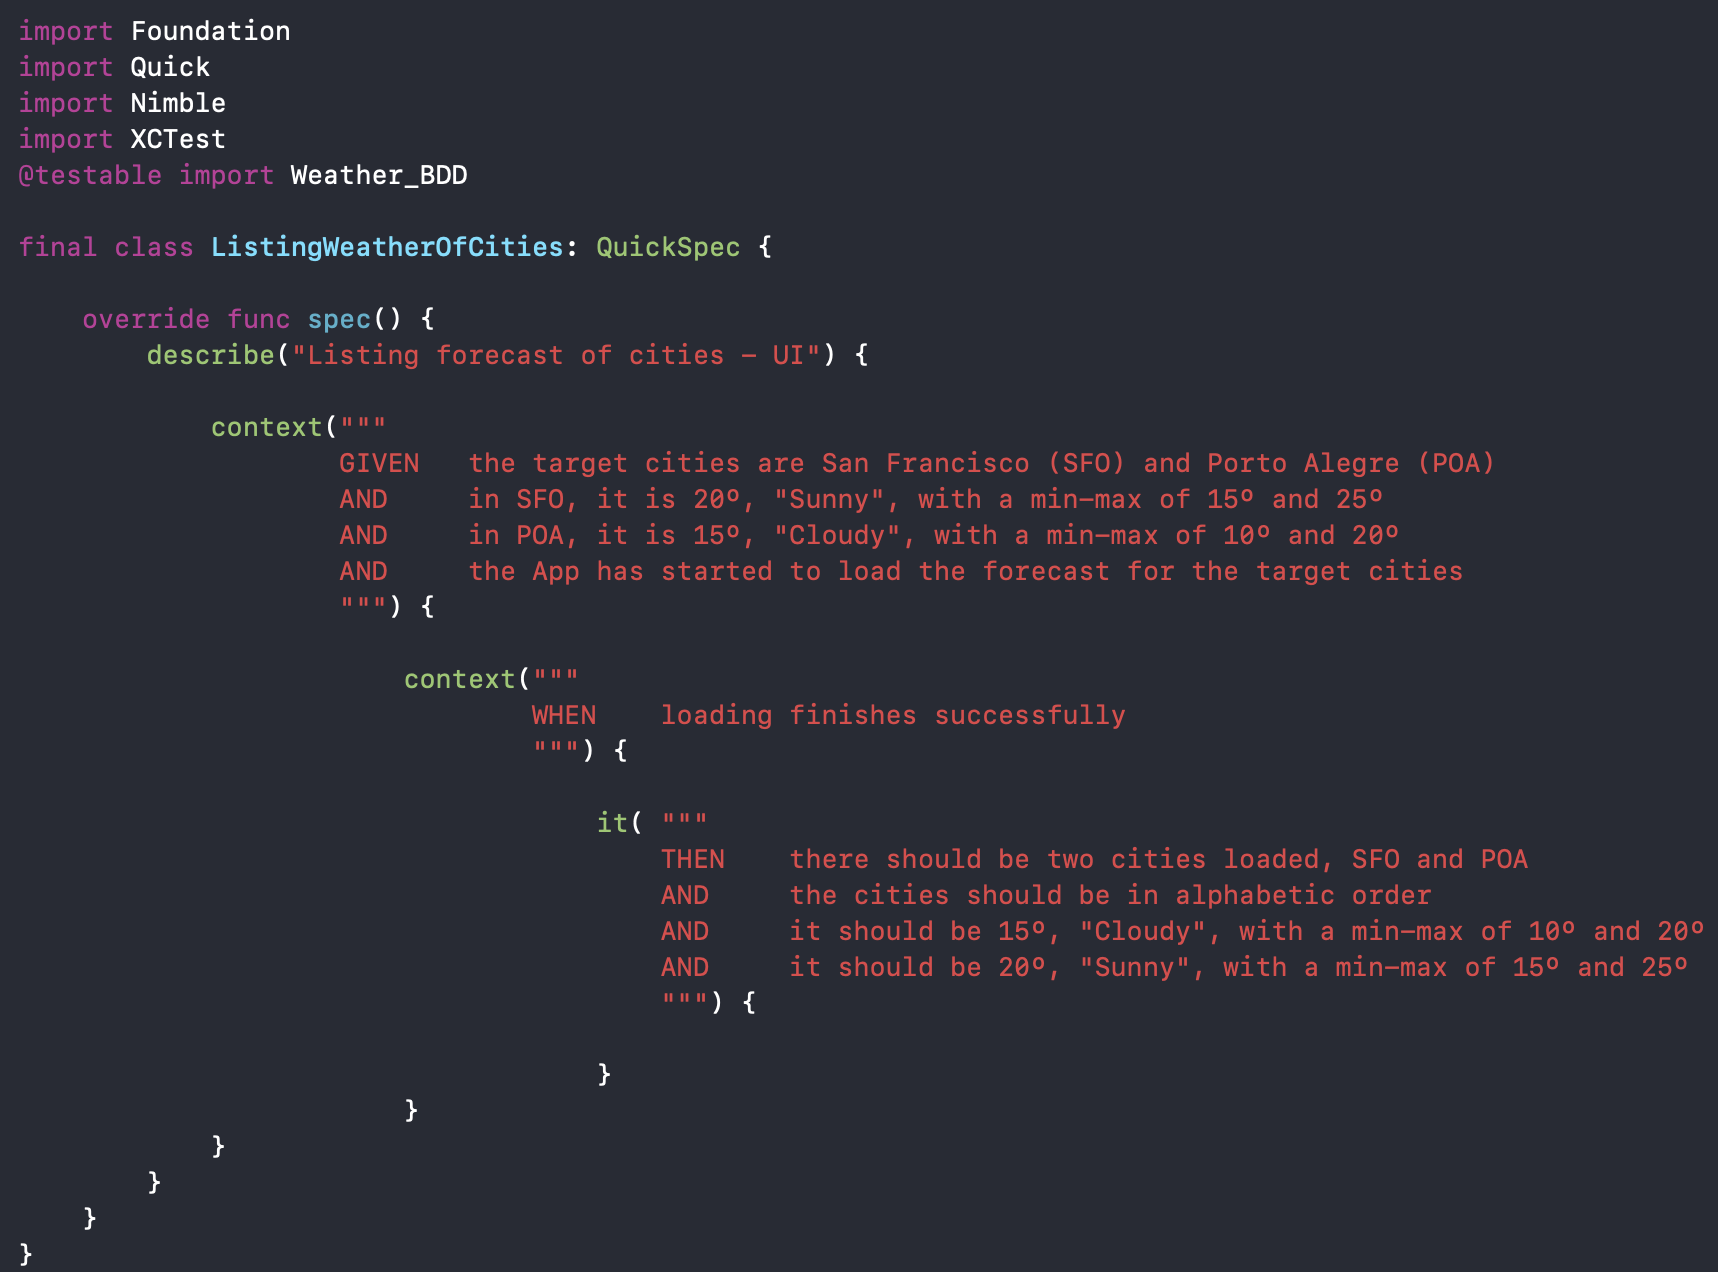
Since we need to launch our App to test its UI, we will write ou testing code inside the "THEN" statement only.
由于我们需要启动应用程序来测试其UI,因此我们仅在“ THEN”语句内编写测试代码。
We can use some XCTest directives to simulate the proposed UI.
我们可以使用一些XCTest指令来模拟建议的UI。
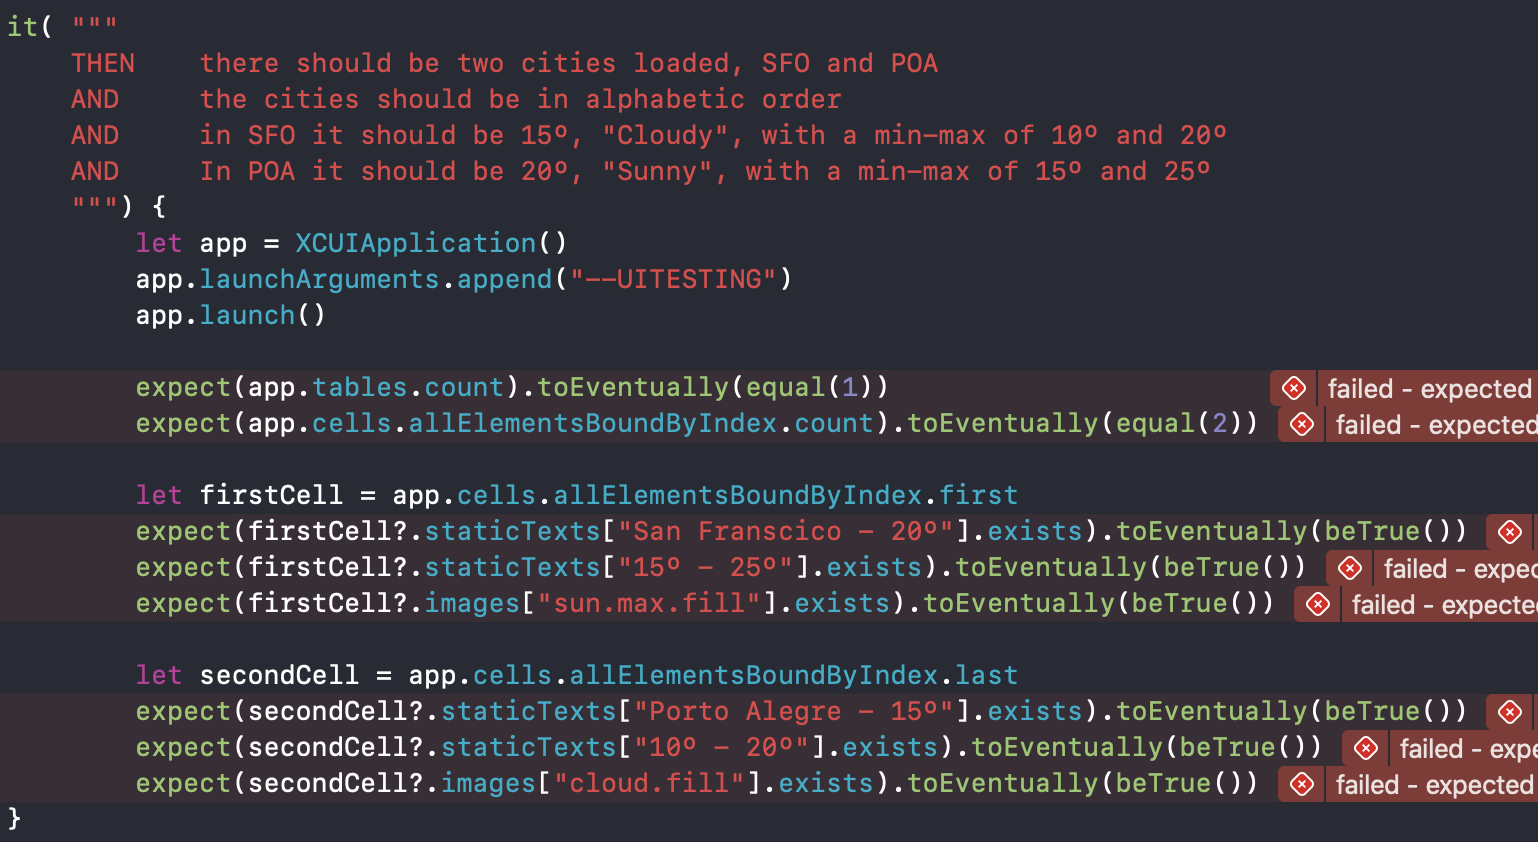
Done. Our test reflects our expectations, now it is time to actually implement it.
做完了 我们的测试反映了我们的期望,现在是时候实际执行它了。
第2步-通过测试 (Step 2 — Making the test pass)
To make our test pass, we will start with the a simplest implementation possible for the interface, a static UI. We do so using SwiftUI.
为了使测试通过,我们将从接口的最简单实现(静态UI)开始。 我们使用SwiftUI。
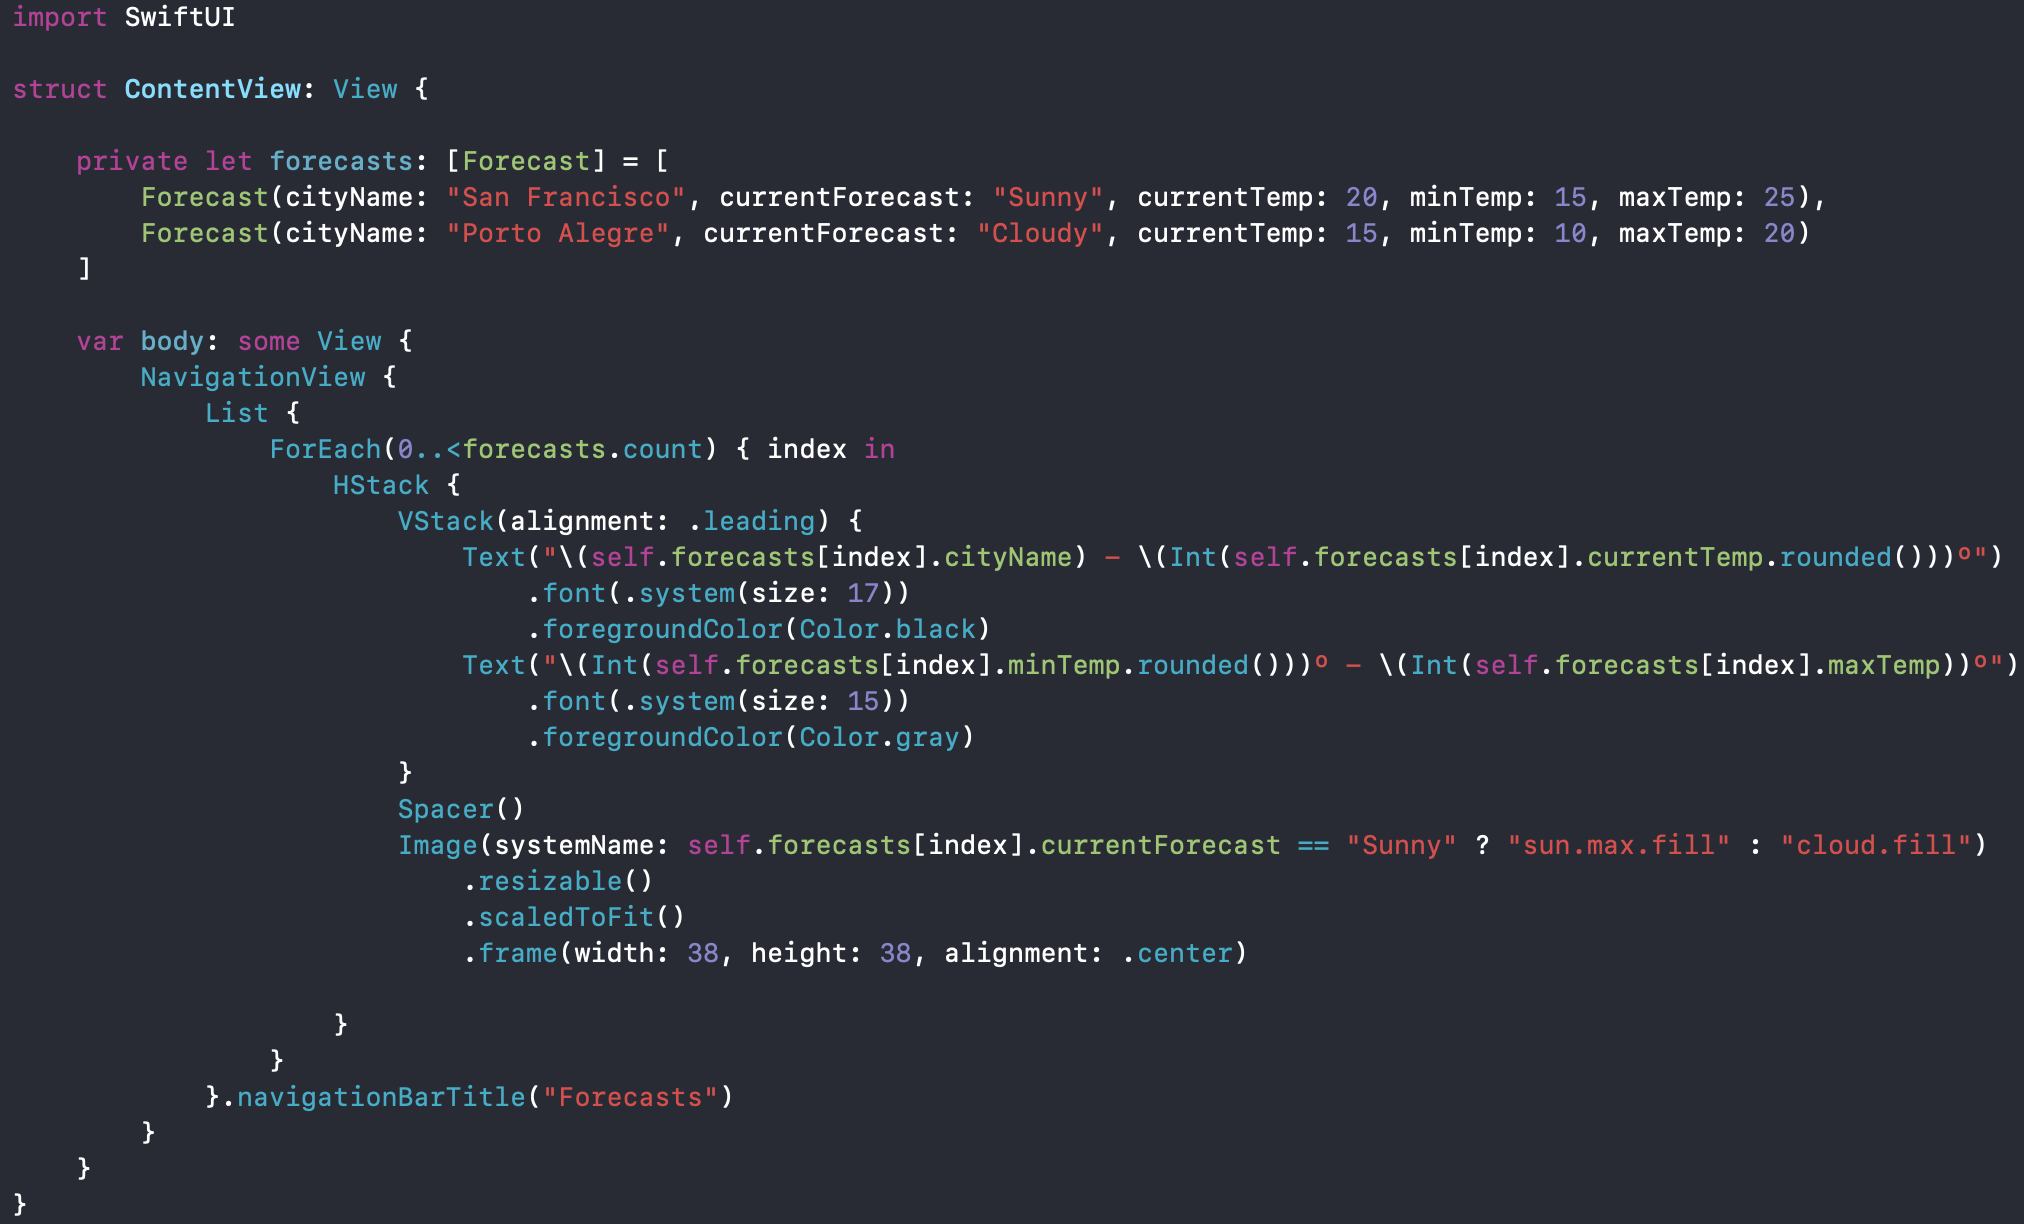
This implementation uses a private constant array of forecasts. In addition, it uses SwiftUI components such as NavigationView, and List to get the appearance our design teams wants.
此实现使用私有常量预测数组。 此外,它使用SwiftUI组件(例如NavigationView和List)来获得设计团队想要的外观。
Done! Now we have a test that runs successfully.
做完了! 现在我们有一个可以成功运行的测试。

第3步-重构 (Step 3— Refactoring)
Although our UI test passes, it still does not use the abstractions we have created previously. So we will update our code and ensure it does just that.
尽管我们的UI测试通过了,但是它仍然没有使用我们之前创建的抽象。 因此,我们将更新我们的代码,并确保这样做。
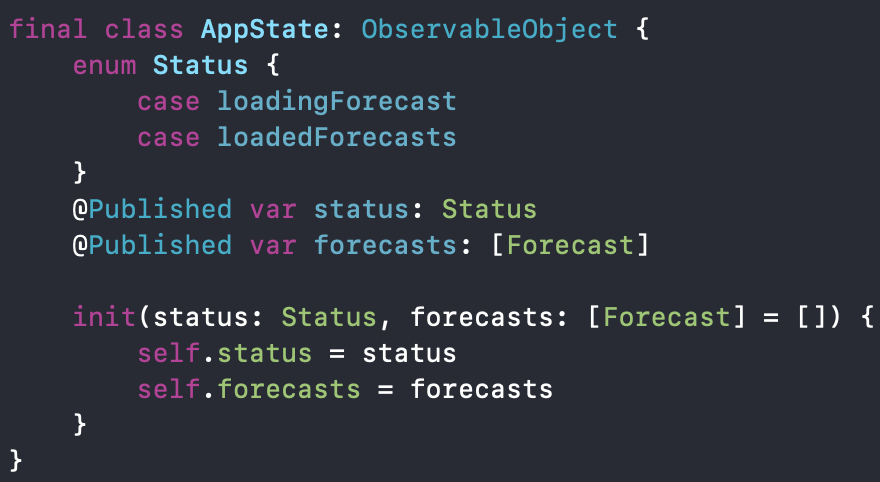
The first modification we should perform is to ensure that the AppState can be used as the driver in a SwiftUI View. This can be done by changing it to a class and making it conform to the ObservableObject protocol. In addition, we should use the property wrapper "@Published" in our properties so that SwiftUI can receive updates from the AppState.
我们应该执行的第一个修改是确保AppState可以用作SwiftUI View中的驱动程序。 可以通过将其更改为类并使其符合ObservableObject协议来完成。 另外,我们应该在属性中使用属性包装器“ @Published”,以便SwiftUI可以从AppState接收更新。
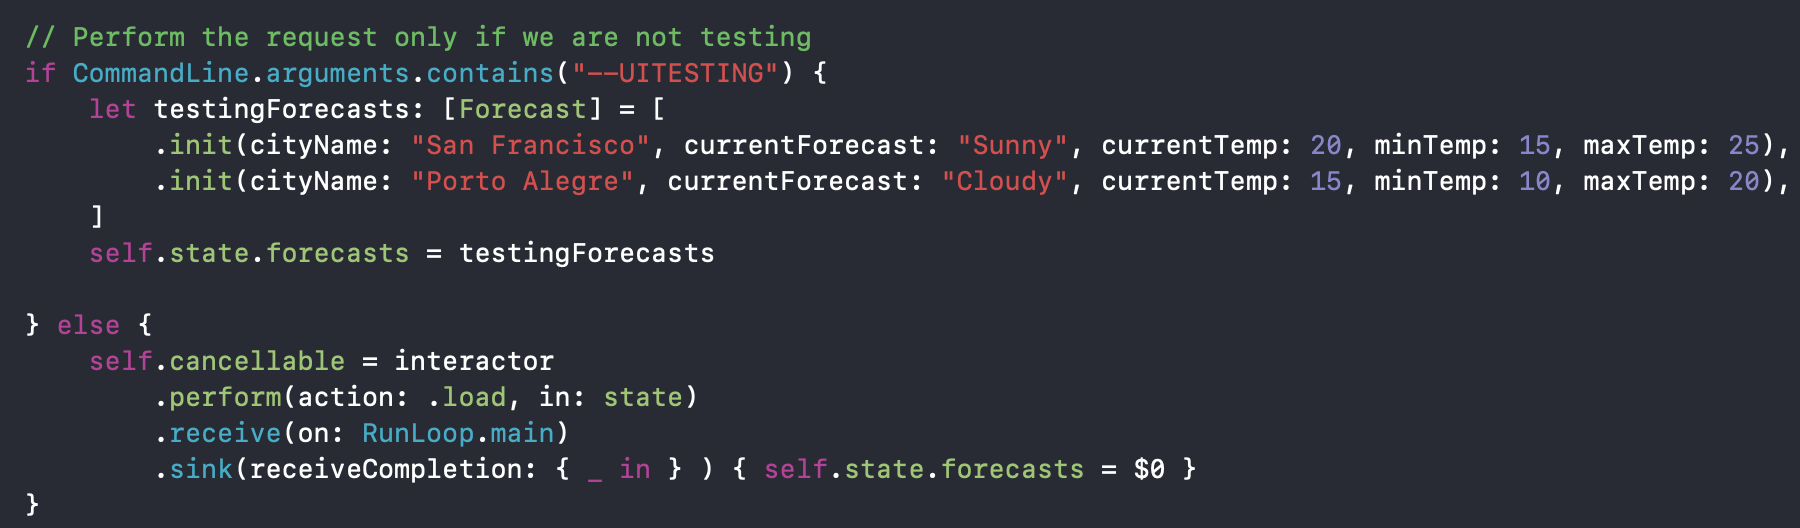
Next, we have to actually make the request for our Forecasts. To keep things simple, we chose to make this request in the SceneDelegate. Here, we will use our two selected cities in our Interactor. In addition, once we the request finishes, we have to update our state property. Finally, we share our State property using environmentObject method in our ContentView.
接下来,我们必须实际请求“预测”。 为了简单起见 ,我们选择在SceneDelegate中发出此请求。 在这里,我们将在Interactor中使用我们选择的两个城市。 另外,一旦请求完成,我们就必须更新state属性。 最后,我们在ContentView中使用environmentObject方法共享State属性。

Next, we make sure our ContentView uses the AppState to build its layout.
接下来,我们确保ContentView使用AppState来构建其布局。

A last step is to make sure our tests are still passing. This can be done by handling the "UITESTING" flag we passed when launching the App in our tests.
最后一步是确保我们的测试仍然通过。 这可以通过处理在测试中启动应用程序时通过的“ UITESTING”标志来完成。
Done!
做完了!
结论 (Conclusion)
We have sucessfully create an entire user story for our App BDD. This last post focused in using BDD when creating UI for our Apps. The main goal of this part is ensuring we use the features we have created previously to drive our UI and that it is aligned with our team's design decisions.
我们已成功为App BDD创建了完整的用户案例。 上一篇文章重点介绍了在为我们的应用程序创建UI时使用BDD。 这部分的主要目的是确保我们使用之前创建的功能来驱动UI,并使其与我们团队的设计决策保持一致。
As such, our current status is:
因此,我们的当前状态是:
✅ Augmenting user stories using BDD scenarios;
using使用BDD场景增强用户故事;
✅ Coding high-level features using executable specifications;
using使用可执行规范对高级功能进行编码;
✅ Coding low-level features using low-level specifications ;
using使用底层规范对底层特征进行编码;
✅ Coding high-level UI features using executable specifications;
using使用可执行文件规范对高级UI功能进行编码;
Finally, I hope you find this guide useful and if you want to continue learning more about BDD, sign up for a complete BDD course in iOS.
最后,希望本指南对您有所帮助,如果您想继续学习有关BDD的更多信息,请在iOS上注册完整的BDD课程。
Your can take a look at the complete implementation.
您可以看一下完整的实现。
Thanks.
谢谢。
Here is a demo of our final App.
这是我们最终应用程序的演示。
ios开发swift


 440
440

 被折叠的 条评论
为什么被折叠?
被折叠的 条评论
为什么被折叠?
 到【灌水乐园】发言


