


redis 新增缓存树节点
In the previous part of the tutorial, we reviewed internal vs external caching, and different caching techniques. In this part, we’ll try external caching with redis, learn how to use it in the code, run redis server in a development environment with docker, and mock it for unit tests.
在本教程的上一部分中,我们回顾了内部和外部缓存以及不同的缓存技术。 在这一部分中,我们将尝试使用redis进行外部缓存,学习如何在代码中使用它,在带有docker的开发环境中运行redis服务器,并对其进行模拟以进行单元测试。
If you don’t follow the tutorial, you can get the sources and use them as a start point:
如果您不遵循本教程,则可以获取源并将其用作起点:
$ git clone git@github.com:losikov/api-example.git
$ cd api-example
$ git checkout tags/v7.0.0$ yarn install
使用Docker运行Redis Server (Run Redis Server with Docker)
The easiest way to run redis on local machine is to use docker. We already have ./scripts/run_dev_dbs.sh script to run MongoDB with docker, let’s update and add redis:
在本地计算机上运行redis的最简单方法是使用docker 。 我们已经有./scripts/run_dev_dbs.sh脚本来通过docker运行MongoDB,让我们更新并添加redis:
#!/bin/sh
#
# Usage: run from project directory: ./scripts/run_dev_dbs.sh
# Description: kill/clear/run redis & mongo with docker for dev environment
# Prerequirements: docker
#


usage()
{
  echo "usage: ./scripts/run_dev_dbs.sh [-k|-c|-r]"
  echo "  -k|--kill  : kill redis and mongo docker containers"
  echo "  -c|--clear : ccreate/clear mongodb host folder"
  echo "  -r|--run   : run redis and mongo containers"
  echo "example: ./scripts/run_dev_dbs.sh -k -c -r"
}


clear=
kill=
run=


[ $# -eq 0 ] && { usage; exit 1; }
while [ "$1" != "" ]; do
  case $1 in
    -k | --kill )     kill=1
                      ;;
    -c | --clear )    clear=1
                      ;;
    -r | --run )      run=1
                      ;;
    -h | --help )     usage
                      exit
                      ;;
    * )               usage
                      exit 1
  esac
  shift
done


if [ "$kill" = "1" ]; then
  docker kill redis mongo
fi


if [ "$clear" = "1" ]; then
  mkdir -p ../docker/mongodb
  rm -rf ../docker/mongodb/*
fi


if [ "$run" = "1" ]; then
  command -v docker >/dev/null 2>&1 || { echo >&2 "'docker' is not installed. Aborting."; exit 1; }


  name='redis'
  [[ $(docker ps -f "name=$name" --format '{{.Names}}') == $name ]] ||
  docker run --rm -d -p 6379:6379 --name "$name"  redis --save ''


  name='mongo'
  [[ $(docker ps -f "name=$name" --format '{{.Names}}') == $name ]] ||
  docker run --rm -d -p 27017-27019:27017-27019 -v $(PWD)/../docker/mongodb:/data/db --name "$name"  mongo:latest
fi
You can run it and check now:
您可以运行并立即检查:

Redis的项目初始设置 (Project Initial Setup for Redis)
Install redis npm and redis-mock as a dev dependency:
将redis npm和redis-mock安装为dev依赖项:
$ yarn add redis @types/redis
$ yarn add -D redis-mock @types/redis-mock
To establish a connection to a redis server we need an url. For unit tests, we should use redis-mock instead of redis. Let’s add REDIS_URL to the config/.env.schema:
要建立与Redis服务器的连接,我们需要一个URL。 对于单元测试,我们应该使用redis-mock而不是redis。 让我们将REDIS_URL添加到config / .env.schema中:
REDIS_URL=In config/.env.dev and in config/.env.prod, set the value:
在config / .env.dev和config / .env.prod中,设置值:
REDIS_URL=redis://localhost:6379and in config/.env.test set the redis-mock value:
并在config / .env.test中设置redis-mock值:
REDIS_URL=redis-mockUpdate src/config/index.ts file. Add redisUrl to Config interface, and to config constant:
更新src / config / index.ts文件。 将redisUrl添加到Config接口和配置常量:
interface Config {
  ...
  redisUrl: string,
  ...
}


const config: Config = {
  ...
  redisUrl: parsedEnv.REDIS_URL as string,
  ...
}
You might use multiple external caches for different purposes. Let’s create the one, a singleton, for our example. Create file src/utils/cache_external.ts with the following content:
您可能将多个外部缓存用于不同的目的。 让我们为我们的示例创建一个单例。 创建具有以下内容的文件src / utils / cache_external.ts :
import * as r from 'redis'


import config from '@exmpl/config'
import logger from '@exmpl/utils/logger'


const redis: typeof r = config.redisUrl === 'redis-mock' ? require('redis-mock') : require('redis')


class Cache {
  private static _instance: Cache


  private _client?: r.RedisClient


  private _initialConnection: boolean


  private constructor() {
    this._initialConnection = true
  }


  public static getInstance(): Cache {
    if (!Cache._instance) {
      Cache._instance = new Cache()
    }
    return Cache._instance
  }


  public open(): Promise<void> {
    return new Promise((resolve, reject) => {
      this._client = redis.createClient(config.redisUrl)
      const client = this._client!
      client.on('connect', () => {
        logger.info('Redis: connected')
      })
      client.on('ready', () => {
        if (this._initialConnection) {
          this._initialConnection = false
          resolve()
        }
        logger.info('Redis: ready')
      })
      client.on('reconnecting', () => {
        logger.info('Redis: reconnecting')
      })
      client.on('end', () => {
        logger.info('Redis: end')
      })
      client.on('disconnected', () => {
        logger.error('Redis: disconnected')
      })
      client.on('error', function(err) {
        logger.error(`Redis: error: ${err}`)
      })
    })
  }


  public close(): Promise<void> {
    return new Promise((resolve) => {
      this._client!.quit(() => {
        resolve()
      })
    })
  }
}


export default Cache.getInstance()
In line 6, based on config.redisUrl value, we use real redis implementation, or just redis-mock to test environment, unit tests.
在第6行中,基于config.redisUrl值,我们使用实际的redis实现,或者只是使用redis-mock来测试环境和单元测试。
Open method (line 26) returns Promise which we need to resolve. To resolve it only once _initialConnection property is used (line 13, 16, 34–37). But the server won’t start listening until it establishes the connection with the redis server. Change the logic if needed.
打开方法(第26行)返回Promise,我们需要解决该问题。 若要仅使用_initialConnection属性(第13、16、34-37行)来解决它。 但是,直到与Redis服务器建立连接后,服务器才会开始侦听。 如果需要,请更改逻辑。
Finally, update src/app.ts to establish a connection with a redis server (line 6):
最后,更新src / app.ts以与Redis服务器建立连接(第6行):
import cacheExternal from './utils/cache_external'
import db from '@exmpl/utils/db'
import logger from '@exmpl/utils/logger'
import {createServer} from '@exmpl/utils/server'
cacheExternal.open()
.then(() => db.open())
.then(() => createServer())
.then(server => {
server.listen(3000, () => {
logger.info(`Listening on http://localhost:3000`)
})
})
.catch(err => {
logger.error(`Error: ${err}`)
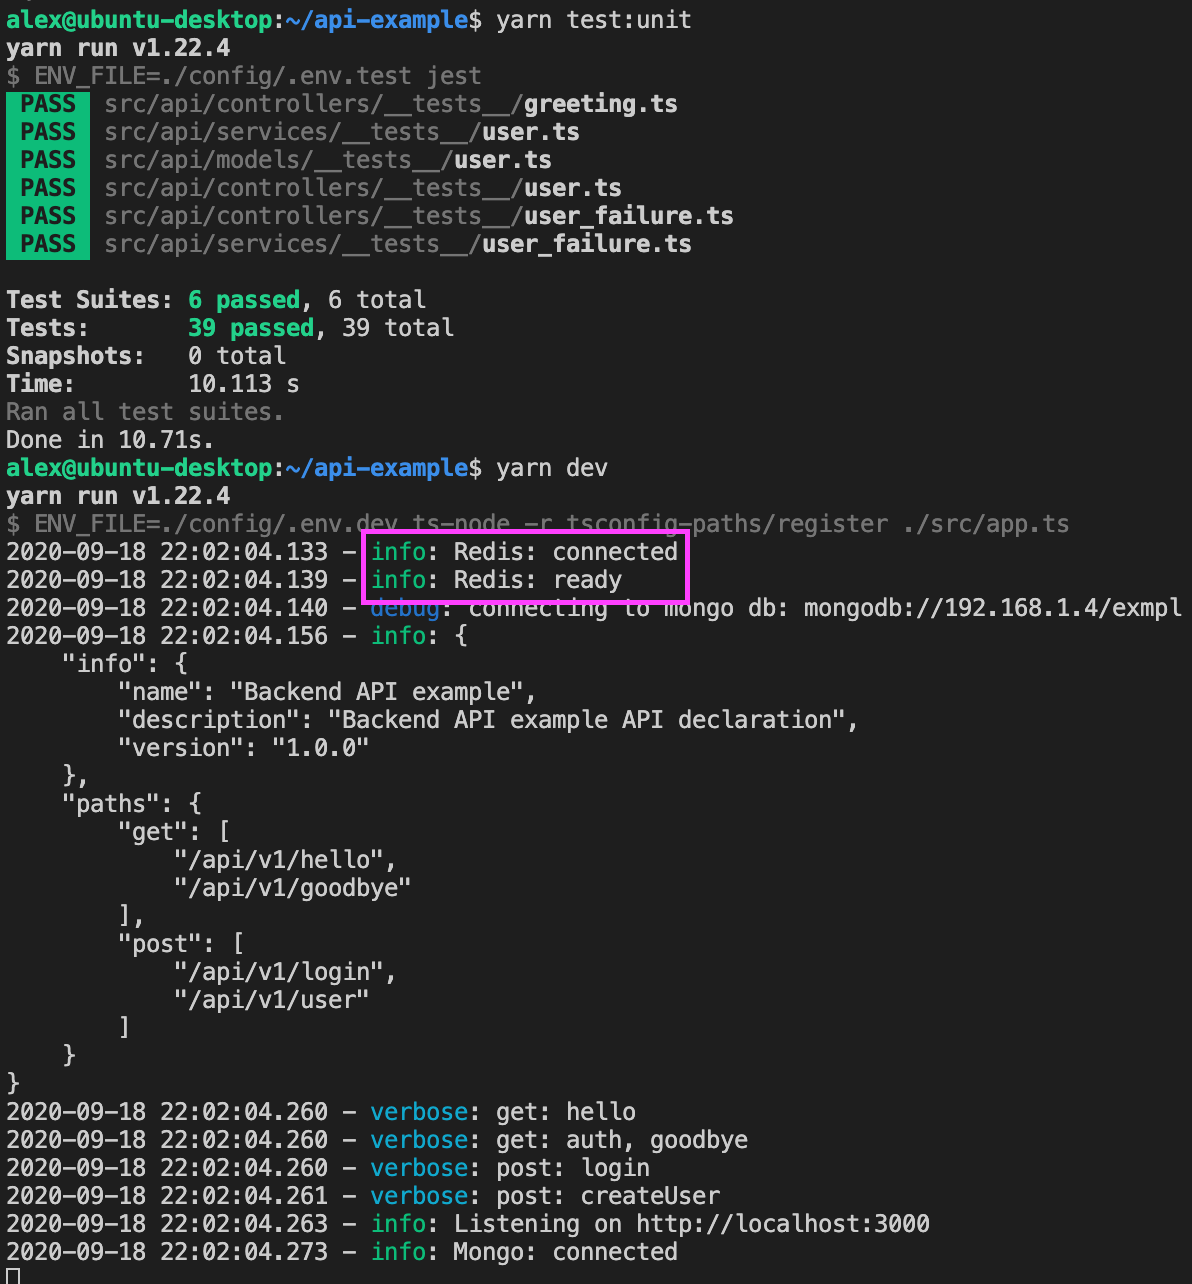
})Run unit tests to make sure they still work, and run the app in dev environment:
运行单元测试以确保它们仍然可以运行,并在开发环境中运行该应用程序:
Redis API (Redis APIs)
Redis has multiple interesting options you might need. Make sure to review the documentation.
Redis有多个您可能需要的有趣选项。 确保查看文档。
For our example, let’s store JSON Web Tokens in redis. In the part covering JWT, I mentioned, that a single Node.js app can handle only ~16K auth requests per second due to a CPU intensive jwt.verify() call. Let’s see if the caching can help to improve it.
对于我们的示例,让我们将JSON Web令牌存储在redis中。 在涉及JWT的部分中,我提到,由于CPU占用大量的jwt.verify()调用,因此单个Node.js应用程序每秒只能处理约16K身份验证请求。 让我们看看缓存是否可以帮助改善它。
redis npm can be promisified, but I didn’t get the desired behavior using it, that’s why I do it manually. Add the following 2 methods to the Cache class in src/utils/cache_external.ts:
Redis的NPM可以promisified ,但我没有得到使用它所需的行为,这就是为什么我做手工。 将以下2个方法添加到src / utils / cache_external.ts中的Cache类中:
public setProp(key: string, value: string, expireAfter: number): Promise<void> {
    return new Promise((resolve, reject) => {
      const result = this._client!.setex(key, expireAfter, value, function(error) {
        if (error) return reject(error)
        resolve()
      })
      if (result !== undefined && result === false) {
        reject(new Error('Redis connection error'))
      }
    })
  }


  public getProp(key: string): Promise<string|undefined> {
    return new Promise((resolve, reject) => {
      const result = this._client!.get(key, function(error, result) {
        if (error) return reject(error)
        resolve(result ? result : undefined)
      })
      if (result !== undefined && result === false) {
        reject(new Error('Redis connection error'))
      }
    })
  }
The implementation is trivial. Pay attention to expireAfter (line 1 and 3) — the token will be evicted from the cache at the same time when JWT expires.
实现是微不足道的。 注意expireAfter (第1行和第3行)—在JWT过期的同时,令牌将从缓存中逐出。
In all previous parts, I added and described unit tests along with the code. It is time to add them. I won’t do it here now, but I’ll add them and commit to the git. Please work on unit tests on your own if you’d like, and compare with mine. Redis get/set functions can return with error or call a callback function passing an error. To cover these cases, I implemented a custom redis mock.
在前面的所有部分中,我都添加了代码并描述了单元测试。 现在是添加它们的时候了。 我现在不在这里做,但是我将它们添加并提交到git 。 如果愿意,请自行进行单元测试,并与我的进行比较。 Redis的获取/设置函数可以返回错误或调用传递错误的回调函数。 为了解决这些情况,我实现了一个自定义的redis模拟。
In our caching example, to store JWT/userId pairs, a database is not used; as a result, the caching technique described in the previous chapter can not be applied. redis is just our primary database to store JWT/userId pairs. In src/api/services/user.ts, update createAuthToken function to store the token, and auth to do both get the token and store it (think over reasons why it can be not in the cache, when it had been pushed to the cache by createAuthToken):
在我们的缓存示例中,为了存储JWT / userId对,不使用数据库。 结果,不能应用上一章中描述的缓存技术。 redis只是我们存储JWT / userId对的主要数据库。 在src / api / services / user.ts中,更新createAuthToken函数以存储令牌,而auth则同时获取并存储令牌(考虑将令牌推送到缓存中后,缓存中不能包含令牌的原因)通过createAuthToken缓存):
import cacheExternal from '@exmpl/utils/cache_external'
...


async function auth(bearerToken: string): Promise<AuthResponse> {
  const token = bearerToken.replace('Bearer ', '')


  try {
    const userId = await cacheExternal.getProp(token)
    if (userId) {
      return {userId: userId}
    }
  } catch (err) {
    logger.warn(`login.cache.addToken: ${err}`)
  }

  return new Promise(function(resolve, reject) {
    jwt.verify(token, publicKey, verifyOptions, (err: VerifyErrors | null, decoded: object | undefined) => {
      if (err === null && decoded !== undefined && (decoded as any).userId !== undefined) {
        const d = decoded as {userId: string, exp: number}
        const expireAfter = d.exp - Math.round((new Date()).valueOf() / 1000)
        cacheExternal.setProp(token, d.userId, expireAfter)
          .then(() => {
            resolve({userId: d.userId})
          })
          .catch((err) => {
            resolve({userId: d.userId})
            logger.warn(`auth.cache.addToken: ${err}`)
          })
      } else {
        resolve({error: {type: 'unauthorized', message: 'Authentication Failed'}})
      }
    })
  })
}


function createAuthToken(userId: string): Promise<{token: string, expireAt: Date}> {
  return new Promise(function(resolve, reject) {
    jwt.sign({userId: userId}, privateSecret, signOptions, (err: Error | null, encoded: string | undefined) => {
      if (err === null && encoded !== undefined) {
        const expireAfter = 2 * 604800 /* two weeks */
        const expireAt = new Date()
        expireAt.setSeconds(expireAt.getSeconds() + expireAfter)


        cacheExternal.setProp(encoded, userId, expireAfter)
          .then(() => {
            resolve({token: encoded, expireAt: expireAt})
          }).catch(err => {
            logger.warn(`createAuthToken.setProp: ${err}`)
            resolve({token: encoded, expireAt: expireAt})
          })
      } else {
        reject(err)
      }
    })
  })
}
In auth function, we check if a token is in a cache (lines 8–10). If not, or if redis is unavailable, we decode the token with jwt.verify (line 17). Finally, if the token is valid, we store it to the cache (line 21), and return the result (line 23, 26), even if redis is unavailable. When we store to the cache, we set a key/value expiration time, which we got from the decoded token (line 20–21).
在auth函数中,我们检查令牌是否在缓存中(第8-10行)。 如果没有,或者redis不可用,我们使用jwt.verify解码令牌(第17行)。 最后,如果令牌有效,我们将其存储到缓存(第21行),并返回结果(第23、26行),即使redis不可用。 当我们存储到缓存中时,我们设置了一个键/值过期时间,它是从解码的令牌中获得的(第20-21行)。
In createAuthToken function, we calculate an expiration time manually (39–41), and set it when we store the token to cache (line 43). The successful result is returned (line 45, 48), even if a redis server is unavailable.
在createAuthToken函数中,我们手动计算过期时间(39-41),并在将令牌存储到缓存时进行设置(第43行)。 即使redis服务器不可用,也会返回成功的结果(第45、48行)。
单元测试 (Unit Testing)
With such implementation, when we don’t rely on redis availability for JWT verification, all unit tests should continue working without any modifications. You can try to run existing unit tests.
通过这种实现,当我们不依赖Redis进行JWT验证时,所有单元测试都应继续工作而无需进行任何修改。 您可以尝试运行现有的单元测试。
In case a connection to redis is required for the code logic to work properly, we should open and close) the connection in each test file. cache_external.ts file already has the code to use inmemory redis-mock. Update src/api/controllers/__tests__/greeting.ts, src/api/controllers/__tests__/user.ts, src/api/services/__tests__/user.ts, to import cacheExternal, open connection in beforeAll, and close it in afterAll:
如果需要与redis的连接才能使代码逻辑正常工作,我们应该在每个测试文件中打开和关闭该连接。 cache_external.ts文件已经具有使用内存redis-mock的代码。 更新src / api / controllers / __ tests __ / greeting.ts , src / api / controllers / __ tests __ / user.ts , src / api / services / __ tests __ / user.ts ,以导入cacheExternal ,在beforeAll中打开连接,并在其中关闭它毕竟:
...
import cacheExternal from '@exmpl/utils/cache_external'
...


beforeAll(async () => {
  await cacheExternal.open()
  ...
})


afterAll(async () => {
  await cacheExternal.close()
  ...
})
‘auth perfromance test’ unit test which processed 16K auth requests per second, handles ~320K now. I got the same number replacing cacheExternal with localCache for storing JWT. It is expected, as we eliminated a CPU heavy jwt.verify call. But this number is only for inmemory redis-mock. As soon as I changed inmemory redis-mock to a real redis server (using config/.env.test file), the performance unit test, single-threaded and with sequential requests, failed, and dropped much below 16K requests per second. Keep it in mind during system design and verify your expectations. Keep it in mind when you choose internal and external caching for different purposes.
每秒处理16K身份验证请求的“身份性能测试”单元测试现在可处理约320K。 我得到了相同的数字,用localCache替换cacheExternal来存储JWT。 可以预期,因为我们消除了CPU繁重的jwt.verify调用。 但是此数字仅用于内存redis-mock 。 一旦将内存redis-mock更改为真实的redis服务器(使用config / .env.test文件),性能单元测试(单线程并带有顺序请求)就失败了,并且每秒下降到16K以下。 在系统设计期间要牢记这一点,并验证您的期望。 当出于不同目的选择内部和外部缓存时,请记住这一点。
You can get the project sources from git https://github.com/losikov/api-example. Git commit history and tags are organized based on the parts.
您可以从git https://github.com/losikov/api-example获取项目源。 Git提交历史记录和标签是根据零件进行组织的。
翻译自: https://medium.com/@losikov/part-8-external-caching-in-node-js-with-redis-2f12607c995
redis 新增缓存树节点


 被折叠的 条评论
为什么被折叠?
被折叠的 条评论
为什么被折叠?
 到【灌水乐园】发言


