


 本文档介绍了如何将Next.js应用程序部署到Firebase平台,利用Firebase托管和云函数功能。教程详细阐述了从配置到发布的整个流程。
firebase部署
1.概述 (1. Overview)
Deploying static websites like React Applications on the Firebase Platform is very straightforward. But that was not the case with Next.js Projects. This is because Next.js Application requires a server to handle server rendering. So deploying just static HTML is not sufficient. Here in this article, I will demonstrate the deployment of a Next.js project to the firebase platform using cloud Function and Firebase Hosting.
在Firebase平台上部署静态网站(例如React应用程序)非常简单。 但是,Next.js项目并非如此。 这是因为Next.js应用程序需要服务器来处理服务器渲染。 因此仅部署静态HTML是不够的。 在本文的此处,我将演示使用Cloud Function和Firebase Hosting将Next.js项目部署到firebase平台。
2.准备一个基本的Next.js应用 (2. Preparing a basic Next.js App)
Let's prepare a simple Next.js application to deploy on the Firebase.
让我们准备一个简单的Next.js应用程序,以部署在Firebase上。
yarn create next-appHere I use yarn to bootstrap a Next.js application.
在这里,我使用yarn引导Next.js应用程序。

I will name my project as next-deploy .
我将我的项目命名为next-deploy 。

This is the initial folder structure we get by running the above command.
这是我们通过运行上面的命令获得的初始文件夹结构。
Now lets edit pages/index.js file to write a basic sample code.
现在,让我们编辑pages/index.js文件以编写基本的示例代码。
Let me explain this code briefly.
让我简要解释一下这段代码。
[Line 16–18]: We are passing props
ssrWorkingthroughgetServerSideProps.[16-18行]:我们正在通过
getServerSideProps传递道具ssrWorking。[Line 4–15]: We are displaying a success image if the props passed through
getServerSidePropsis present. [JUST TO CHECK IF SSR IS WORKING DURING DEPLOYMENT][第4-15行]:如果存在通过
getServerSideProps传递的道具,我们将显示成功图像。 [只需检查SSR在部署期间是否正常运行]
在本地运行应用 (Running App Locally)
If we run yarn dev on our project, it runs successfully as expected.
如果我们在项目上运行yarn dev ,它将按预期成功运行。
开始部署过程 (Starting Deployment Process)
选项1:使用Firebase托管进行静态部署 (Option 1: Static Deployment with Firebase Hosting)
We can deploy our app simply using Static HTML Export with next build && next export command.
我们只需使用带有next build && next export命令的静态HTML导出即可部署我们的应用程序。
next export command prerender all our pages under pages folder to static HTML pages. So it will run without the need of a Node.js server. But this simplicity comes with the cost. It now does not support getServerSideProps within our pages as it requires a server.
next export命令将pages文件夹下的所有页面预呈现为静态HTML页面。 因此,它将无需Node.js服务器即可运行。 但是,这种简单性带来了成本。 现在它不支持我们页面中的getServerSideProps,因为它需要服务器。
So if you want SSR functionality, follow Option 2.
因此,如果要使用SSR功能,请按照选项2进行操作。
选项2:结合使用Firebase Cloud功能和Firebase托管 (Option 2: Using the Firebase Cloud Function along with Firebase Hosting)
Firebase设置(第1部分-在Firebase控制台上) (Firebase Setup (Part 1 - on Firebase Console))
Let's start by setting the Firebase project by going to the firebase console.
让我们从进入firebase控制台开始设置Firebase项目。

Select Add Project on your console.
在控制台上选择“ Add Project ”。
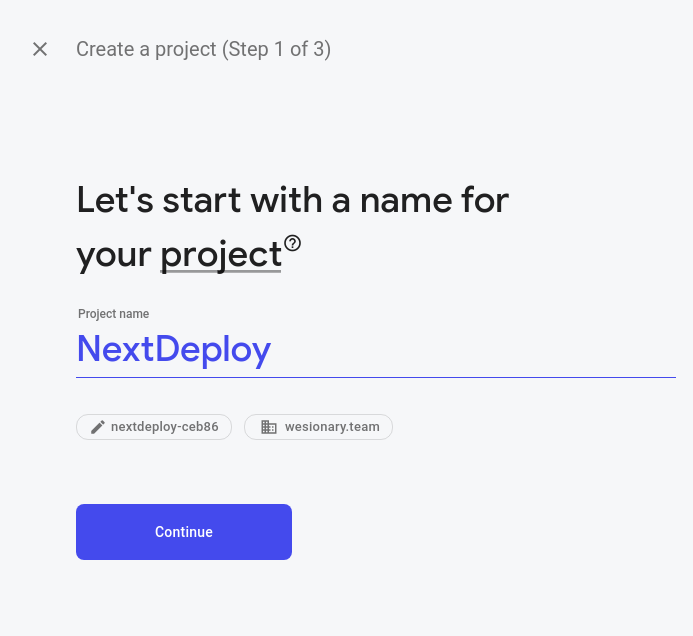
Enter your Project Name and press continue. Similarly, select continue for step 2 and step 3 and click create Project. The following page appears confirming the project is successfully setup.
输入您的项目名称,然后按继续。 同样,为步骤2和步骤3选择继续,然后点击create Project 。 出现下一页,确认项目已成功设置。

Now we can navigate to our firebase dashboard by clicking on the currently created project on the console.
现在,我们可以通过单击控制台上当前创建的项目导航到我们的Firebase仪表板。

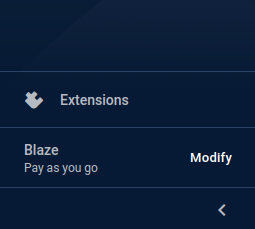
Here, on the left bottom section on the dashboard, we see the plan we are currently using. The default one is Spark.
在这里,在仪表板的左下方,我们可以看到当前正在使用的计划。 默认的是Spark 。

We need to upgrade to choose Blaze (Pay as you go) Plan in order to use cloud Function Functionality.
为了使用云功能功能,我们需要升级以选择Blaze(即用即付)计划。
This is the only configuration we need on the firebase console.
这是我们在Firebase控制台上所需的唯一配置。
Firebase设置(第2部分-在我们的Next.js项目上) (Firebase Setup (Part 2 - on our Next.js Project))
Now we go back to our Next.js Project. We start by installing the firebase tools to be able to run firebase CLI commands.
现在,我们回到Next.js项目。 我们从安装firebase工具开始,以便能够运行firebase CLI命令。
npm install -g firebase-tools
npm install -g firebase-tools
Then we connect our Next.js project with the firebase project we just created by the following command.
然后,将Next.js项目与通过以下命令刚创建的firebase项目连接。
firebase login
firebase login
Now we have access to all the firebase projects associated with the login account. We now initialize firebase on our project using
现在,我们可以访问与登录帐户关联的所有firebase项目。 现在,我们使用
firebase init
firebase init
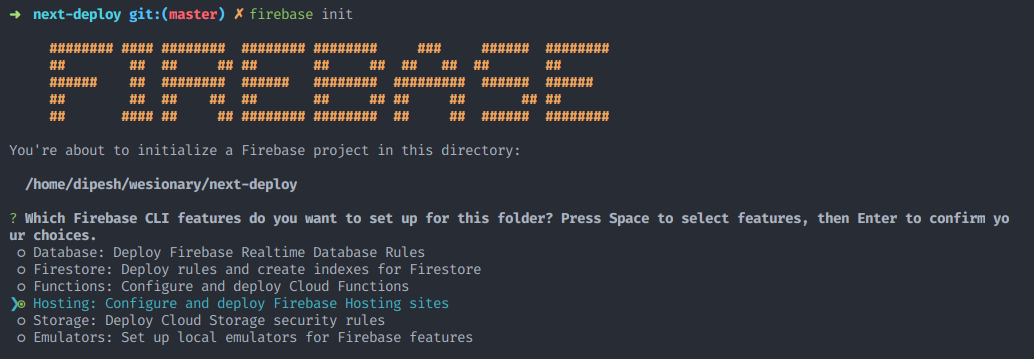
We will only select Hosting Feature. We will not select Firebase Functions because we will be doing manually for simplicity.
我们只会选择托管功能。 我们将不选择Firebase Functions,因为为简单起见,我们将手动进行操作。

Now we select existing projects as we have already created project through firebase console.
现在,我们选择现有项目,因为我们已经通过Firebase控制台创建了项目。

And select the project we just created on the console.
然后选择我们刚刚在控制台上创建的项目。

We select public and No for subsequent questions. That's it. We have set up a firebase on our Next.js Project.
对于后续问题,我们选择public , No 。 而已。 我们已经在Next.js项目上建立了一个火力基地。
手动Firebase配置 (Manual Firebase Configuration)
Firebase.json (Firebase.json)
{
  "hosting": {
    "public": "public",
    "ignore": [
      "firebase.json",
      "**/.*",
      "**/node_modules/**"
    ]
  }
}
This is the default firebase.json . Now we edit our firebase.json file to our requirements.
这是默认的firebase.json 。 现在,我们根据需要编辑firebase.json文件。
{
  "hosting": {
    "public": "public",
    "ignore": ["firebase.json", "**/.*", "**/node_modules/**"],
    "rewrites": [
      {
        "source": "**",
        "function": "nextServer"
      }
    ]
  },
  "functions": {
    "source": ".",
    "runtime": "nodejs10"
  }
}
Let me explain this code briefly.
让我简要解释一下这段代码。
- [Line 1–11]: Includes hosting related configuration. [第1-11行]:包括与主机相关的配置。
[Line 3–4]:
publicdefines the files in our project directory that should be deployed andignoredefines the files that should be ignored during deployment.[第3–4行]:
public定义了项目目录中应部署的文件,而ignore定义了在部署期间应忽略的文件。[Line 5–10]: We include the rewrite rule in the case if the request to files or directories through URL doesn’t exist on the public folder. In such a case we execute
nextServercloud function to determine the response. [We will be creating this function soon][第5-10行]:如果公用文件夹中不存在通过URL对文件或目录的请求,则包括重写规则。 在这种情况下,我们执行
nextServer云功能来确定响应。 [我们将很快创建此功能]- [Line 12–15]: Includes cloud function related configuration. [12-15行]:包括与云功能相关的配置。
[Line 13]:
sourceindicates the location of ournextServerfunction.[第13行]:
source指示我们nextServer函数的位置。[Line 14]:
runtimeindicates the Node.js runtime version to run ournextServerfunction.[第14行]:
runtime表示运行nextServer函数的Node.js运行时版本。
云功能 (Cloud Function)
Now we write our custom server code on function.js file on the root of the project.
现在,我们在项目根目录的function.js文件上编写自定义服务器代码。
const { https } = require('firebase-functions');
const { default: next } = require('next');


const isDev = process.env.NODE_ENV !== 'production';


const server = next({
  dev: isDev,
  //location of .next generated after running -> yarn build
  conf: { distDir: '.next' },
});


const nextjsHandle = server.getRequestHandler();
exports.nextServer = https.onRequest((req, res) => {
  return server.prepare().then(() => nextjsHandle(req, res));
});
Let me explain this code briefly.
让我简要解释一下这段代码。
- [Line 4]: Here we are checking if we are running the application in a development or production environment to later provide the information to the next function on Line 7. [第4行]:此处我们正在检查是否在开发或生产环境中运行该应用程序,以便稍后将信息提供给第7行上的下一个功能。
[Line 6–10]: Here we connect our custom Server to our Next.js Application by providing the location of
.nextfolder generated after runningyarn buildcommand in our root Next.js application to theconfoption o the next function.[第6-10行]:在这里,我们通过将根Next.js应用程序中运行
yarn build命令运行后生成的.next文件夹的位置提供给conf选项或next函数,将自定义服务器连接到Next.js应用程序。[Line 12]:
server.getRequestHandlerreturns a request handler which we can use to parse all HTTP requests.[第12行]:
server.getRequestHandler返回一个请求处理程序,我们可以使用它来解析所有HTTP请求。[Line 13]:
server.preparemakes our Next.js build code(.next) ready to run on our custom server for handling SSR.[第13行]:
server.prepare使我们的Next.js构建代码(.next)准备在我们的自定义服务器上运行以处理SSR。
Note: The name of the function we exported here i.e nextServer on line 12 should match the function name we previously declared on firebase.json on line 8.
注意: 我们在此处导出的函数的名称,即 第12行的 nextServer 应该与我们先前在第8行的 nextServer 上声明的函数名称匹配。

Our Folder Structure looks like this now.
我们的文件夹结构现在看起来像这样。
让我们尝试部署[尝试1] (Let's Try Deploying [Try 1])
Let us try our luck in deploying the project now.
让我们尝试一下现在部署项目的运气。
//first install all the required pacakages we will be using
1. yarn add firebase-admin firebase-functions cross-env//build our Next.js project to generate .next folder
2. yarn build//Now deploy with production environment
3. cross-env NODE_ENV=production firebase deploy — only functions,hosting
Hard luck :(
运气不好:(
改善我们的配置 (Improve Our Configuration)
The above problem states that the index.js file doesn't exist on the root folder. So cloud function deployment failed.
上面的问题指出根文件夹中不存在index.js文件。 因此云功能部署失败。
Why is it searching index.js file in the first place?
为什么首先搜索index.js文件?
This was because we provided “.” to the source function property on Line 13 on firebase.json. So it is looking at the main key on the root package.json for cloud function. Since we did not previously define main key on package.json file, it defaults to index.js.
这是因为我们提供了“.” 到firebase.json 13行的源函数属性。 因此,它正在寻找根package.json上的main键以获取云功能。 由于我们之前未在package.json文件上定义main键,因此默认为index.js 。
package.json (package.json)
{
  "name": "next-deploy",
  "version": "0.1.0",
  "main": "function.js",
  "private": true,
  "scripts": {
    "dev": "next dev",
    "build": "next build",
    "start": "next start",
    "deploy": "yarn build && cross-env NODE_ENV=production firebase deploy --only functions,hosting"
  },
  "dependencies": {
    "cross-env": "^7.0.2",
    "next": "9.5.3",
    "react": "16.13.1",
    "react-dom": "16.13.1"
  }
}
Let me explain this code briefly.
让我简要解释一下这段代码。
[Line 4]: We provide our function file
function.json themainkey.[第4行]:我们在
main键上提供了功能文件function.js。[Line 10]: We add the
deployscript to build and deploy the project.[第10行]:我们添加了
deploy脚本来构建和部署项目。
让我们尝试部署[尝试2] (Let’s Try Deploying [Try 2])
Now I think we are OK with all the configuration stuff. Let's try the deployment for the second time.
现在,我认为我们对所有配置材料都可以。 让我们第二次尝试部署。
//builds the app and deploy
yarn deploy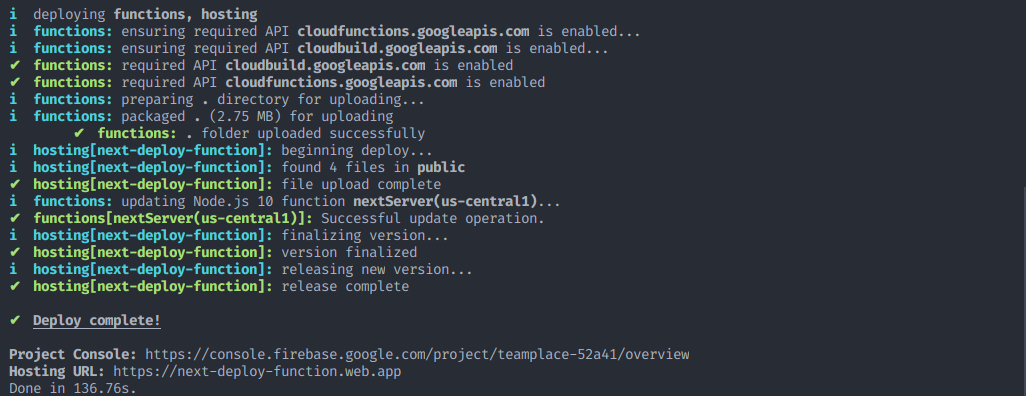
Yesss :) deployment completed with success. It also gives us the Hosting Url where it is deployed. Let's try it.
是的:)部署成功完成。 它还为我们提供了将其部署到的托管网址。 让我们尝试一下。
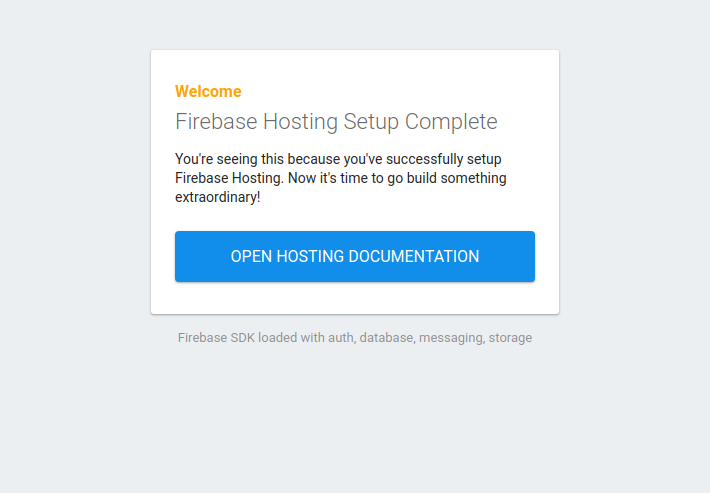
Wait!!! What is this webpage we are seeing? This is not the webpage we designed earlier :(
等待!!! 我们看到的这个网页是什么? 这不是我们之前设计的网页:(
Why did it fail?
为什么失败了?
Remember the public folder that was generated during firebase.init process. It contains the index.html on it with the above webpage code. So the request was handled by the index.html file on public folder instead of function we wrote.
还记得public这是在生成的文件夹firebase.init过程。 它包含上面带有网页代码的index.html 。 因此,请求被index.html文件上处理public文件夹而不是function ,我们写。
So, delete the index.html file on the public folder and deploy again using yarn deploy. The deployment succeeds this time too. We can confirm the deployment on the firebase console.
因此,删除公用文件夹上的index.html文件,然后使用yarn deploy再次yarn deploy 。 这次部署也成功。 我们可以在Firebase控制台上确认部署。
Firebase仪表板上的“功能”部分 (Functions Section on Firebase Dashboard)

Firebase仪表板上的主机部分 (Hosting Section on Firebase Dashboard)

Now if we go to the deployed URL, we see our designed website. And SSR is also working too.
现在,如果我们转到部署的URL,我们将看到我们设计的网站。 SSR也正在工作。

结论 (CONCLUSION)
If you get lost on any part you can check my Github project.
如果您迷路了,可以检查我的Github项目。
https://github.com/dipesh429/nextjs-firebase-cloud-function-deploy
https://github.com/dipesh429/nextjs-firebase-cloud-function-deploy
That’s it for this article. This is the end of our short journey to deploying Next.js Application on Firebase Platform using Cloud Function with Firebase Hosting. Hope this will help you with your project. Any kind of suggestions would be highly appreciable. Happy Coding ☺.
本文就是这样。 这是我们使用Cloud Function和Firebase Hosting在Firebase平台上部署Next.js应用程序的短暂旅程的结束。 希望这会对您的项目有所帮助。 任何类型的建议都是非常可取的。 快乐编码Co。
firebase部署


 6196
6196

 被折叠的 条评论
为什么被折叠?
被折叠的 条评论
为什么被折叠?
 到【灌水乐园】发言


