


 本文介绍了一种利用GitHub Pages和Python脚本创建免费URL缩短器的方法。通过获取短域名、制作URL重定向并自动化更新过程,作者实现了个性化的URL缩短服务。
缩短url
URL shorteners are great. You can take a long URL and make it 6–8 characters, you know the drill.
URL缩短器很棒。 您可以使用一个较长的URL并将其设置为6-8个字符,这一点您知道了。
And the free URL shorteners are pretty nice too! bit.ly is what I used, and it did its job pretty well, but free public shorteners have a few issues:
免费的URL缩短器也非常不错! 我使用的是bit.ly,它做得很好,但是免费的公共起酥油有一些问题:
- Finding the perfect short URL is hard: most of the short ones that make sense, are usually already taken. 找到完美的短URL很难:大多数有意义的短URL通常已经被使用。
the URLs are hard to update: (and I don’t know if this is a bit.ly specific issue), but you can’t change the URL the short link points to, once it has been created.
URL很难更新:( 并且我不知道这是否是一个特定的问题) , 但是一旦创建, 您就不能更改短链接指向的URL 。
So I decided to make my own instead.
所以我决定自己做。
步骤1:获取短域名 (Step 1: Getting a short domain)
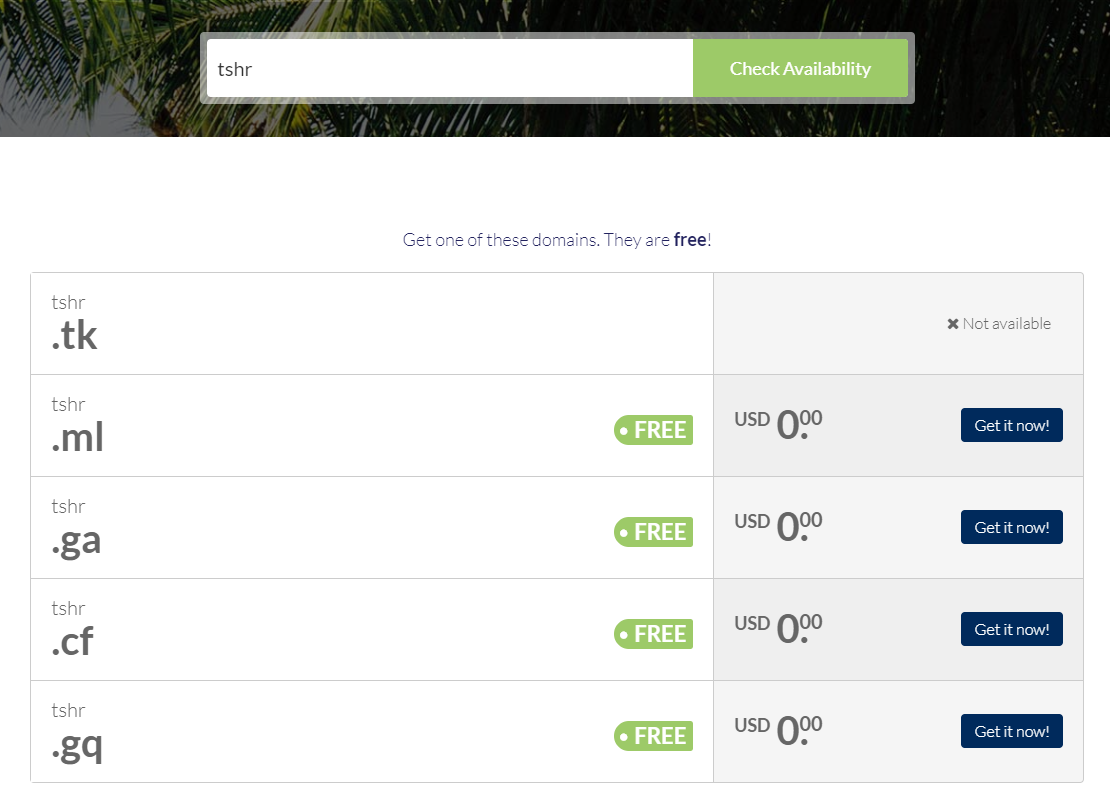
The entire point of a URL shortener is to be short, and for that you need to get a short domain name. Fortunately, services like Dot tk exist, which provide domains from various TLDs at no cost. (If you’re a university student, you can also use the GitHub Student pack for domains like .me).
URL缩短器的要点是简短的,为此,您需要获得一个简短的域名。 幸运的是,存在诸如Dot tk之类的服务,这些服务免费提供来自各种TLD的域。 (如果您是一名大学生,还可以将GitHub学生包用于.me之类的域 )。
I got the domain tshr.me for myself.
我自己拥有域名tshr.me。
第2步:使URL重定向 (Step 2: Making the URLs redirect)
Traditionally, URLs run off of a hosted web server, which are also relatively easy to make, as shown in this video for example.
传统上,URL是从托管的Web服务器上运行的,例如 , 如本视频所示 ,URL也相对易于创建。
But the issue with a web server solution is that you have to host it, and hosting ain’t free.
但是,Web服务器解决方案的问题在于您必须托管它,并且托管不是免费的。
Sure, there’s services like Heroku, which is a great platform, but it’s inadequate for our use case:
当然,有诸如Heroku之类的服务,这是一个很好的平台,但不足以满足我们的用例:
- Its free dynos only run for 550 hours a month, which means you either have to add your credit card information, or there will be no guarantees that your links will always work. 它的免费dynos每月仅运行550个小时,这意味着您要么必须添加信用卡信息,要么无法保证您的链接始终有效。
Free dynos go to sleep after 1 hour of inactivity, meaning if someone tries to access your URLs after a long time, they might have to wait a significantly long time before they get redirected. (This can possibly be fixed by scheduling cron jobs to ping the server, but it’s not a great solution.)
闲置1小时后,免费的dynos 会进入睡眠状态 ,这意味着如果某人在很长一段时间后尝试访问您的URL,他们可能必须等待很长时间才能被重定向。 (可以通过安排 cron作业 来ping服务器来解决此问题,但这不是一个很好的解决方案。)
And most importantly: Heroku’s free tier doesn’t support custom domain names!
最重要的是: Heroku的免费套餐不支持自定义域名!
So we will have to use a different approach.
因此,我们将不得不使用不同的方法。
抢救GitHub –第1部分 (GitHub to the rescue — Part 1)
You should be knowing already, that GitHub can hosts static websites for free on its platform called GitHub Pages.
您应该已经知道,GitHub可以在名为GitHub Pages的平台上免费托管静态网站。
But you might be thinking, “Yes, I know you can use GitHub for static websites, but you can’t use it to host web servers, dummy.”
但是您可能会想: “是的,我知道您可以将GitHub用于静态网站,但您不能使用它托管虚拟服务器的网络服务器。”
… or can you. 🤨
…还是可以。 🤨
Nah, you can’t host a web server on GitHub, but you can do the next best thing: host a static URL shortener.
不,您不能在GitHub上托管Web服务器,但是您可以做第二件好事:托管静态URL缩短器。
<html>
  <head><meta http-equiv="refresh" content="0;url=https://medium.com" /></head>
  <!-- Old Method: requires JavaScript
  <script>
    window.location.replace('https://medium.com');
  </script> -->
</html>
This script, when ran in a browser, will redirect you to medium.com immediately. Put this file in a repository on GitHub, add the domain name tshr.me to the GitHub Pages custom domain field, and BOOM!💥
在浏览器中运行时,此脚本将立即将您重定向到medium.com 。 将此文件放在GitHub上的存储库中,将域名tshr.me添加到GitHub Pages自定义域字段,然后BOOM!💥
tshr.me now redirects to medium.com.
tshr.me现在重定向到medium.com 。
… you don’t seem very impressed. Don’t worry, we’ll get there.
……您似乎并不印象深刻。 不用担心,我们会到达那里。
只需使其自动化(使用Python!) (Just Automate it (with Python!))
Here comes the fun part:
这里是有趣的部分:
If we could generate all the static short links we want that use the above technique to redirect to the actual URL we want, then this technique might be of some actual use, right?
如果我们可以生成所有希望使用上述技术重定向到所需实际URL的静态短链接,那么该技术可能会有实际用途,对吗?
So I wrote a python scripts that takes in JSON data of various short links and their corresponding redirect URLs, and generates all the HTML pages for me.
因此,我编写了一个python脚本,该脚本接收各种短链接及其相应的重定向URL的JSON数据,并为我生成所有HTML页面。
def main():
    html = '<html><head><meta http-equiv="refresh" content="0;url={url}" /></head></html>'


    with open('links.json') as f:
        links = json.load(f)


    os.mkdir('dist')


    for link in links:
        html_document = html.format(url=link['url'])


        linkname = link['name']
        file_path = f'dist/{linkname}.html'


        with open(file_path, 'w') as f:
            f.write(html_document)


if __name__ == "__main__":
    main()
The corresponding JSON data looks like this:
相应的JSON数据如下所示:
[
  {
    "name": "index",
    "url": "https://tusharsadhwani.dev"
  },
  {
    "name": "cv",
    "url": "https://tusharsadhwani.dev/assets/resume.pdf"
  }
]
Now we’re talking! Running this script generates your HTML redirects and places them neatly in a folder, which you can upload to your GitHub.
现在我们在说话! 运行此脚本将生成HTML重定向,并将其整齐地放置在一个文件夹中,您可以将该文件夹上载到GitHub。
But this isn’t exactly the most convenient, right? Every time you have to update your URLs, you have to update the JSON file, run the python code, push the folder to GitHub…
但这并不是最方便的,对吧? 每次必须更新URL时,都必须更新JSON文件,运行python代码,将文件夹推送到GitHub…
It just sounds really cumbersome. And it is.
听起来真的很麻烦。 是的。
抢救GitHub –第2部分 (GitHub to the rescue — Part 2)
Here’s where we use GitHub’s slightly less known, but really powerful tool: GitHub Actions.
在这里,我们使用GitHub鲜为人知但功能强大的工具: GitHub Actions。

GitHub Actions is GitHub’s super powerful builtin CI/CD tool. It runs a virtual machine for you, that can pull your code, test it, and deploy it, every single time you push an update to your repository. All for no cost at all.
GitHub Actions是GitHub的超级强大的内置CI / CD工具。 它为您运行一个虚拟机,每次将更新推送到存储库时,该虚拟机即可提取代码,对其进行测试并进行部署。 完全免费。
What we are going to do is use its Python workflow that runs our HTML generator script for us, and use a plugin to create a separate GitHub Pages branch to deploy it to, automatically.
我们要做的是使用其Python工作流程为我们运行HTML生成器脚本,并使用一个插件创建一个单独的GitHub Pages分支,以将其自动部署到该分支。
Using this, we can update our short links by simply editing and saving our links.json file, everything else will be handled for us by GitHub.
使用此工具,我们可以通过简单地编辑和保存links.json文件来更新短链接,其他所有内容都将由GitHub处理。
But first, we need to make some arrangements.
但是首先,我们需要做出一些安排。
部署密钥:简短说明 (Deploy Keys: a short explanation)
GitHub has a feature called Deploy Keys, which are essentially just SSH keys that have read/write access to your repository, so a computer that has that key can push code to your repo directly.
GitHub具有一项称为Deploy Keys的功能,它本质上只是对存储库具有读/写访问权限的SSH密钥,因此具有该密钥的计算机可以将代码直接推送到您的存储库中。
To add a deploy key to your GitHub repo, follow these simple steps:
要将部署密钥添加到您的GitHub存储库,请遵循以下简单步骤:
Generate an SSH key:
生成SSH密钥:
open your terminal/command prompt and type
打开终端/命令提示符并键入
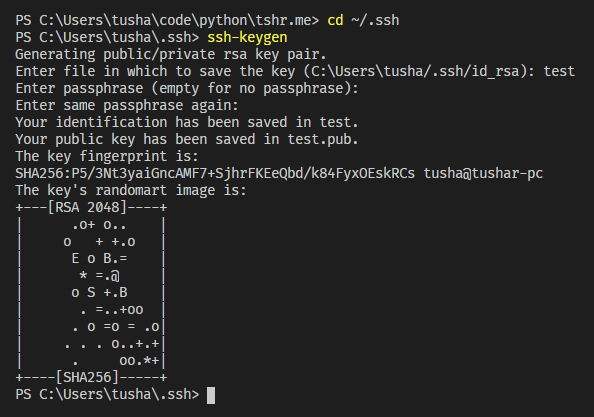
ssh-keygenssh-keygenGive it any name you like (using the repository name would be good), use an empty passphrase for it, and keep everything else default.
给它一个您喜欢的名称(使用存储库名称就可以了),为其使用空密码,并将其他所有内容保留为默认值。
This will generate a private key file, and a public
这将生成一个私钥文件和一个公共
.pubfile, both with the same name..pub文件,都具有相同的名称。.pubfile, both with the same name.(If the commandssh-keygendoesn’t work, you might have to install OpenSSH on your system).pub文件,都具有相同的名称。 (如果命令ssh-keygen不起作用,则可能必须在系统上安装OpenSSH)
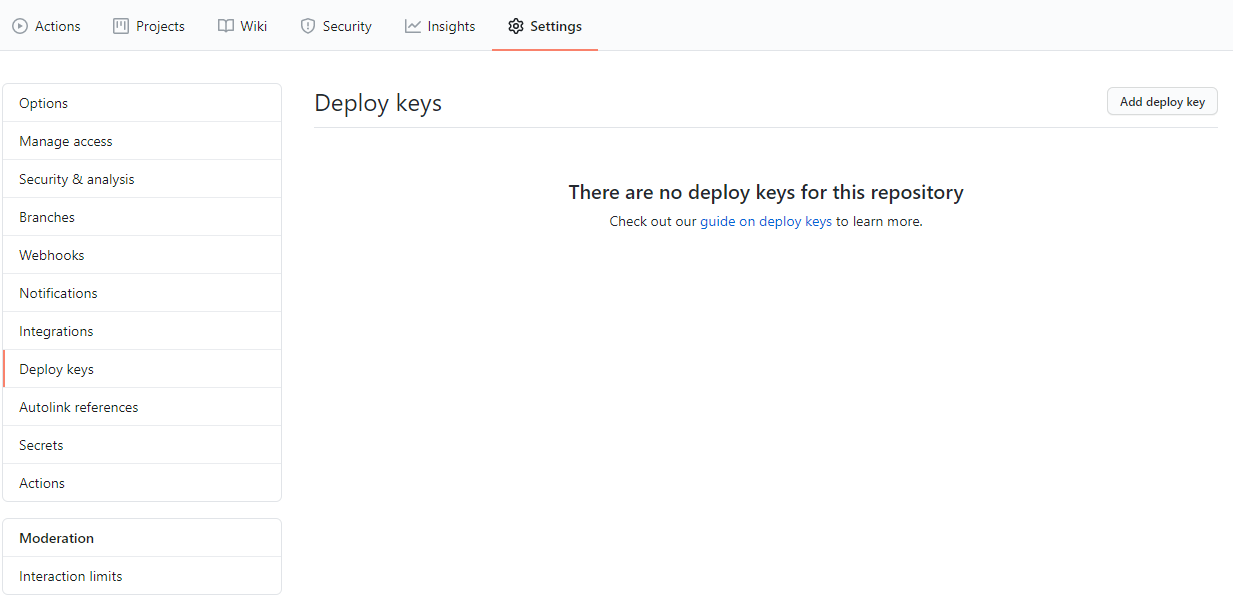
Open your repository settings, and go to the Deploy Keys tab.
打开存储库设置,然后转到“部署密钥”选项卡。
It should look something like this:
它看起来应该像这样:
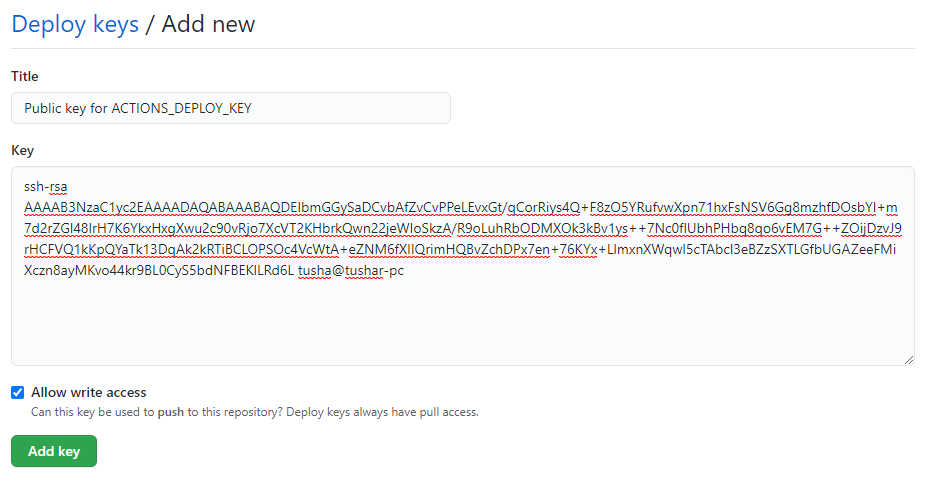
Click on “Add deploy key” on the top right, and copy-paste the entire contents of the
.pubfile that you just generated. (Make sure to click the “write access” checkbox):单击右上角的“添加部署密钥”,然后复制粘贴刚刚生成的
.pub文件的全部内容。 (确保单击“写访问权”复选框) :
Then head down to the Secrets section of your repository settings, and add a new secret named
ACTIONS_DEPLOY_KEY, and copy your private key into it. It should look something like:然后转到存储库设置的Secrets部分,并添加一个名为
ACTIONS_DEPLOY_KEY的新密钥,并将您的私钥复制到其中。 它看起来应该像这样:

And that’s it! We can now get into the Action (pun intended).
就是这样! 现在,我们可以进入Action (双关语)。
最后一步:设置GitHub Action (Final step: Setting up the GitHub Action)
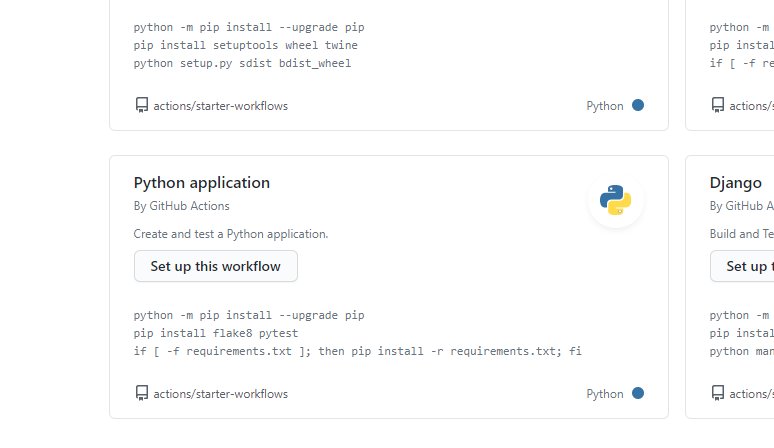
Simply navigate to the Actions tab, and click on the Python Application workflow. Replace its contents with the ones provided below:
只需导航至“操作”选项卡,然后单击“ Python应用程序”工作流程即可。 将其内容替换为以下内容:
name: Python Deploy


on:
  push:
    branches: [ master ]
  pull_request:
    branches: [ master ]


jobs:
  build:
    runs-on: ubuntu-latest


    steps:
    - uses: actions/checkout@v2
    - name: Set up Python 3.8
      uses: actions/setup-python@v2
      with:
        python-version: 3.8


    - name: Build
      run: python main.py


    - name: Deploy to GitHub Pages
      uses: peaceiris/actions-gh-pages@v3
      with:
        deploy_key: ${{ secrets.ACTIONS_DEPLOY_KEY }}
        publish_dir: ./dist
And we’re done!
我们完成了!
You can create your own free URL shortener by simply forking my repository:
您可以通过简单地分叉我的存储库来创建自己的免费URL缩短器:
https://github.com/tusharsadhwani/url-shortener,
https://github.com/tusharsadhwani/url-shortener ,
adding a secret and a deploy key to your repo with write access, and changing the website name from tshr.me to whatever your domain name is, in the main.py file.
通过写访问权向您的仓库添加一个秘密和一个部署密钥,并在main.py文件中将网站名称从tshr.me更改为您的域名。
Thanks for reading this article!Big thanks from my side to Coding Garden, whose videos motivated me to make this project in the first place, and this article, which led me to the free hack that I came up with. Also thanks to Wojtek Pawlik (GingerPlusPlus) for suggesting a non-javascript method for redirects.
感谢您阅读本文!非常感谢Coding Garden ,他的视频促使我首先进行了这个项目,而这篇文章促使我想到了免费的技巧。 也感谢Wojtek Pawlik (GingerPlusPlus)建议使用非JavaScript重定向方法。
翻译自: https://medium.com/@tushar.sadhwani000/how-i-made-my-own-url-shortener-for-free-751d29afa463
缩短url


 456
456

 被折叠的 条评论
为什么被折叠?
被折叠的 条评论
为什么被折叠?
 到【灌水乐园】发言


