


python中矩阵转图像
translation image is part of transformation image that change geometric transformations of image. Translation image is process of shift or move image to other position along distance that you want to move.
翻译图像是变换图像的一部分,可改变图像的几何变换。 平移图像是将图像沿想要移动的距离平移或移动到其他位置的过程。

Image above show p point and move this point to p’ along T distance in 2 dimensions. As simple in coordinate of p is (x,y) when we want to move p to p’. Coordinate of p’ is (x+T,y+T)(actually, T is not always positive. So, coordinate of p’ is (x+T, y+T or x-T, y-T). you can use this method to code in python but now I will use matrix to calculation this method.
上图显示了p点,并将该点沿T距离二维移动到p'。 当我们想将p移至p'时,p的坐标简单为(x,y)。 p'的坐标为(x + T,y + T)(实际上,T并不总是正数。因此,p'的坐标为(x + T,y + T或xT,yT)。您可以使用此方法python中的代码,但现在我将使用矩阵来计算此方法。

In image above show how to calculate new position of each x,y. x,y in equation is position of pixels in image. Equation above have 2 component first component is identity matrix in first row change last component to distance that you want to move this pixel in x coordinate called Tx and second row change last component to distance that is moved too called Ty. Second component is matrix that contain x,y (position in image(order of pixel)) of image and add 1 in third row (From property of matrix col of matrix 1 have to equal row of matrix 2) then bring 2 components dot together. Result is matrix size 2*1 that contain new position of x,y. when you have new position(x’,y’) of pixel, you will change intensity of new position pixel equal intensity from x, y
在上图中,显示了如何计算每个x,y的新位置。 等式中的x,y是图像中像素的位置。 上面的方程式有2个分量,第一个分量是第一行中的恒等矩阵,将最后一个分量更改为要在x坐标中移动此像素的距离,称为Tx,第二个行将最后一个分量更改为也移动的距离,也称为Ty。 第二个分量是包含图像的x,y(图像位置(像素顺序))并在第三行中加1的矩阵(从矩阵1的矩阵col的属性等于矩阵2的行),然后将两个分量点组合在一起。 结果是矩阵大小2 * 1包含x,y的新位置。 当您有像素的新位置(x',y')时,将从x,y更改新位置像素的强度等强度
编码部分 (Coding Part)
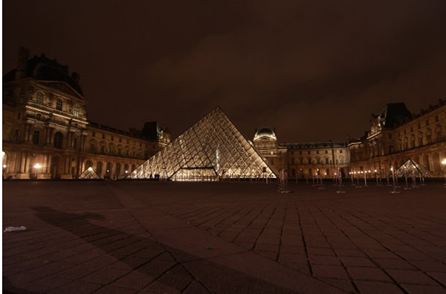
I use image below is input image and send it to translation_img function that calculation and change intensity follow above algorithm
我使用下面的图像作为输入图像,并将其发送到translation_img函数,该函数按照上述算法计算和更改强度
First -> read input image using OpenCV library and define distance that you want to shift image. It can be positive or negative value. In this example I use shift x coordinate is 100 pixel, shift y coordinate is 100 too.
首先->使用OpenCV库读取输入图像并定义要移动图像的距离。 它可以是正值或负值。 在此示例中,我使用shift x坐标为100像素,y坐标也为100。

Second -> create translation_img function take 3 parameter is input_img, shift_distance, shape_of_out_img then extract parameter to some variable.
第二个->创建translation_img函数,将3个参数输入input_img,shift_distance,shape_of_out_img,然后将参数提取到某个变量。

After that, define translation matrix using numpy library
之后,使用numpy库定义翻译矩阵

Then create blank image using np.zeros() and shape is equal shape of input image.
然后使用np.zeros()创建空白图像,并且形状等于输入图像的形状。

Create 2 dimensional loops for access all pixels in image outer loop access along height, inner loop access along width then create origin_xy matrix and bring 2 matrix dot it together. You will get new position of x,y
创建二维循环以访问图像中的所有像素沿着高度的外部循环访问,沿着宽度的内部循环访问,然后创建origin_xy矩阵并将2个矩阵点在一起。 您将获得x,y的新位置

Last step is change intensity value of blank image that I create at first. In Addition, carefully about new_xy that less than zero because image position not have negative value it start (0,0) before change intensity you have to check this condition. Last step is return image.
最后一步是更改我最初创建的空白图像的强度值。 此外,请仔细检查new_xy小于零的位置,因为图像位置没有负值,所以它必须在更改强度之前开始(0,0),然后检查此条件。 最后一步是返回图像。

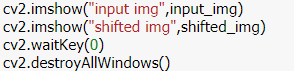
If you want to see image use cv2.imshow() function type follow this code below to see image
如果要查看图像,请使用cv2.imshow()函数类型,请按照以下代码查看图像
This is output from shifted distance = (100,100)
这是从偏移距离=(100,100)输出的

Full version of translation image code
完整版本的翻译图像代码


You will see this code in this github
您将在此github中看到此代码
https://github.com/prayat-pu/Computer_vision/blob/master/tranform_image/translation_img.py
https://github.com/prayat-pu/Computer_vision/blob/master/tranform_image/translation_img.py
翻译自: https://medium.com/@bosssds65/translation-image-using-translation-matrix-with-python-d5d2b580d963
python中矩阵转图像


 2291
2291


 被折叠的 条评论
为什么被折叠?
被折叠的 条评论
为什么被折叠?
 到【灌水乐园】发言


