


rxjs angular
All the patterns you will ever need to subscribe and unsubscribe from RxJS Observables in your Angular project!
您需要在Angular项目中订阅和取消订阅RxJS Observables的所有模式!
Follow along the code with this live demoFind the full source code for this blog in this github repository
跟随代码进行此实时演示 ,在此github存储库中找到此博客的完整源代码
介绍 (Introduction)
We use RxJS in every Angular app we write, it has a large impact on the data flow across our app, performance and much more
我们在编写的每个Angular应用程序中都使用RxJS,它对整个应用程序中的数据流,性能等产生很大影响
It is important to unsubscribe from our Observables in order to avoid memory leaks. This article will show you most of the patterns you can unsubscribe from Observables in your Angular components!
取消订阅我们的Observable很重要,这样可以避免内存泄漏。 本文将向您展示您可以从Angular组件中的Observable取消订阅的大多数模式!
We start with creating this dummy service to help up keep track on the subscriptions we are making
我们从创建此虚拟服务开始,以帮助跟踪我们正在进行的订阅
@Injectable({
  providedIn: 'root',
})
export class DummyService {
  getEmissions(scope: string): Observable<string> {
    return Observable.create((observer) => {
      console.log(`${scope} Subscribed`);


      const subscription: Subscription = timer(0, 1000)
        .pipe(
          map((n) => `${scope} Emission #${n}`),
          tap(console.log)
        )
        .subscribe(observer);


      return () => {
        subscription.unsubscribe();
        console.log(`${scope} Unsubscribed`);
      };
    });
  }
}
Our dummy service will have a single getEmissions method, which accepts a scope to log events and returns an Observable which emits${scope} Emission #n every nth second.
我们的虚拟服务将有一个getEmissions方法,该方法接受一个scope来记录事件并返回一个Observable,该对象每n秒发出${scope} Emission #n 。
#1“常规”方式 (#1 The “Regular” Way)
The simplest way of subscribing and unsubscribing from an Observable is to subscribe within ngOnInit, create a class property holding our Subscription, and unsubscribe within ngOnDestroy.To make things easier, we can initialize the subscription property to Subscription.EMPTY to avoid null checking it when unsubscribing:
订阅和可观察到的退订的最简单的方法是内认购ngOnInit ,创建一个类持有物业我们的Subscription范围内,和退订ngOnDestroy 。为了方便起见,我们可在订购属性初始化为Subscription.EMPTY以避免无效检查它的时候取消订阅:
@Component({
  selector: 'app-regular',
  template: `<div>{{ emission }}</div>`,
})
export class RegularComponent implements OnInit, OnDestroy {
  emission: string;


  /*
    Note: we initialize to Subscription.EMPTY to avoid null checking within ngOnDestroy
   */
  private subscription: Subscription = Subscription.EMPTY;


  constructor(private dummyService: DummyService) {}


  ngOnInit(): void {
    this.subscription = this.dummyService
      .getEmissions('Regular')
      .subscribe((emission) => (this.emission = emission));
  }


  ngOnDestroy(): void {
    this.subscription.unsubscribe();
  }
}
To see everything’s working we’ll remove the component from the DOM after 3 seconds to see that it is unsubscribes
要查看一切正常,我们将在3秒钟后从DOM中删除该组件,以确认其已取消订阅

As the name suggests, this is the most basic way of unsubscribing, it is good when you have a single Subscription, but when you have multiple subscriptions, each of them will need its own class property and a call to unsubscribe within ngOnDestroy
顾名思义,这是最基本的退订方式,当您有一个单独的 Subscription时很好,但是当您有多个Subscription时,每个订阅都将需要自己的类属性,并且需要在ngOnDestroy调用unsubscribe
#2 Subscription.add方法 (#2 Subscription.add method)
RxJS Subscription comes with a built in Subscription.add method that allows us to stack multiple teardown logics to a single Subscription instance.First, create class property initialized to new Subscription(), next instead of assigning our subscriptions to class properties, call Subscription.add methodAnd finally, unsubscribe within ngOnDestroy
RxJS Subscription带有一个内置的Subscription.add方法,该方法使我们可以将多个拆解逻辑堆叠到单个Subscription实例中。首先,创建初始化为new Subscription()类属性,其次,而不是将我们的订阅分配给类属性,请调用Subscription.add内methodAnd最后,退订ngOnDestroy
@Component({
  selector: 'app-add',
  template: `
    <div>{{ emissionA }}</div>
    <div>{{ emissionB }}</div>
  `,
})
export class AddComponent implements OnInit, OnDestroy {
  emissionA: string;
  emissionB: string;


  private subscription: Subscription = new Subscription();


  constructor(private dummyService: DummyService) {}


  ngOnInit(): void {
    this.subscription.add(
      this.dummyService
        .getEmissions('[Add A]')
        .subscribe((emission) => (this.emissionA = emission))
    );


    this.subscription.add(
      this.dummyService
        .getEmissions('[Add B]')
        .subscribe((emission) => (this.emissionB = emission))
    );
  }


  ngOnDestroy(): void {
    this.subscription.unsubscribe();
  }
}
Opening our console we should see two subscriptions:
打开控制台,我们应该看到两个订阅:

With this, we can easily use the built-in power of RxJS and subscribe / unsubscribe to multiple Observables without introducing extra class properties.
这样,我们可以轻松使用RxJS的内置功能并订阅/取消订阅多个Observable,而无需引入额外的类属性。
#3 AsyncPipe (#3 AsyncPipe)
Angular has many great built-in pipes, one of them is the AsyncPipe.The AsyncPipe accepts an Observable and automatically subscribes to it and unsubscribes when the component destroyed.Opposed to previous examples, here we are not subscribing in our component, but pass the Observable to AsyncPipe:
Angular有很多很棒的内置管道,其中之一就是AsyncPipe .AsyncPipe接受一个Observable并自动订阅它,并在组件销毁时取消订阅。可观察到AsyncPipe:
@Component({
  selector: 'app-async',
  template: `<div>{{ emissions$ | async }}</div>`
})
export class AsyncComponent implements OnInit {
  emissions$: Observable<string>;


  constructor(private dummyService: DummyService) {}


  ngOnInit(): void {
    this.emissions$ = this.dummyService.getEmissions('[Async]');
  }
}
In my opinion this is one of the cleanest ways to use Observables in Angular.All you need is to create the Observables and let Angular subscribe and unsubscribe for you.
我认为这是在Angular中使用Observable的最干净的方法之一,您需要创建的Observables并让Angular为您订阅和取消订阅。
#4 takeUntil运算符 (#4 takeUntil Operator)
RxJS is packed with many useful operators, takeUntil is one of them.According to its’ signarture, takeUntil accepts a notifier, which upon emission unsubscribe from the source Observable.In our case, we would want to notify the Observable when the component destroyed, to do so we add class property called componentDestroyed$ (or any other name you would like) of type Subject<void> and use it as a notifier.All left to do is to “notify” within ngOnDestroy, our final code will be:
RxJS包含了许多有用的运算符, takeUntil是其中之一,根据它的签名,takeUntil接受一个notifier ,该标识符在发出时从源Observable取消订阅。在本例中,我们希望在组件被破坏时通知Observable,为此,我们添加类型为Subject<void>名为componentDestroyed$ (或您想要的其他名称)的类属性,并将其用作通知程序。剩下要做的就是在ngOnDestroy “通知”,我们的最终代码将是:
@Component({
  selector: 'app-until',
  template: `<div>{{ emission }}</div>`,
})
export class UntilComponent implements OnInit, OnDestroy {
  emission: string;


  private componentDestroyed$: Subject<void> = new Subject<void>();


  constructor(private dummyService: DummyService) {}


  ngOnInit(): void {
    this.dummyService
      .getEmissions('takeUntil')
      .pipe(takeUntil(this.componentDestroyed$))
      .subscribe((emission) => (this.emission = emission));
  }


  ngOnDestroy(): void {
    this.componentDestroyed$.next();
  }
}
Opposed to the previous “regular” way, this pattern does not introduce extra class properties with multiple subscriptions. All we need to do is add takeUntil(componentDestroyed$) and let RxJS take care of the rest.
与以前的“常规”方式相反,此模式不引入带有多个预订的额外类属性。 我们需要做的就是添加takeUntil(componentDestroyed$)并让RxJS负责其余的工作。
#5 SubSink库 (#5 SubSink Library)
SubSink is an awesome library by Ward Bell, it allows you to gracefully unsubscribe Observables within your component.
SubSink是Ward Bell的一个很棒的库,它使您可以在组件内优雅地取消订阅Observable。
First, install SubSink by runningnpm i subsink or yarn add subsinkNext we’ll create class property of type SubSink.SubSink comes in two flavors, an Easy Technique (using a setter) and an Array/Add Technique.
首先,通过运行npm i subsink或yarn add subsink安装SubSink。接下来,我们将创建SubSink类型的类属性.SubSink有两种形式,一种是Easy Technique (使用setter)和一种Array / Add Technique 。
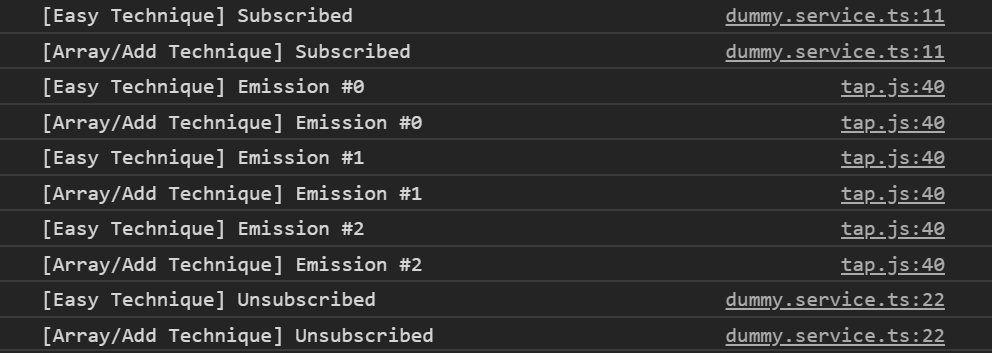
Using the Easy Technique is as simple as using the sink setter method.Using the Array/Add Technique has the same syntax as RxJS native Subscription.add.Creating a subscription for each of the methods, our component will look like this
使用Easy Technique就像使用接收sink setter方法一样简单。使用Array / Add Technique的语法与RxJS native Subscription.add相同。为每个方法创建订阅后,我们的组件将如下所示
@Component({
  selector: 'app-sink',
  template: `
    <div>{{ easyEmission }}</div>
    <div>{{ arrayAddEmission }}</div>
  `,
})
export class SinkComponent implements OnInit, OnDestroy {
  easyEmission: string;
  arrayAddEmission: string;


  private subs = new SubSink();


  constructor(private dummyService: DummyService) {}


  ngOnInit(): void {
    /* Using the Easy Technique with a setter function */
    this.subs.sink = this.dummyService
      .getEmissions('[Easy Technique]')
      .subscribe((emission) => (this.easyEmission = emission));


    /* Using the Array/Add Technique */
    this.subs.add(
      this.dummyService
        .getEmissions('[Array/Add Technique]')
        .subscribe((emission) => (this.easyEmission = emission))
    );
  }


  ngOnDestroy(): void {
    this.subs.unsubscribe();
  }
}
#6直到毁灭图书馆 (#6 until-destroy Library)
Note: this library behaves differently on Pre Ivy Angular, for more information visit the docs
注意:该库在Pre Ivy Angular上的行为有所不同,有关更多信息,请访问文档
until-destroy is one of many awesome libraries by ngneat, it uses UntilDestroy decorator to deter which properties are subscriptions and automatically unsubscribe them when the component destroyed.We can also use its’ custom RxJS operator named untilDestroyed instead of using class properties.
直到灭是由许多真棒库之一ngneat ,它采用UntilDestroy装饰阻止哪些属性订阅和自动取消其当组件destroyed.We也可以使用命名其定制RxJS操作untilDestroyed而不是使用类属性。
To use it we only need to apply the UntilDestroy decorator to our component, and add untilDestroyed operator to Observables’ pipe:
要使用它,我们只需要在组件上应用NeverDestroy装饰器,然后在Observables的管道中添加untilDestroyed运算符即可:
@UntilDestroy()
@Component({
  selector: 'app-destroyed',
  template: `<div>{{ emission }}</div> `,
})
export class DestroyedComponent implements OnInit {
  emission: string;


  constructor(private dummyService: DummyService) {}


  ngOnInit(): void {
    this.dummyService
      .getEmissions('[UntilDestroy]')
      .pipe(untilDestroyed(this))
      .subscribe((emission) => (this.emission = emission));
  }
}
To conclude, until-destroy is very powerful library that allows you to automatically subscribe / unsubscribe from Observables.In addition, until-destroy has many features that are not described in this article, so don’t be shy and head to their github repo!
总而言之,直到-destroy是一个非常强大的库,它允许您自动从Observables订阅/取消订阅。此外,直到-destroy 具有许多本文未介绍的功能 ,因此请不要害羞并前往其github存储库 !
摘要 (Summary)
We’ve seen a a lot of ways and patterns to subscribe and unsubscribe from our Observables, each has it’s own pros and cons and brings a different coding style to the table.
我们已经看到了很多可以从Observable订阅和取消订阅的方式和模式,每种方式和模式各有优缺点,并为表格带来了不同的编码风格。
The most important thing is, whichever pattern you choose be consistent.
最重要的是,无论您选择哪种模式都是一致的。

翻译自: https://medium.com/@tal.ohana.x/rxjs-angular-unsubscribe-like-a-pro-ffeedec60aa7
rxjs angular


 381
381

 被折叠的 条评论
为什么被折叠?
被折叠的 条评论
为什么被折叠?
 到【灌水乐园】发言


