


An article that will show you how to create a React Router for your React App.
一篇文章,将向您展示如何为React App创建一个React Router。
Before we begin, go to node.js and download the latest version of node. Node.js® is a JavaScript runtime built on Chrome’s V8 JavaScript engine.
在开始之前,请转到node.js并下载最新版本的node。 Node.js®是基于Chrome的V8 JavaScript引擎构建JavaScript运行时。

Once the latest version of Node.Js is installed, Open up the terminal and navigate to your Desktop. Run npx create-react-app router-app in your terminal to begin the creation of your new react application.
安装最新版本的Node.Js之后,打开终端并导航到您的桌面。 运行npx create-react-app router-app 在您的终端上开始创建新的react应用程序。

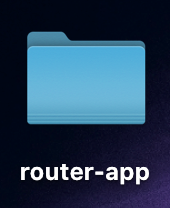
After the creation of your router-app is complete you'll notice it in your desktop.
路由器应用程序创建完成后,您会在桌面上注意到它。

In your terminal, navigate to your newly created app and run npm start. You should see the app open in your browser.
在您的终端中,导航到新创建的应用程序并运行npm start。 您应该会在浏览器中看到该应用已打开。

Open the router-app folder in your code editor (I used Visual Studio Code). Navigate to src folder and into App.js file. Next You will need to delete the highlighted code below as it is not needed. Save file.
在代码编辑器中打开router-app文件夹(我使用了Visual Studio Code)。 导航到src文件夹并进入App.js文件。 下一步您将需要删除下面突出显示的代码,因为它不是必需的。 保存存档。


Next we are going to create our pages for our multi-page web app. (Home.js, About.js, Projects.js, Contact.js)
接下来,我们将为多页Web应用程序创建页面。 (Home.js,About.js,Projects.js,Contact.js)
Starting in your Home.js file we will be adding our code. First importing react from React and then creating our Home Function that will return a header, “Welcome to my Website!” Then exporting the Home function.
从您的Home.js文件开始,我们将添加我们的代码。 首先从React导入react,然后创建Home函数,该函数将返回标题“欢迎使用我的网站!”。 然后导出 Home功能。

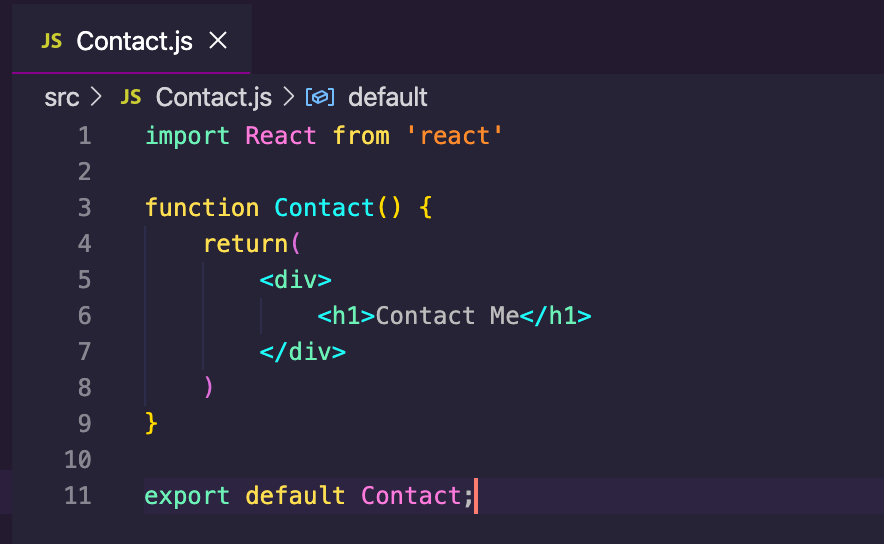
Copy your code from Home.js and paste to the other pages making adjustments pertaining to each page.
从Home.js复制代码,然后粘贴到其他页面上,以进行与每个页面有关的调整。
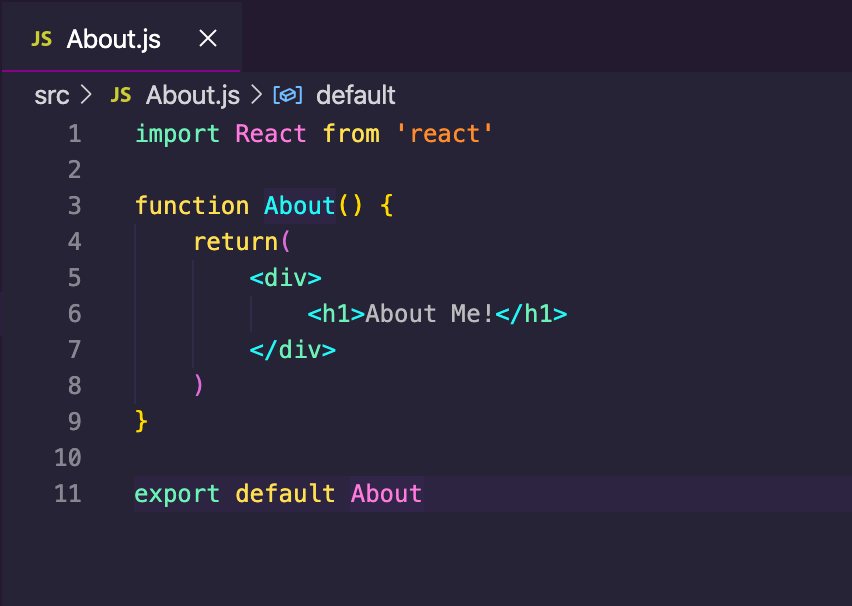

About Me Page
关于我页面
Projects Page
项目页面
Contact Page
联系页面
Once all your pages have their code ready, go back into your App.js file.Inside your App.js file we will be importing these pages using the code below. You may need to adjust your routes depending on your pages location.
当所有的页面都有自己的代码准备好了,回到你App.js file.Inside您App.js文件,我们将导入使用下面的代码这些页面。 您可能需要根据页面位置调整路线。
Next we will check to make sure the components that we imported are working by adding them into your return App function as shown below.
接下来,我们将通过将其添加到您的return App函数中来确保导入的组件正常工作,如下所示。

Once all is saved, go back into your browser where the react app was opened, (Mine was opened in http://localhost:3000/) and you should see the output of all your pages.
保存所有内容后,返回打开React应用的浏览器(在http:// localhost:3000 /中打开了Mine),您应该会看到所有页面的输出。

Now that we have tested our pages and are getting the expected output, Here comes the fun part! We will be installing the react router to our react application. Go back into your terminal(You may need to kill the npm start process with control + Z) and inside your router-app folder type in npm install - -save react-router-dom.
现在我们已经测试了页面并获得了预期的输出,这是有趣的部分! 我们将在React应用程序中安装react路由器。 回到您的终端(您可能需要使用control + Z终止npm启动过程),然后在您的router-app文件夹中键入npm install--save react-router-dom。

Once it appears to be installed go into your package.json file in your editor to confirm it has been installed as a dependency.
一旦它似乎已安装,进入编辑器中的package.json文件,以确认它已作为依赖项安装。
Our goal now is to create separate paths for each page, Lets go into our Index.js file and add {BrowserRouter} from react-router-dom and wrap the App.js File within the newly imported component. This will allows us to use the route methods within our App.js file. Use code below for reference.
现在我们的目标是为每个页面创建单独的路径,让我们进入我们的Index.js文件,并从React路由器-DOM添加{} BrowserRouter和新导入的组件内包裹App.js文件。 这将使我们能够使用App.js文件中的route方法。 使用下面的代码作为参考。


Next we will go into our App.js file and import {Route, Link} from ‘react-router-dom’ and add our Route paths to our components.
接下来,我们将进入App.js文件,并从“ react-router-dom”导入{Route,Link}并将Route路径添加到组件中。
Dont forget to start your application again with npm start if its not up and running already. You will notice once it starts up the home page path of ‘/’ will contain only the home contents.
如果尚未启动并运行它,请不要忘记使用npm start再次启动您的应用程序。 您会注意到,一旦启动,首页路径“ /”将仅包含首页内容。

All your pages will have their own paths, you can test this out by typing /about/projects/contactAt the end of your applications URL (Mines http://localhost:3000)
您所有的页面都有自己的路径,您可以通过输入/ about / projects / contact进行测试。在应用程序URL的末尾(Mines http:// localhost:3000 )。
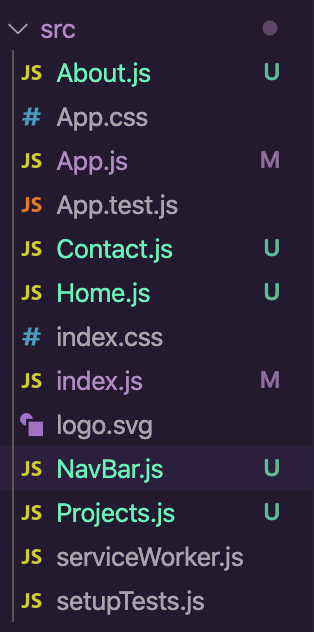
To finish off the application we will be creating a Navigation bar component to navigate from page to page. Create a new file named NavBar.js inside your src folder in your code editor.
为了完成该应用程序,我们将创建一个导航栏组件以在页面之间导航。 在代码编辑器的src文件夹内创建一个名为NavBar.js的新文件。
Inside NavBar.js you will import React from ‘react’ import {Link} from ‘react-router-dom’ and create a NavBar function returning your navigation bar code. We will be using the Link method to route to the specified page. Dont forget to export your code so we can use it on the next step! See code Below.
在NavBar.js中,您将从'react' 导入 React,从'react-router-dom'导入{Link}并创建一个返回您的导航条形码的NavBar函数。 我们将使用Link方法路由到指定页面。 不要忘记导出您的代码,以便我们在下一步中使用它! 请参见下面的代码。

To wrap it all up we import our newly created NavBar component into App.js so that we can use it to navigate our page. We add the Navbar into our Return App Function to render out to the browser. Save and Done!
为了将所有内容包装起来,我们将新创建的NavBar组件导入App.js,以便我们可以使用它来导航页面。 我们将Navbar添加到Return App Function中以呈现到浏览器。 保存并完成!

Go into your Browser and Voila! Your navigation is born and ready to use!
进入浏览器,瞧! 您的导航已经诞生,可以使用了!

This Concludes my Tutorial, Hope you enjoyed.
结束了我的教程,希望您喜欢。
翻译自: https://medium.com/@jperez.cemex/how-to-create-a-react-router-65e0ea1376f4


 806
806

 被折叠的 条评论
为什么被折叠?
被折叠的 条评论
为什么被折叠?
 到【灌水乐园】发言


