


Learning Android Application Development from scratch can be tricky sometimes for a newbie like myself. I am assuming that you are equipped with a complete Android Studio setup and have a fair idea about Android Activity and Markup language.
对于像我这样的新手来说,从头开始学习Android应用程序开发有时会很棘手。 我假设您已经配备了完整的Android Studio设置,并且对Android活动和标记语言有一个很好的了解。
Let us create a Android Project with Empty Activity and follow the process. On completion, we are presented with two files:1. MainActivity.java (Red box in Fig 1)2. activity_main.xml (Green box in Fig 1)Just for curiosity, we delete both the files from the project folder, and now the project is broken.
让我们创建一个具有“空活动”的Android项目并遵循该过程。 完成后,我们将看到两个文件:1。 MainActivity.java (图1中的红色框)2。 activity_main.xml (图1中的绿色框)出于好奇,我们从项目文件夹中删除了这两个文件,现在项目已损坏。
Through this post, we’ll try to fix what’s broken and set up a new default activity without starting from scratch.
通过这篇文章, 我们将尝试修复问题,并设置新的默认活动,而无需从头开始。

Before we go into the actual process of setting up the default activity, let’s look at how we can create an activity. It can either be created from the File tab section (purple box on the top left of Fig 1) or Project Manager window (blue box, i.e., the leftmost window of Fig 1). Given below are the two ways to create a new activity:
在进入设置默认活动的实际过程之前,让我们看一下如何创建活动。 可以从“文件”选项卡部分(图1左上角的紫色框)或“项目管理器”窗口(蓝色框,即图1的最左侧窗口)中创建它。 下面给出了创建新活动的两种方法:
- Go to File tab > New > Activity > Empty Activity 转到文件选项卡>新建>活动>空活动
- Right Click on App module > New > Activity > Empty Activity 右键单击应用程序模块>新建>活动>空活动


We will work with Empty Activity(named New Main Activity) in this post.
在这篇文章中,我们将使用Empty Activity(名为New Main Activity)。
Once an Activity is selected, a new window will pop up, asking us to Configure the Activity we have chosen previously. Fill up the details as required and do check the check-boxes saying Generate a Layout File and Launcher Activity (Fig 3).
选择活动后,将弹出一个新窗口,要求我们配置先前选择的活动。 根据需要填写详细信息,并选中“生成布局文件和启动器活动”复选框(图3)。


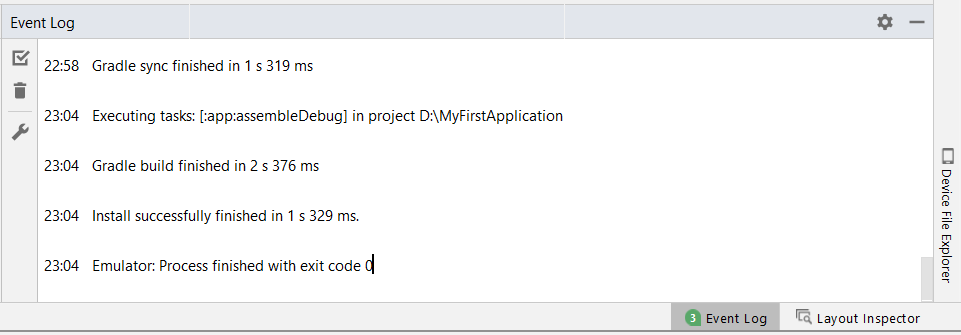
If everything is done correctly, the app will build successfully & run without any errors. We can go back to building our cool application. (Fig 4)
如果一切都正确完成,则该应用将成功构建并运行,并且没有任何错误。 我们可以回过头来构建我们很酷的应用程序。 (图4)

Otherwise, if the check-boxes are left unchecked (Fig 5), the new activity will be generated. But it won’t run because Default Activity is not set (Fig 6).
否则,如果未选中复选框(图5),则将生成新活动。 但是它不会运行,因为未设置默认活动(图6)。

We will first create a layout file and then update the Android Manifest file to fix this issue.
我们将首先创建一个布局文件,然后更新Android Manifest文件以解决此问题。
步骤1:创建布局文件 (Step 1: Create a layout file)
To create a layout file go to File > New > XML > Layout XML File (Fig 7.1)
要创建布局文件,请转到文件>新建> XML>布局XML文件(图7.1)

In the layout configuration window, the Root Tag field can be filled as Linear Layout, Relative Layout, etc. (Root Tag can also be changed later)
在布局配置窗口中,“根标签”字段可以填写为“线性布局”,“相对布局”等。 (“根标签”以后也可以更改)

步骤2:配置Android清单文件 (Step 2: Configure Android Manifest file)
To open the Android Manifest file go to the Project Manager window (brown box in Fig 1) and follow the file hierarchy (Fig 8):App > manifests > AndroidManifest.xml
要打开Android Manifest文件,请转到Project Manager窗口(图1中的棕色框)并遵循文件层次结构(图8):App> manifests> AndroidManifest.xml

In the XML file you will see activity tag (Fig 9): <activity android:name= ”.NewMainActivity”></activity>
在XML文件中,您将看到活动标记(图9):<activity android:name =” .NewMainActivity”> </ activity>
If there is no code within the activity tag that means that particular activity (.NewMainActivity in our case) is not set as Default Activity.
如果活动代码中没有代码,则意味着该特定活动(在本例中为.NewMainActivity)未设置为默认活动。

Add the following markup code within the activity tag to make it a Default Activity (Fig 10):
在活动标签内添加以下标记代码,使其成为默认活动(图10):
<intent-filter>
    <action android:name="android.intent.action.MAIN"/>
    <category android:name="android.intent.category.LAUNCHER"/>
</intent-filter>
Now, build the application and run it. It will run successfully (Fig 11).
现在,构建应用程序并运行它。 它将成功运行(图11)。


 2954
2954


 被折叠的 条评论
为什么被折叠?
被折叠的 条评论
为什么被折叠?
 到【灌水乐园】发言


