


Hey guys, as we go through another week in quarantine, I thought of deviating from our Scala track (Microservices, IO Monad, Macros) and explore something new & exciting.
嘿,伙计们,因为我们通过在隔离一个星期,我想从我们的Scala轨道(偏离的微服务 , IO单子 , 宏 )和探索新事物和令人兴奋的。
With the increasing number of smartphone users, businesses have to focus more on continuously improving their user’s app experience. According to a survey by Google, a smartphone user has at a time, around 35 Apps on their device. With the combined App market on Google Play Store & Apple App Store, crossing more than 1M+, it is an increasingly competitive race to gain the top spot.
随着智能手机用户数量的增加,企业必须将更多的精力放在不断改善其用户的应用程序体验上。 根据Google的一项调查 ,智能手机用户一次在其设备上拥有大约35个应用程序。 随着Google Play商店和Apple App Store上合并的App市场超过100万+,赢得头把交椅的竞争越来越激烈。
With the existing practices, developers have to not only write separate code for both Android & iOS (in 2 different languages as well) but also keep updating both to keep up with the latest features. It goes without saying that the developers have to maintain a uniform experience across apps on the 2 different platforms.
按照现有的做法,开发人员不仅必须为Android和iOS编写单独的代码(还以2种不同的语言编写),而且还必须不断更新两者以跟上最新功能。 不用说,开发人员必须在2个不同平台上的应用程序之间保持统一的体验。
Phew ! this seems discouraging enough to anyone thinking about App development or starting an App-based venture. But fear not, Flutter is here to the rescue…
Ph! 对于任何考虑开发应用程序或进行基于应用程序的创业的人来说,这似乎都令人沮丧。 但不要担心,Flutter随时准备解救……
Flutter is Google’s mobile UI framework that provides a fast and expressive way for developers to build native apps on both iOS & Android, using a single codebase.
Flutter是Google的移动UI框架,它为开发人员提供了一种快速而富有表现力的方法,使他们可以使用单个代码库在iOS和Android上构建本机应用程序。
That seems great. But how exactly does it work?
好像很棒 但是它是如何工作的呢?
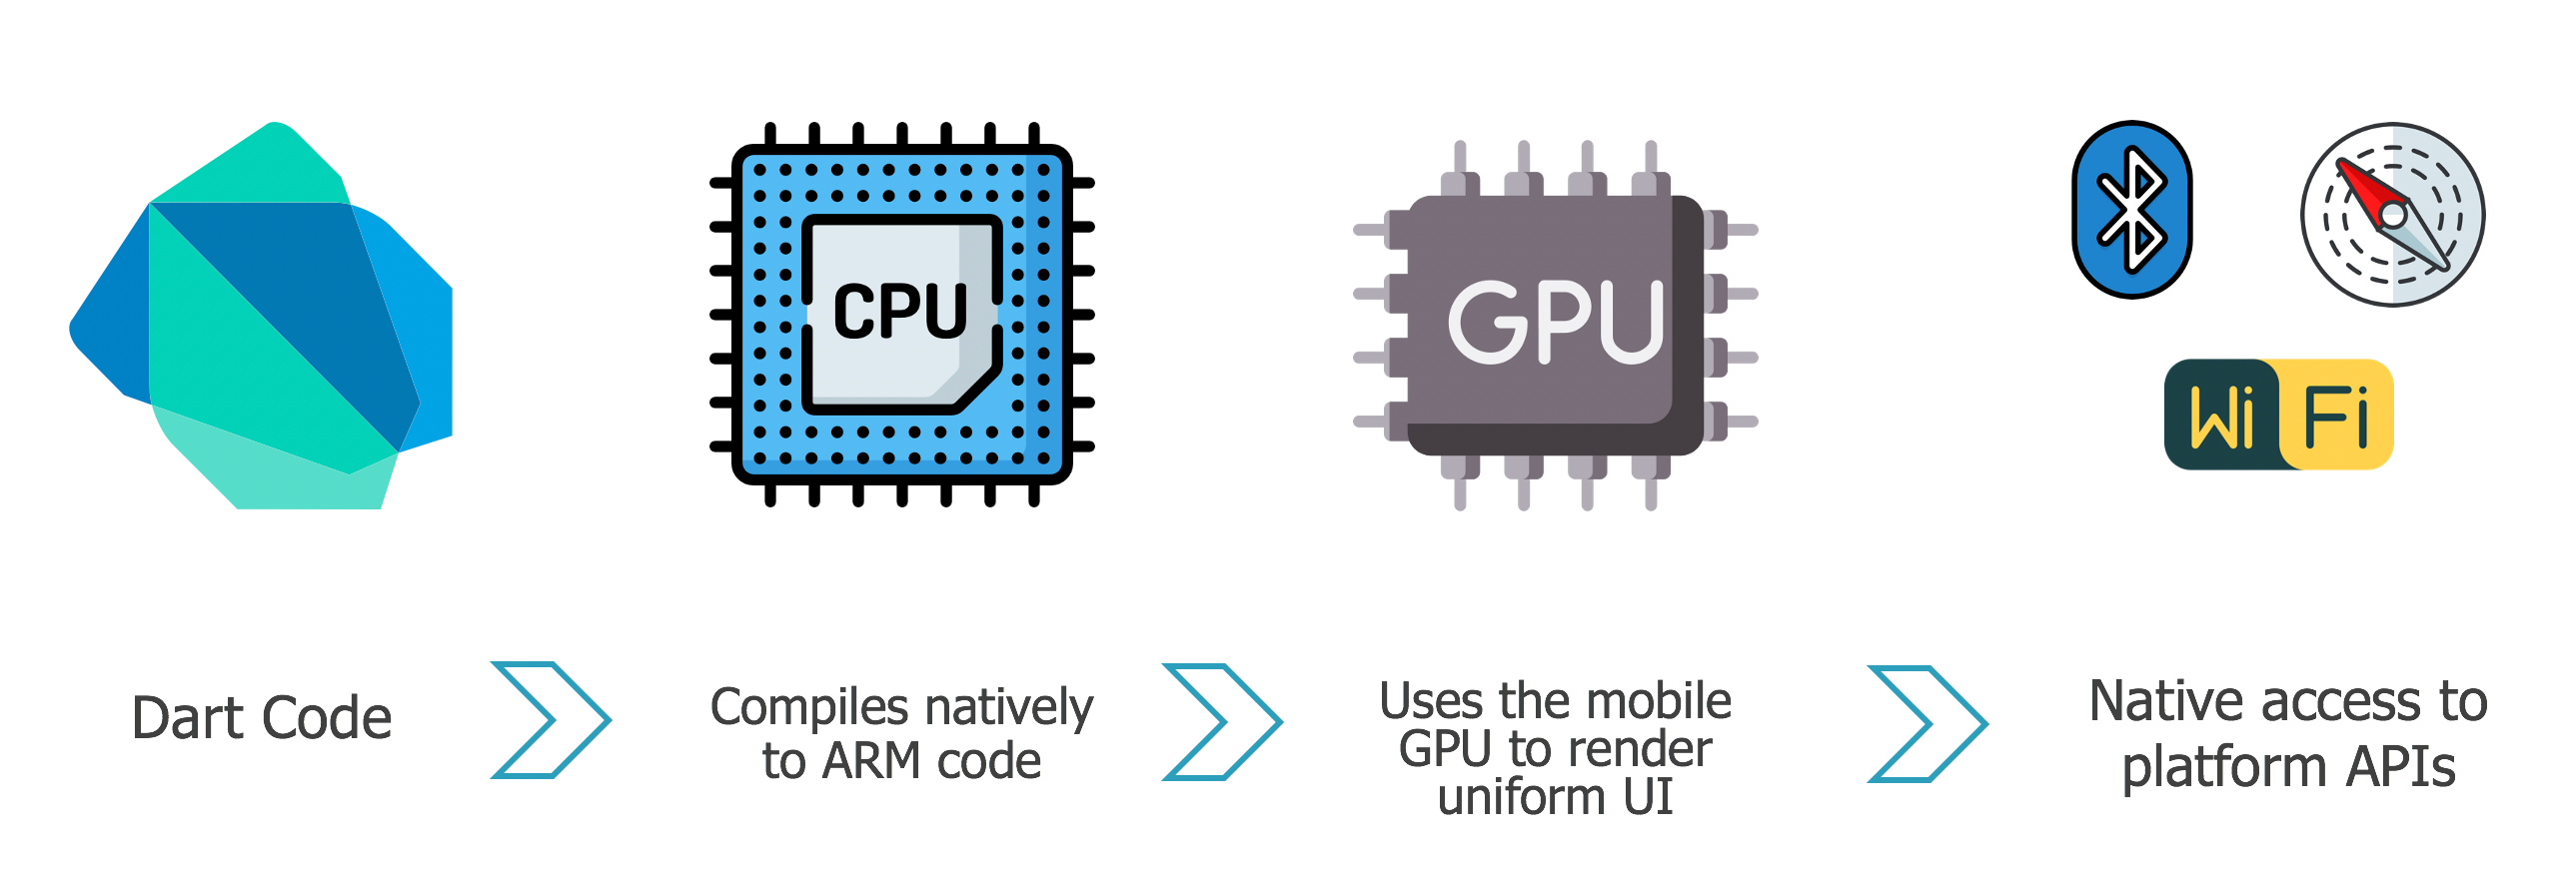
Development in Flutter is done with the Dart programming language (quite similar to any other OOP language). The code gets compiled natively and uses the GPU to render a uniform UI. Moreover, it also has native access to platform APIs such as GPS & Bluetooth.
Flutter中的开发是使用Dart编程语言完成的(非常类似于任何其他OOP语言)。 该代码是本地编译的,并使用GPU渲染统一的UI。 此外,它还可以本地访问平台API,例如GPS和蓝牙。
Also, development is Flutter is mostly just a composition of widgets, which are the building blocks of a Flutter app.
而且,Flutter的开发主要只是小部件的组成,而这些部件是Flutter应用程序的构建块。
This pattern of widget composition is not only easy and result in faster development cycles, but also widgets developed once can be reused across multiple applications. Moreover, widgets also ensure uniform rendering across Android & iOS devices, and uniform API for developers to access device native services.
小部件组成的这种模式不仅容易并且可以缩短开发周期,而且一旦开发的小部件就可以在多个应用程序中重用。 此外,小部件还可以确保在Android和iOS设备上进行统一渲染,并为开发人员访问设备本机服务提供统一的API。
I bet you are pretty excited now to develop your first App in Flutter. We’ll start off with building a simple clock app. Welcome to the Dart side! (pun intended :P)
我敢打赌,您现在很高兴在Flutter中开发您的第一个应用程序。 我们将从构建一个简单的时钟应用程序开始。 欢迎来到Dart方面! (双关语意图:P)
I will be using Android Studio for this demo, with the Flutter plugin installed.
我将在安装了Flutter插件的演示中使用Android Studio。
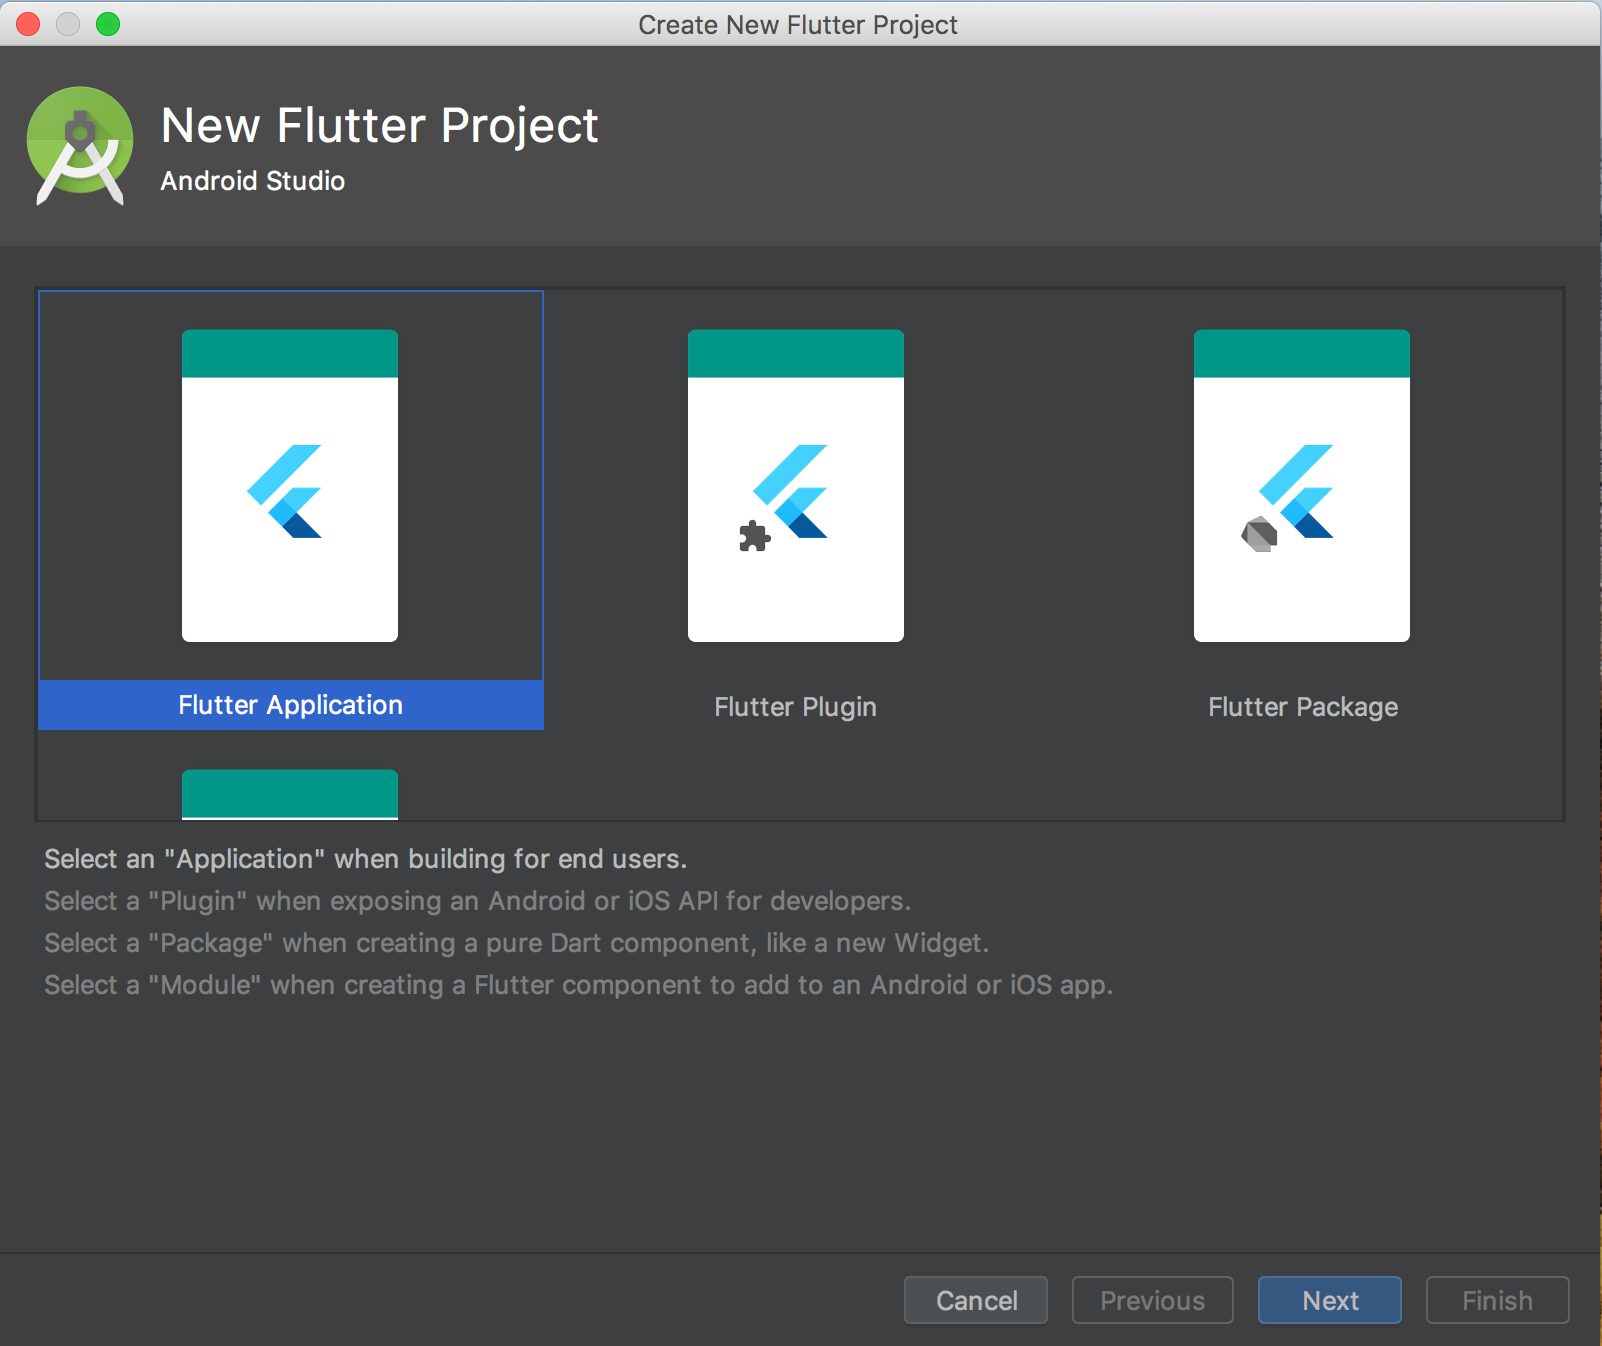
Once you have created a new Flutter project, navigate to the “main.dart” file. In Java terms, this is the class with the main() method.
创建新的Flutter项目后,导航至“ main.dart”文件。 用Java术语来说,这是带有main()方法的类。
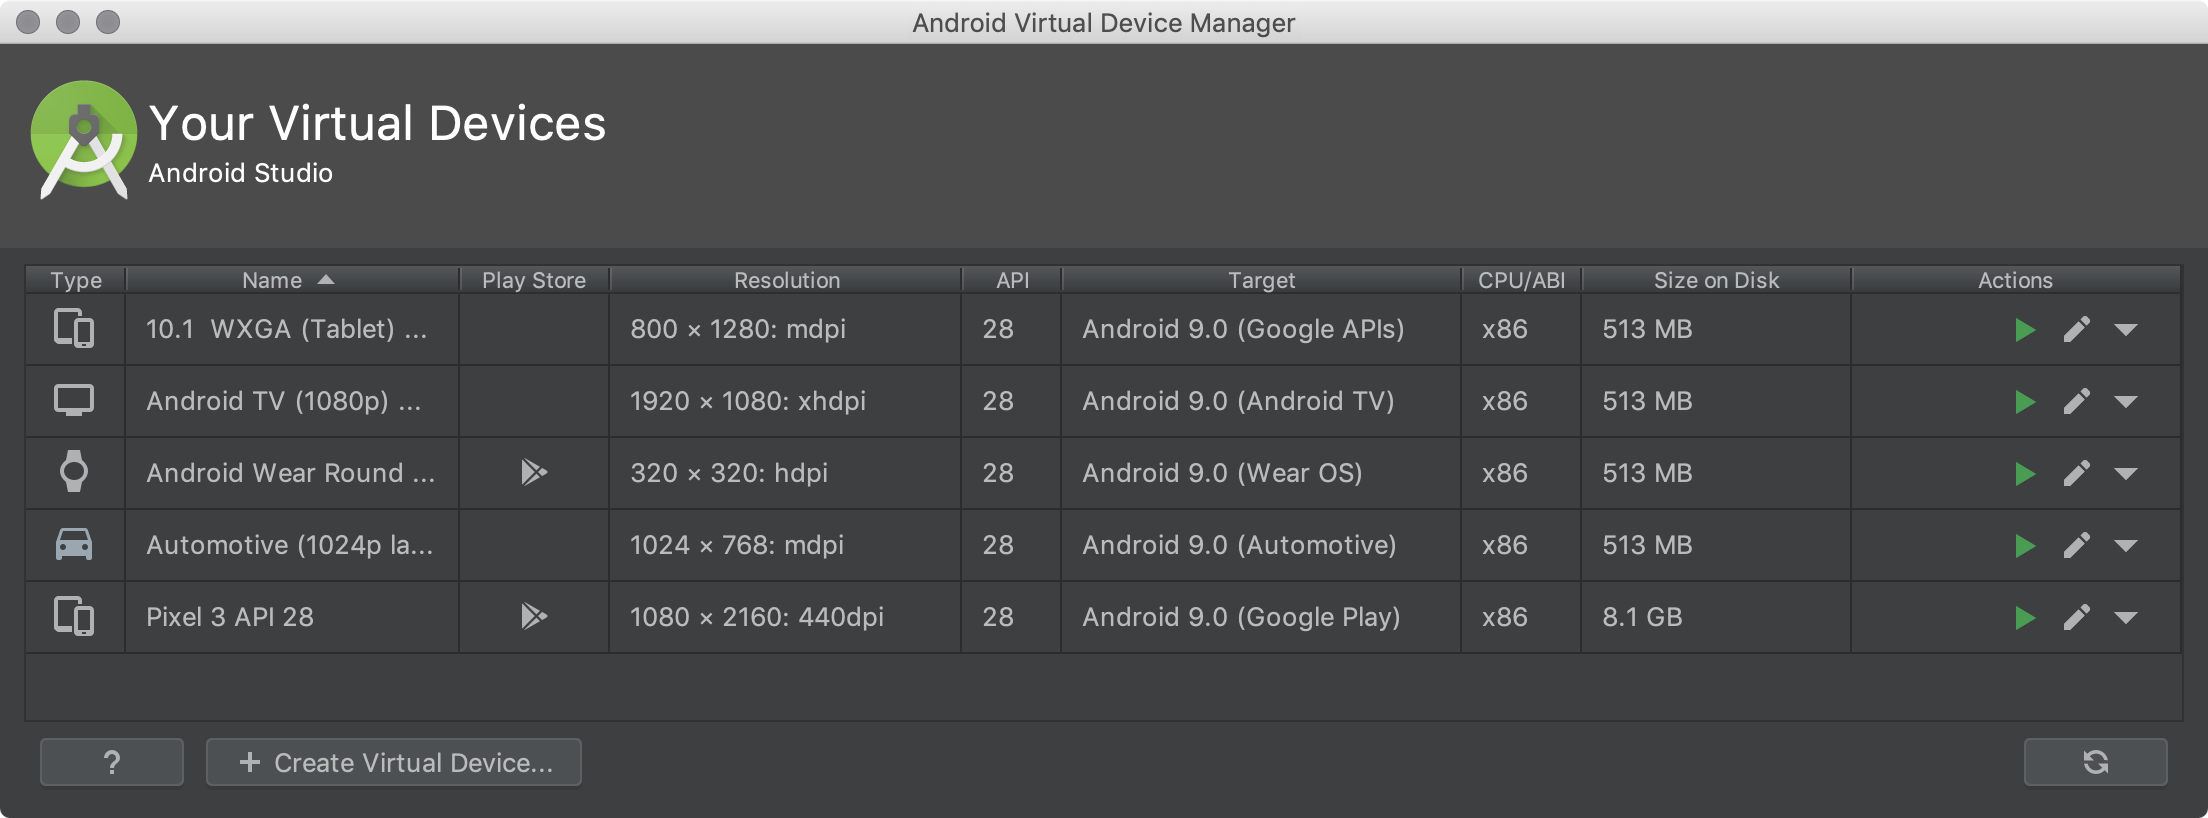
Before starting development, you need to create an Android virtual device as well, which you can do following this link.
开始开发之前,你需要创建一个Android的虚拟设备,以及,你可以做以下这个链接。
Now, we can start some real coding.
现在,我们可以开始一些实际的编码。
We will compose some widgets to get our final app. Considering the brevity of this post, I will be giving only a brief explanation of the widgets, but will link official docs in case you want to learn more. Also, for the same reason, I won’t be linking the screenshot of the virtual device after each step, but by trying it out in your own system will make this post much more interactive.
我们将编写一些小部件以获取最终的应用程序。 考虑到这篇文章的简短性,我将仅简要介绍这些小部件,但是如果您想了解更多信息,将链接官方文档。 同样,出于同样的原因,我不会在每个步骤之后都链接虚拟设备的屏幕截图,但是通过在您自己的系统中进行尝试可以使此帖子更具交互性。
We will start by creating a stateless-widget class called Clock. This is the class where all of our logic for building the app goes. Also, to ensure OOTB integration with material design, we will encapsulate our clock widget in the MaterialApp widget.
我们将从创建一个名为Clock的无状态窗口小部件类开始。 这是我们构建应用程序的所有逻辑所用的课程。 另外,为了确保OOTB与材料设计集成,我们将时钟小部件封装在MaterialApp小部件中。
import 'package:flutter/material.dart';


void main() {
  runApp(MaterialApp(
    home: Clock(),
  ));
}


class Clock extends StatelessWidget {
  @override
  Widget build(BuildContext context) {
    return Container();
  }
}
The build function of our Clock widget is the one responsible to actually render content on the screen. Since we are returning an empty Container widget here, our app will also render a blank screen on the virtual device.
Clock小部件的构建功能是负责在屏幕上实际呈现内容的功能。 由于我们在此处返回一个空的Container小部件,因此我们的应用程序还将在虚拟设备上呈现空白屏幕。
We will now add the Scaffold widget to introduce layout in our App, and then use the Text widget to render the current time on the screen. To centrally align our render, we will encapsulate the Text widget with the Center widget, and also add some font-style with the style attribute.
现在,我们将添加Scaffold小部件以在我们的App中引入布局,然后使用Text小部件在屏幕上呈现当前时间。 为了集中对齐渲染,我们将使用“ 中心”窗口小部件封装“文本”窗口小部件,并使用style属性添加一些字体样式 。
import 'package:flutter/material.dart';


void main() {
  runApp(MaterialApp(
    home: Clock(),
  ));
}


class Clock extends StatelessWidget {
  @override
  Widget build(BuildContext context) {
    return Container(
        child: Center(
            child: Text(
              DateTime.now().toString(),
              style: TextStyle(
                  fontSize: 66.0,
                  fontWeight: FontWeight.bold,
                  color: Colors.black
              ),
            )
        )
    );
  }
}
If you reload the app, you will be able to see the current time being rendered on the screen. But, there is still one problem: the time is not getting updated. This is because our Clock widget extends the Stateless widget class. To maintain and update the state of the app, we need to extend the Stateful widget class.
如果您重新加载应用程序,则可以在屏幕上看到当前渲染的时间。 但是,仍然存在一个问题:时间没有更新。 这是因为我们的Clock小部件扩展了Stateless小部件类。 为了维护和更新应用程序的状态,我们需要扩展Stateful小部件类。
Also, we will need to define the initial state using the initState() method, and for updating the time, we will use the Timer.periodic() function. Let’s do that:
同样,我们将需要使用initState()方法定义初始状态,并且为了更新时间,我们将使用Timer.periodic()函数。 让我们这样做:
import 'dart:async';


import 'package:flutter/material.dart';


void main() => runApp(MaterialApp(
  home: Home(),
));


class Home extends StatefulWidget {
  @override
  _HomeState createState() => _HomeState();
}


class _HomeState extends State<Home> {
  DateTime now;
  String timeString;


  @override
  void initState() {
    now = DateTime.now();
    timeString = timeToString(now);


    new Timer.periodic(Duration(seconds: 1), (Timer t) {
      setState(() {
        now = DateTime.now();
        timeString = timeToString(now);
      });
    });
  }


  String timeToString(DateTime time) {
    return "${time.hour.toString().padLeft(2, '0')}:${time.minute.toString().padLeft(2, '0')}:${time.second.toString().padLeft(2, '0')}";
  }


  @override
  Widget build(BuildContext context) {


    return Scaffold(
      body: Container(
        child: Center(
            child: Text(
              "$timeString",
              style: TextStyle(
                  fontSize: 66.0,
                  fontWeight: FontWeight.bold,
                  color: Colors.black
              ),
            )
        ),
      ),
    );
  }
}
The Timer.periodic() function here, takes as argument a lambda expression, which is triggered every second and update the state of our App. Now, if you reload the app you will be able to see the time is getting updated every second.
这里的Timer.periodic()函数将lambda表达式作为参数,该表达式每秒触发一次,并更新我们的App状态。 现在,如果您重新加载该应用程序,您将能够看到时间每秒钟都在更新。
Now lets’ go ahead and add a background image as well. But to make this more interesting, let add some logic such that our app changes its background based on the time of the day.
现在,让我们继续添加背景图像。 但是为了使它变得更有趣,请添加一些逻辑,以便我们的应用根据一天中的时间更改其背景。
We will first need to add the images in the assets folder at the root and update the assets key in the pubspec.yaml file. This file is similar to your package.json file in a Node project. Here, I’m adding 2 images for the day and night time.
我们首先需要在根目录的assets文件夹中添加图像,并更新pubspec.yaml文件中的assets键。 该文件类似于Node项目中的package.json文件。 在这里,我将为白天和晚上添加2张图像。
# To add assets to your application, add an assets section, like this:
  assets:
    - assets/night.jpg
    - assets/day.png
Now let’s do the final step of selecting the background image based on the current time, and use the BoxDecoration widget to render it as the background of our Container widget.
现在,让我们执行基于当前时间选择背景图像的最后一步,并使用BoxDecoration小部件将其渲染为Container小部件的背景。
......
@override
Widget build(BuildContext context) {
String bgImage = now.hour > 6 && now.hour < 19 ? "assets/day.png" : "assets/night.jpg";
return Scaffold(
body: Container(
decoration: BoxDecoration(
image: DecorationImage(
image: AssetImage(bgImage),
fit: BoxFit.cover
)
),
child: Center(
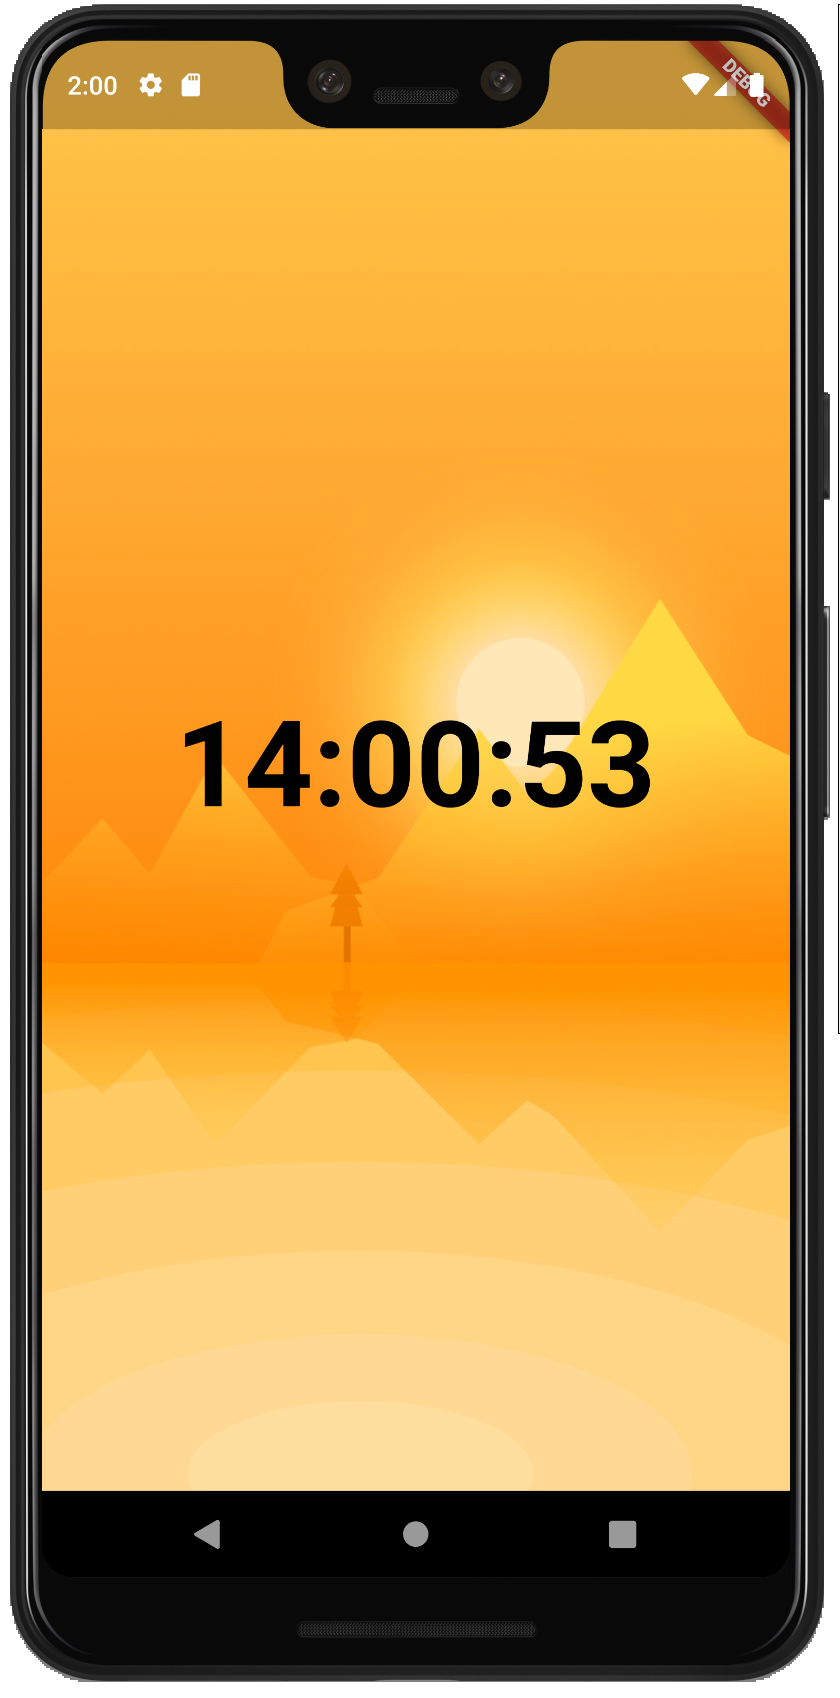
......And we are done. Now if you reload the app, you must see our clock rendered on the screen with the appropriate background according to the current time.
我们完成了。 现在,如果您重新加载该应用程序,则必须根据当前时间在屏幕上看到带有适当背景的时钟。
I hope this post will help you in kick-starting app development in Flutter and you can apply the same principles for your next app.
希望这篇文章对您在Flutter中启动应用程序开发有所帮助,并且您可以为下一个应用程序应用相同的原则。
Until next time, Ciao !!
直到下次,Ciao!


 1524
1524


 被折叠的 条评论
为什么被折叠?
被折叠的 条评论
为什么被折叠?
 到【灌水乐园】发言


