


In this article, we are going to go through some basic information about MotionLayout, a subclass of ConstraintLayout. It’s used by Android developers to create motion and widget animations in their apps. We plan to describe the building blocks needed to create those animations. Using an example, we’re going to highlight the most important steps. In the end, useful links will be listed, along with more information and examples.
在本文中,我们将介绍有关MotionLayout的一些基本信息, MotionLayout是ConstraintLayout的子类。 Android开发人员使用它在其应用程序中创建动作和小部件动画。 我们计划描述创建这些动画所需的构件。 通过示例,我们将重点介绍最重要的步骤。 最后,将列出有用的链接,以及更多的信息和示例。
介绍 (Introduction)
As stated in the documentation:
如文档中所述:
MotionLayout is a layout type that helps you manage motion and widget animation in your app. It is a subclass of ConstraintLayout and builds upon its rich layout capabilities.
MotionLayout是一种布局类型,可帮助您管理应用程序中的运动和小部件动画。 它是ConstraintLayout的子类,并基于其丰富的布局功能构建。
So, it’s really powerful, it has a lot of potential, but it only works with its direct children. It does not support nested layout hierarchies or activity transitions and this should be taken into consideration.
因此,它确实非常强大,具有很大的潜力,但仅适用于直系子代。 它不支持嵌套的布局层次结构或活动转换,因此应予以考虑。
Some of MotionLayouts key features are: describing transitions between layouts, animating layout properties, and supporting seekable transitions and keyframes for customized transitions. Lastly, it is fully declarative and any of its transitions can be described in an XML file.
MotionLayouts的一些主要功能包括:描述布局之间的过渡,设置布局动画的动画效果,并支持可查找的过渡和自定义过渡的关键帧。 最后,它是完全声明性的,可以在XML文件中描述其任何转换。
Since MotionLayout is an extension of ConstraintLayout, it inherits all of its features and you need to add the following dependency to your app’s build.gradle:
由于MotionLayout是ConstraintLayout的扩展,因此它继承了其所有功能,您需要将以下依赖项添加到应用程序的build.gradle中 :
dependencies {
    implementation 'androidx.constraintlayout:constraintlayout:2.0.0-beta4'
}
Or this if you’re not using AndroidX:
如果您不使用AndroidX,请执行以下操作:
dependencies {
    implementation 'com.android.support.constraint:constraint-layout:2.0.0-beta4'
}
If you add MotionLayout to your layout file, you’ll notice that Android Studio (I’m using Android Studio 4.0 Beta 3) complains with an error such as this:
如果将MotionLayout添加到布局文件中,您会注意到Android Studio (我正在使用Android Studio 4.0 Beta 3)抱怨诸如此类的错误:

Here, you can click the Generate MotionScene file button and a motion scene file will be generated for you. I named my layout file motion_layout.xml and the generated file is named motion_layout_scene.xml (it can be found inside the res/xml folder). The layout file now looks like this:
在这里,您可以单击“ 生成MotionScene文件”按钮,然后将为您生成一个运动场景文件。 我将布局文件命名为motion_layout.xml ,生成的文件名为motion_layout_scene.xml (可以在res / xml文件夹中找到)。 现在,布局文件如下所示:

The generated motion_layout_scene.xml looks like this:
生成的motion_layout_scene.xml如下所示:
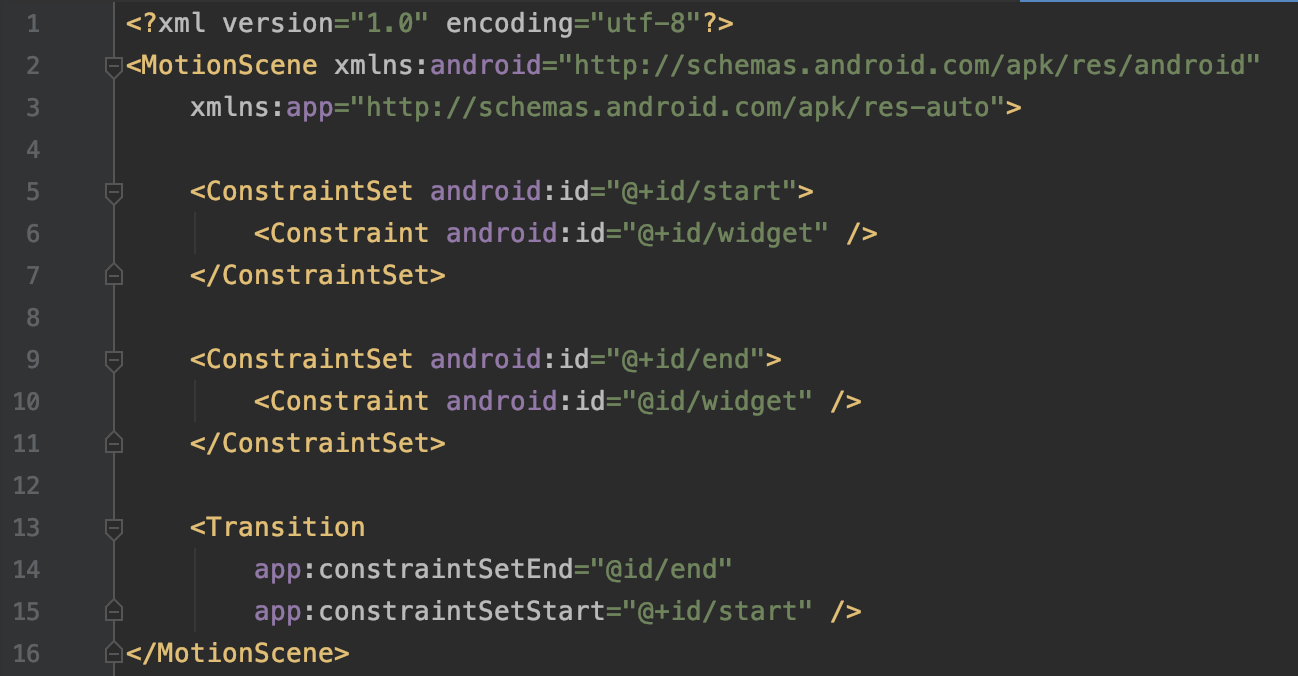
MotionScene is the root element of a motion scene file and it’s used to create animations in a declarative way. The same MotionScene file can be reused and applied to different layouts.
MotionScene是运动场景文件的根元素,它用于以声明方式创建动画。 可以重复使用同一MotionScene文件并将其应用于不同的布局。
The ConstraintSet element has definitions for each View you want to animate in a motion sequence.
ConstraintSet元素具有要在运动序列中进行动画处理的每个View的定义。
Constraint element specifies the attributes and location of a single View in a motion sequence.
约束元素指定运动序列中单个View的属性和位置。
Transition contains at least the start and end ConstraintSet and it describes the changes from the start to the end state. It can contain OnClick, OnSwipe and KeyFrameSet elements.
过渡至少包含开始和结束ConstraintSet ,它描述了从开始状态到结束状态的更改。 它可以包含OnClick , OnSwipe和KeyFrameSet元素。
More info about mentioned elements can be found in the official documentation.
有关提到的元素的更多信息,请参见官方文档 。
But, enough theory, let’s check out our example!
但是,有足够的理论,让我们看看我们的例子!
动画样本 (Sample Animation)
Feel free to check out the Github repo with the source code below.
欢迎使用下面的源代码查看Github存储库。
Our layout file activity_music_band_list.xml has the following hierarchy:
我们的布局文件activity_music_band_list.xml具有以下层次结构:
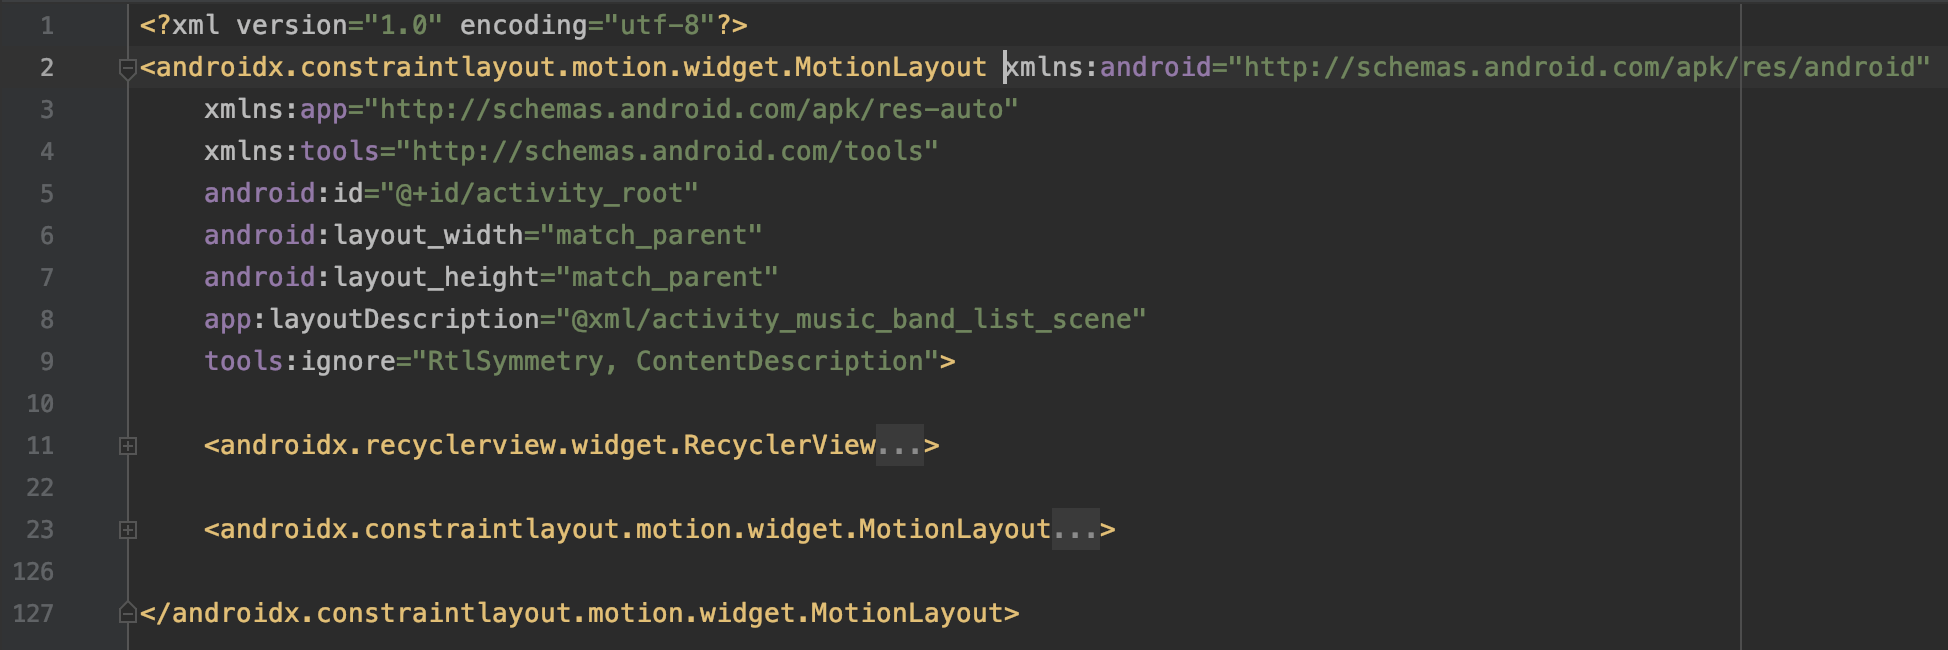
Here, you can see a parent MotionLayout with two children — RecyclerView and another MotionLayout, containing views that will be animated. The purpose of the parent MotionLayout is to control the visibility of its children through a motion scene file.
在这里,您可以看到一个带有两个子级的父级MotionLayout - RecyclerView和另一个MotionLayout ,其中包含将被动画化的视图。 父级MotionLayout的目的是通过运动场景文件控制其子级的可见性。
Before we dive deeper into the animation implementation, I wanted to mention that this is a multi-step animation. MotionLayout currently doesn’t have an API for controlled multi-step transitions. Since I have 4 ConstraintSets and need to handle 3 transitions, I have to start some transitions programmatically. For more complex transitions, with more steps, you can see an article written by Chris Banes.
在深入研究动画实现之前,我想提到这是一个多步骤动画。 MotionLayout当前没有可控的多步过渡的API。 由于我有4个ConstraintSet,并且需要处理3个过渡,因此我必须以编程方式开始一些过渡。 有关更复杂的过渡和更多步骤,您可以参阅Chris Banes撰写的文章 。
When the RecyclerView item is clicked, we call the animate method that is defined in MusicBandListActivity.
单击RecyclerView项后,我们将调用MusicBandListActivity中定义的animate方法。
The vhValues parameter is an interface with two methods that provide information necessary for positioning views by using ConstraintSet.
vhValues参数是具有两种方法的接口,这两种方法通过使用ConstraintSet提供定位视图所需的信息。
The musicBandModel represents a POJO of the clicked RecyclerView item.
musicBandModel代表单击的RecyclerView项的POJO。
First, we need to modify the margins of our views with values from the interface parameter:
首先,我们需要使用interface参数中的值修改视图的边距:
private fun animate(
    vhValues: MusicBandAdapter.ViewHolderValues,
    musicBandModel: MusicBandModel) {
    val marginTop =
        (vhValues.getThumbnailHeight() * SCALE).toInt() - (iconSize * SCALE / 2).toInt() - margin
    animatedView.also {
        var set = it.getConstraintSet(firstSet)
        set.setMargin(R.id.thumbnail, ConstraintSet.TOP, vhValues.getY())
        set.setVisibility(R.id.thumbnail, ConstraintSet.VISIBLE)
        set.setMargin(R.id.more_info, ConstraintSet.TOP, marginTop)
        set.applyTo(it)
        set = it.getConstraintSet(secondSet)
        set.setMargin(R.id.more_info, ConstraintSet.TOP, marginTop)
        set.applyTo(it)
        set = it.getConstraintSet(thirdSet)
        set.setMargin(R.id.more_info, ConstraintSet.TOP, marginTop)
        set.setMargin(R.id.about_container, ConstraintSet.TOP, marginTop)
        set.applyTo(it)
        // ...
    }
}
The animatedView represents the child MotionLayout, containing all the views that will be animated. The firstSet, secondSet, thirdSet are ids of the ConstraintSets.
该animatedView代表孩子MotionLayout,包含所有将要动画意见。 firstSet , secondSet , thirdSet是ConstraintSets的 ID。
private val firstSet = R.id.first_set
private val secondSet = R.id.second_set
private val thirdSet = R.id.third_set
They are defined in animated_music_band_item_scene.xml.
它们在animation_music_band_item_scene.xml中定义。
After that, we need to set data to animated views, set the transition listener, start the parent animation to hide RecyclerView, and show the child MotionLayout. Here is the code for that:
之后,我们需要将数据设置为动画视图,设置过渡侦听器,启动父动画以隐藏RecyclerView ,并显示子级MotionLayout 。 这是该代码:
private fun animate(
    vhValues: MusicBandAdapter.ViewHolderValues,
    musicBandModel: MusicBandModel) {
    animatedView.also {
    	// ...
        with(binding) {
            thumbnail.background =
            ContextCompat.getDrawable(this@MusicBandListActivity, musicBandModel.drawableId)
            name.text = getString(musicBandModel.name)
            tags.text = getString(musicBandModel.tags)
            description.text = getString(musicBandModel.shortDescriptionStringRes)
            aboutText.text = getString(musicBandModel.aboutStringRes)
            it.setTransitionListener(transitionAdapter)
            root.transitionToEnd()
            it.setTransition(firstSet, secondSet)
            it.setTransitionDuration(ANIMATION_DURATION)
            it.transitionToState(secondSet)
            activeSet = ConstraintSetState.FIRST_TO_SECOND
        }
    }
}
The activeSet is a ConstraintSetState type which is an enum that helps us track which ConstraintSet will be next or previous.
activeSet是ConstraintSetState类型,它是一个枚举,可帮助我们跟踪哪个ConstraintSet将是下一个或上一个。
private enum class ConstraintSetState {
    FIRST_TO_SECOND,
    SECOND_TO_THIRD,
    SECOND_TO_FIRST,
    THIRD_TO_SECOND
}
You’ll notice that the root animation is started by using the transitionToEnd() method which has only two ConstraintSets → activity_music_band_list_scene.xml. The animation on animatedView isn’t though. That is because we have a multi-step animation and we have to set transitions manually.
您会注意到,使用只有两个ConstraintSets → activity_music_band_list_scene.xml的transitionToEnd ()方法启动了根动画。 但是,animationView上的动画不是。 那是因为我们有一个多步动画,并且我们必须手动设置过渡。
Since there is quite a lot of XML code in the MotionScene file, which I do not want to copy and paste here, you can open animated_music_band_item_scene.xml and check all ConstraintSets and Transitions.
由于MotionScene文件中有很多XML代码,我不想在此处复制和粘贴,因此您可以打开animation_music_band_item_scene.xml并检查所有ConstraintSets和Transitions 。
After the first transition (firstSet → secondSet), the screen looks like this:
第一次转换后 ( firstSet → secondSet ),屏幕如下所示:
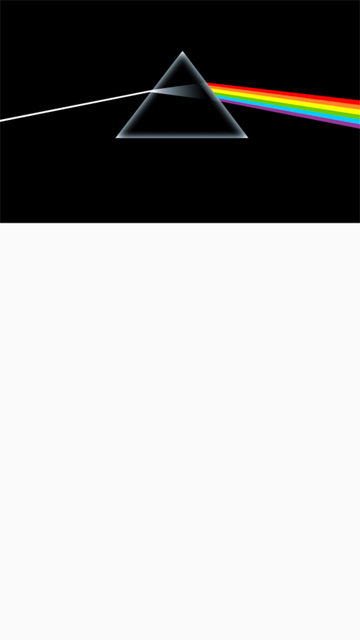
In the first_set, we are positioning the views, setting the thumbnail dimension ratio and scale. The scale needs to be resetted because we want the initial scale while the animation is running from end to start. The actual scale is applied from frame position 80 (defined in Transition block). We are also hiding the back arrow by setting its alpha and visibility value. In the second_set, we have to set the scale type again so it would not be lost. We also need to hide other views by changing their alpha values.
在first_set中 ,我们定位视图,设置缩略图的尺寸比例和比例。 需要重设比例,因为我们需要动画从头到尾运行时的初始比例。 从帧位置80(在“ 过渡”块中定义)开始应用实际比例。 我们还通过设置Alpha和可见性值来隐藏后退箭头。 在second_set中 ,我们必须再次设置比例类型,以免丢失。 我们还需要通过更改其他Alpha值来隐藏其他视图。
When the first transition is done, we are immediately ready to start the second transition (secondSet → thirdSet) in the onTransitionCompleted callback. This results in the following screen:
完成第一个转换后,我们可以立即准备在onTransitionCompleted回调中开始第二个转换( secondSet → thirdSet )。 这将显示以下屏幕:
We’re starting from the second_set and, in the third_set, we are making the views visible while controlling the situation when the animation will be executed from the end to start state. Inside the Transition block, the OnClick action is used to toggle between second_set and third_set.
我们从second_set开始,在third_set中 ,使视图可见,同时控制从结束到开始状态执行动画的情况。 在Transition块内部, OnClick操作用于在second_set和third_set之间切换。
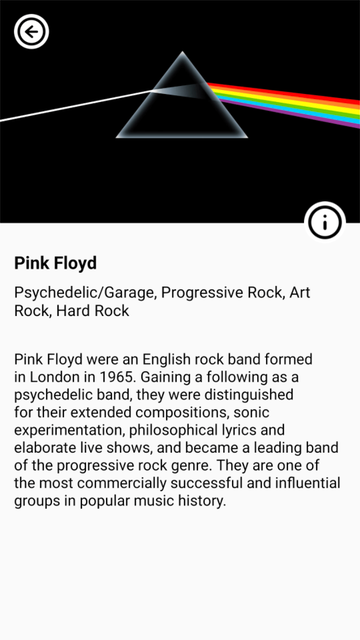
The last step of the animation is completely defined in the motion scene file because we can choose actions when the user clicks on the view. In our scenario, we again have an OnClick action inside Transition which handles the start and the end state for us. There is also a KeyFrameSet element which contains the KeyAttribute elements used to change alpha values for specific views during transition. Attribute app:framePosition can hold any value between 0 and a 100. Another useful class is ImageFilterView which, in our case, is used to animate between two images with its crossfade attribute.
动画的最后一步完全在运动场景文件中定义,因为我们可以在用户单击视图时选择动作。 在我们的方案中,我们在Transition内再次有一个OnClick动作,该动作为我们处理开始和结束状态。 还有一个KeyFrameSet元素,其中包含KeyAttribute元素, 这些元素用于在过渡期间更改特定视图的alpha值。 属性app:framePosition可以容纳0到100之间的任何值。另一个有用的类是ImageFilterView ,在我们的示例中,该类用于使用其crossfade属性在两个图像之间设置动画。
The screen now looks like this:
屏幕现在看起来像这样:

结论 (Conclusion)
This article provided some general information about MotionLayout and a sample animation with all the pieces put together. Even though it’s still in beta, that doesn’t prevent us from creating beautiful animations. If you want to find out more about MotionLayout here are some resources:
本文提供了有关MotionLayout和示例动画的所有常规信息, 并将所有部分放在一起。 即使它仍处于测试阶段,也不能阻止我们创建精美的动画。 如果您想了解有关MotionLayout的更多信息,请参见以下资源:
Introduction to MotionLayout (part I) by Nicolas Roard
Nicolas Roard的MotionLayout 简介(第一部分)
Introduction to MotionLayout (part II) by Nicolas Roard
Nicolas Roard的MotionLayout 简介(第二部分)
Introduction to MotionLayout (part III) by Nicolas Roard
Nicolas Roard的MotionLayout 简介(第三部分)
Defining motion paths in MotionLayout by Nicolas Roard
Nicolas Roard 在MotionLayout中定义运动路径
Complex UI/Animations on Android — featuring MotionLayout by Nikhil Panju
Android上的复杂UI /动画-包含 Nikhil Panju的MotionLayout
Do the Loco-MotionLayout: Building Animations with MotionLayout by Michael Scamell
做Loco-MotionLayout:使用MotionLayout构建动画,作者 :Michael Scamell
Advanced & Practical MotionLayout by Jason Pearson
Jason Pearson的进阶和实用MotionLayout
I hope that you learned something new in this article. Feel free to post any questions or comments below or contact me on denis@arsfutura.co. Cheers!
希望您在本文中学到了新东西。 随时在下面发表任何问题或评论,或通过denis@arsfutura.co与我联系。 干杯!
Originally posted on:
最初发布于:
Special thanks to Lea Metlicic, Antonija Golic, Josip Grubeša.
特别感谢Lea Metlicic , Antonija Golic和JosipGrubeša。
翻译自: https://levelup.gitconnected.com/introduction-to-motionlayout-on-android-f16420d42459


 560
560


 被折叠的 条评论
为什么被折叠?
被折叠的 条评论
为什么被折叠?
 到【灌水乐园】发言


