


动力节点数据库脚本下载
In a project that I worked on a while ago, I was presented with a problem that wasn’t very unique. It involved how we could safely pass identifiable user information such as phone numbers encoded and encrypted by a third party service in Ruby, to be decrypted and decoded into our application for the user.
在我之前从事的一个项目中,我遇到的问题不是很独特。 它涉及到我们如何安全地传递可识别的用户信息,例如由Ruby中的第三方服务编码和加密的电话号码,然后将其解密和解码为用户的应用程序。
//Link with encrypted token
https://example.com?token=XXXXX
Ruby provides straightforward handling for signed and unsigned big endians using pack() and unpack() methods for accessing underlying bits and bytes. However, Javascript has the problem of not properly handling large integers, as it can only store signed or unsigned integers of up to 53 bits. See Number.MAX_SAFE_INTEGER.
Ruby使用pack()和unpack()方法对有符号和无符号的大端字节序进行直接处理,以访问基础位和字节。 但是,Javascript存在不能正确处理大整数的问题,因为它只能存储最多53位的有符号或无符号整数。 参见Number.MAX_SAFE_INTEGER 。

In this case, we both shared the same encryption key, a process known as Symmetric Encryption. This means that the same encryption key must be used to decrypt the data.
在这种情况下,我们都共享相同的加密密钥,这一过程称为“对称加密” 。 这意味着必须使用相同的加密密钥来解密数据。
In that project and some applications, where we want to encode and encrypt sensitive data, we also need to be able to decode and decrypt this information, when we need it, anywhere in our application, as such that the decrypted value is not altered during the process ensuring Data Integrity. Essentially:
在那个项目和一些我们想要对敏感数据进行编码和加密的应用程序中,我们还需要能够在需要时在应用程序中的任何地方解码和解密此信息,以使解密后的值在更改期间不会发生变化。确保数据完整性的过程。 本质上:
const value = 0123456789 // Initial valueconst token = encrypt(value) // Encrypted tokenconst decryptedValue = decrypt(token) // Decrypted valuevalue === decryptedValue // Must be TRUESimply using Base64 encoding, which will obfuscate and create short tokens is not a reliable security solution as Base64 strings can be easily decoded. For this article, I will demonstrate how you can create a simple, secure and fast symmetric encryption solution to encrypt data, and applied across any application even as short, SEO-friendly URL parameters using the following tools:-
仅使用Base64编码(会混淆并创建短令牌)并不是一种可靠的安全解决方案,因为可以轻松解码Base64字符串。 在本文中,我将演示如何使用以下工具创建简单,安全和快速的对称加密解决方案来加密数据,并应用于任何应用程序,甚至是简短的,对SEO友好的URL参数:
Typescript — adds static typed definitions to JavaScript
Typescript —将静态类型定义添加到JavaScript
Symmetric Encryption — cryptographic encryption technique which uses the same encryption keys for both encryption and decryption of data
对称加密-加密加密技术,它使用相同的加密密钥对数据进行加密和解密
Crypto — built-in Node.js module which provides cryptographic functionality
加密-内置的Node.js模块,提供加密功能
Buffer — subclass of JavaScript’s
Uint8Arrayclass used for character encoding and decodingBuffer — JavaScript的
Uint8Array类的子类,用于字符编码和解码Automated testing, version management and package publishing using GitHub, CircleCI and Semantic release
使用GitHub , CircleCI和Semantic版本进行自动化测试,版本管理和软件包发布

发展历程 (Development)
You also need to have npm and/or yarn globally installed. See how to install YARN and NPM. I also prefer using NVM to manage my Node versions.
您还需要全局安装npm和/或yarn 。 了解如何安装YARN和NPM 。 我也更喜欢使用NVM来管理我的Node版本。
Next, we create our project folder and set up typescript:
接下来,我们创建项目文件夹并设置打字稿:
$ mkdir encrypt-decrypt-library
$ cd encrypt-decrypt-library
Initialize package.json for the project:
初始化项目的package.json :
$ yarn init -yNext, we need to install Typescript as a dev dependency. This is because we will be compiling our Typescript code into JavaScript for our production build.
接下来,我们需要将Typescript安装为dev依赖项。 这是因为我们将把Typescript代码编译到JavaScript中以进行生产构建。
$ yarn add -D typescriptNext, we need to install ts-node to enable us execute Typescript files without needing to compile them and also @types/node .
接下来,我们需要安装ts-node以使我们能够执行Typescript文件而不需要对其进行编译,以及@types/node 。
// TypeScript execution for node
$ yarn add -D ts-node @types/node
Next, we need to add a tsconfig.json file to the root of our project for our Typescript configuration. We initialize a tsconfig.json file as follows:
接下来,我们需要将tsconfig.json文件添加到项目的根目录以进行Typescript配置。 我们按以下方式初始化tsconfig.json文件:
$ yarn tsc --init --rootDir src --outDir distThis will generate an initial tsconfig.json file at the root of the project with possible configuration options, with non-essential options commented out. I have updated this file as follows:
这将在项目的根目录下生成一个初始tsconfig.json文件,其中包含可能的配置选项,并注释掉了非必要的选项。 我已更新此文件,如下所示:
{
  "compilerOptions": {
    /* Basic Options */
    "lib": [
      "dom",
      "dom.iterable",
      "esnext",
      "es2017"
    ],                                         /* Specify library files to be included in the compilation. */
    "removeComments": true,                    /* Do not emit comments to output. */
    "allowJs": true,                           /* Allow javascript files to be compiled. */
    "declaration": true,                       /* Generates corresponding '.d.ts' file. */
    "module": "commonjs",                      /* Specify module code generation: 'none', 'commonjs', 'amd', 'system', 'umd', 'es2015', 'es2020', or 'ESNext'. */
    "esModuleInterop": true,                   /* Enables emit interoperability between CommonJS and ES Modules via creation of namespace objects for all imports. Implies 'allowSyntheticDefaultImports'. */
    "allowSyntheticDefaultImports": true,      /* Allow default imports from modules with no default export. This does not affect code emit, just typechecking. */
    "target": "es6",                           /* Specify ECMAScript target version: 'ES3' (default), 'ES5', 'ES2015', 'ES2016', 'ES2017', 'ES2018', 'ES2019', 'ES2020', or 'ESNEXT'. */
    "noImplicitAny": true,                     /* Raise error on expressions and declarations with an implied 'any' type. */
    "moduleResolution": "node",                /* Specify module resolution strategy: 'node' (Node.js) or 'classic' (TypeScript pre-1.6). */
    "sourceMap": true,                         /* Generates corresponding '.map' file. */
    "strict": true,                            /* Enable all strict type-checking options. */
    "outDir": "./dist",                        /* Redirect output structure to the directory. */
    "rootDir": "./src",                        /* Specify the root directory of input files. Use to control the output directory structure with --outDir. */
    /* Advanced Options */
    "skipLibCheck": true,                     /* Skip type checking of declaration files. */
    "forceConsistentCasingInFileNames": true  /* Disallow inconsistently-cased references to the same file. */


    /* Visit https://aka.ms/tsconfig.json to read more about this file */
  },
  "include": ["src"],
  "exclude": [
    "node_modules",
    "dist",
    "**/*.test.ts"
  ]
}
Next, we need to install some additional packages for our library. Note that the NPM’s crypto module has been deprecated as it is now a built-in Node module. This module provides us cryptographic functionalities like OpenSSL’s hash, cipher, decipher, sign, verify and HMAC functions.
接下来,我们需要为我们的库安装一些其他软件包。 请注意,NPM的加密模块已被弃用,因为它现在是内置的Node模块。 该模块为我们提供了加密功能,例如OpenSSL的哈希,密码,解密,签名,验证和HMAC功能。
We will be using the Buffer class to write and read unsigned 64-bit integers because JavaScript has a maximum safe integer of 53 bits and our library must be able to handle 64-bit big endian especially when we need to encrypt and decrypt large integers such as phone numbers.
我们将使用Buffer类来写入和读取无符号的64位整数,因为JavaScript的最大安全整数为53位,并且我们的库必须能够处理64位大字节序,尤其是当我们需要对诸如此类的大整数进行加密和解密时作为电话号码。
We also need to install dotenv to load environment variables from an .env file into process.env .
我们还需要安装dotenv以便将环境变量从.env文件加载到process.env 。
$ yarn add -D dotenvNext, we need create our src directory and then our library file as follows:
接下来,我们需要创建我们的src目录,然后创建我们的库文件,如下所示:
$ mkdir src
$ touch src/encryption.ts
We also need to create an .env file to store our environmental variables and .env.example file to place all the keys of the .env variables. The .env file must be ignored in a .gitignore file to prevent our environmental variables from getting into source control for security reasons.
我们还需要创建一个.env文件来存储我们的环境变量和.env.example文件来将所有的按键.env变量。 必须在.gitignore文件中忽略.env文件,以防止出于安全原因我们的环境变量进入源代码管理。
$ touch .env .env.example .gitignoreENCRYPTION_KEY=AAAAAAAAAAAAAAAAAAAAAAAA
ALGORITHM=des-ede3
SALT=salt
IV=ENCRYPTION_KEY=
ALGORITHM=
SALT=
IV=node_modules
dist
.idea
yarn-error.log
package-lock.json
.envNext we create our encryption class by updating encryption.ts as follows:
接下来,我们通过更新encryption.ts创建加密类,如下所示:
import crypto from 'crypto';


interface IConfig {
    algorithm: string;
    encryptionKey?: string;
    salt: string;
    iv?: Buffer;
}


export default class Encryption {


    private algorithm: string;
    private password: Buffer;
    private salt: string;
    private iv: Buffer | null;


    constructor(config: IConfig) {
        this.algorithm = config.algorithm;
        this.salt = config.salt;
        // encode encryption key from utf8 to hex
        const ENCRYPTION_KEY = config.encryptionKey ? Buffer.from(config.encryptionKey).toString('hex') : '';
        // initialize key
        this.key = Buffer.from(ENCRYPTION_KEY, "hex");
        // initialize IV
        this.iv = config.iv || null;
    }


    /**
     * Function to encrypt a string into a url slug
     */
    encrypt = (value: string | number, isInt: boolean = false): string => {

    }


    /**
     * Function to decrypt a url token
     */
    decrypt = (token: string, isInt: boolean = false): string => {

    }


}
On the browser, Javascript offers two functions for decoding and encoding base64 strings, btoa() and atob(), see Base64. As our code runs outside of a browser and due to the problems associated with encoding and decoding UTF-16-bit DOMString, we will be encoding and decoding 64-bit Big Integers to Big endian bytes and vice versa using the Buffer class including writeBigUInt64BE() and readBigUInt64BE() methods:
在浏览器上,Javascript提供了两个用于解码和编码base64字符串的btoa()和atob() ,请参见Base64 。 由于我们的代码在浏览器之外运行,并且由于与编码和解码UTF-16位DOMString有关的问题,我们将使用包括writeBigUInt64BE()的Buffer类将64位Big Integer编码和解码为Big endian字节,反之亦然writeBigUInt64BE()和readBigUInt64BE()方法:
// allocate Buffer instance
const buf = Buffer.allocUnsafe(8);// Write value to Buffer instance at the specified offset as big-endian.buf.writeBigUInt64BE(BigInt(value));// Read an unsigned, big-endian 64-bit integer from the Buffer instance at the specified offset
// and returns as a stringbuf.readBigUInt64BE(0).toString();
Next, we also need to implement cryptographic functionalities in our encrypt() and decrypt() functions. I have updated the Encryption class as follows:
接下来,我们还需要在encrypt()和decrypt()函数中实现加密功能。 我已经更新了加密类 如下:
import crypto from 'crypto';


interface IConfig {
    algorithm?: string;
    encryptionKey?: string;
    salt?: string;
    iv?: Buffer;
}


export default class Encryption {


    private algorithm: string;
    private key: Buffer | string;
    private salt: string;
    private iv: Buffer | null;


    constructor(config: IConfig) {
        this.algorithm = config.algorithm || '';
        this.salt = config.salt || '';
        // encode encryption key from utf8 to hex
        const ENCRYPTION_KEY = config.encryptionKey ? Buffer.from(config.encryptionKey).toString('hex') : '';
        // initialize key
        this.key = ENCRYPTION_KEY ? Buffer.from(ENCRYPTION_KEY, "hex") : '';
        // initialize IV
        this.iv = config.iv || null;

        // validate missing config options
        if (!this.algorithm && !this.key) {
            throw Error('Configuration Error!');
        }
    }


    /**
     * Function to encrypt a string into a url slug
     */
    encrypt = (value: string, isInt: boolean = false): string => {


            // Validate missing value
            if (!value) {
                throw Error('A value is required!');
            }

            // Initialize Cipher instance
            const cipher = crypto.createCipheriv(this.algorithm, this.key, this.iv);


            // Return Buffer as a binary encoded string
            let buffer = Buffer.from(value, 'utf8').toString("binary");


            // Support for small and big integers
            if (isInt) {
                // Set byte auto padding to false
                cipher.setAutoPadding(false);


                // allocate Buffer instance 8 bytes
                const buf = Buffer.allocUnsafe(8);


                // Write value to buf instance at the specified offset as big-endian.
                buf.writeBigUInt64BE(BigInt(value));


                // encode as binary
                buffer = buf.toString("binary");
            }


            // Get encrypted data from the cipher instance
            const firstPart = cipher.update(buffer, "binary", "base64");
            const finalPart = cipher.final("base64")


            // concat and return both parts
            return `${firstPart}${finalPart}`;
    }


    /**
     * Function to decrypt a url token
     */
    decrypt = (token: string, isInt: boolean = false): string => {


            // Validate missing token
            if (!token) {
                throw Error('A token is required!');
            }

            // Initialize Decipher instance
            const decipher = crypto.createDecipheriv(this.algorithm, this.key, this.iv);


            // Support for small and big integers
            if (isInt) {
                // Set byte auto padding to false
                decipher.setAutoPadding(false);
            }


            // encodes encrypted value from base64 to hex
            const buffer = Buffer.from(token, "base64").toString("hex");


            // Get decrypted data from decipher instance
            const firstPart = decipher.update(buffer, 'hex', 'base64');
            const finalPart = decipher.final('base64') || '';


            // concat both parts
            const decrypted = `${firstPart}${finalPart}`;


            // Encode decrypted value as a 64-bit Buffer
            const buf = Buffer.from(decrypted, "base64");


            // Support for small and big integers
            if (isInt) {
                // Reads an unsigned, big-endian 64-bit integer from buf at the specified offset
                // and returns as a string
                return buf.readBigUInt64BE(0).toString();
            }
            // convert decrypted value from base64 to utf-8 string
            return buf.toString('utf8');
    }


}
For this, we use the built-in Node Crypto library and implement the crypto.createCipheriv()and crypto.createDecipheriv() methods to create and return a Cipherand Decipher instance respectively using the following parameters:
为此,我们使用内置的Node Crypto库并实现crypto.createCipheriv()和crypto.createDecipheriv()方法,分别使用以下参数创建和返回Cipher和Decipher实例:
algorithm— underlying algorithm being used, which is based on OpenSSLalgorithm—使用的基础算法,基于OpenSSLkey— the raw key used by the algorithmkey算法使用的原始密钥iv初始化向量
To encrypt data, we use the crypto.createCipheriv() method to create a Cipher instance and then cipher.update() and cipher.final() methods to produce the encrypted data. To decrypt the data, we use the crypto.createDecipheriv() method to create a Decipher instance and decipher.update() and decipher.final() methods to produce the unencrypted data. See CreateCipherIV and CreateDecipherIV for more on crypto methods and options.
为了加密数据,我们使用crypto.createCipheriv()方法创建一个Cipher实例,然后使用cipher.update()和cipher.final()方法来生成加密的数据。 为了解密数据,我们使用crypto.createDecipheriv()方法创建一个Decipher实例,并使用decipher.update()和decipher.final()方法来生成未加密的数据。 有关crypto方法和选项的更多信息,请参见CreateCipherIV和CreateDecipherIV 。
Both our encrypt() and decrypt() methods use symmetric encryption algorithms, ensuring that the same encryption key used in encrypting the data must be used in decrypting it. Learn more about Symmetric Encryption Algorithms. Next, we need to add some tests to our library.
我们的encrypt()和decrypt()方法都使用对称加密算法,以确保在解密数据时必须使用与加密数据相同的加密密钥。 了解有关对称加密算法的更多信息。 接下来,我们需要向我们的库中添加一些测试。
测验 (Tests)
To add tests to our library, we need to install some dependencies namely Mocha and Chai:
要将测试添加到我们的库中,我们需要安装一些依赖项,即Mocha和Chai :
$ yarn add -D mocha @types/mocha chai @types/chaiWe need to add some tests for our encrypt and decrypt methods. First, we need to create a tests folder in the root of our project. This folder will contain our test files. Next, we create a test file, encryption.test.ts:
我们需要为我们的encrypt和decrypt方法添加一些测试。 首先,我们需要在项目的根目录中创建一个tests文件夹。 此文件夹将包含我们的测试文件。 接下来,我们创建一个测试文件encryption.test.ts :
$ mkdir tests
$ touch tests/encryption.test.ts
Update the encryption.test.ts file as follows:
按如下所示更新encryption.test.ts文件:
import chai from 'chai';


import Encryption from "../src/encryption";


const expect = chai.expect;


describe('Encryption', () => {
    const config = {
        algorithm: process.env.ALGORITHM,
        encryptionKey: process.env.ENCRYPTION_KEY,
        salt: process.env.SALT,
    }


    describe('Ensuring encrypting and decrypting of string and number', () => {


        it('should encrypt and decrypt the string correctly', () => {
            const testString = 'The world goes round and round';
            const encryptionLibrary = new Encryption(config);
            const encrypted = encryptionLibrary.encrypt(testString);
            const decrypted = encryptionLibrary.decrypt(encrypted);
            expect(encrypted.length > 0).to.eql(true);
            expect(testString).to.eql(decrypted);
        });


        it('should encrypt and decrypt the number as a big integer correctly', () => {
            const testNumber = 1234567890;
            const encryptionLibrary = new Encryption(config);
            const encrypted = encryptionLibrary.encrypt(testNumber, true);
            const decrypted = encryptionLibrary.decrypt(encrypted, true);
            expect(encrypted.length > 0).to.eql(true);
            expect(String(testNumber)).to.eql(decrypted);
        });


        it('should encrypt and decrypt the number as an unsigned 64-bit integer correctly', () => {
            const testNumber = 123;
            const encryptionLibrary = new Encryption(config);
            const encrypted = encryptionLibrary.encrypt(testNumber, true);
            const decrypted = encryptionLibrary.decrypt(encrypted, true);
            expect(encrypted.length > 0).to.eql(true);
            expect(String(testNumber)).to.eql(decrypted);
        });


        it('should encrypt and decrypt the number as a string correctly', () => {
            const testNumber = '123';
            const encryptionLibrary = new Encryption(config);
            const encrypted = encryptionLibrary.encrypt(testNumber) || '';
            const decrypted = encryptionLibrary.decrypt(encrypted);
            expect(encrypted.length > 0).to.eql(true);
            expect(testNumber).to.eql(decrypted);
        });
    });


    describe('Ensure decrypting of unsigned big endian token into a valid number', () => {
        it('should decrypt the encoded slug to a Big Integer correctly', () => {
            const decrypted = new Encryption(config).decrypt('NF1r855MimY=', true);
            expect(decrypted.length > 0).to.eql(true);
            expect(decrypted).to.eql('123');
        });
    });


    describe('Ensure decrypting of string token into a valid string', () => {
        it('should decrypt the encoded slug to a valid string correctly', () => {
            const decrypted = new Encryption(config).decrypt('3XtsFcHjmBgVfSvhRMmp+A==') || '';
            expect(decrypted.length > 0).to.eql(true);
            expect(decrypted).to.eql('Hello world');
        });
    });


    describe('Ensure decrypting of an 8-byte Big integer token into a valid number', () => {
        it('should decrypt the encoded slug to a Big Integer correctly', () => {
            const decrypted = new Encryption(config).decrypt('n4a98Hps93o=', true);
            expect(decrypted.length > 0).to.eql(true);
            expect(decrypted).to.eql('12345678901234567890');
        });
    });


    describe('Ensure validation of encrypt or decrypt methods ', () => {
        it('should return an error message if encrypt has no value', () => {
            expect(() => new Encryption(config).encrypt()).to.throw('A value is required!');
        });


        it('should return an error message if decrypt has no value', () => {
            expect(() => new Encryption(config).decrypt()).to.throw('A token is required!');
        });
    });


    describe('Ensure validation of library with no configuration', () => {
        it('should fail to encrypt the string correctly and return an error message', () => {
            expect(() => new Encryption({}).encrypt('The world goes round and round')).to.throw('Configuration Error!');
        });
        it('should fail to decrypt the string correctly and return an error message', () => {
            expect(() => new Encryption({}).decrypt('n4a98Hps93o=', true)).to.throw('Configuration Error!');
        });
    });


});
The ALGORITHM, ENCRYPTION_KEY and SALT are environmental variables set in our .env file.
ALGORITHM , ENCRYPTION_KEY和SALT是在我们的环境中设置的环境变量。 env文件。
Next, we need to update the scripts property in our package.json with our test command:
接下来,我们需要使用test命令来更新package.json的scripts属性:
// package.json"scripts": {
  "test": "./node_modules/.bin/mocha \"tests/**/*.ts\" --require ts-node/register --require dotenv/config"
},
We are able to define node scripts to run within the scripts property of our package.json file.
我们能够定义节点脚本以在package.json文件的scripts属性内运行。
We run the test using Node CLI arguments — Mocha requiring ts-node so we can execute the Typescript test file without needing to compile them. We register the ts-node loader by using ts-node/register. We also specify the path to the test files. It will run every test file within the tests folder matching the pattern. It also requires dotenv/config, which allows us to use variables set in our .env file.
我们使用Node CLI参数运行测试-Mocha需要ts-node因此我们可以执行Typescript测试文件而无需对其进行编译。 我们使用ts-node/register注册ts-node加载器。 我们还指定测试文件的路径。 它将运行中的每一个测试文件tests文件夹匹配的模式。 它还需要dotenv/config ,它允许我们使用在.env文件中设置的变量。
To start the test, we simply run in the command line yarn run test.
要开始测试,我们只需在命令行中yarn run test 。
$ yarn run testyarn run v1.22.4$ ./node_modules/.bin/mocha "tests/**/*.ts" --require ts-node/register --require dotenv/configEncryption
    Ensuring encrypting and decrypting of string and number
      ✓ should encrypt and decrypt the string correctly
      ✓ should encrypt and decrypt the number as a big integer correctly
      ✓ should encrypt and decrypt the number as a string correctly
    Ensure decrypting of Big Integer token into a valid number
      ✓ should decrypt the encoded slug to a Big Integer correctly
    Ensure decrypting of string token into a valid string or number
      ✓ should decrypt the encoded slug to a valid string correctly
    Ensure decrypting of an 8-byte Big integer token into a valid number
      ✓ should decrypt the encoded slug to a Big Integer correctly
    Ensure validation of encrypt or decrypt methods
      ✓ should return an error message if encrypt has no value
      ✓ should return an error message if decrypt has no value
    Ensure validation of library with no configuration
      ✓ should fail to encrypt the string correctly
      ✓ should fail to decrypt the string correctly10 passing (25ms)
林亭 (Linting)
To ensure we have a clear and consistent coding convention in our library, it is important to add linting. Linting helps development by enforcing code style, identifying, reporting and fixing any inconsistencies and bugs in our code. For our Encryption library, I have opted to use ESLint because it supports both JavaScript and TypeScript.
为确保我们的库中有清晰一致的编码约定,添加棉绒很重要。 Linting通过强制执行代码样式,识别,报告和修复代码中的任何不一致和错误来帮助开发。 对于我们的加密库,我选择使用ESLint,因为它支持JavaScript和TypeScript。
First, install all the required dev dependencies:
首先,安装所有必需的dev依赖项:
eslint — ESLint linting library
eslint — ESLint整理库
@typescript-eslint/parser — TypeScript parser for ESLint
@ typescript-eslint / parser — ESLint的TypeScript解析器
@typescript-eslint/eslint-plugin — A plugin with TypeScript specific ESLint rules
@ typescript-eslint / eslint-plugin —具有TypeScript特定ESLint规则的插件
// Install ESLint and plugins
$ yarn add -D eslint @typescript-eslint/parser @typescript-eslint/eslint-plugin
We also need to install Prettier, which works very well with ESLint and is great at handling code formatting.
我们还需要安装Prettier ,它与ESLint很好地配合,并且非常适合处理代码格式。
prettier — the core prettier library
漂亮-核心漂亮的图书馆
eslint-config-prettier — disables ESLint rules that might conflict with prettier
eslint-config-prettier -禁用可能与更漂亮的ESLint规则
eslint-plugin-prettier — runs Prettier as an ESLint rule
eslint-plugin- prettier-将Prettier作为ESLint规则运行
// Install Prettier and plugins
$ yarn add -D prettier eslint-config-prettier eslint-plugin-prettier// Installs husky and lint
$ yarn add -D husky lint-staged
We also installed lint-staged which ensures that linting is run on files before they are committed. This ensures that all files committed to GIT don’t have any linting or formatting errors. Husky used in combination with lint-staged enables us to run specified linting commands on pre-commit and helps make git hooks easier. You can read more about Git Hooks here.
我们还安装了lint-staged ,以确保在文件提交之前对文件运行linting。 这样可以确保提交给GIT的所有文件都没有任何掉毛或格式化错误。 Husky与lint-staged结合使用使我们能够在预提交时运行指定的linting命令,并有助于简化git hooks。 您可以在此处阅读有关Git Hooks的更多信息。
We then need to set up a configuration file for ESLint:
然后,我们需要为ESLint设置一个配置文件:
$ npx eslint --init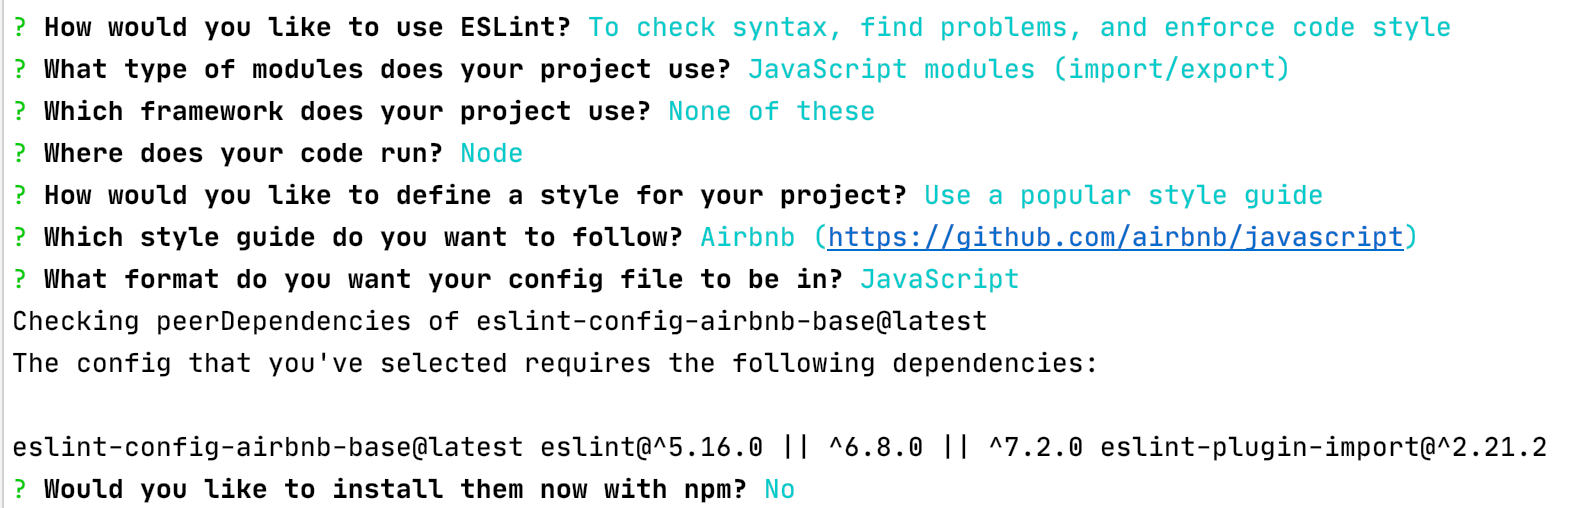
This generates a configuration file .eslintrc.js. I have added some modifications with our plugins and rules:
这将生成一个配置文件. eslintrc.js . eslintrc.js 。 我对我们的插件和规则进行了一些修改:
module.exports = {
  parser: "@typescript-eslint/parser",
  env: {
    es6: true,
    node: true,
  },
  extends: [
    'airbnb-base', // Uses airbnb rules
    'prettier/@typescript-eslint', // Uses eslint-config-prettier to disable ESLint rules from @typescript-eslint/eslint-plugin that would conflict with prettier
    'plugin:prettier/recommended', // Enables eslint-plugin-prettier and eslint-config-prettier. This will display prettier errors as ESLint errors. Make sure this is always the last configuration in the extends array.
  ],
  plugins: [
    "@typescript-eslint"
  ],
  globals: {
    Atomics: 'readonly',
    SharedArrayBuffer: 'readonly',
  },
  parserOptions: {
    ecmaVersion: 2018,
    sourceType: 'module',
  },
  rules: {
    "import/extensions": "off"
  },
  settings: {
    "import/resolver": {
      "node": {
        "extensions": [
          ".js", ".ts"
        ],
        "moduleDirectory": [
          "node_modules", "src/"
        ]
      }
    }
  }
};
Next, create an .eslintignore file that tells ESLint the directories or files to ignore and add the following:
接下来,创建一个. eslintignore . eslintignore文件,该文件告诉ESLint要忽略的目录或文件,并添加以下内容:
node_modules
dist
tests
coverage
styleguide.config.jssrc/**/*.test.tsx
src/**/*.md
src/serviceWorker.ts
Update our package.jsonby adding our lint command to the scripts property:
通过将lint命令添加到scripts属性来更新package.json :
// package.json"scripts": {
  ...
  "lint": "eslint 'src/**/*.{js,ts}' --quiet --fix"
},
The above script can be run from the command line using npm run lint or yarn lint. This command will run ESLint through all the .js and .ts files. It will automatically fix any ESLint errors, but any other errors will be printed out in the command line.
上面的脚本可以使用npm run lint或yarn lint npm run lint 。 此命令将通过所有.js和.ts文件运行ESLint。 它会自动修复任何ESLint错误,但其他任何错误都将在命令行中打印出来。
To configure lint-staged and husky, we also add the following configuration to the package.json :
要配置lint-staged和husky ,我们还向package.json添加以下配置:
// package.json"husky": {
  "hooks": {
    "pre-commit": "lint-staged"
  }
},
"lint-staged": {
  "src/**/*.{js,ts}": [
    "prettier --single-quote --write",
    "eslint --fix"
  ]
},
With the configuration above, anytime a commit is made to git, lint-staged will run Prettier and ESLint on any staged files with matching extensions. It will automatically fix any errors that can be amended and add them to the current commit. However, it will fail if there are linting errors that cannot be fixed automatically. These errors will need to be fixed manually before trying to commit the code again.
使用上述配置,只要对git进行了提交, lint-staged都会在具有匹配扩展名的所有暂存文件上运行Prettier和ESLint。 它将自动修复所有可以修正的错误,并将其添加到当前提交中。 但是,如果存在无法自动修复的棉绒错误,它将失败。 在尝试再次提交代码之前,需要手动修复这些错误。

生产(Production)
To use our Encryption library as an NPM module, we need to export our Encryption class and then compile our Typescript files into JavaScript.
要将加密库用作NPM模块,我们需要导出加密类,然后将Typescript文件编译为JavaScript。
First, we create our export file index.ts in our src folder as follows:
首先,我们在src文件夹中创建导出文件index.ts ,如下所示:
$ touch src/index.tsand export our Encryption class as follows:
并如下导出我们的Encryption类:
import Encryption from "./encryption";

export default Encryption;
For production, we add a build script to the scripts property of our package.json:
对于生产,我们将build脚本添加到package.json的scripts属性中:
// package.json"scripts": {
  ...
  "build": "NODE_ENV=production tsc"
},
The rootDir and outDir properties of the compiler options in the tsconfig.json file specifies the root directory of the input files and the output directory for the compiled files. Running yarn build will compile the TypeScript files into JavaScript files in the dist folder.
tsconfig.json文件中编译器选项的rootDir和outDir属性指定输入文件的根目录和已编译文件的输出目录。 运行yarn build将把TypeScript文件编译为dist文件夹中JavaScript文件。
We also need to install rimraf dev dependency, which acts like the rm -rf command.
我们还需要安装rimraf dev依赖项,其作用类似于rm -rf命令。
$ yarn add -D rimrafNext we update package.json by updating our build script and adding main and module properties to set the entry point for our library, which is our compiled Javascript file and the types property to points to our Typescript declaration entry file:
接下来,我们通过更新build脚本并添加main和module属性来设置我们的库的入口点,从而更新package.json ,该入口点是我们编译的Javascript文件,而types属性指向我们的Typescript声明入口文件:
// package.json"scripts": {
  ...
  "build": "rimraf ./dist && NODE_ENV=production tsc"
},
......
"main": "dist/index.js",
"module": "dist/index.js",
"types": "dist/index.d.ts"
Now, when we run yarn build, rimraf will remove our old dist folder before the TypeScript compiler emits new code to dist.
现在,当我们运行yarn build , rimraf将在TypeScript编译器向dist发出新代码之前删除旧的dist文件夹。
文献资料 (Documentation)
It is always important to include reliable documentation to help us keep track of the various aspects of an application. It helps improve on the quality of the code and makes it easier for further development, maintenance and knowledge transfer.
包括可靠的文档始终很重要,以帮助我们跟踪应用程序的各个方面。 它有助于提高代码的质量,并使其更容易进行进一步的开发,维护和知识转移。
Next, we need to create a README.md file at the root of our project:
接下来,我们需要在项目的根目录下创建一个README.md文件:
$ touch README.mdAnd update as follows:
并更新如下:
出版 (Publishing)
Before we can publish our library, we want to exclude certain files from our final package. We will be doing this by adding a files property to our package.json , which tells NPM which files and/or directories to include in our package:
在发布库之前,我们要从最终软件包中排除某些文件。 我们将通过在package.json添加一个files属性来做到这一点,该属性告诉NPM包中要包含哪些files和/或directories :
// package.json "files": [ "dist" ],
We also create an .npmignore file at the root of our project, which also specifies which directories or files for NPM to ignore:
我们还创建了一个. npmignore 位于项目根目录的. npmignore文件,该文件还指定NPM忽略哪些目录或文件:
 // . npmignore src
node_modules
tests
.idea
coverage
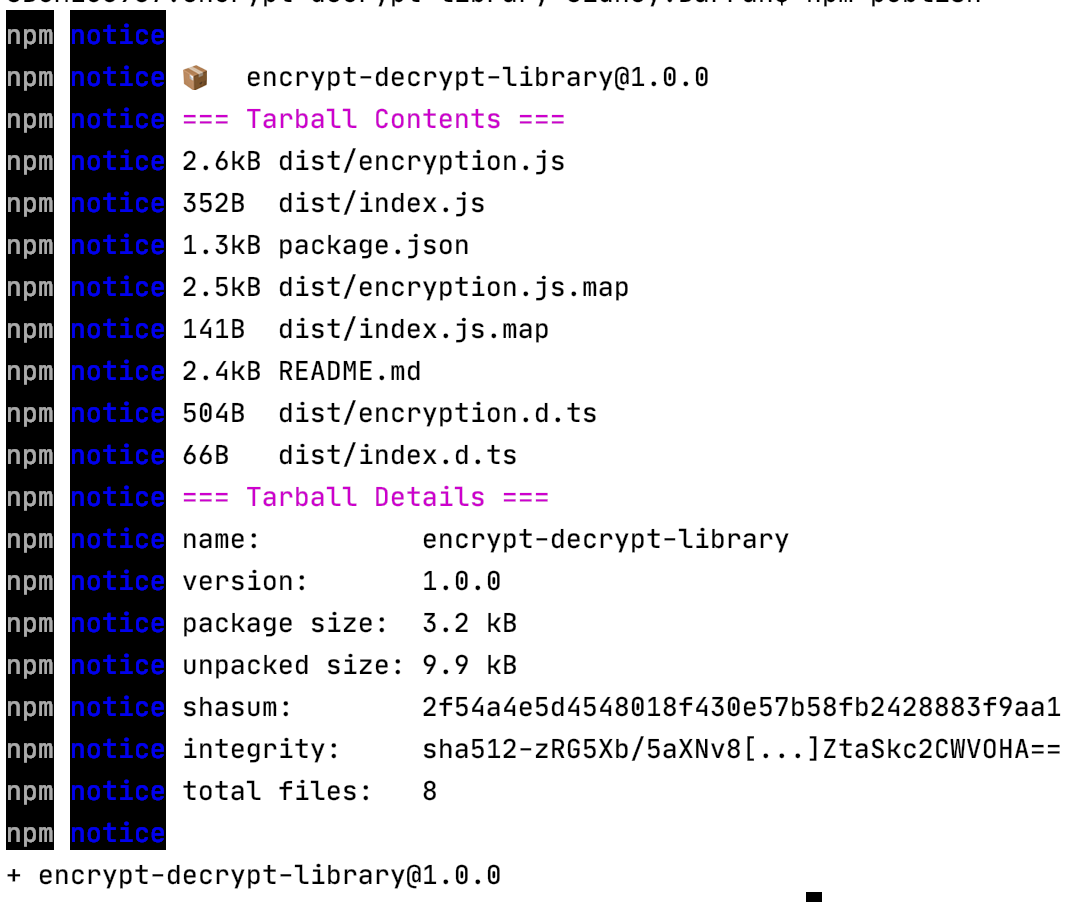
Next, we publish our package to NPM by running npm publish in the command line. You need to have an account on NPM and may need to run npm login to log into your NPM account before you can publish. Accounts on NPM are free. NPM also requires that the name of your package is unique.
接下来,我们通过在命令行中运行npm publish包发布到NPM 。 您需要在NPM上拥有一个帐户,并且可能需要运行npm login才能登录到您的NPM帐户,然后才能进行发布。 NPM上的帐户是免费的。 NPM还要求您的软件包名称唯一。
自动化的工作流程 (Automated Workflow)
It is important that we automate the release process as this saves time and improves code quality. It allows us to be able to automate the various steps above, such as installing dependencies, linting, testing, versioning and publishing our library to NPM.
重要的是我们要自动化发布过程,因为这样可以节省时间并提高代码质量。 它使我们能够自动化上述各个步骤,例如安装依赖项,整理,测试,版本控制以及将库发布到NPM。
Please see my article, How to Automate Continuous Integration and Development, Versioning and Publishing for a step by step guide on how to setup CI/CD using Github, CircleCI and Semantic Release to automate your workflows including test automation, linting, versioning, deployment and publishing to NPM.
请参阅我的文章“如何自动进行持续集成和开发,版本控制和发布” ,以获取有关如何使用Github,CircleCI和Semantic Release设置CI / CD的逐步指南,以自动化您的工作流程,包括测试自动化,整理,版本控制,部署和部署。发布到NPM。
状态徽章 (Status Badges)
We may need to include build badges in our project to provide public access to the build status of our package. Status badges can be embedded at the top of the project’s README file.
我们可能需要在项目中包括构建徽章,以使公众可以访问我们软件包的构建状态。 状态标记可以嵌入在项目的README文件的顶部。
We will be adding CircleCI and Semantic Release status badges at the top of our project’s README file. See CircleCI — Adding Status Badges.
我们将在项目的README文件的顶部添加CircleCI和Semantic Release状态徽章。 请参阅CircleCI-添加状态徽章。
# CircleCI Template:
[](<LINK>) # Semantic Release Template :
[](<NPM-PACKAGE-LINK>) // CircleCI Build Status
[]( https://app.circleci.com/pipelines/github/s-barrah/encrypt-decrypt-library ) // Semantic Release
[]( https://github.com/semantic-release/semantic-release ) // NPM Status
[]( https://www.npmjs.com/package/encrypt-decrypt-library )

用法(Usage)
To use our library in any project, install using YARN or NPM:
要在任何项目中使用我们的库,请使用YARN或NPM安装:
// Via Yarn $ yarn add encrypt-decrypt-library // Via NPM $ npm install --save encrypt-decrypt-library
And we can import and use anywhere in the project:
我们可以在项目的任何地方导入和使用:
 import Encryption from "encrypt-decrypt-library"; const config = {
   algorithm: process.env.ALGORITHM,
   encryptionKey: process.env.ENCRYPTION_KEY,
   salt: process.env.SALT,
}
const encryption = new Encryption(config); // Encrypt a string
encryption.encrypt('Hello world') // Encrypted as an unsigned 64-bit Integer
encryption.encrypt(123, true) // Encrypted as string
encryption.decrypt('gmmBh17Q4QA=')

// Encrypted as an integer
encryption.decrypt('NF1r855MimY=', true)
结论 (Conclusion)
There are various reasons why we may need to encrypt and decrypt data. We may want to pass sensitive information as URL parameters and want it obfuscated from users. Base64 encoding can create short and SEO-friendly URL tokens and in Node, libraries such asatob and btoa can emulate the browsers functionality, however, Base64 encoding is not secure. You can read more about JavaScript Base64.
有多种原因导致我们可能需要加密和解密数据。 我们可能希望将敏感信息作为URL参数传递,并希望其被用户混淆。 Base64编码可以创建简短且SEO友好的URL令牌,并且在Node中,诸如atob和btoa库可以模拟浏览器的功能,但是,Base64编码并不安全。 您可以阅读有关JavaScript Base64的更多信息。
The aim of this article was to demonstrate how to create a simple and easy-to-use encryption library that can be imported and used in any of our projects to encode and encrypt simple strings and numbers into short, secure and SEO-friendly URL parameters.
本文的目的是演示如何创建一个简单易用的加密库,该库可以导入并在我们的任何项目中使用,以将简单的字符串和数字编码和加密为简短,安全且对SEO友好的URL参数。 。
There are a few NPM libraries that provide encryption and encoding such as CryptoJS. You can also explore this list of JavaScript Crypto libraries and decide what fits your use case.
有一些NPM库提供加密和编码,例如CryptoJS 。 您还可以浏览此JavaScript加密库列表,并确定适合您的用例的。
Feel free to clone, fork or star my Simple Encryption library GitHub repository below if it helps you:
如果有帮助,请随意克隆,派生或加星标下面的我的简单加密库GitHub存储库:
进一步阅读 (Further Reading)
翻译自: https://medium.com/@sidneyb231/a-simple-encryption-library-in-node-js-with-typescript-d72c294998bf
动力节点数据库脚本下载


 2133
2133


 被折叠的 条评论
为什么被折叠?
被折叠的 条评论
为什么被折叠?
 到【灌水乐园】发言


