


树莓派2 ssh设置
I recently used some spare hardware to create a little file server on a Raspberry Pi, and I wanted to be able to log in to the Pi when I am away from home to check on things. This little document describes how I set that up. If you are curious about how I set up the file server, I wrote an article on that, too.
我最近使用一些备用硬件在Raspberry Pi上创建了一个小的文件服务器,并且我希望能够在出门在外时检查事物。 这个小文件描述了我的设置方法。 如果您对如何设置文件服务器感到好奇,我也写了一篇文章。
启用SSH (Enable SSH)
I started with a Raspberry Pi 3 running Raspbian, and I am going to assume you can get up and running with Raspbian, too. These instructions are going to be Raspbian-specific in some places, but most of this is also applicable to other Linux-based operating systems on the Pi.
我从运行Raspbian的Raspberry Pi 3开始,我将假设您也可以使用Raspbian并开始运行。 这些说明在某些地方将是特定于Raspbian的,但是大多数说明也适用于Pi上的其他基于Linux的操作系统。
You can enable SSH graphically, or from the command prompt.
您可以以图形方式或在命令提示符下启用SSH。
以图形方式启用SSH (Enabling SSH Graphically)
Click the icon in the top left to open the menu, and then select “Preferences…” and then “Raspberry Pi Configuration.”
单击左上角的图标以打开菜单,然后选择“首选项...”,然后选择“ Raspberry Pi配置”。
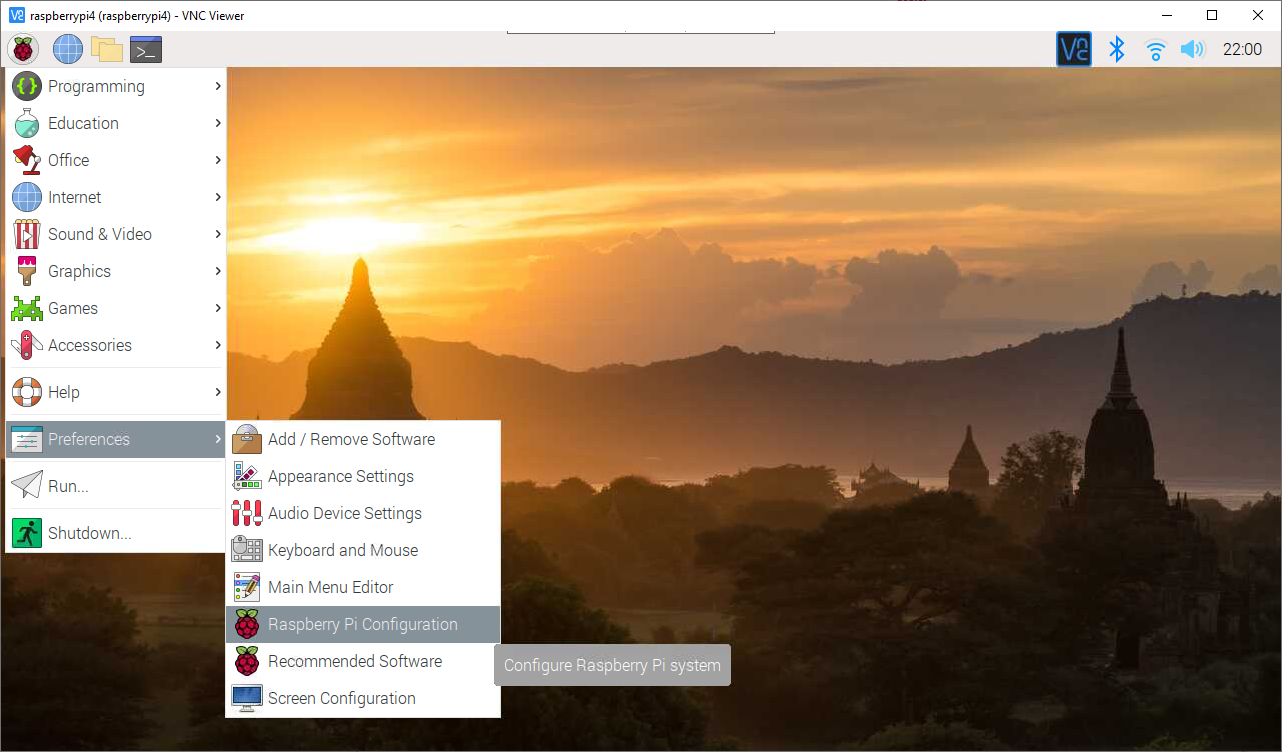
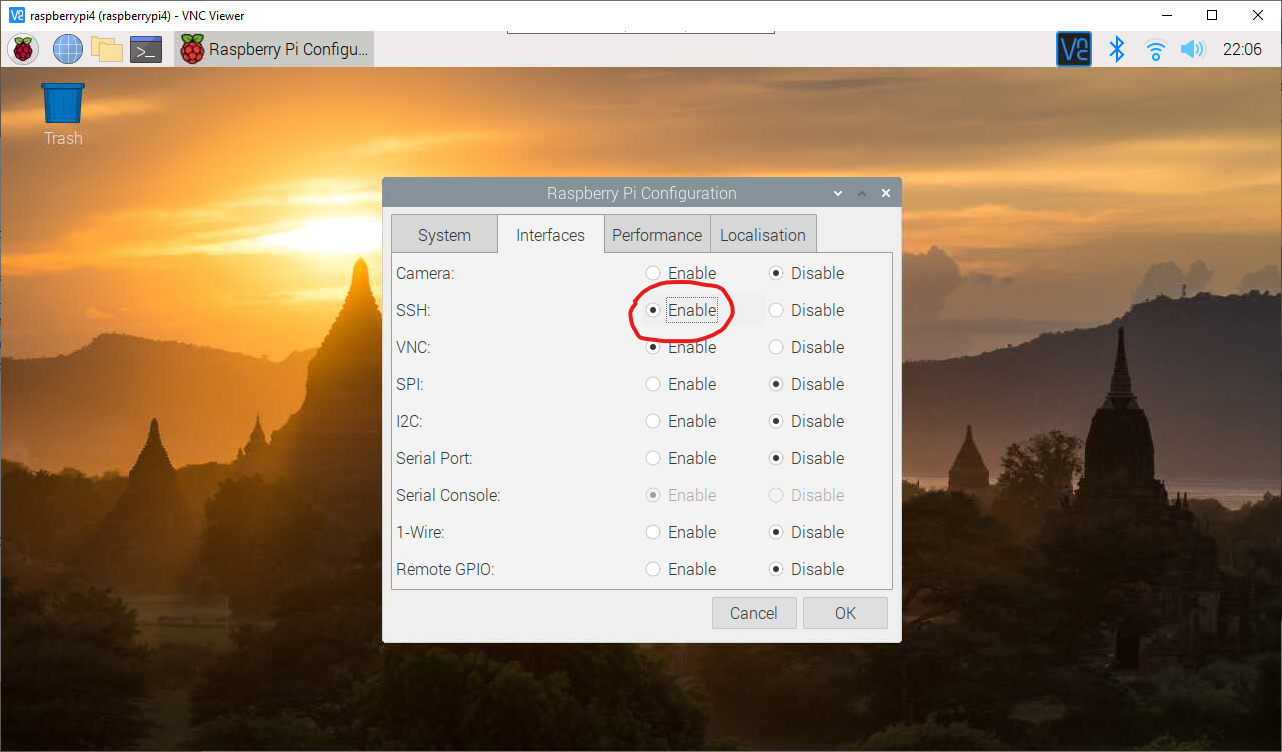
In the Raspberry Pi Configuration dialog, switch to the “Interfaces” tab, enable SSH, and click OK. That’s it!
在“ Raspberry Pi配置”对话框中,切换到“接口”选项卡,启用SSH,然后单击“确定”。 而已!
从提示符启用SSH (Enabling SSH From the Prompt)
Enabling SSH from the prompt is also pretty simple. The following two commands will do it.
从提示中启用SSH也非常简单。 以下两个命令将完成此操作。
sudo systemctl enable ssh
sudo systemctl start ssh
An alternate way to enable SSH from the prompt is to use the raspi-config system. Type sudo raspi-config at the prompt and press Enter. You’ll find SSH under “Interfacing Options.” Use the arrow and Tab keys to navigate.
从提示符启用SSH的另一种方法是使用raspi-config系统。 在提示符下键入sudo raspi-config ,然后按Enter。 您会在“接口选项”下找到SSH。 使用箭头和Tab键进行导航。
测试SSH (Testing SSH)
At this point, you should be able to log in to your Pi from another machine on the same network using your username (likely pi) and password.
此时,您应该可以使用用户名(可能是pi )和密码从同一网络上的另一台计算机登录到Pi。
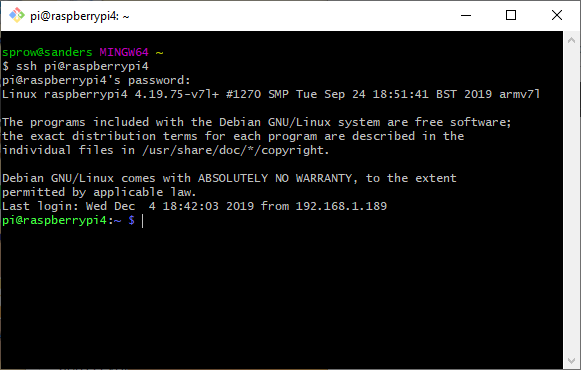
(You might notice that my Pi is named raspberrypi4. I have a lot of these doing various things. Yours may be named just raspberrypi, or you may have changed the name to something else, like dave. Just substitute the correct name whenever you need to.)
(您可能会注意到,我的Pi命名为raspberrypi4 。我有很多类似的东西在做您的事情。您的Pi可能被命名为raspberrypi ,或者您可能已经将名称更改为dave类的其他名称。只要需要,请使用正确的名称替换至。)
更改端口 (Change the Port)
Unfortunately, everyone knows that SSH lives on port 22, and this makes it a target for scanning. We can get a little bit of security by changing the port to something else. In this case, let’s use port 2222.
ünfortunately,每个人都知道在端口22 SSH的生活,这使得它的目标进行扫描。 通过将端口更改为其他端口,我们可以获得一点安全性。 在这种情况下,让我们使用端口2222。
At the prompt, type the following.
在提示符下,键入以下内容。
sudo cp /etc/sshd/sshd_config !#$.dist
sudo nano /etc/ssh/sshd_config
The first line makes a backup of the unmodified (“distribution”) SSH daemo
 最低0.47元/天 解锁文章


 961
961

 被折叠的 条评论
为什么被折叠?
被折叠的 条评论
为什么被折叠?
 到【灌水乐园】发言


