


angular 拦截器
Recently, I have been working on a task, regarding AWS S3 bucket file uploading using Angular and preSigned URLs. In that project, I have used HTTP interceptor to handle my request to bind all header parameters. My problem arose while I was trying upload files and found that I wasn’t able to since there were “two Authorization headers” in that request. They were the usual request header with token and the header which auto binds by the presigned Url. To solve this issue, I found a super-easy solution that allowed me to bypass my HTTP interceptor and BOOM! Issue fixed. Let’s dive into what I did.
最近,我一直在从事一项工作,涉及使用Angular和preSigned URL上载AWS S3存储桶文件 。 在该项目中,我使用HTTP拦截器来处理绑定所有标头参数的请求。 我尝试上载文件时出现问题,但由于该请求中有“两个Authorization标头”,所以我无法这样做。 它们是带有令牌的常规请求标头,以及由预签名的Url自动绑定的标头。 为了解决这个问题,我找到了一个超级简单的解决方案,使我可以绕过HTTP拦截器和BOOM! 问题已解决。 让我们深入研究我所做的。
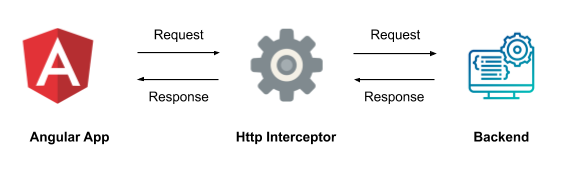
等一下...什么是拦截器? (Wait… What is an Interceptor?)
Before starting the explanation of my trick, let’s get to know what interceptors are and how we can use them.
在开始解释我的技巧之前,让我们了解什么是拦截器以及如何使用它们。
Angular is one of the most popular front-end development frameworks in the developer community. One of the main reasons for that is that Angular provides many built-in tools that help to scale industry level JavaScript applications. Interceptors are one of the tools in the list capable of handling HTTP requests globally. They allow us to intercept incoming and outgoing HTTP requests using the HttpClient. By intercepting the request we can modify or change any parameter of the request.
Angular是开发人员社区中最受欢迎的前端开发框架之一。 主要原因之一是Angular提供了许多内置工具,可帮助扩展行业级JavaScript应用程序。 拦截器是列表中能够全局处理HTTP请求的工具之一。 它们使我们能够使用HttpClient拦截传入和传出的HTTP请求。 通过拦截请求,我们可以修改或更改请求的任何参数。
Before diving any deeper I suggest that you have a basic knowledge of Angular HTTP Client and RxJS Observable.
在深入探讨之前,我建议您具有Angular HTTP Client和RxJS Observable的基础知识。
这是窍门 (Here is the trick)
As I mentioned above, there are occasions where we need to allow for a custom header (or, in other words, to skip the interceptor action in http requests).
如前所述,在某些情况下,我们需要允许使用自定义标头(或者换句话说,跳过http请求中的拦截器操作)。
BONUS POINT: Usually in Angular best practices, it is better to keep our services separate from modules, components and models etc. Please checkout the below folder structure. It is better if you can refer to this structure for your future implementations.
优点:通常,在Angular最佳实践中,最好将我们的服务与模块,组件和模型等分开。请签出以下文件夹结构。 最好在以后的实现中参考此结构。
src
 ┣ app
 ┃ ┣ common
 ┃ ┣ customer
 ┃ ┣ models
 ┃ ┣ public
 ┃ ┣ services
 ┃ ┃ ┣ authentication
 ┃ ┃ ┃ ┣ guards
 ┃ ┃ ┃ ┃ ┣ auth.guard.ts
 ┃ ┃ ┃ ┣ interceptors
 ┃ ┃ ┃ ┃ ┣ response.interceptor.ts
 ┃ ┃ ┃ ┗ auth.service.ts
 ┃ ┃ ┣ directives
 ┃ ┃ ┣ pipes
 ┃ ┃ ┣ resolvers
 ┃ ┃ ┣ services-api
 ┃ ┃ ┣ services-inter
 ┃ ┣ app.component.css
 ┃ ┣ app.component.html
 ┃ ┣ app.component.spec.ts
 ┃ ┣ app.component.ts
 ┃ ┣ app.module.ts
 ┃ ┣ app.routing.ts
 ┃ ┗ app.server.module.ts
 ┣ assets
 ┣ environments
 ┣ favicon.ico
 ┣ index.html
As per the file tree, I kept my interceptors inside the src/services/interceptors folder.
根据文件树,我将拦截器保留在src / services / interceptors文件夹中。

Now check out my sample service file.
现在查看我的样本服务文件。
Here we can see that there are two types of requests. In the finish submission request, you can see that we do not append a header to the request. But in the second request, I have appended a header. “Note: In both requests we are handling the headers by the interceptor.”
在这里我们可以看到有两种类型的请求。 在完成提交请求中,您可以看到我们没有在请求中附加标题。 但是在第二个请求中,我添加了一个标题。 “ 注意 :在这两个请求中,我们都是由拦截器处理标头。”
The trick is adding a custom flag to the request header, which we do not want to append the header by the HTTP interceptor.
诀窍是在请求标头上添加自定义标志,我们不希望通过HTTP拦截器将标头追加到标头。
Now check the interceptor file.
现在检查拦截器文件。
Here, I have added a condition to the interceptor. By checking the custom flag, I have bypassed the request header. ( As mentioned above I have done this to bypass HTTP interceptor to upload files to AWS s3 bucket. In that case, the pre-signed URL will automatically define a request header). For other requests, token will be appended.
在这里,我为拦截器添加了一个条件。 通过检查自定义标志,我绕过了请求标头。 (如上所述,我这样做是为了绕过HTTP拦截器,将文件上传到AWS s3存储桶。在这种情况下,预签名的URL将自动定义请求标头)。 对于其他请求,将附加令牌。
Actually this is only one of the uses of HTTP interceptor. There are many other uses too which I will list here:
实际上,这只是HTTP拦截器的用途之一。 我还将在这里列出其他许多用途:
- Error handling 错误处理
- Notification handling 通知处理
- Format JSON responses 格式化JSON回应
- Toast handling 吐司处理
- For automatic loaders 对于自动装载机
- Authentication handling 认证处理
- Caching 快取
结论 (Conclusion)
Okay, that is it. I hope this article will help make your life easier and save some time. I highly recommend that you check the following article if you want to see how I came across this issue in a practical scenario.
好的,就是这样。 希望本文能帮助您简化生活并节省时间。 我强烈建议您查看以下文章,以了解在实际情况下我是如何遇到此问题的。
Thanks for reading and happy coding :)
感谢您的阅读和愉快的编码:)
翻译自: https://codeburst.io/super-easy-trick-to-bypass-http-interceptors-in-angular-93df3dc2c86e
angular 拦截器


 4123
4123


 被折叠的 条评论
为什么被折叠?
被折叠的 条评论
为什么被折叠?
 到【灌水乐园】发言


