


I’m a huge fan of serverless, but one of the areas that’s still a bit tougher with it is testing. While you can mock an API call to a function, it’s not quite as easy to test an API endpoint as I’d experienced in more traditional stacks. This led me to creating a test suite in Postman, that hits my deployed APIs. Specifically I’m using this more as a smoke test, and final proof that the deployed APIs work as expected from real world use cases. I still have unit and integration tests in my codebase, but these Postman tests have turned out to be an extra layer of confidence. Further there is LocalStack which aims to simulate the AWS environment locally, but I wanted something that was a true test…
我是无服务器的忠实拥护者,但是在测试方面还有一点困难。 尽管可以模拟对函数的API调用,但是测试API端点并不像我在更传统的堆栈中所经历的那样容易。 这导致我在Postman中创建了一个测试套件,该套件符合了我部署的API。 具体来说,我将其更多地用作冒烟测试,并最终证明所部署的API能够按实际用例预期工作。 我的代码库中仍然有单元测试和集成测试,但是事实证明,这些Postman测试又增加了一层信心。 此外,还有旨在在本地模拟AWS环境的LocalStack ,但我想要一个真正的测试……
The ultimate reason for this, is that it gives a really true feeling of confidence in what has just been deployed, as it’s a 100% real test of the system — no mocks, no LocalStack, all real AWS services.
这样做的最终原因是,它为 刚刚部署的 内容提供了真正 的信心 ,因为它是对系统的100%真实测试-没有模拟,没有LocalStack,所有真实的AWS服务。
In this post I’ll describe how I setup these tests, and how they get triggered after a deploy. I’m using the Serverless Framework, but running Postman tests via their command line tool called Newman, thus you should be able to trigger these any CI system.
在这篇文章中,我将介绍如何设置这些测试以及部署后如何触发它们。 我使用的是Serverless Framework ,但是通过名为Newman的命令行工具运行Postman测试,因此您应该能够触发这些任何CI系统。
邮差 (Postman)
Postman is a wonderful GUI tool for making HTTP calls. My use has grown considerably over the years, and I find that I leverage it a lot more than I’d have expected. It’s nice to be able to create “collections” of calls for testing, and use their “environments” to be able to execute those tests against different deployments (e.g. dev vs. staging vs. production, etc.). Here’s how I set up the smoke test suite for a recent project. Note, I am assuming you are either lightly familiar with Postman, or you’ll figure it out easily after installing it, so I’ll avoid true step-by-step instructions…
Postman是用于进行HTTP调用的出色GUI工具。 这些年来,我的使用量有了很大的增长,而且我发现我的使用量超出了我的预期。 能够创建测试调用的“集合”,并使用它们的“环境”能够针对不同的部署(例如,开发,过渡,生产等)执行这些测试,这是很好的。 这是我为最近的项目设置烟雾测试套件的方法。 请注意,我假设您对Postman不太熟悉,或者在安装后可以轻松搞清楚,所以我将避免使用真正的分步说明…
In Postman, there are four main pieces to set up:
在《邮递员》中,需要设置四个主要部分:
- Create a collection to organize your tests/requests, and to hold common global values referenced in tests. 创建一个集合来组织您的测试/请求,并保存测试中引用的通用全局值。
- Create environments to allow running the tests in different environments (dev/test/prod) 创建环境以允许在不同的环境中运行测试(dev / test / prod)
- Create folders within your collection to organize common variables and tests used by the requests in the folder. I use this to separate tests by general category or topic such as success vs. failure, or tests requiring auth vs. those that don’t. 在集合中创建文件夹,以组织文件夹中的请求所使用的常见变量和测试。 我用它按一般类别或主题将测试分开,例如成功与失败,或者需要认证与不需要认证的测试。
- Write your tests. 编写测试。
First, I highly recommend checking out Postman’s testing docs in general. There’s a lot you can do, and reading this is good background here. Additionally, Serverless Guru has a doc on Postman Newman which also gets into using them from AWS CodeBuild, etc.
首先,我强烈建议您总体上检查Postman的测试文档 。 您可以做很多事情,在这里阅读是很好的背景。 此外, Serverless Guru拥有有关Postman Newman的文档,该文档也可以从AWS CodeBuild等中使用。
采集 (Collection)
First, create a collection. Then, click the “…” menu next to it and pick Edit. Here you’ll find the Variables tab. In my collection, all I have here is a JSON Schema definition for my API, as all tests will validate against this.
首先,创建一个集合。 然后,单击其旁边的“…”菜单,然后选择“编辑”。 在这里,您会找到“变量”标签。 在我的收藏夹中,这里只有我的API的JSON模式定义,因为所有测试都将对此进行验证。
You can then use these variables in your requests with a line like:
然后,您可以在请求中使用以下行来使用这些变量:
pm.collectionVariables.get(“my_json_schema”)
pm.collectionVariables.get(“ my_json_schema”)
环境环境 (Environments)
I set up an environment for each deployment I want to test. This can include localhost as well. In each environment, I set up variables for values such as the base URL/host/domain and API keys — i.e. things that are specific to that environment. You can then use those in requests by putting {{my_variable}} in the request, e.g. for a base URL, you’d set the request URL as:
我为要测试的每个部署都设置了一个环境。 这也可以包括本地主机。 在每种环境中,我都为诸如基本URL /主机/域和API密钥之类的值设置变量-即特定于该环境的内容。 然后,您可以通过在请求中添加{{my_variable}}来在请求中使用这些请求,例如,对于基本URL,您可以将请求URL设置为:
This same syntax works in the Headers section, so if you have an API key you’re using or similar, you can simply put {{api_key}} in as the value for the header (presuming you’ve defined an api_keyvariable in your environment).
标头部分中使用了相同的语法,因此,如果您使用的API密钥或类似的密钥,则可以简单地将{{api_key}}用作标头的值(假设您已在自己的api_key中定义了api_key变量环境)。
资料夹 (Folders)
Within the collection, I create folders to organize tests that have commonalities. What this allows for, is adding tests to the folder, which allows you to only define that test once, but have it used with all requests in the folder. In my current API, which is small, I have three folders: success cases, user errors (malformed requests, etc.), and api key tests. The success cases for example have tests defined on that folder to ensure HTTP success responses, valid (JSON schema compliant, and containing success data) response, response time checking, as well as some more detailed ones like verifying that a value in the JSON is in range. You define these by clicking on the … menu for the folder and selecting edit, then defining the tests in the Tests tab.
在集合中,我创建文件夹来组织具有通用性的测试。 这就允许在文件夹中添加测试,这仅允许您一次定义该测试,但可以将其用于文件夹中的所有请求。 在我目前很小的API中,我有三个文件夹:成功案例,用户错误(格式错误的请求等)和api密钥测试。 例如,成功案例在该文件夹上定义了测试,以确保HTTP成功响应,有效(符合JSON模式并包含成功数据)响应,响应时间检查以及一些更详细的测试,例如验证JSON中的值是否正确。在范围内。 通过单击文件夹的…菜单并选择编辑,然后在“测试”选项卡中定义测试,可以定义这些测试。

测验 (Tests)
Finally we have all the individual “tests” — or rather, a set of many different requests (in each folder), that we have specific tests for. These are regular Postman requests, but then you add tests on the Tests tab of that request (you’re now seeing all the different levels where you can define tests). These tests are whatever you need to ascertain that that specific request has performed properly. This shouldn’t be general JSON format, as that’s done in at a higher level where you’re validating your JSON schema for all requests. But, this could validate either an exact response for that particular request, or something a bit less strict if applicable, such as testing that the response value(s) are within a certain range, or aren’t blank, etc.
最后,我们拥有所有单独的“测试”,或者说,有一组许多不同的请求(在每个文件夹中),我们针对这些请求进行了特定的测试。 这些是常规的邮递员请求,但是您可以在该请求的“测试”选项卡上添加测试(您现在看到可以定义测试的所有不同级别)。 这些测试是确定特定请求是否正确执行所需的一切。 这不应该是通用的JSON格式,因为它是在更高级别上完成的,在该级别中,您将验证所有请求的JSON模式。 但是,这可以验证针对该特定请求的确切响应,也可以验证一些不太严格的响应(如适用),例如测试响应值在一定范围内或不为空白等。
运行测试 (Running the Tests)
In order to run the tests, you’ll use the Newman CLI. First, you need to export your tests and your environments.
为了运行测试,您将使用Newman CLI。 首先,您需要导出测试和环境。
出口环境 (Exporting Environments)
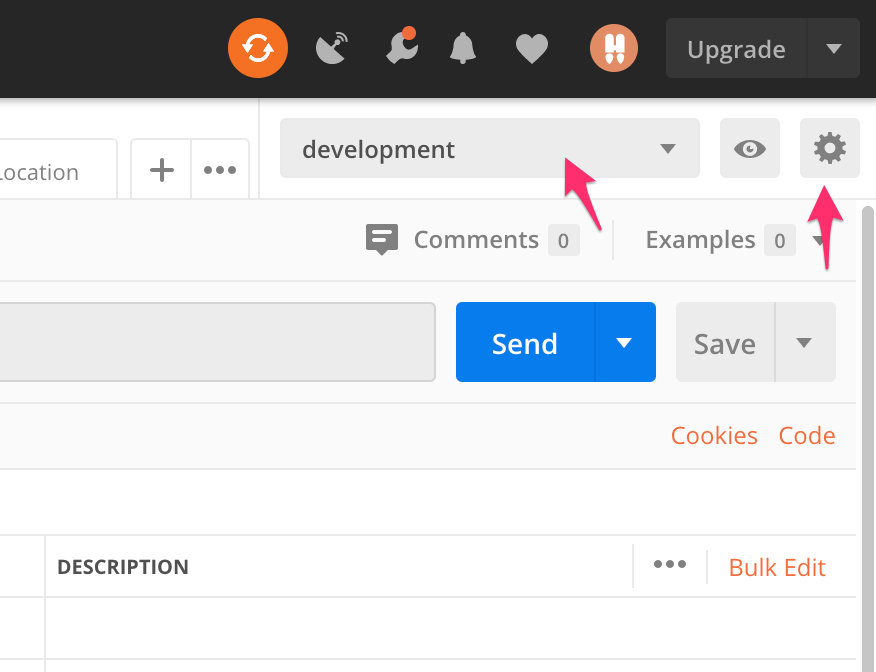
You’ll export a JSON file for each environment you have. Click the gear icon next to the environments dropdown to bring up the environments. Then click the download icon which will prompt you to save your environment file. Do this for each environment.
您将为每个环境导出一个JSON文件。 单击环境下拉菜单旁边的齿轮图标以调出环境。 然后单击下载图标,这将提示您保存环境文件。 针对每个环境执行此操作。
导出测试 (Exporting Tests)
Next, export the tests themselves. This will be a single file, as all your environment specific values are in the environments files. In the Collections pane of Postman, click the three dots next to the collection, and pick Export. Save the collection (producing another JSON file).
接下来,自己导出测试。 这将是一个文件,因为您所有特定于环境的值都在环境文件中。 在Postman的“收藏”窗格中,单击收藏旁边的三个点,然后选择“导出”。 保存集合(生成另一个JSON文件)。
安装Newman和执行测试 (Installing Newman and Executing Tests)
Finally, to execute the tests, ensure you have Newman installed. You can do this via NPM or Homebrew. See the Newman GitHub page for details. Then you use a command line like:
最后,要执行测试,请确保已安装Newman。 您可以通过NPM或Homebrew完成此操作。 有关详细信息,请参见Newman GitHub页面 。 然后,您使用如下命令行:
node_modules/.bin/newman run -e postman_dev_env.json postman_api_tests.json
node_modules / .bin / newman运行-e postman_dev_env.json postman_api_tests.json
The -e flag points at the environment file to use, and then the last .json file is your file of tests.
-e标志指向要使用的环境文件,然后最后一个.json文件是您的测试文件。
There are other ways to run it and this also depends a bit on how you installed it — my install is local via NPM above as you can guess. You can also run it from code.
还有其他方法可以运行它,这还取决于您的安装方式-您可以通过上面的NPM进行本地安装。 您也可以从代码中运行它。
无服务器框架部署集成 (Serverless Framework Deploy Integration)
Finally, in my setup, I add NPM scripts entries for these, one per environment. Then I use the serverless-plugin-scripts plugin, to add scripts to my Serverless config, so that I can integrate running these in my Serverless deploys.
最后,在我的设置中,我为每个环境添加了NPM脚本条目。 然后,我使用serverless-plugin-scripts插件将脚本添加到我的Serverless配置中,以便可以在我的Serverless部署中集成运行这些脚本。
In my case, you’ll see that I also augment this with an initial call to the API to warm things up, in the case of the dev environment, where we have Aurora Serverless DB configured to go to sleep when inactive (not the case for production). So, these scripts in the serverless.yml file look like:
就我而言,在开发环境中,我们将Aurora Serverless DB配置为在不活动时进入睡眠状态(不是这种情况),同时还通过对API的初次调用来增强此功能以预热事情用于生产)。 因此,serverless.yml文件中的这些脚本如下所示:
custom:
  scripts:
    commands:
      smoke-test-dev: "echo 'activating dev serverless DB and running dev smoke test...'; curl --request GET 'https://YOUR-API-URL' > /dev/null 2>&1; sleep 30; npm run test-dev"
      smoke-test-production: "echo 'running production smoke test...'; npm run test-production"
    hooks:
      'after:deploy:finalize': ${self:custom.scripts.commands.smoke-test-${self:provider.stage}}
But what you’ll also notice in there is the hooks section, where in the deploy finalize step, we trigger these tests automatically. The regular serverless deploy occurs, then the tests are run as a final step, AND this dictates whether the deploy actually succeeds or fails (just in terms of the serverless deploy command). You could then rollback your deploy, or whatever makes sense in your case.
但是,您还将在hooks部分注意到,该部分在部署完成步骤中会自动触发这些测试。 进行常规的无服务器部署,然后将测试作为最后一步运行,并且这决定了部署实际上是成功还是失败(就serverless deploy命令而言)。 然后,您可以回滚部署,或者在您的情况下进行任何有意义的操作。
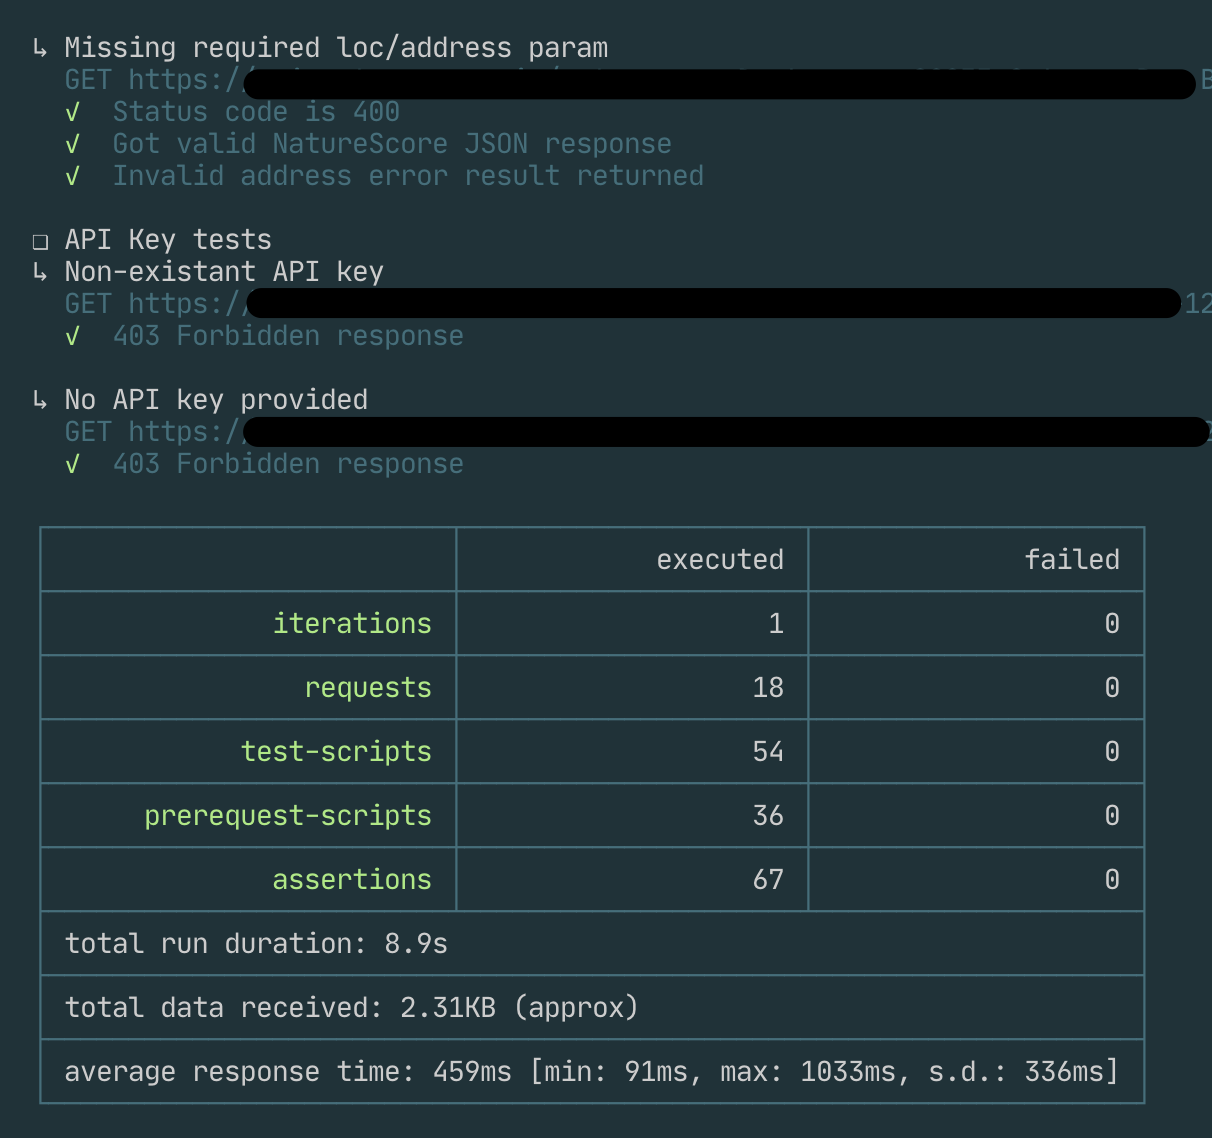
Postman/Newman has nice output, where it shows the tests from each request, organized by folder, and then a final summary of all the results. The below is truncated, but you can see one test (“Missing required loc/address param”), then you’ll see the last two tests are from the “API Key tests” folder:
Postman / Newman的输出很好,可以显示每个请求的测试结果(按文件夹组织),然后显示所有结果的最终摘要。 以下内容被截断了,但是您可以看到一个测试(“缺少所需的位置/地址参数”),然后您将看到最后两个测试来自“ API密钥测试”文件夹:
That’s it! I hope this is useful, or that it creates testing ideas of your own.
而已! 我希望这是有用的,或者希望它创建您自己的测试思路。
翻译自: https://levelup.gitconnected.com/smoke-testing-serverless-apis-with-postman-15a13c58262b


 767
767

 被折叠的 条评论
为什么被折叠?
被折叠的 条评论
为什么被折叠?
 到【灌水乐园】发言


