


初学react实现路由跳转
A Beginners Guide to React
React入门指南
It’s nearly the end of 2019, and you think you might finally be ready to get started learning ReactJS. You hear it’s become the most popular front end JavaScript framework. You sit down at your computer, and are ready to give it a go. Starting off, you probably jump straight in with Facebook’s official React tutorial. After that maybe another tutorial on medium. You do some reading here and there, and if you are like me, you end up pretty confused. You hear terms like “props”, “state”, “virtual dom”, “ES6”, “babel”, “webpack”, “higher-order components”, “Redux”, and much more. Soon you realise that learning React is not as easy as you once imagined and either quit or confusedly persevere on.
快到2019年底了,您认为您可能终于可以开始学习ReactJS了。 您会听说它已成为最受欢迎的前端JavaScript框架。 您坐在计算机旁,可以试一试了。 首先,您可能会直接进入Facebook的官方React教程。 在那之后,也许还有另一本关于媒体的教程。 您在这里和那里做一些阅读,如果您像我一样,最终会很困惑。 您会听到诸如“ props”,“ state”,“ virtual dom”,“ ES6”,“ babel”,“ webpack”,“ higher-order components”,“ Redux”等术语。 很快,您意识到学习React并不像您曾经想象的那样容易,要么退出要么困惑地坚持不懈。
Does this sound like you? Because this is exactly how I felt when I started learning React. All I wanted to do was set up a simple React app, and I was getting very confused. I thought React had a fairly difficult learning curve, and I was feeling pretty overwhelmed.
这听起来像你? 因为这正是我开始学习React时的感受。 我要做的只是建立一个简单的React应用,我感到非常困惑。 我以为React的学习曲线比较困难,我感到不知所措。
I soon realised that React was fairly easy to learn, but the way I went about learning it was difficult. The problem was I didn’t know how to learn it. Firstly, I was relatively new to the world of front end development and I didn’t know what I was doing. I was somewhat familiar with HTML and only used JavaScript a few times. That certainly did not help. There were technologies and information that I should have spent a little more time learning prior to React, that would have lowered the learning curve tremendously.
我很快意识到React很容易学习,但是我学习的方式却很困难。 问题是我不知道如何学习。 首先,我对前端开发领域还比较陌生,我不知道自己在做什么。 我对HTML有点熟悉,只使用过几次JavaScript。 那当然没有帮助。 在React之前,我应该花一些时间来学习一些技术和信息,这会大大降低学习曲线。
This is what I would have liked to have known before I began writing a single line of React code:
在开始编写一行React代码之前,这是我希望知道的:
先决条件 (Prerequisites)
First, let’s nail out the basics. Before you start diving into React, you should probably have at least a little experience with each of the following:
首先,让我们确定基础知识。 在开始研究React之前,您可能应该至少对以下每个方面有一点经验:
- HTML- CSS- ES6 JavaScript- NodeJS + NPM
-HTML- CSS- ES6 JavaScript- NodeJS + NPM
If you are familiar with each of the above, then learning React is going to be a lot easier for you. React is big on JavaScript and HTML.
如果您熟悉以上所有内容,那么学习React对您来说将变得容易得多。 React在JavaScript和HTML方面非常重要。
什么是React (What is React)
React is a JavaScript library built in 2013 by the Facebook development team. React wanted to make user interfaces more modular (or reusable) and easier to maintain. According to React’s website, it is used to “Build encapsulated components that manage their own state, then compose them to make complex UIs.”
React是Facebook开发团队于2013年构建JavaScript库。 React希望使用户界面更具模块化(或可重用)并且易于维护。 根据React网站的说法,它用于“构建管理其自身状态的封装组件,然后对其进行组合以构成复杂的UI。”
了解基本 (Understand the Basic)
React has 4 ideas that are key to getting started learning with React.
React有4个想法,这些想法是开始学习React的关键。
1.组件 (1.Components)
React apps have component based architectures. Conceptually, components are more like JavaScript Functions.They accept inputs(called “props”) and return React elements describing what should appear on screen. Probably a title, an author’s name, the date published, some text, some photos, like buttons, share buttons, etc. If you were building this blog in React, each of these would most likely be a component.
React应用程序具有基于组件的架构。 从概念上讲,组件更像JavaScript函数。它们接受输入(称为“ props”)并返回描述应该在屏幕上显示的React元素。 可能是标题,作者姓名,发布日期,一些文本,一些照片(例如按钮,共享按钮等)。如果您在React中构建此博客,则每个这些极有可能是一个组成部分。
If you create a component for a share button, you can reuse that component to build other share buttons, or reuse it across multiple different kinds of articles. This is the idea with React. You are building components that then can be used and reused to build bigger components.
如果为共享按钮创建组件,则可以重复使用该组件来构建其他共享按钮,或者在多种不同类型的文章中重复使用它。 这就是React的想法。 您正在构建组件,然后可以使用这些组件并对其进行复用以构建更大的组件。
2.道具 (2. Props)
Props is short for properties. Properties are how you pass information unidirectionally from parent to child components. I like to think of them as property attributes or parameters, since it is conceptually similar to passing arguments into a function, and syntactically similar to HTML attributes. Look at the example used previously. If this were a React component, the props would be what you are passing in as “src”, “alt”, “height”, and “width”. You can also pass in callback functions for the child to execute such as “onClick”.
道具是财产的简称。 属性是您如何从父组件向子组件单向传递信息。 我喜欢将它们视为属性或参数,因为它在概念上类似于将参数传递给函数,并且在语法上类似于HTML属性。 查看先前使用的示例。 如果这是一个React组件,那么props就是您要传递的“ src”,“ alt”,“ height”和“ width”。 您还可以传递回调函数以供孩子执行,例如“ onClick”。
3.状态 (3. State)
Many React components will be stateful components. State is exactly what it sounds like. It’s the internal state of your component. Think of a checkbox on a web page. It can either be checked or unchecked. When the user clicks on the checkbox, it will check the box if it is unchecked, and when the user clicks it again it will uncheck the box. The checkbox is an example of a stateful component. In this example, the internal state of the checkbox would be a boolean that would either be checked true or checked false.
许多React组件将是有状态的组件。 状态就是听起来的样子。 这是组件的内部状态。 想一想网页上的复选框。 可以选中或取消选中它。 当用户单击复选框时,它将选中该复选框(如果未选中),而当用户再次单击时,它将取消选中该复选框。 该复选框是有状态组件的示例。 在此示例中,复选框的内部状态将是一个布尔值,该布尔值将被选中为true或被选中为false。
While many components have state, some are stateless. Just because lots of components have state doesn’t mean that every component needs to be stateful. Sometimes it makes sense to omit state from a component. Think of an image html tag.
虽然许多组件都具有状态,但有些组件是无状态的。 仅仅因为许多组件都具有状态并不意味着每个组件都必须是有状态的。 有时,从组件中省略状态是有意义的。 想想图像html标签。
<img src=”smiley.gif” alt=”Smiley face” height=”42" width=”42">
<img src=”smiley.gif” alt=”Smiley face” height=”42" width=”42">
If this image tag would be an example of a stateless component. You are passing in parameters, but the image tag itself does not have an internal state that it needs to manage itself.
如果此图像标签将是无状态组件的示例。 您正在传递参数,但是image标签本身没有内部状态,需要它自己进行管理。
4.React生命周期 (4. React lifecycle)
React is much easier to understand if you have a basic idea behind the React component lifecycle. The React lifecycle describes when and how a component should mount, render, update, and unmount in the DOM. React has lifecycle hooks (React component methods) that help you manage state, props, and work with the lifecycle flow.
如果您对React组件生命周期有一个基本的了解,那么React就会更容易理解。 React生命周期描述了组件何时以及如何在DOM中安装,渲染,更新和卸载。 React具有生命周期挂钩(React组件方法),可帮助您管理状态,道具和使用生命周期流程。

React component lifecycle has three categories — Mounting, Updating and Unmounting.
React组件的生命周期分为三类 -安装,更新和卸载。
The render() is the most used lifecycle method.
render ()是最常用的生命周期方法。
- It is a pure function. 它是一个纯函数。
- You cannot set state in render() 您不能在render()中设置状态
2. The componentDidMount() happens as soon as your component is mounted.
2.一旦安装了组件,就会发生componentDidMount ()。
- You can set state here but with caution. 您可以在此处设置状态,但要谨慎。
3. The componentDidUpdate() happens as soon as the updating happens.
3. componentDidUpdate ()在更新发生后立即发生。
- You can set state here but with caution. 您可以在此处设置状态,但要谨慎。
4. The componentWillUnmount() happens just before the component unmounts and is destroyed.
4. componentWillUnmount ()刚好在组件卸载并销毁之前发生。
- This is a good place to cleanup all the data. 这是清理所有数据的好地方。
- You cannot set state here. 您无法在此处设置状态。
5. The shouldComponentUpdate() can be used rarely.
5. shouldComponentUpdate ()很少使用。
- It can be called if you need to tell React not to re-render for a certain state or prop change. 如果您需要告诉React不要针对特定状态或道具更改重新渲染,则可以调用它。
- This needs to be used with caution only for certain performance optimizations. 仅在某些性能优化时才需要谨慎使用。
6.The two new lifecycle methods are getDerivedStateFromProps() and getSnapshotBeforeUpdate().
6.两种新的生命周期方法是getDerivedStateFromProps ()和getSnapshotBeforeUpdate ()。
- They need to be used only occasionally. 它们仅需要偶尔使用。
- Not many examples are out there for these two methods and they are still being discussed and will have more references in the future. 这两种方法的示例并不多,并且仍在讨论中,将来还会有更多参考。
Note: You can read more about React’s lifecycle here
These are only the basics to get started.
这些只是入门的基础。
安装React (Install React)
Step1: Go to the terminal and then type,
步骤1:前往终端,然后输入
npx create-react-app app-nameThis creates a template of a React application with the name of app-name .
这将创建一个名为app-name的React应用程序模板。
Note: npx is a package runner command included within npm .
注意: npx 是 npm 包含的包 npm 程序命令 。
Step2: You need to navigate to the directory of this application and then view it in your browser like so:
步骤2:您需要导航到该应用程序的目录,然后在浏览器中查看它,如下所示:
cd app-name
npm start
If the above operation is successful, your browser will open up to a URL of localhost:3000 . This is the output in the browser
如果以上操作成功,您的浏览器将打开URL到localhost:3000 。 这是浏览器中的输出
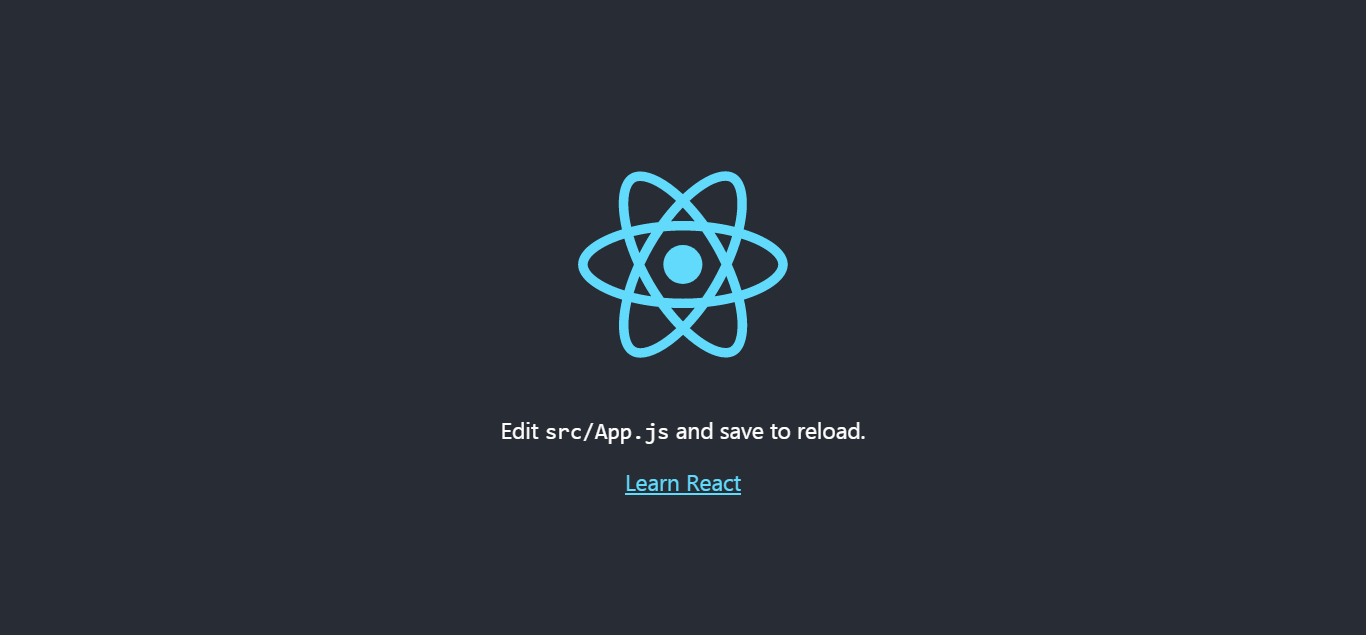
Output in the browser
在浏览器中输出
Now, let’s create a simple Hello World! application with this project.
现在,让我们创建一个简单的Hello World! 该项目的应用程序。
你好,世界! —使用React (Hello World! — With React)
Within your project directory, go to src/index.js and replace the contents of the file index.js as follows:
在您的项目目录中,转到src/index.js并替换文件index.js的内容,如下所示:

Code for index.js
index.js的代码
Lines 1 and 2: Importing thereactandreact-domlibraries. Thereactmodule is used to write HTML code within JavaScript(also known as JSX) andreact-appis used to execute therenderfunction that will display the contents onto the page.Lines 1 and 2:导入react和react-dom库。react模块用于在JavaScript(也称为JSX)中编写HTML代码,而react-app用于执行将内容显示在页面上的render函数。Line 4: Render anh1element in a container which has anidof root.Line 4:在具有rootid的容器中渲染h1元素。
The output of the code is as follows:
代码的输出如下:

什么是ReactDOM.render方法 (What is ReactDOM.render Method)

The first argument(also known as
element) specifies which element do you want to display, for instanceh1,pand so on and so forth.第一个参数( 也称为
element)指定要显示的元素,例如h1,p等,依此类推。The second argument(also known as
container) specifies where you want to display the element. In normal convention, it’s adivelement withidof'root'.We use JavaScript DOM API to identify this such element.第二个参数( 也称为
container)指定要显示的元素。 按照惯例,它是id为' root '的div元素。我们使用JavaScript DOM API来识别此类元素。
Note: div element that has the id of 'root’ you can find the code in HTML file, public/index.html at line 31.
注意: id 为 'root' div 元素可以在line 31. HTML文件public/index.html中找到代码line 31.
All of the elements we specify in the element argument will be displayed within the div element that has the specified id of root .
所有我们在指定元素的element参数将内显示div有指定的元素id的root 。
Thus, the compiler tells the browser that: the element will be displayed within container
因此,编译器告诉浏览器: 所述 element 将在被显示 container
Note: The ReactDOM.render method cannot contain two-parent elements in the first argument.i.e.,
注意: ReactDOM.render方法的第一个参数 .ie中不能包含双亲元素。

Instead, you can do like below image,
相反,您可以像下面的图片那样做,

We can specify one single parent element to display 2 child h1 elements on the page.
我们可以指定一个父元素来在页面上显示2个子h1元素。
功能组件 (Functional Components)
let’s take html code:
让我们以html代码为例:
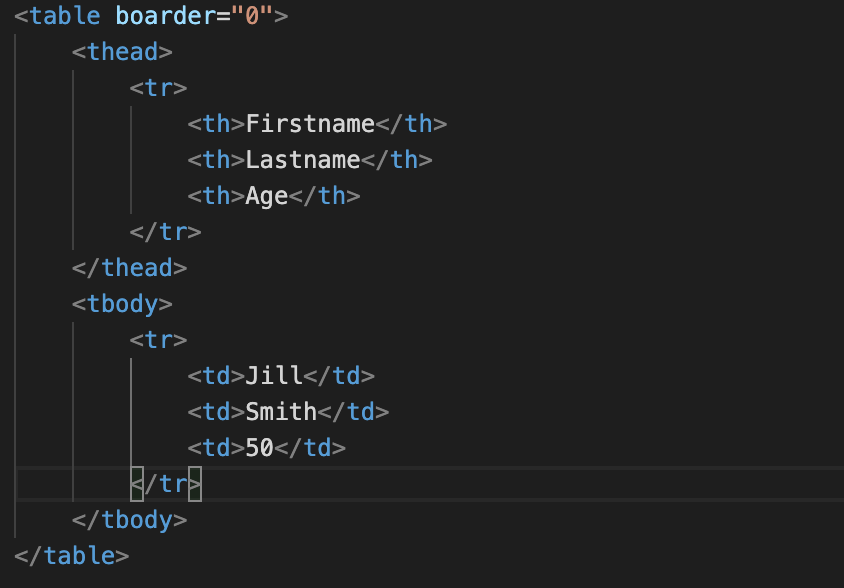
it is not viable to put so many elements within the render method. It is good practice to implement modularity.
在render方法中放置这么多元素是不可行的。 实施模块化是一个好习惯。
核心思想 (Core Idea)
function ComponentName() {
     return(
      <component> </component>
   )
}ReactDOM.render(<ComponentName/> , document.getElementById('root'))
component is the HTML element you want to render, like h1 or p .
component是您要呈现HTML元素,例如h1或p 。
基本范例 (Basic Example)
As an example, let’s rewrite the function of the Hello World! app.
例如,让我们重写Hello World的功能! 应用程式。
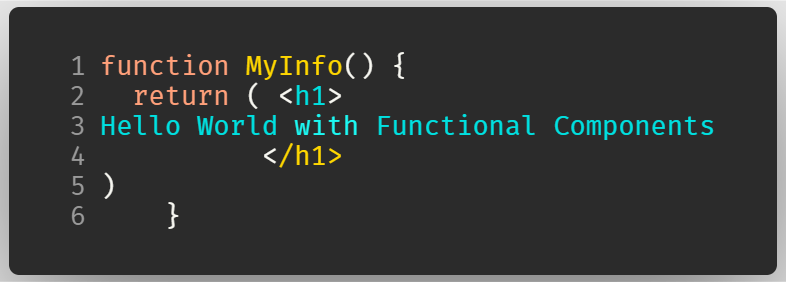
Basic Functional Components example
基本功能组件示例
Note: Always remember to use return on your elements, otherwise, it will throw an error
注意:请始终记住 在元素上 使用 return ,否则会抛出错误
To render it,
要渲染它,

Use the function within the render method
使用render方法中的函数
As you can notice, we can write our function as a JSX tag.
如您所见,我们可以将函数编写为JSX标签。
Keep in mind that you should
请记住,您应该
use self-closing tags.
使用自动关闭标签。
Your function should start with a capital letter.
您的功能应以大写字母开头。
The code gives the following output
该代码给出以下输出
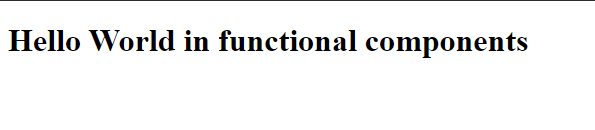
Here also, we cannot have multiple parent elements. Like before, we will use one parent element with two child elements.
同样在这里,我们不能有多个父元素。 像以前一样,我们将使用一个父元素和两个子元素。

In real-life projects, it is common practice to put your functional components within separate files as it makes your program more modular.
在现实生活的项目中,通常的做法是将功能组件放在单独的文件中,因为这样可以使程序更具模块化。
将功能组件移到单独的模块中 (Move Functional Components Into Separate Modules)
Let’s say your functional component is too complex. As a developer, you want to move your component into another file so that it can be used in your main file. Thus, this makes your program modular. Furthermore, modularity also makes your code look neater.
假设您的功能组件过于复杂。 作为开发人员,您想将组件移动到另一个文件中,以便可以在您的主文件中使用它。 因此,这使您的程序模块化。 此外,模块化还使您的代码看起来更整洁。
核心思想 (Core Idea)
First, create a functional component in a separate file. Then, we will export it as follows:
首先,在一个单独的文件中创建一个功能组件。 然后,我们将其导出如下:
export default ComponentNameComponentName is the name of your functional component.
ComponentName是您的功能组件的名称。
例: (Example:)
Create a new file, called MyApp.js and write your code as follows:
创建一个名为MyApp.js的新文件, MyApp.js如下所示编写代码:
1.import React from 'react';
2.
3.function MyAPP(){
4.  return(
5.   <div>
6.     <h1>Hello</h1>
7.     <ul>
8.      <li> hi</li>
9.     </ul>
10.   </div>11.);
12.}
13.export default MyApp;
Line 1: Import thereactmodule to use JSX tags within our codeLine 1:导入react模块以在我们的代码中使用JSX标签Lines 3–12: Our functional componentLines 3–12:我们的功能组件Line 13: Export ourMyAppfunction so that it could be used within ourindex.jsfile.Line 13:导出MyApp函数,以便可以在我们的index.js文件中使用它。
Now we can use it in our index.js file like so:
现在我们可以像下面这样在index.js文件中使用它:
using components located in a different file
使用位于不同文件中的组件
Line 3: We will use theimportkeyword to use theMyAppcomponent. Always remember to use relative paths to specify your module. First-party modules likereactdon’t need relative paths.Line 3:我们将使用import关键字来使用MyApp组件。 始终记住使用相对路径来指定模块 。 第一方模块(例如react不需要相对路径。Line 5: Render theMyAppcomponent.Line 5:渲染MyApp组件。
父/子组件 (Parent/Child Components)
Sometimes, even when writing HTML tags within functions becomes too complex. You cannot write so many lines of code within a function as it seems unreadable.
有时,即使在函数内编写HTML标签也变得太复杂了。 您无法在函数中编写太多行代码,因为看起来似乎不可读。
You can nest your functional components as much as you want
您可以根据需要嵌套尽可能多的功能组件
核心思想 (Core Idea)
Define basic functional components
定义基本功能组件
function MyFirstComponent() {
    return(
     <component> </component>
   )
 }
Use it in a second functional component
在第二个功能组件中使用
function MySecondComponent() {
  return (
    <div>
      <MyFirstComponent/>
      <!--further code here -->
    </div>
  )
}
And then render it
然后渲染
ReactDOM.render(<MySecondComponent/> ,
                document.getElementById('root')
基本范例 (Basic Example)
As an example, let’s define a footer element in a separate file and then use it.
例如,让我们在一个单独的文件中定义一个页脚元素,然后使用它。
In a file Footer.js
在文件Footer.js
And then to use it in App.js :
然后在App.js使用它:
Notice that our Footer element was used in Line 13
请注意, Line 13中使用了我们的Footer元素
Now let’s render App element within index.js
现在让我们在index.js渲染App元素
Rendering App element
渲染应用程序元素
回顾 (Recap)
1.Hello World App (1.Hello World App)
import React from "react"
import ReactDOM from "react-dom"ReactDOM.render(<h1> Hello World </h1> , document.getElementById('root'))
2.功能组件 (2.Functional Components)
function MyComponent() {
  return(
    <component>
    </component>
    )
}ReactDOM.render(<MyComponent/> ,
document.getElementById('root')
3.另一个文件中的功能组件 (3.Functional Components in Another File)
Define a component,
MyComponent.jsand export定义一个组件
MyComponent.js并导出
function MyComponent() {
  return(
    <component> </component>
    )
}export default MyComponent
Use in another file
index.js,在另一个文件
index.js,
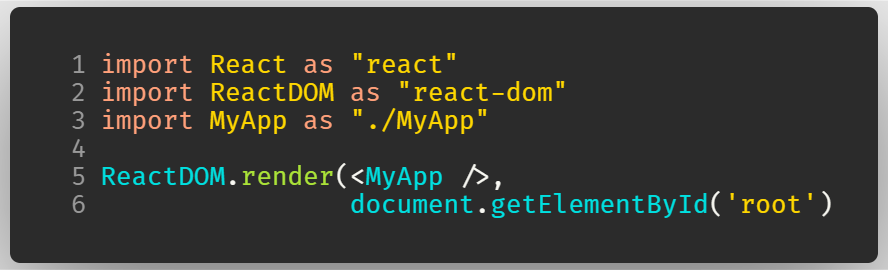
import React from "react"
import ReactDOM from "react-dom"
import MyComponent from "./MyComponent"ReactDOM.render(<MyComponent/> , document.getElementById('root'))
4.嵌套组件 (4.Nested Components)
Define the first component,
MyComponent.jsand export定义第一个组件
MyComponent.js并导出
function MyComponent() {
  return(
   <component> </component>
    )
}export default MyComponent
Define the second component,
App.jsand export定义第二个组件
App.js并导出
And then use in index.js
然后在index.js使用
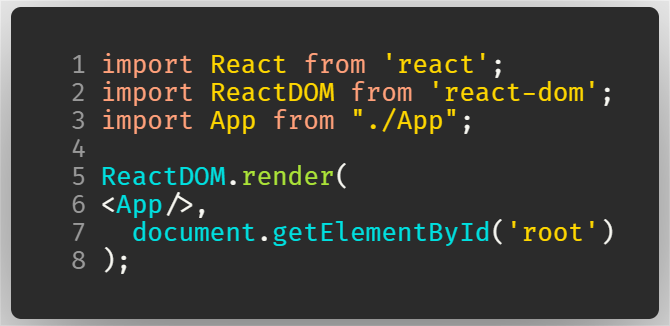
import React from "react"
import ReactDOM from "react-dom"
import App from "./App"ReactDOM.render(<App/>,
document.getElementById('root')
Hopefully this quick overview helps you ease into the world of React and provides a bit of guidance for your initial journey.
希望这个快速的概述可以帮助您轻松进入React的世界,并为您的初始旅程提供一些指导。
Resources :
资源:
Happy learning! Stay home, stay safe.
学习愉快! 待在家里,保持安全。
翻译自: https://medium.com/swlh/a-beginners-guide-to-react-4b1758e6f9c9
初学react实现路由跳转


 261
261

 被折叠的 条评论
为什么被折叠?
被折叠的 条评论
为什么被折叠?
 到【灌水乐园】发言


