


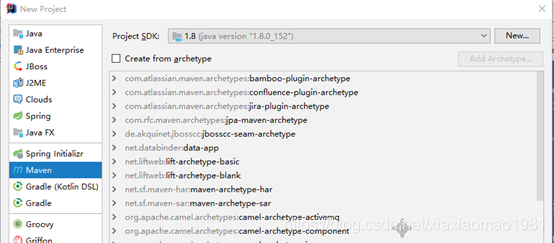
下面来通过一个实例讲解Session认证的方式
创建工程:
引入依赖:
org.springframework
spring-webmvc
5.0.4.RELEASE
javax.servlet
javax.servlet-api
3.1.0
org.projectlombok
lombok
1.18.8
security‐springmvc
org.apache.tomcat.maven
tomcat7‐maven‐plugin
2.2
org.apache.maven.plugins
maven‐compiler‐plugin
1.8
1.8
maven‐resources‐plugin
utf‐8
true
src/main/resources
true
**/*
src/main/java
**/*.xml
Spring容器配置
在config包下定义ApplicationConfig.java,这个配置类相当于spring的配置文件@Configuration@ComponentScan(basePackages = ,excludeFilters = {@ComponentScan.Filter(type = FilterType.ANNOTATION,value = Controller.)})ApplicationConfig {
}
在config包下定义WebConfig.java,这个配置类相当于springmv的配置文件@Configuration @EnableWebMvc
@ComponentScan(basePackages = "cn.xh"
,includeFilters = {@ComponentScan.Filter(type = FilterType.ANNOTATION,value = Controller.class)})public class WebConfig implements WebMvcConfigurer {
//视频解析器
@Bean
public InternalResourceViewResolver viewResolver(){
InternalResourceViewResolver viewResolver = new InternalResourceViewResolver();
viewResolver.setPrefix("/WEB-INF/view/");
viewResolver.setSuffix(".jsp");
return viewResolver;
}
}
加载spring容器在init包下定义spring容器的初始化类SpringApplicationInitializer,该类实现了WebApplicationInitializer接口相当于web.xml文件。Spring容器启动时会加载所有实现了WebApplicationInitializer接口的类。public class SpringApplicationInitializer extends
AbstractAnnotationConfigDispatcherServletInitializer {
@Override
protected Class>[] getRootConfigClasses() {
return new Class>[] { ApplicationConfig.class }; } @
Override
protected Class>[] getServletConfigClasses() {
return new Class>[] { WebConfig.class }; } @
Override
protected String[] getServletMappings() {
return new String [] {"/"};
}
}该类对应的web.xml文件可以参考:org.springframework.web.context.ContextLoaderListenercontextConfigLocation/WEB‐INF/application‐context.xmlspringmvcorg.springframework.web.servlet.DispatcherServletcontextConfigLocation/WEB‐INF/spring‐mvc.xml1springmvc/
实现认证功能
在webapp/WEB-INF/views下定义认证页面login.jsp
用户登录用户名:
密 码:
在WebConfig中新增如下配置,将/直接导向login.jsp页面:
@Override
public voidaddViewControllers(ViewControllerRegistry registry) {
registry.addViewController("/").setViewName("login");
}
启动项目,访问/路径地址,进行测试
创建认证接口;
认证接口用来对传入的用户名和密码进行验证,验证成功返回用户的详细信息,失败抛出错误异常。
public interfaceAuthenticationService {
/**
*用户认证
* @paramauthenticationRequest用户认证请求
* @return认证成功的用户信息
*/UserDto authentication(AuthenticationRequest authenticationRequest);
}
认证请求结构:
@Data
public classAuthenticationRequest {
/**
*用户名
*/privateString username;
/**
*密码
*/privateString password;
}
用户详细信息:
@Data
@AllArgsConstructor
public classUserDto {
privateString id;
privateString username;
privateString password;
privateString fullname;
privateString mobile;
}
认证实现类:
@Service
public classAuthenticationServiceImpl implementsAuthenticationService {
@OverridepublicUserDto authentication(AuthenticationRequest authenticationRequest) {
if(authenticationRequest == null|| StringUtils.isEmpty(authenticationRequest.getUsername())
|| StringUtils.isEmpty(authenticationRequest.getPassword())){
throw newRuntimeException("账号或密码为空");
}
UserDto userDto = getUserDto(authenticationRequest.getUsername());
if(userDto == null){
throw newRuntimeException("查询不到该用户");
}
if(!authenticationRequest.getPassword().equals(userDto.getPassword())){
throw newRuntimeException("账号或密码错误");
}
returnuserDto;
}
//模拟用户查询publicUserDto getUserDto(String username){
returnuserMap.get(username);
}
//用户信息privateMap userMap= newHashMap<>();
{
userMap.put("zhangsan",newUserDto("1010","zhangsan","123","张三","133443"));
userMap.put("lisi",newUserDto("1011","lisi","456","李四","144553"));
}
}
登录controller:
@RestController
public classLoginController {
@AutowiredprivateAuthenticationService authenticationService;
/**
*用户登录
* @paramauthenticationRequest登录请求
* @return*/@PostMapping(value = "/login",produces = "text/plain;charset=utf‐8")
publicString login(AuthenticationRequest authenticationRequest){
UserDto userDto = authenticationService.authentication(authenticationRequest);
returnuserDto.getFullname() + "登录成功";
}
}
测试
实现会话功能:
当用户登录系统后,系统需要记住用户的信息,一般会把用户的信息放在session中,在需要的时候从session中获取用户的信息,这就是会话机制。首先在UserDto中定义一个Session_USER_KEY,作为session的key
public static finalString SESSION_USER_KEY= "_user";修改LoginController,认证成功后,将用户的信息放入session,并增加用户注销的方法,用户注销时清空session
@PostMapping(value = "/login",produces = "text/plain;charset=utf‐8")
publicString login(AuthenticationRequest authenticationRequest, HttpSession session){
UserDto userDto = authenticationService.authentication(authenticationRequest);
//用户信息存入sessionsession.setAttribute(UserDto.SESSION_USER_KEY,userDto);
returnuserDto.getUsername() + "登录成功";
}
@GetMapping(value = "logout",produces = "text/plain;charset=utf‐8")
publicString logout(HttpSession session){
session.invalidate();
return"退出成功";
}增加测试资源,在LoginController中增加测试资源:
@GetMapping(value = "/r/r1",produces = {"text/plain;charset=utf-8"})
publicString r1(HttpSession session){
String fullname = null;
Object userObj = session.getAttribute(UserDto.SESSION_USER_KEY);
if(userObj != null){
fullname = ((UserDto)userObj).getFullname();
}else{
fullname = "匿名";
}
returnfullname + "访问资源1";
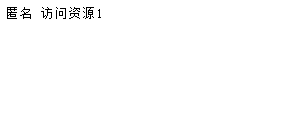
}测试:
未登录访问 /r/r1显示:
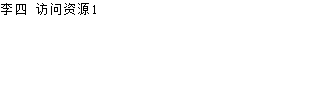
已登录访问 /r/r1显示:
实现授权功能
用户访问系统需要经过授权,需要完成如下功能:禁止未登录用户访问某些资源
登录用户根据用户的权限决定是否能访问某些资源
第一步:在UserDto里增加权限属性表示该登录用户拥有的权限:
@Data
@AllArgsConstructor
public classUserDto {
public static finalString SESSION_USER_KEY= "_user";
privateString id;
privateString username;
privateString password;
privateString fullname;
privateString mobile;
/**
*用户权限
*/privateSet authorities;
}
第二步:在AuthenticationServiceImpl中为用户初始化权限,张三给了p1权限,李四给了p2权限:
//用户信息
privateMap userMap= newHashMap<>();
{
Set authorities1 = newHashSet<>();
authorities1.add("p1");
Set authorities2 = newHashSet<>();
authorities2.add("p2");
userMap.put("zhangsan",newUserDto("1010","zhangsan","123","张三","133443",authorities1));
userMap.put("lisi",newUserDto("1011","lisi","456","李四","144553",authorities2));
}
第三步:在LoginController中增加测试资源:
/**
*测试资源2
* @paramsession* @return*/
@GetMapping(value = "/r/r2",produces = {"text/plain;charset=utf-8"})
publicString r2(HttpSession session){
String fullname = null;
Object userObj = session.getAttribute(UserDto.SESSION_USER_KEY);
if(userObj != null){
fullname = ((UserDto)userObj).getFullname();
}else{
fullname = "匿名";
}
returnfullname + "访问资源2";
}
第四步:在interceptor包下实现授权拦截器SimpleAuthenticationInterceptor:校验用户是否登录
校验用户是否有操作权限
@Component
public classSimpleAuthenticationInterceptor implementsHandlerInterceptor {
//请求拦截方法@Overridepublic booleanpreHandle(HttpServletRequest request, HttpServletResponse response, Object
handler) throwsException {
//读取会话信息Object object = request.getSession().getAttribute(UserDto.SESSION_USER_KEY);
if(object == null) {
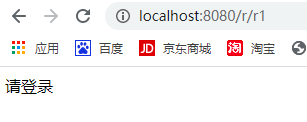
writeContent(response, "请登录");
}
UserDto user = (UserDto) object;
//请求的urlString requestURI = request.getRequestURI();
if(user.getAuthorities().contains("p1") && requestURI.contains("/r1")) {
return true;
}
if(user.getAuthorities().contains("p2") && requestURI.contains("/r2")) {
return true;
}
writeContent(response, "权限不足,拒绝访问");
return false;
}
//响应输出private voidwriteContent(HttpServletResponse response, String msg) throwsIOException {
response.setContentType("text/html;charset=utf-8");
PrintWriter writer = response.getWriter();
writer.print(msg);
writer.close();
response.resetBuffer();
}
}
在WebConfig中配置拦截器,配置/r/**的资源被拦截器处理:
@Autowired
privateSimpleAuthenticationInterceptor simpleAuthenticationInterceptor;
@Override
public voidaddInterceptors(InterceptorRegistry registry) {
registry.addInterceptor(simpleAuthenticationInterceptor).addPathPatterns("/r/**");
}
测试:
未登录:
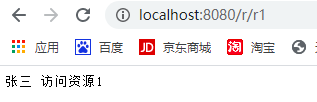
张三访问/r/r1:
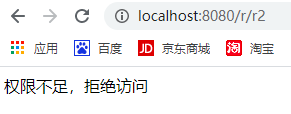
张三访问 /r/r2:
我们通过session会话的方式实现了简单的认证和授权,但是在企业中我们往往会使用第三方的框架如:shiro和spring security来帮我们提高开发效率。


 404
404


 被折叠的 条评论
为什么被折叠?
被折叠的 条评论
为什么被折叠?
 到【灌水乐园】发言


